- Загрузка файлов
- How to Upload Files with HTML
- How to Access Files
- How to Include a Request Body
- How to Set the Content-Type
- Recap
- How to Create a File Upload Form to Collect Photos, Documents, and More
- Step 1: Start with a base HTML form.
- Step 2: Add the file upload code.
- Step 3: Test your file upload form.
- Up(load) and Away
Загрузка файлов
Для того чтобы можно было загружать на сервер один или несколько файлов, в форме применяется специальное поле. В браузерах Firefox, IE и Opera такой элемент отображается как текстовое поле, рядом с которым располагается кнопка с надписью «Обзор. » (рис. 1). В Safari и Chrome доступна только кнопка «Выберите файл» (рис. 2).
![]()
Рис. 1. Вид поля для загрузки файла в Firefox
![]()
Рис. 2. Загрузка файлов в Chrome
При нажатии на кнопку открывается окно для выбора файла, где можно указать, какой файл пользователь желает использовать.
Синтаксис поля для отправки файла следующий.
Атрибуты перечислены в табл. 1.
| Атрибут | Описание |
|---|---|
| accept | Устанавливает фильтр на типы файлов, которые вы можете отправить через поле загрузки файлов. |
| size | Ширина текстового поля, которое определяется числом символов моноширинного шрифта. |
| multiple | Позволяет выбирать и загружать сразу несколько файлов. |
| name | Имя поля, используется для его идентификации обработчиком формы. |
Прежде, чем использовать данное поле, в форме необходимо сделать следующее:
- задать метод отправки данных POST ( method=»post» );
- установить у атрибута enctype значение multipart/form-data .
Форма для загрузки файла продемонстрирована в примере 1.
Пример 1. Создание поля для отправки файла
Хотя можно установить ширину поля через атрибут size , в действительности ширина никак не влияет на результат работы формы. В браузерах Safari и Chrome этот атрибут вообще никакого воздействия не оказывает.
Атрибут multiple более важен, он позволяет не ограничиваться одним файлом для выбора, а указать их сразу несколько для одновременной загрузки.
Если атрибут accept не указывать, тогда добавляются и загружаются файлы любого типа. Наличие accept позволяет ограничить выбор файла, что особенно важно, когда требуется загрузить только изображение или видео. В качестве значения выступает MIME-тип, несколько значений разделяются между собой запятой. Также можно использовать следующие ключевые слова:
- audio/* — выбор музыкальных файлов любого типа;
- image/* — графические файлы;
- video/* — видеофайлы.
В табл. 2 показаны некоторые допустимые значения атрибута accept .
| Значение | Описание |
|---|---|
| image/jpeg | Только файлы в формате JPEG. |
| image/jpeg,image/png | Только файлы в формате JPEG и PNG. |
| image/* | Любые графические файлы. |
| image/*,video/* | Любые графические и видеофайлы. |
Использование дополнительных атрибутов показано в примере 2.
Пример 2. Загрузка фотографий
Не все браузеры поддерживают новые атрибуты. IE полностью игнорирует multiple и accept , Safari не поддерживает accept , а Firefox не работает с MIME-типом, только с ключевыми словами. Поэтому в примере выше специально для Firefox установлено значение image/*,image/jpeg . Также учтите странную ошибку в Опере, она не допускает пробелы после запятой внутри accept .
Результат примера показан на рис. 3. Обратите внимание, что из-за наличия multiple несколько изменился вид поля.
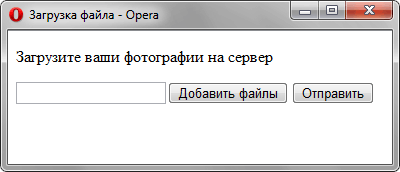
Рис. 3. Загрузка файлов в Opera
How to Upload Files with HTML

Austin Gil

When building applications with HTML, you may eventually come to a point where you need to allow users to upload files. Surprisingly, it’s not quite as straightforward as you might assume.
In this post, we’ll look at all things you need to support file uploads in HTML.
How to Access Files
The very first step is accessing a file to upload. Unfortunately, or rather, fortunately, browsers can’t access our file systems. If they did, it would be a major security concern.
There is work being done on the File System Access API, but it’s experimental and will be limited access, so let’s just pretend it doesn’t exist.
Accessing a file requires user interaction, which means we need something in the UI for the user to interact with. Conveniently, there is the input element with a file type attribute.
On its own, a file input isn’t very useful. It allows a user to select a file from their device, but that’s about it.
To actually send the file to a server, we need to make an HTTP request, which means we need a . We’ll put the file input inside along with a to submit the form.
The input will also need a to make it accessible for assistive technology, an id attribute to associate it with the label, and a name attribute in order to include its data along with the HTTP request.
How to Include a Request Body
If we watch the network tab as we submit the form, we can see that it generates a GET request, and the payload is sent as a query string that looks like this: “ ?name=filename.txt ”. It’s essentially a key-value pair, with the key being the input name and the value being the name of the file.
Not quite what we’re going for here.
We can’t actually send a file using a GET request because you can’t put a file in the query string parameters. We need to put the file in the body of the request.
To do that, we need to send a POST request, which we can do by changing the form’s method attribute to «post» .
Now, if we explore that request, we can see that we are making a post request. We can also see that the request has a payload containing the form’s data. Unfortunately, the data is still just a key-value pair with the input name and the filename.
How to Set the Content-Type
We’re still not actually sending the file, and the reason has to do with the request “ Content-Type ”.
By default, when a form is submitted, the request is sent with a Content-Type of application/x-www-form-urlencoded . And unfortunately, we can’t send the binary file information as URL encoded data.
In order to send the file contents as binary data, we have to change the Content-Type of the request to multipart/form-data . And in order to do that, we can set the form’s enctype attribute.
Now, if we submit the form one more time, we can see the request uses the POST method and has the Content-Type set to multipart/form-data . In Chromium browsers, you’ll no longer see the request payload, but you can see it in the Firefox DevTools under the request Params tab.
Recap
With all that in place, we can upload files using HTML. To re-iterate, sending files with HTML requires three things:
- Create an input with the type of file to access the file system.
- Use a form with method=»post» to include a body on the request.
- Set the request’s Content-Type to multipart/form-data using the enctype attribute.
Thank you so much for reading. If you liked this article, and want to support me, the best ways to do so are to share it, sign up for my newsletter, and follow me on Twitter.
Austin Gil
For over ten years I helped organizations build fast, secure, accessible websites. Now I help others do the same through high-quality content, open-source projects, and presentations.
If you read this far, tweet to the author to show them you care. Tweet a thanks
Learn to code for free. freeCodeCamp’s open source curriculum has helped more than 40,000 people get jobs as developers. Get started
freeCodeCamp is a donor-supported tax-exempt 501(c)(3) charity organization (United States Federal Tax Identification Number: 82-0779546)
Our mission: to help people learn to code for free. We accomplish this by creating thousands of videos, articles, and interactive coding lessons — all freely available to the public. We also have thousands of freeCodeCamp study groups around the world.
Donations to freeCodeCamp go toward our education initiatives, and help pay for servers, services, and staff.
How to Create a File Upload Form to Collect Photos, Documents, and More
File upload forms help businesses get valuable information, whether it’s a photo for a product review or documents for a job application. The alternative is usually email, where you’re likely to lose track of files in countless threads or a bottomless inbox.
Luckily, it’s easy to include a file upload in your HTML form with a few lines of code. The harder part—accepting the file, scanning the submission for spam, and storing it—is all handled on the back end by Formspree.
To demonstrate how you can create your own file upload form, we’ll use the example of Seltz, a fictional small business that lets you customize the carbonation of your seltzer water. They’re offering customers the chance to design their own seltzer cans by submitting an online form. Customers will upload the image they want on their can and submit the form. Then, Seltz will send them a preview of their design before shipping out their custom seltzer six-pack.

Step 1: Start with a base HTML form.
Before you add the file upload component to your form, code the HTML base. If you need help, start with some code from our free form library, and check out this blog post with instructions on coding forms for beginners.
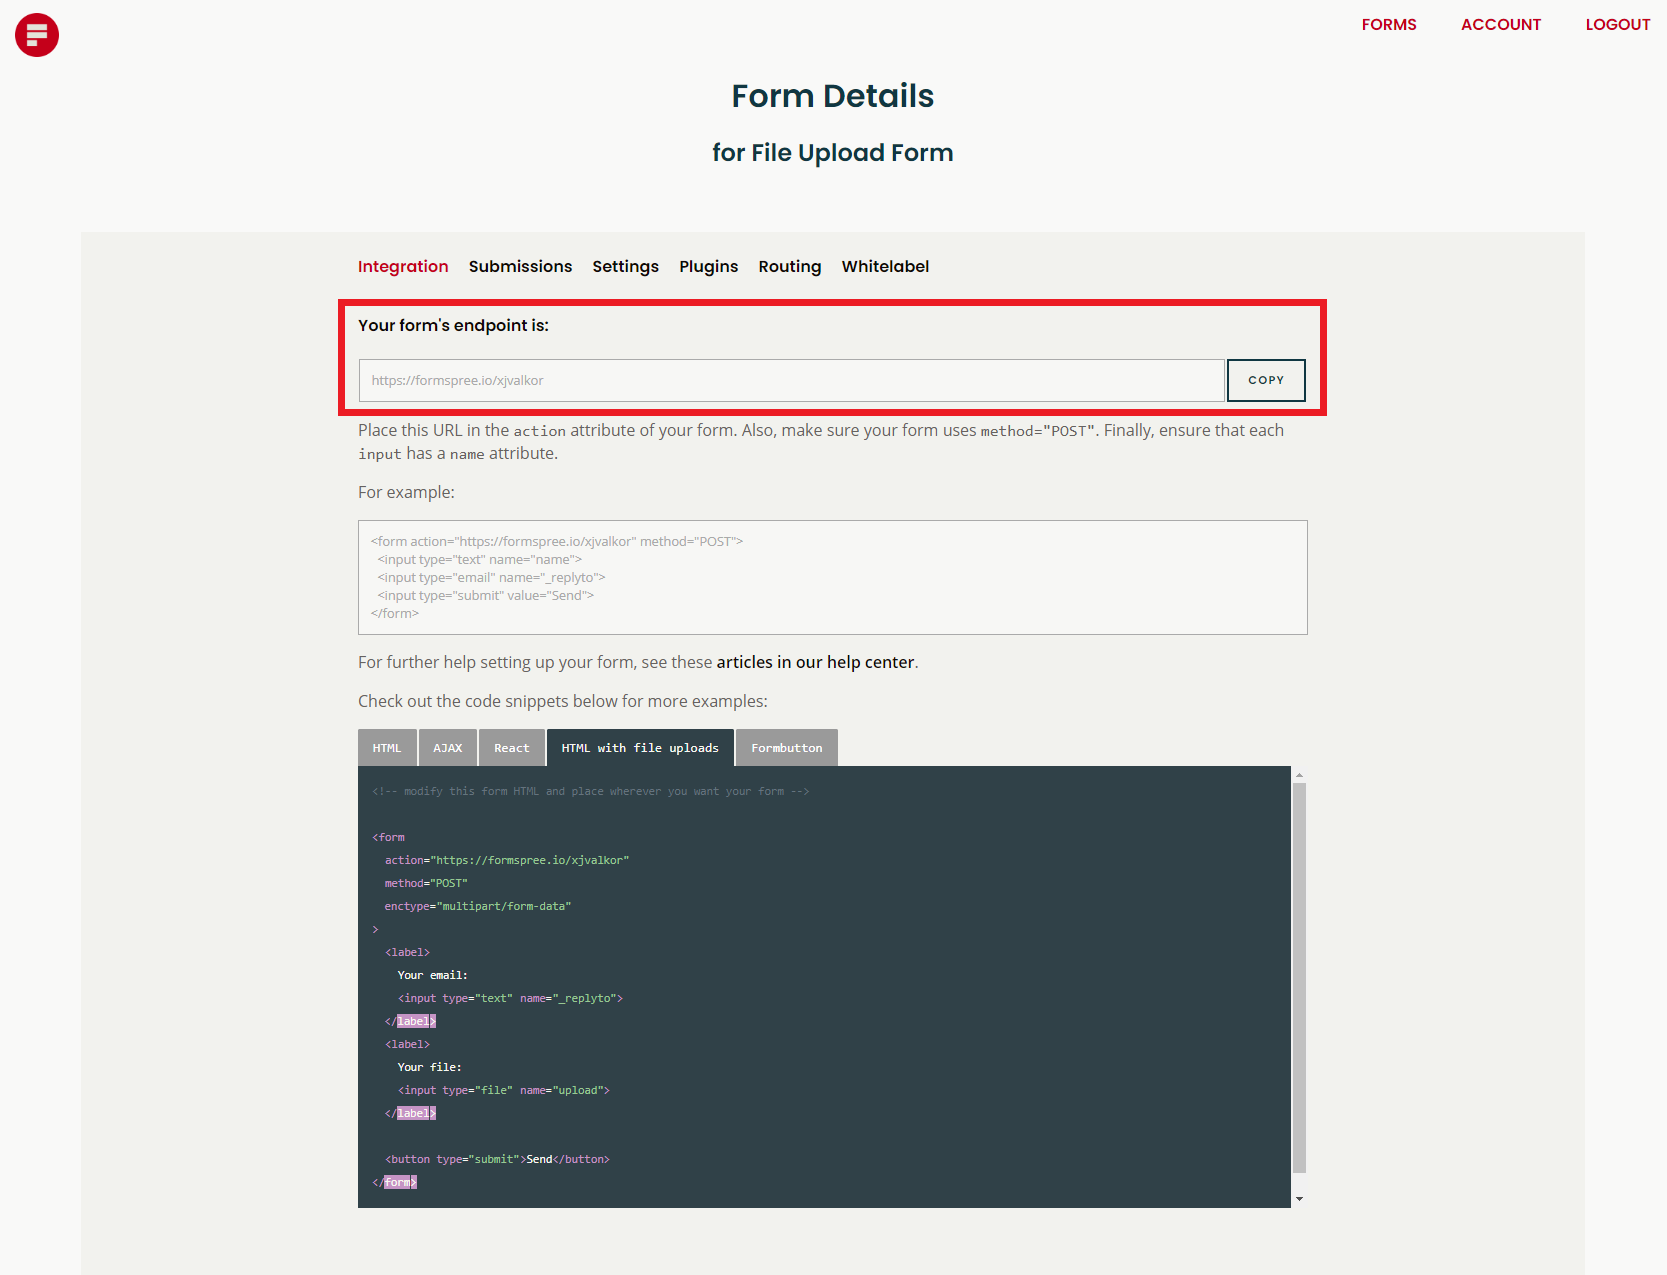
Seltz’s submission form needs fields for name, email, file upload, and the submit button. We changed the text on the button to read “Preview Your Seltzer.” Here’s what the code looks like before we add the file upload component:
form id="fs-frm" name="file-upload-form" accept-charset="utf-8" action="https://formspree.io/FORM_ID" method="post"> fieldset id="fs-frm-inputs"> label for="full-name">Full Namelabel> input type="text" name="name" id="full-name" placeholder="First and Last" required=""> label for="email-address">Email Addresslabel> input type="email" name="_replyto" id="email-address" placeholder="email@domain.tld" required=""> ------placeholder for file upload------ input type="hidden" name="_subject" id="email-subject" value="File Upload Form Submission"> fieldset> input type="submit" value="Preview Your Seltzer"> form> If you use Formspree to manage the back end of your form, replace the FORM_ID with a unique Formspree end point. Within your account, click + New Form , name the form, and then go to the Integration tab.
Step 2: Add the file upload code.
With just a few more lines of code, your HTML form can handle uploads of any file kind and size.
Add an enctype=»multipart/form-data» attribute after the method=»POST» attribute in the tag so the opening form HTML will look like this:
form id="fs-frm" accept-charset="utf-8" action="https://formspree.io/xzbjawgz/FORM_ID" method="POST" enctype="multipart/form-data" > This tells your browser to encode the form in binary because it has a file, instead of encoding as straight text as you would with all other forms.
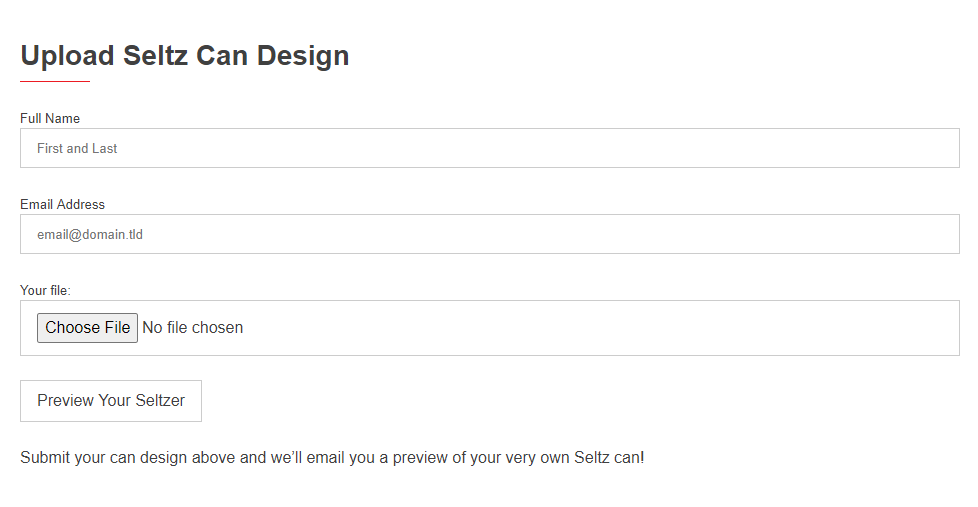
Then, add these and fields where you want the file upload to appear in your form:
label for="upload"> Your file:label> input type="file" name="upload"> The form, when installed on the Seltz site, looks like this:
Step 3: Test your file upload form.
Run a couple of tests by submitting the form yourself with a file. If there’s an issue, you’ll get an error message pinpointing the problem. If all goes well, the file upload form submissions will appear in your account, like so:
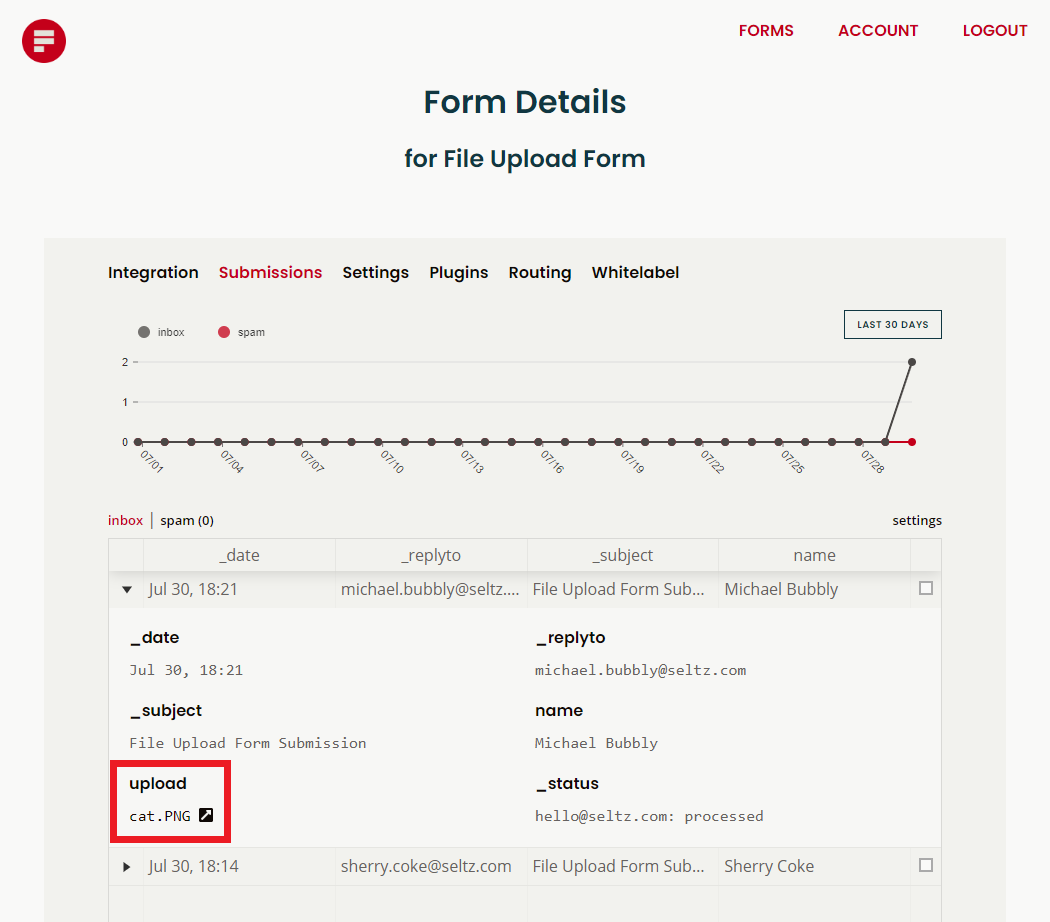
Clicking the file name, highlighted in the red box above, will download the file. Formspree hosts all of the uploaded files and form submissions so that you don’t have to. We also screen the submissions for spam and send likely offenders to a separate folder in your account. Learn more about spam protection here.
Up(load) and Away
Formspree doesn’t just host all of your file upload form submissions; we also allow you to build your own workflow. You can organize your form responses in Google Sheets, Airtable, or Trello. Or nurture leads with HubSpot and ConvertKit. Or sign people up for your Mailchimp newsletter, create support tickets in Zendesk and collect payments with Stripe. The form is just the beginning.