- Understand and Manage Java Settings in Windows 11/10
- What is Java
- Java Control Panel
- Remove temporary Java files
- Clear Java cache using command line
- Java Update
- Other Java settings
- Uninstall Old Java versions
- Java Download
- Java on Windows: switching to a specific Java version/ runtime
- Background
- Installing and switching between multiple Java versions
Understand and Manage Java Settings in Windows 11/10
Adobe Flash and Java are two downloads most of us have installed on our Windows computers, as they give us a richer internet and browsing experience. We have already seen how to manage Adobe Flash Settings. Today we will learn about Java Settings in Windows 10/8/7.
What is Java
Java is a programming language and computing platform, which powers state-of-the-art programs including utilities, games, and business applications. It allows you to play online games, chat with people around the world, view images in 3D, and more.
Java Control Panel
Java software or the Java Runtime Environment is also referred to as the Java Runtime, Runtime Environment, Runtime, JRE, Java Virtual Machine, etc. It can be managed from the Java Control Panel. To access the Java Control Panel, open Control Panel and click on Java. Here you will be able to get information on the version number and also View the files.
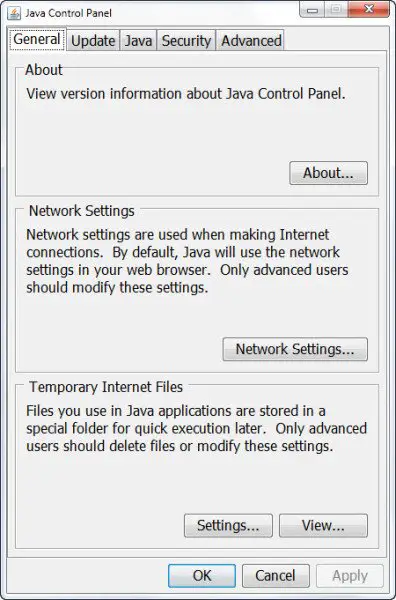
Remove temporary Java files
When browsing the internet, whenever your browser uses Java, the Java files are stored in special folders for quicker execution later on.
To see the location of the folder and other details, click on the Settings button.

By default, these temporary java files are stored in the
C:\Users\Username\AppData\LocalLow\Sun\Java\Deployment\cache
folder in the JAR format. You can set the compression level for these JAR files and even set the amount to be set aside for storing these files.
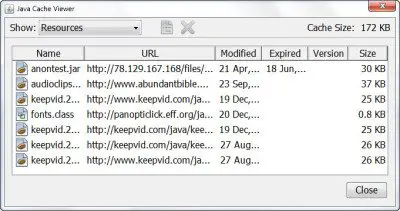
You can view the files by clicking on the View button.
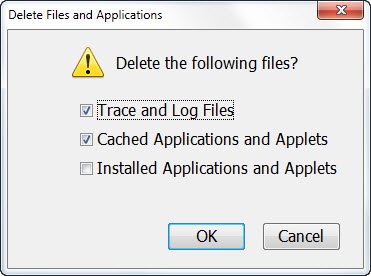
To delete these temporary Java JAR files, click on Delete Files. Now you can select which files you wish to delete and click on OK.
Clear Java cache using command line
To clear Java cache using the command line, open a command prompt windows, type the following and press Enter:
Java Update
We tend to ignore updating our Java. But it is very important that we always make sure that you are using the latest version of Java since vulnerabilities in Java are often exploited to compromise your computer. The latest Java version contains important enhancements to improve the security, performance, and stability of the Java applications that run on your machine. Whenever security holes are detected, they are patched, and it is therefore imperative that you ensure that you have the latest version of java installed as it includes vulnerability fixes.
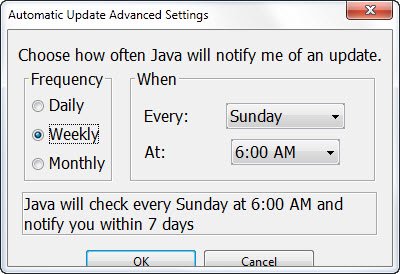
You can configure the Java update settings by clicking on the Update tab.
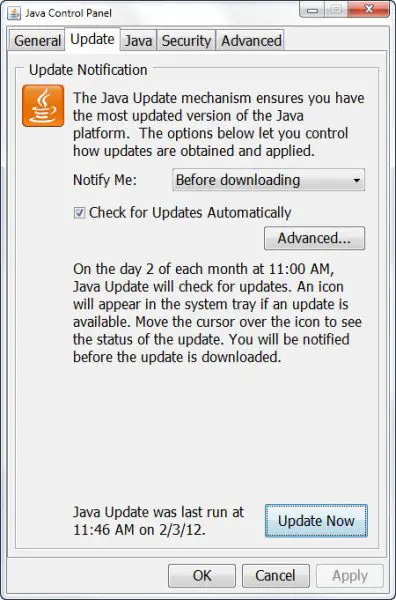
Make sure that the Check for Updates Automatically is checked. Clicking on the Advanced button will let you set the frequency of the update checks.
By the way, I noticed that it was a long time since I had updated Java. So I clicked on Update Now to start the update process. This starts the juscheck.exe process, which will check if an update is available and accordingly inform you.
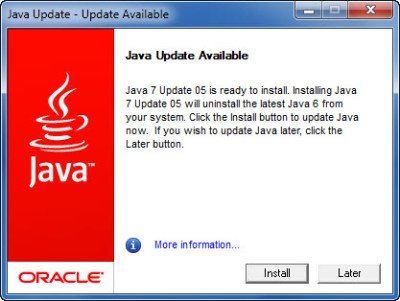
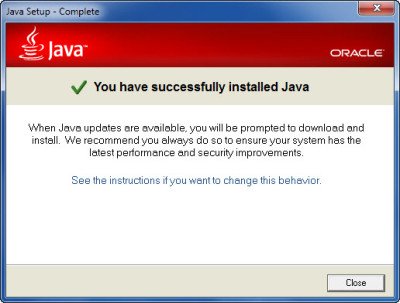
Clicking on Install will start the update process. Once it is completed, click on Close.
Other Java settings
The Java tab lets you view and manage the Java Runtime versions and settings for Java applications and applets.
The Security tab lets you view the type of certificates to identify yourself.
The Advanced tab lets you configure other settings.
Uninstall Old Java versions
Keeping old and unsupported versions of Java on your system presents a serious security risk.
Older versions of SunJava (up to JRE 6 update 7) indeed did remain when updates were installed and need to be removed as the older versions of SunJava are highly vulnerable to Winfixer/Vundo. It took from 2005 until the update late last year to JRE 6 update 10 for SunMicrosystems to Sun Microsystems to get the autoupdater of SunJava to uninstall previous (vulnerable) versions of the program. Updates from JRE 6 Update 10 forward are in a self-contained “jre6” folder that is overwritten if a new JRE is installed. Even when using the most up-to-date version of SunJava, if older, vulnerable, version(s) are still on your computer, it is vulnerable to infection. Unfortunately, simply using Add/Remove programs to uninstall the old versions is not completely affective.
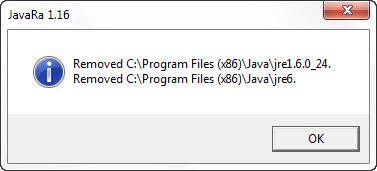
We suggest you try JavaRa. After updating Java to its latest version today, I ran JavaRa and used it to remove older Java versions.

It detected two older versions on my computer, which I then removed.
NOTE. My MVP colleague and TWCF Mod Corrine adds: JavaRa hasn’t been updated to support the removal of JRE 7 and seems to have trouble past JRE 6u32. It has moved to SingularLabs.com. In addition, Paul McLain no longer supports JavaRa, but Freð ðe Vries still does.
Java Download
You can download and install Java for Windows manually from Java.com here.
Hope you have learned something new here in this post. If you have anything more to add, please do so in the comments section.
Java on Windows: switching to a specific Java version/ runtime
This post show how to have multiple Java runtime environments on your PC and switch between them on Windows so that a particular program uses the version that you want it to.
Background
Due to Java SE Platform licensing changes by Oracle, developers have turned to alternatives such as OpenJDK. The AdoptOpenJDK site provides Prebuilt OpenJDK Binaries for Free (the main line on their landing page) and as you will see, there are numerous versions that you could use:
- JDK 8 Long-term Support ( LTS )
- JDK 11 LTS
- JDK 16 (the latest)
- Each of these could be 32-bit or 64-bit versions and you can choose the JVM that you run (Hotspot vs OpenJ9)
In short, there are options and there are times when you want to run something with a specific version of the JVM or you want to test something with multiple JVMs.
Installing and switching between multiple Java versions
The method that I follow is that I have a folder D:\apps where I put different applications tools that I want to use. Under this, I create a folder called jdk and use that as the main holding folder for all the different JDK / JVM that I want to use. I personally prefer not installin each JVM / JDK into my computer any more but to use them ‘without installation’.
Head on over to the releases page at AdoptOpenJDK to get the package you need. Start by changing the platform to Windows as shown below.

Next, pick the JDK (the full Java Development Kit) or the smaller JRE (Java Runtime Environment) and download the ZIP file version. Remember x86 means it’s the 32-bit version and x64 means that it’s the 64-bit version. If you have a modern (relatively new) Windows 10 PC, it’s almost certainly running the 64-bit version of Windows and will therefore support both the versions. In that case, the x64 is preferable though you may have some programs that don’t work correctly on the 64-bit version and need the 32-bit version.
Once you have downloaded the version (or versions) that you want to get, unzip the package. In my case, I unzip it to d:\apps\jdk so that I have all the JDKs/ JREs in one place. After unzipping, I change the folder names to be something like jdk-11.0.11_x64 and jdk-11.0.11_x86 so that I can easily tell which folder has the 64-bit and which one has the 32-bit.
Running a program with Java basically requires you to do: $ java . and for this to work, it needs two things to be in place:
- The Java version that you want to run must be the first Java installation on the path (so that Windows can find it)
- The environment variable JAVA_HOME must be set to the installation that you want to use
So, for switching Java versions, you need to do this:
set JAVA_HOME=d:\apps\jdk\jdk-11.0.11_x86\ path=d:\apps\jdk\jdk-11.0.11_x86\bin;%PATH% The first line sets the JAVA_HOME and the second one moves the x86 version of the JDK / JRE to the path. Note that the JAVA_HOME points to the main directory where the whole installation is, and the path must be to the /bin folder under the JAVA_HOME so that java.exe can be found. After you do this, you should see this:
$ java -version openjdk version "11.0.11" 2021-04-20 OpenJDK Runtime Environment AdoptOpenJDK-11.0.11+9 (build 11.0.11+9) OpenJDK Client VM AdoptOpenJDK-11.0.11+9 (build 11.0.11+9, mixed mode) To switch to a different version, you just need to set both those items correctly again. For example, in my case, I would do:
$ path=d:\apps\jdk\jdk-11.0.11_x64\bin;%PATH% $ set JAVA_HOME=d:\apps\jdk\jdk-11.0.11_x64\ $ java -version openjdk version "11.0.11" 2021-04-20 OpenJDK Runtime Environment AdoptOpenJDK-11.0.11+9 (build 11.0.11+9) OpenJDK 64-Bit Server VM AdoptOpenJDK-11.0.11+9 (build 11.0.11+9, mixed mode) (Notice how the last line shows 64-Bit Server VM since it’s now running the 64-bit VM)
It’s not as convenient as using pik to switch Ruby versions on Windows but I imagine it would be a good idea to write something like pik for this. Also, I did not search if there are tools that let you do this easily but there might well be something.
That’s all there is to it. I noted this down mainly for myself since I need to do this occasionally. If it helps you, that’s great! Please leave a comment if there is something else that you think we should add into the post.