- 2 Ways to install latest Python on Windows 11 or 10 – GUI & CMD
- Installing Python 3 on Windows 10 or 11
- 1. Download Python’s latest version
- 2. Start Python Installation on Windows
- 3. Check version
- 4. Stop Python from opening the Microsoft store
- 5. Open PowerShell, CMD, or Terminal (Admin)
- 6. List Python versions
- 7. Use Winget to install Python
- 8. Run a simple program
- Windows set python version
- Windows
- MacOS
- Linux
- Set Python 3 as your default “Python Version” on Windows 10/11
- Steps to Change the Default Python Version on Windows 10/11 to Python 3
- Conclusion
2 Ways to install latest Python on Windows 11 or 10 – GUI & CMD
Installing Python 3 on Windows 11 or 10 machines is not difficult, however, if you are a beginner then we have discussed the both Graphical and command prompt ways to install it. Especially, for those who are not much familiar with Python, it is an open-source high-level interpreted programming language.
It is known for its versatility because it has been used widely for programming applications, web development, data analysis, machine learning, artificial intelligence, data visualization, web scraping, and scientific computing. The reason behind’s Python popularity among the developer community is its clear syntax, readability, ease of use, and large number of libraries & frameworks. All this is possible because of a vast but active community.
Python also supports most of the popular IDEs or can be written using a simple text file created using Notepad.
Let’s go through the article, whether you are a beginner or experienced, in this tutorial we will find the necessary steps required to install and set up Python on Windows operating systems.
Installing Python 3 on Windows 10 or 11
Here we are discussing two ways to set up Python one is using the graphical installation wizard and the other with the help of a command in prompt or Powershell (Terminal).
1. Download Python’s latest version
As we know Python is not included in Windows by default to compile our programs based on it. Therefore, visit the official website- python.org to download the latest version by clicking on the Download button.

2. Start Python Installation on Windows
After following the previous steps, you would already have the executable file of python on your Windows.
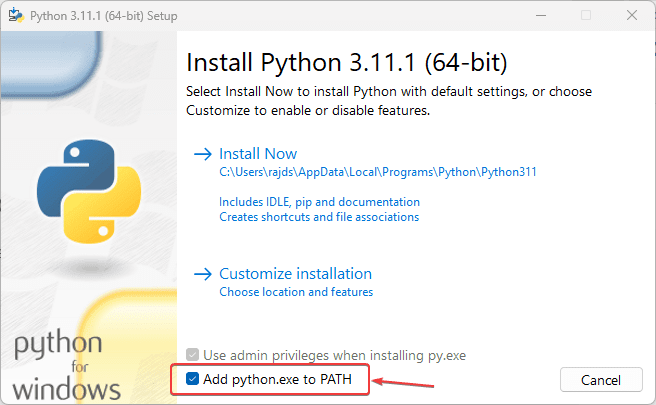
- Double-click python executable to start the installation wizard.
- Select the “Add Python.exe to PATH” box otherwise, we won’t be able to run PIP or Python using native Windows Powershell or command prompt.
- After that click on the Install Now option.
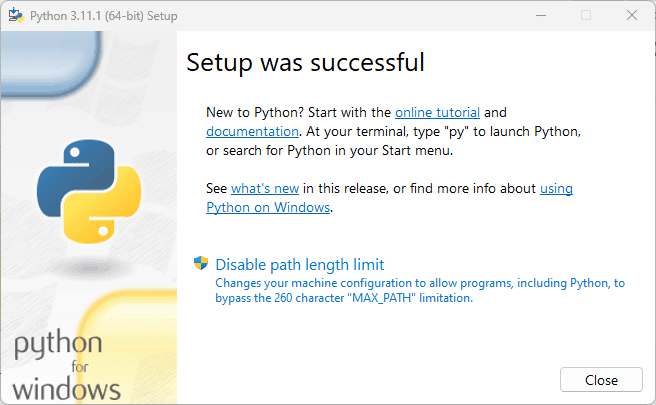
- The setup will start running, this will also install PIP and documentation on your system.
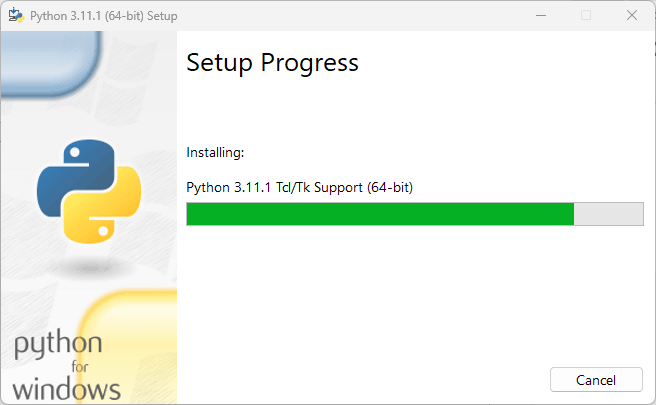
- Finish the installation by clicking on the Close button.
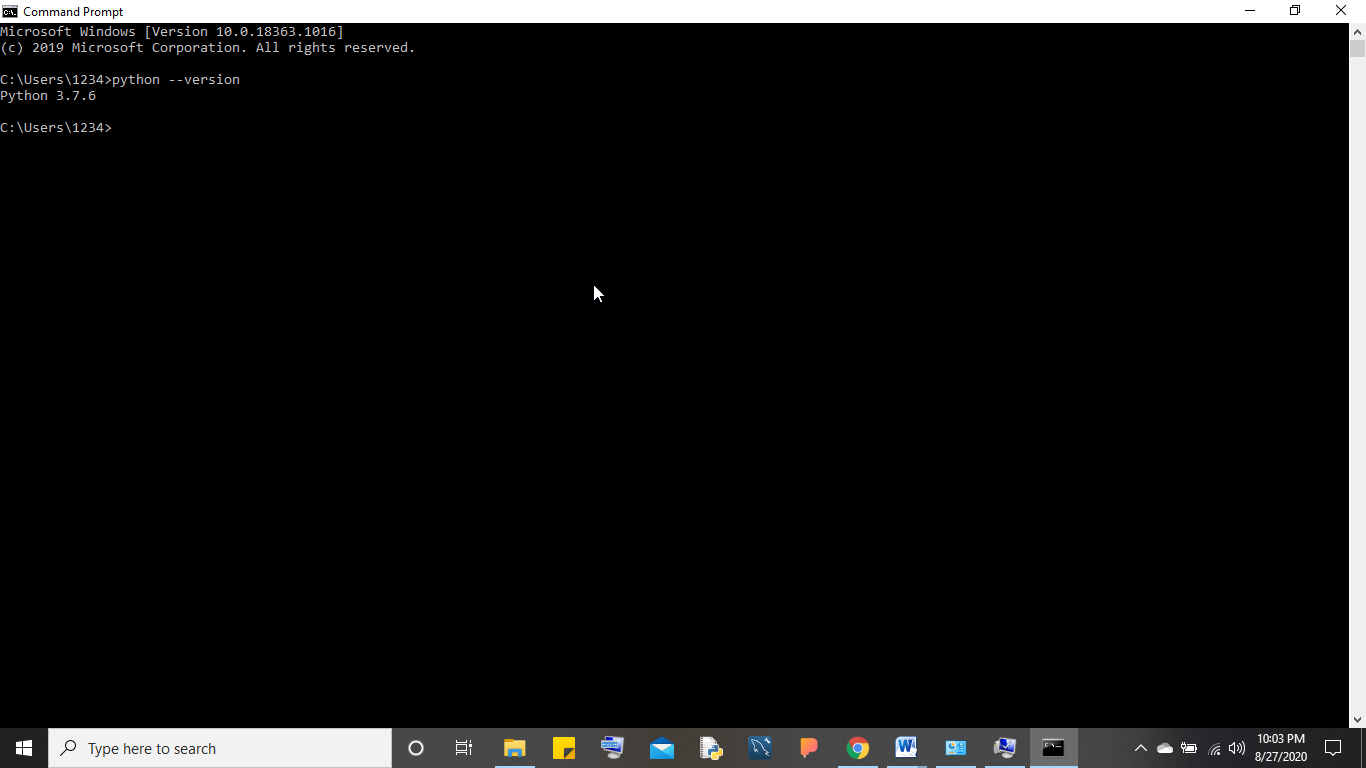
3. Check version
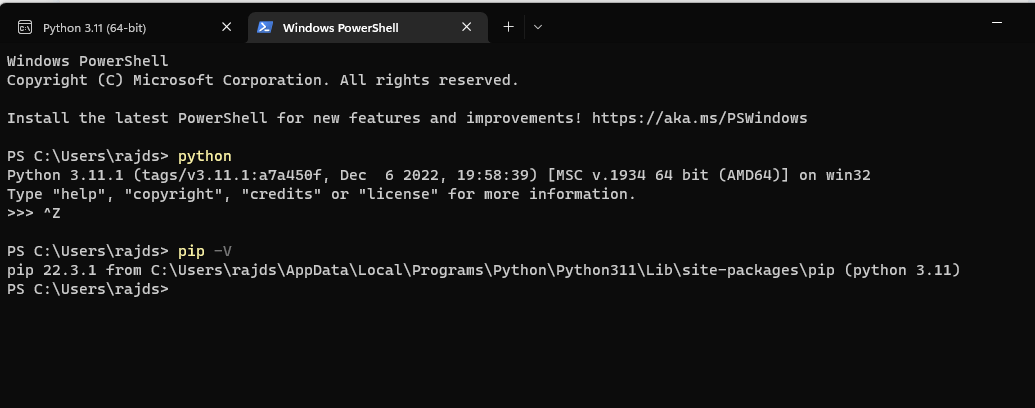
To confirm, the installation is successful without any error, let’s check the version of installed Python and PIP. For this, you can either use the Command prompt or Powershell. Alternatively, we can also run the Python terminal app to issue commands, for that in your Windows Search type – python as its app appears, and click to open it. You will have a Python interpreter with version details as well.
Note: If typing python on on command terminal or Powershell, opens the Microsoft Store then go through the next step.
4. Stop Python from opening the Microsoft store
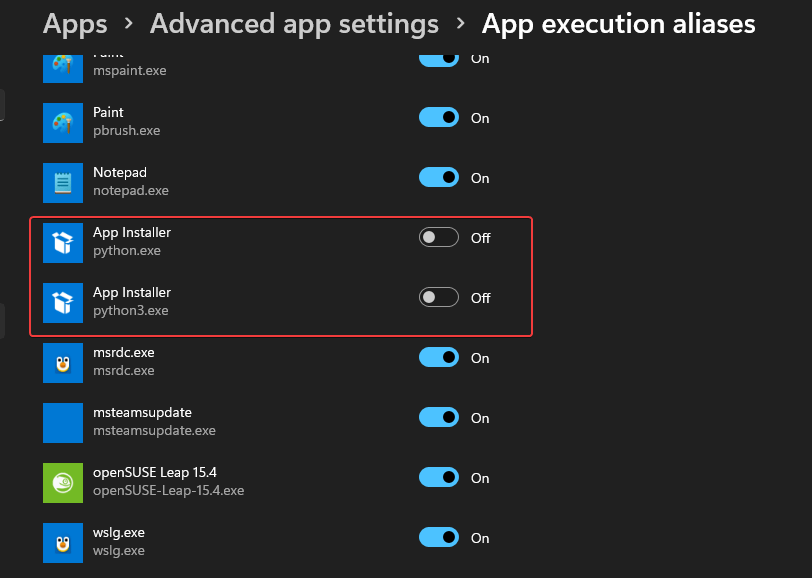
By default, if you type python on the command prompt or PowerShell in Windows, it will open Microsoft Store to download another version of Python instead of using the existing version of your Python. To stop that and tell the system to run the one you have installed, Follow the steps:
- Go to the Windows Search box
- Type- Manage App Execution Aliases
- As its icon appears click to open it.
- Search for Python3 and Python App Installers
- Turn off the toggle button given there for them.
- Close your CMD Terminal or Powershell and reopen it again.
- Now, type python in that to check your current version.
#Use the command line method
5. Open PowerShell, CMD, or Terminal (Admin)
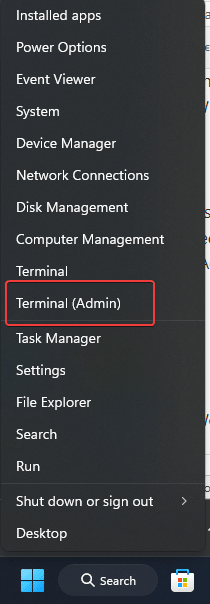
Right-click on the Windows Start button and select Terminal (Admin). If you have PowerShell then you can go for that as well.
6. List Python versions
When you go for command line installation there are multiple versions available to install. We can use Winget to first check what are those and, later, to install them as well.
winget search Python.Python

7. Use Winget to install Python
Once you have decided which version is suitable for your project then set it up using the following syntax.
winget install Python.Python.version-number
For example, if you want to have 3.11 then the command will be like this:
winget install Python.Python.3.11
When you are done with it, close your CMD terminal or PowerShell and reopen it again to check, whether it is working or not.
For that either use:
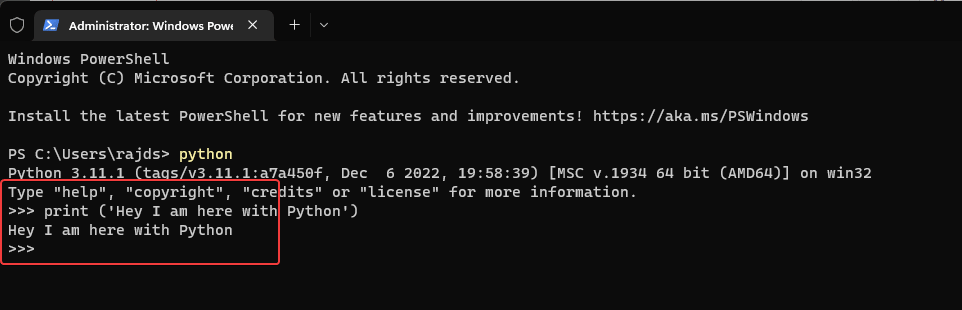
8. Run a simple program
Open the Python command line and type:
print ('Hey I am here with Python') The above code will print “Hey I am here with Python” on your screen.
Other Articles:
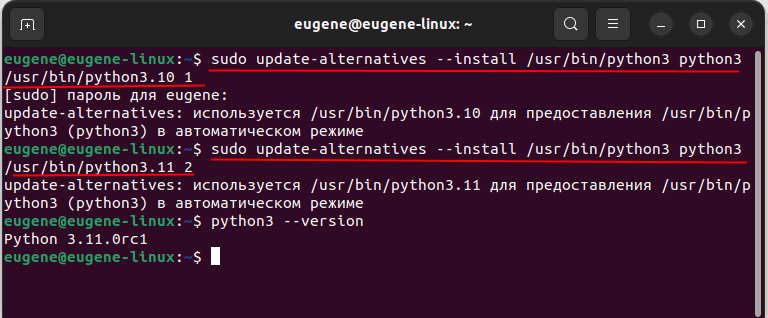
Windows set python version
На одной рабочей машине одновременно может быть установлено несколько версий Python. Это бывает полезно, когда идет работа с некоторыми внешними библиотеками, которые поддерживают разные версии python, либо в силу каких-то других причин нам надо использовать несколько разных версий. Например, на момент написания статьи последней и актуальной является версия Python 3.11 . Но, допустим, необходимо также установить версию 3.10 , как в этом случае управлять отдельными версиями Python?
Windows
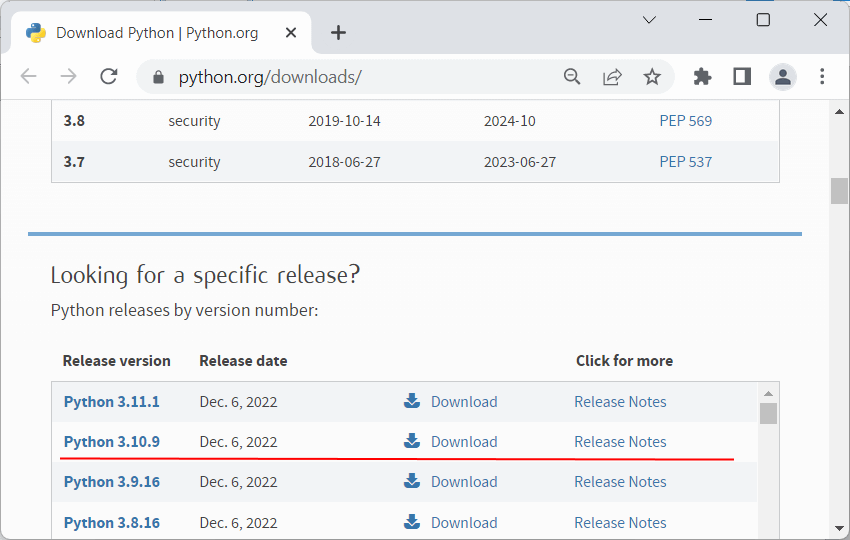
На странице загрузок https://www.python.org/downloads/ мы можем найти ссылку на нужную версию:
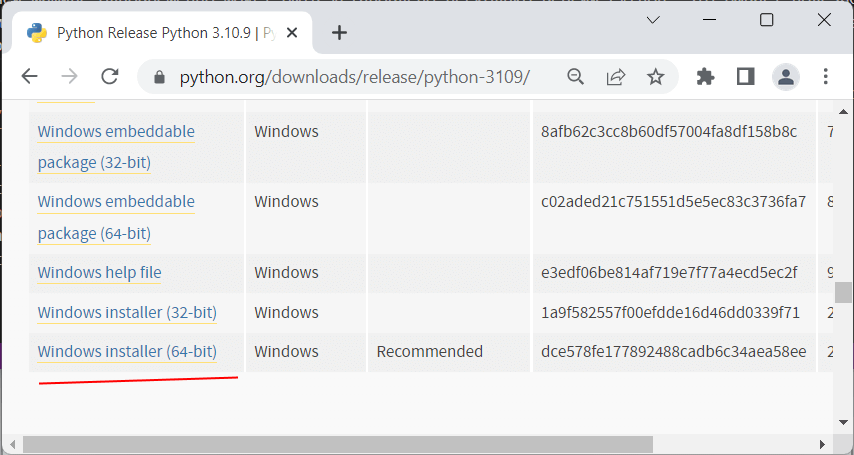
И также загрузить ее и установить:
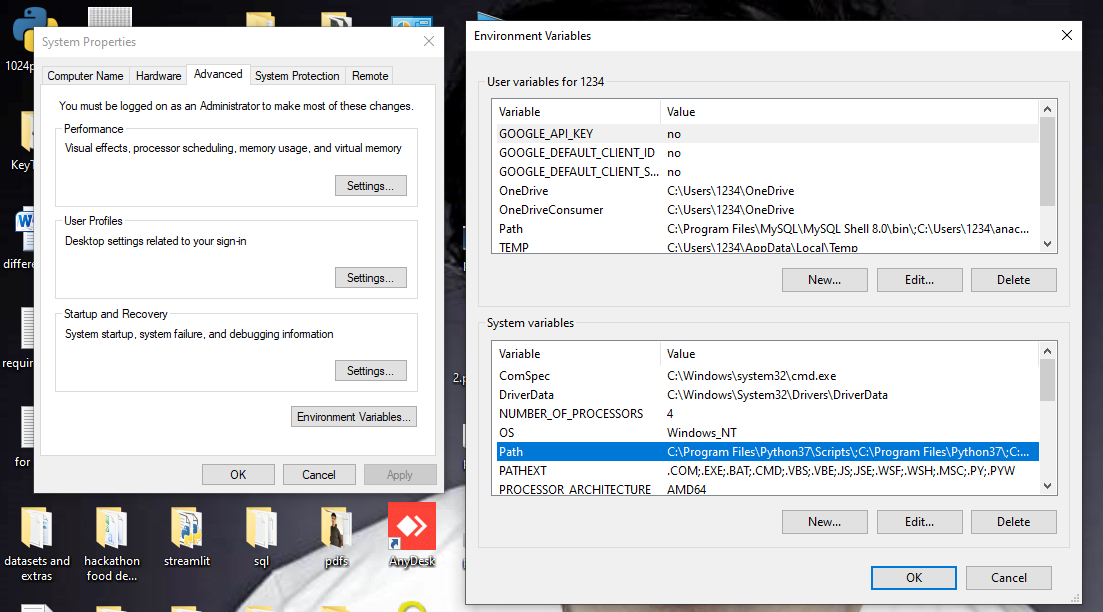
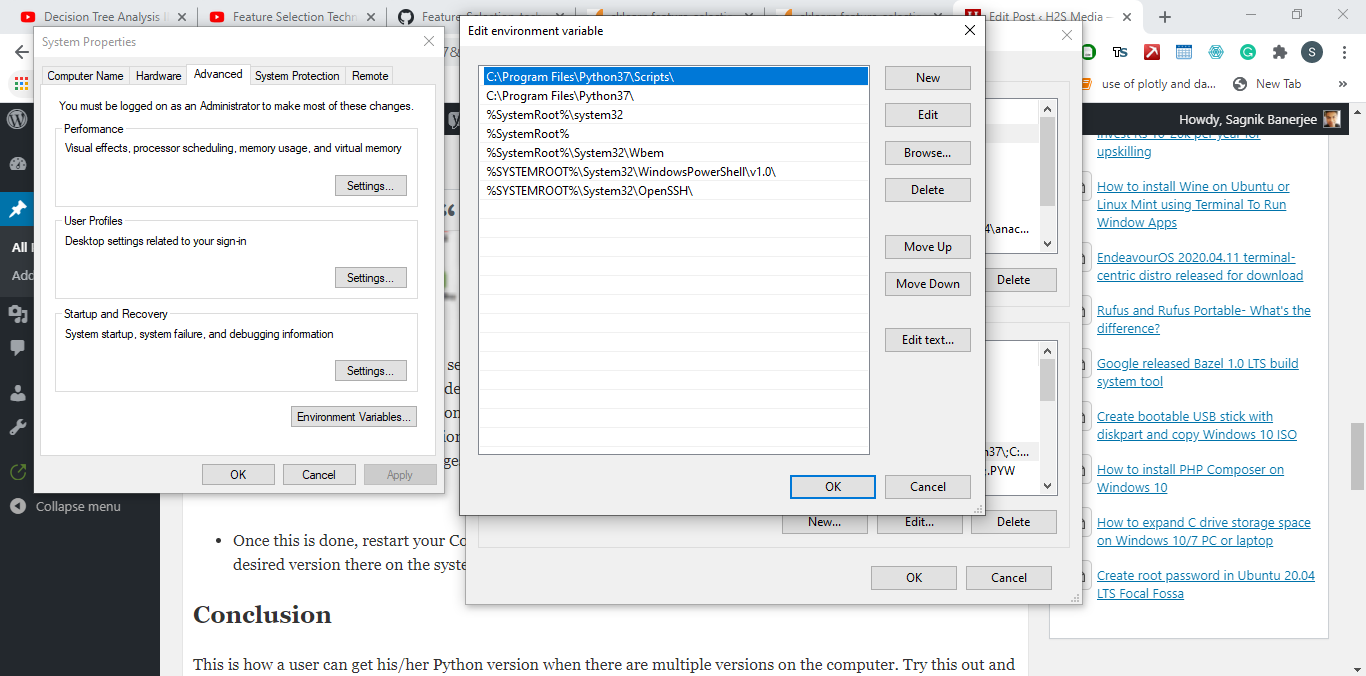
Чтобы при использовании интерпретатора Python не прописывать к нему весь путь, добавим при установке его в переменные среды. Но здесь надо учитывать, что в переменных среды может содержаться несколько путей к разным интерпретаторам Python:
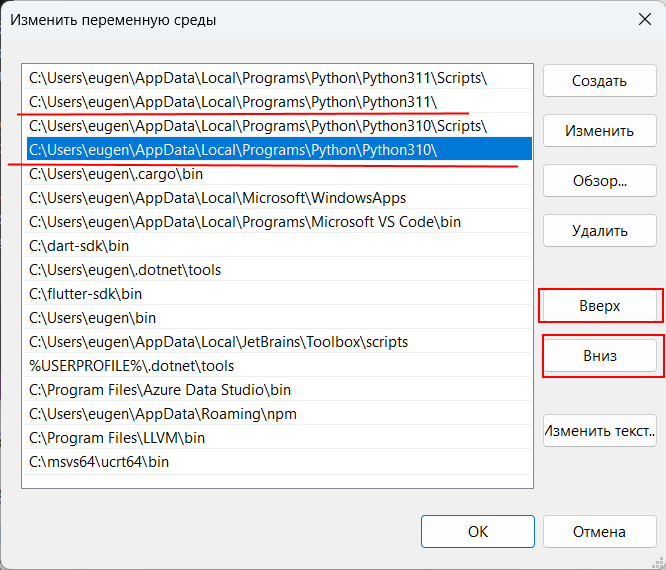
Та версия Python, которая находится выше, будет версией по умолчанию. С помощью кнопки «Вверх» можно нужную нам версию переместить в начало, сделав версией по умолчанию. Например, в моем случае это версия 3.11. Соответственно, если я введу в терминале команду
python --version