Windows java plug in
Installing and Configuring the Java Plug-in for Java Applets ~~ For Windows
Confirm the Java Applet Settings
Verify that you have the proper Java Applet Settings.
Note: For the requirements and configurations for the OS and Web browser, please see the section on ActiveAssets Client System and Configuration Requirements.
Verify the Java Plug-in settings in the Web Browser (Internet Explorer).
- If you don’t see the �Java (Sun) item, this means the Java plug-in has not been installed. Installation is necessary, please refer to the Automatic Java Plug-in Installation.
- If you do see the �Java (Sun)� item, verify that the box is checked next to �Use JRE 1.5.0_xx for the �. If it is not checked, then check it.
When you see the various messages displayed while using applets, please handle them as explained below.
- When the security certificate confirmation screen appears: This is the screen that confirms that Java is operating correctly on your system. Approve of the operation by clicking the Yes button.
- What to do when the Java install prompt appears: This confirms that the Java Plug-in is not installed. To continue, start the install process.
- The ActiveAssets Multiple Upload and Download Applets are blank: When you see this, this means that for some reason, the Java Plug-in has not been installed properly. You will need to manually install the Java Plug-in at this point.
The following warning message dialog illustrates the Security Certificate acceptance screen. This appears when performing Multiple Uploads or Downloads.
- Click Yes and the Multiple Upload/Download applet will display.
- Click Always and the Multiple Upload/Download applet appears, and this dialog will not display with subsequent applet usage.
If the Java Plug-in has not been installed, you will be prompted to do so. Follow the wizard, and perform the installation.
- After the installation preparation has concluded, the �Java 2 Runtime Environment SE v1.4.2_x� usage license screen will be displayed. Click the Agree radio button, then click Next .
- Next you will see the �Setup Install Type� screen. Select one of the radio buttons, and click Next.
- The Installation will now begin.
- After the installation has finished, you will see the InstallShield Wizard Completed� screen. Click the Finish button.
- The next time you use the ActiveAssets Multiple Upload feature, You will see the Security Certificate acceptance screen. Click Yes , or Always .
- You will be returned to the ActiveAssets Multiple Upload or Download screen. If you see a screen like the one below, the installation procedure has fully completed.
Note: In the following, you do not need to follow the same Installation Procedure.
- To insure that the Java Plug-in has been installed correctly please verify the Java Applet settings, as described above. Verify that the check box next to �Use Java 2 v1.4.2_xx for the � is checked.
- Verify that �Java 2 Runtime Environment, SE v1.xx_xx� is displayed in the �Add and Remove Programs� system control panel.
Note: You can verify which are the latest versions of the Java Plug-in and Web Browser by looking at the System Requirements section of the FAQ.
If you see a blank screen when trying to use the Multiple Upload or Download applets, this means you are lacking a compatible version of the Java Plug-in. Please follow the instructions below to manually install the Java Plug-in.
- Please first log out of ActiveAssets prior to downloading the plug-in.
- Sun Microsystems is the developer and distributor of the Java Plug-in. Go to their Java Plug-in page, as listed below, and begin the installation process. See http://java.sun.com/j2se/1.4.2/download.html.
- Find the J2SE v1.4.2_xx JRE version, and click the Download J2SE JRE link.
- The Download page is displayed.
- Click the Accept radio button, and click the link for �Windows Offline Installation, Multi-Language� in the �Windows Platform-Java(TM) Runtime Environment, Standard Edition 1.4.2_xx� section.
- The file download confirmation dialog is displayed.
- Click the Run button, and the auto install process begins.
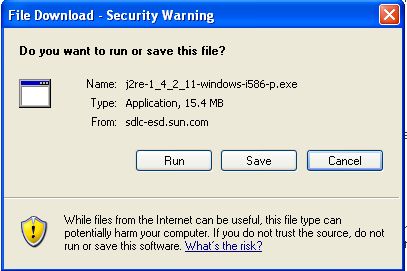
=> For more information on this, see Step 4 of the Auto installing the Java Plug-in section of this document.
- If you select Save instead of Run in the download confirmation dialog, an executable file will be downloaded instead. After downloading this file, double click on it to begin the installation process.
- After downloading, you will see a file named j2re-1_4_2_xx-windows-i586-p.exe
- After the installation has started up, the �Java 2 Runtime Environment SE v1.4.2_x� usage license screen will be displayed. Click the Agree radio button, then click Next .
=> For the rest of the steps to install, please follow from step 4 of the Auto installing the Java Plug-in section of this document.
How to download and install Java plugin in a browser
Java applets (Plugins) were introduced in the first version of Java. From early 2010 major browsers started avoiding Java applets because of security constraints and difficulty with the underlying platforms. Java Applets are deprecated in Java 9 and are completely removed from Java 11.
Applets are usually written in Java. However, they can even be written with any other language run on JVM like Jython, Scala, Pascal, JRuby and so on.
Some advantages of Java Applets are as below,
- They can run much faster compared Javascript
- Since they run as a separate process on JVM, they get access to all the system resources including hardware
- Till the canvas support came into existence applets were the favorite to render 3D graphics
- Cross-platform, once created can be run on any platform
It is important to note that, in modern browsers, Java support has to be enabled manually as Java isn’t enabled by default.
2. Enable Java support in browsers
In this section, we will see how Java can be enabled in various browsers on the Windows platform.
2.1. Internet Explorer
- Click on Tools menu and click on Internet Options
- Go to Security tab and click on Custom Levels
- In the new popup scroll to Scripting section and enable/disable Java by going to the section Scripting of Java Applets
2.2. Google Chrome
- Click on the wrench icon on the far right of the address bar
- On the menu click on Settings
- Click on Advanced settings at the end of the Settings menu
- Click on Content Settings
- Scroll down to Plug-ins and look for Java and click on Disable link to turn on/off the Java plugins
2.3. Mozilla Firefox
- Click on the little hamburger icon (Tools menu) on the far right next to address bar and choose Add-Ons menu
- Click on Plugins from the left side menu and scroll down to the bottom
- Click on Java Applet Plugins to enable/disable Java plugins
2.4. Safari
- Go to Preferences
- Click on Security
- Scroll down to Enable Java. Enable or Disable by clicking on the checkbox
3. Java Plugin Example
In this section, I will show how to write a sample Java Plugin. I am using the IntelliJ Idea editor and in the end, I have attached the complete source code.
3.1. Java plugin lifecycle
- Init – init() method is to group initialization logic. This method runs first when the applet is run.
- Start – the start() method runs after the init method and it contains the actual code to run. This method runs each time when the plugin is restored or tabs are switched.
- Paint – paint() method is used to redraw the applet. This method is invoked after the start method and whenever the browser is refreshed and resized.
- Stop – this method is automatically called whenever the user moves off the page where the plugin sits. Stop method is called whenver the plugin window is minimized and even when the browser tabs are switched.
- Destroy – this method is automatically called whenever the browser is shut down normally. This method removes the plugin object from the memory.
3.2. Example program
In this section, I am going to show a basic plugin program that shows the applet lifecycle methods.
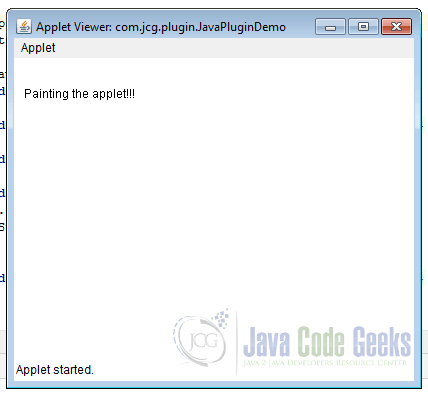
package com.jcg.plugin; import java.applet.Applet; import java.awt.*; public class JavaPluginDemo extends Applet < //init method is called only once, when the plugin class is initially loaded public void init() < System.out.println("Plugin initialized"); >//executed immediately after init method. It gets executed each time when the plugin //is reloaded, resized and refreshed public void start() < System.out.println("Plugin execution started"); >//executed whenever the plugin is minimized and user moved to another tab public void stop() < System.out.println("Plugin execution stopped"); >//redraws the output on the plugin. executed immediately after the start method. //executed whenever applet is resized and refreshed public void paint(Graphics g) < System.out.println("Painting the plugin"); g.drawString("Painting the applet. ", 10, 40); >//executed only once like init method. executed when the applet is closed public void destroy() < System.out.println("Plugin is bing removed"); >> Right-click on the program and click run. This launches the applet viewer. Output in the applet viewer is as in the below image,
Output from the plugin lifecycle methods is as follows,
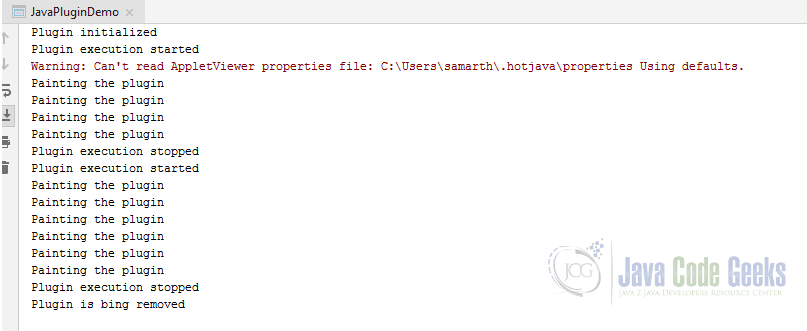
In the above output, you can notice that start, paint and stop methods are called multiple times. Whereas, init and destroy are called only once.
3.3. Serving Java Plugins
Plugins can be locally viewed in Applet Viewer. When it has to be served to a remote computer, it has to be served via HTML. Below is the sample HTML snippet to serve Java Plugin,
tag is used to serve the applets.
4. Download Source Code
Download
You can download the full source code of this example here: How to download and install Java plugin in a browser