What is command line in php
- Tell PHP to execute a certain file.
$ php my_script.php $ php -f my_script.php
$ php -r 'print_r(get_defined_constants());'
Note: Read the example carefully: there are no beginning or ending tags! The -r switch simply does not need them, and using them will lead to a parse error.
$ some_application | some_filter | php | sort -u > final_output.txt
As with every shell application, the PHP binary accepts a number of arguments; however, the PHP script can also receive further arguments. The number of arguments that can be passed to your script is not limited by PHP (and although the shell has a limit to the number of characters which can be passed, this is not in general likely to be hit). The arguments passed to the script are available in the global array $argv . The first index (zero) always contains the name of the script as called from the command line. Note that, if the code is executed in-line using the command line switch -r, the value of $argv[0] will be «Standard input code» ; prior to PHP 7.2.0, it was a dash ( «-» ) instead. The same is true if the code is executed via a pipe from STDIN .
A second global variable, $argc , contains the number of elements in the $argv array (not the number of arguments passed to the script).
As long as the arguments to be passed to the script do not start with the — character, there’s nothing special to watch out for. Passing an argument to the script which starts with a — will cause trouble because the PHP interpreter thinks it has to handle it itself, even before executing the script. To prevent this, use the argument list separator — . After this separator has been parsed by PHP, every following argument is passed untouched to the script.
# This will not execute the given code but will show the PHP usage $ php -r 'var_dump($argv);' -h Usage: php [options] [-f] [args. ] [. ] # This will pass the '-h' argument to the script and prevent PHP from showing its usage $ php -r 'var_dump($argv);' -- -h array(2) < [0]=>string(1) "-" [1]=> string(2) "-h" >
However, on Unix systems there’s another way of using PHP for shell scripting: make the first line of the script start with #!/usr/bin/php (or whatever the path to your PHP CLI binary is if different). The rest of the file should contain normal PHP code within the usual PHP starting and end tags. Once the execution attributes of the file are set appropriately (e.g. chmod +x test), the script can be executed like any other shell or perl script:
Example #1 Execute PHP script as shell script
Assuming this file is named test in the current directory, it is now possible to do the following:
$ chmod +x test $ ./test -h -- foo array(4) < [0]=>string(6) "./test" [1]=> string(2) "-h" [2]=> string(2) "--" [3]=> string(3) "foo" >
As can be seen, in this case no special care needs to be taken when passing parameters starting with — .
The PHP executable can be used to run PHP scripts absolutely independent of the web server. On Unix systems, the special #! (or «shebang») first line should be added to PHP scripts so that the system can automatically tell which program should run the script. On Windows platforms, it’s possible to associate php.exe with the double click option of the .php extension, or a batch file can be created to run scripts through PHP. The special shebang first line for Unix does no harm on Windows (as it’s formatted as a PHP comment), so cross platform programs can be written by including it. A simple example of writing a command line PHP program is shown below.
Example #2 Script intended to be run from command line (script.php)
if ( $argc != 2 || in_array ( $argv [ 1 ], array( ‘—help’ , ‘-help’ , ‘-h’ , ‘-?’ ))) ?>
This is a command line PHP script with one option.
can be some word you would like
to print out. With the —help, -help, -h,
or -? options, you can get this help.
The script above includes the Unix shebang first line to indicate that this file should be run by PHP. We are working with a CLI version here, so no HTTP headers will be output.
The program first checks that there is the required one argument (in addition to the script name, which is also counted). If not, or if the argument was —help, -help, -h or -?, the help message is printed out, using $argv[0] to dynamically print the script name as typed on the command line. Otherwise, the argument is echoed out exactly as received.
To run the above script on Unix, it must be made executable, and called simply as script.php echothis or script.php -h. On Windows, a batch file similar to the following can be created for this task:
Example #3 Batch file to run a command line PHP script (script.bat)
@echo OFF "C:\php\php.exe" script.php %*
Assuming the above program is named script.php , and the CLI php.exe is in C:\php\php.exe , this batch file will run it, passing on all appended options: script.bat echothis or script.bat -h.
See also the Readline extension documentation for more functions which can be used to enhance command line applications in PHP.
On Windows, PHP can be configured to run without the need to supply the C:\php\php.exe or the .php extension, as described in Command Line PHP on Microsoft Windows.
Note:
On Windows it is recommended to run PHP under an actual user account. When running under a network service certain operations will fail, because «No mapping between account names and security IDs was done».
User Contributed Notes 7 notes
On Linux, the shebang (#!) line is parsed by the kernel into at most two parts.
For example:
1: #!/usr/bin/php
2: #!/usr/bin/env php
3: #!/usr/bin/php -n
4: #!/usr/bin/php -ddisplay_errors=E_ALL
5: #!/usr/bin/php -n -ddisplay_errors=E_ALL
1. is the standard way to start a script. (compare «#!/bin/bash».)
2. uses «env» to find where PHP is installed: it might be elsewhere in the $PATH, such as /usr/local/bin.
3. if you don’t need to use env, you can pass ONE parameter here. For example, to ignore the system’s PHP.ini, and go with the defaults, use «-n». (See «man php».)
4. or, you can set exactly one configuration variable. I recommend this one, because display_errors actually takes effect if it is set here. Otherwise, the only place you can enable it is system-wide in php.ini. If you try to use ini_set() in your script itself, it’s too late: if your script has a parse error, it will silently die.
5. This will not (as of 2013) work on Linux. It acts as if the whole string, «-n -ddisplay_errors=E_ALL» were a single argument. But in BSD, the shebang line can take more than 2 arguments, and so it may work as intended.
Summary: use (2) for maximum portability, and (4) for maximum debugging.
Command Line Interface в PHP
До этого момента мы с Вами знали, что PHP работает на сервере. Клиент обращается к серверу по протоколу HTTP с каким-либо запросом, запрос на сервере обрабатывается и формируется ответ. После этого клиенту снова по протоколу HTTP в ответе отдаётся сформированный ответ. Однако, если взять какой-нибудь более-менее продвинутый сайт, то мы увидим, что есть задачи, которые не решаются стандартным клиент-серверным путем. Например: поздравлять пользователей с днём рождения и дарить им скидку на какой-нибудь продукт. Для того, чтобы это сделать, нам придется обновлять раз в день php-скрипт в браузере, чтобы он выбирал пользователей, у которых сегодня ДР, затем создавал для них скидки, и отправлял им сообщения по почте. Согласитесь, неудобно это делать вручную и в браузере. Для таких случаев в PHP предусмотрен Command Line Interface (CLI) – интерфейс командной строки.
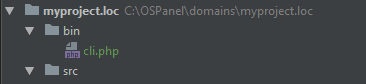
CLI позволяет запускать программы на PHP не через привычную нам клиент-серверную архитектуру, а как простые программы в командной строке. Давайте создадим простейший скрипт, чтобы показать, как это работает. Создаём новую папку bin в корне проекта, а в ней файл – cli.php.

А теперь запускаем консоль из OpenServer:
Переходим в папку с нашим проектом, выполнив:
И пишем следующую команду:
Написали простейшее консольное приложение! Уже неплохо. Но что если мы захотим сложить 2 числа, которые нужно передать скрипту? Как Вы понимаете, сделать это с помощью GET- или POST- запросов уже не получится. Так как же быть?
Аргументы консольного приложения

На помощь нам приходят аргументы, которые мы можем передать в скрипт, указав их после имени скрипта в командной строке. Вот так:
А для того, чтобы получить к ним доступ из php-скрипта используется магическая переменная $argv. Она представляет собой массив, в котором нулевой элемент – это путь до скрипта, а все последующие – это его аргументы в консоли.

Давайте теперь запустим наш скрипт с параметрами:
Как видим, наши аргументы попали в этот массив. Давайте напишем простейший скрипт, который будет складывать все переданные ему аргументы.

Запустим его, и убедимся, что все работает:
И он действительно работает: 3 + 4 + 5 = 12.

А что если мы хотим передавать аргументы с именами? Вроде такого:
И затем в коде получать их в коде по их именам? Для этого нам следует написать простейший парсер, который будет находить вот такие именованные параметры и их значения. Пишем.
Отлично, теперь мы можем обращаться к элементам массива params, чтобы выяснить, были ли нам переданы какие-то аргументы или нет.
CLI и ООП
Мы с вами изучили некоторые основы работы с CLI. Давайте теперь перенесем эти знания на объектно-ориентированный подход и научимся работать через интерфейс командной строки с объектами.
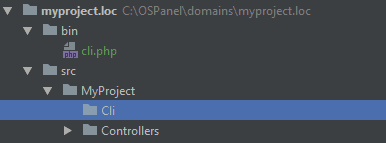
Для этого нам понадобится создать отдельную директорию под «команды». Команды – так мы будем называть наши специальные классы, которые будут выполнять какой-то код через запуск из командной строки. Создаем новую директорию: src/MyProject/Cli.
И теперь создадим наш первый класс, который будет заниматься тем, что считает сумму переданных в него аргументов: -a и -b.
params = $params; $this->checkParams(); > public function execute() < echo $this->getParam('a') + $this->getParam('b'); > private function checkParams() < $this->ensureParamExists('a'); $this->ensureParamExists('b'); > private function getParam(string $paramName) < return $this->params[$paramName] ?? null; > private function ensureParamExists(string $paramName) < if (!isset($this->params[$paramName])) < throw new CliException('Param with name "' . $paramName . '" is not set!'); >> >В конструкторе класса мы принимаем список параметров, сохраняем их, а затем вызываем метод checkParams(), который проверяет наличие обязательных параметров для этого скрипта. В нём просто поочередно вызывается метод для проверки в массиве нужных ключей. Если их нет – метод кинет исключение. И, наконец, есть метод execute(), который содержит бизнес-логику. В нем используется метод getParam(), который вернет параметр (при его наличии), либо вернет null (при его отсутствии).
И также создаём исключение, специально для ошибок, возникающих при работе с CLI.
Теперь давайте снова вернемся в нашу точку входа для консольных приложений cli.php. Этот файл можно назвать фронт-контроллером для консольных команд, он как index.php в случае с клиент-серверным подходом будет создавать другие объекты и запускать весь процесс.
Дополним этот код так, чтобы он создавал экземпляр нужного класса и передавал ему аргументы.
); // Составляем полное имя класса, добавив нэймспейс $className = '\\MyProject\\Cli\\' . array_shift($argv); if (!class_exists($className)) < throw new \MyProject\Exceptions\CliException('Class "' . $className . '" not found'); >// Подготавливаем список аргументов $params = []; foreach ($argv as $argument) < preg_match('/^-(.+)=(.+)$/', $argument, $matches); if (!empty($matches)) < $paramName = $matches[1]; $paramValue = $matches[2]; $params[$paramName] = $paramValue; >> // Создаём экземпляр класса, передав параметры и вызываем метод execute() $class = new $className($params); $class->execute(); > catch (\MyProject\Exceptions\CliException $e) < echo 'Error: ' . $e->getMessage(); >
Теперь мы можем запустить наш скрипт с помощью вот такой команды:
Если мы захотим создать еще один класс, в котором мы будем вычитать из аргумента a аргумент b, то нам нужно будет продублировать довольно большой объем кода. Но ведь если присмотреться – большую часть кода из класса Summator можно вынести в отдельный класс и использовать его повторно.
Давайте создадим абстрактный класс, который будет заниматься тем, что будет сохранять переданные в него параметры и запускать метод для их проверки.
params = $params; $this->checkParams(); > abstract public function execute(); abstract protected function checkParams(); protected function getParam(string $paramName) < return $this->params[$paramName] ?? null; > protected function ensureParamExists(string $paramName) < if (!isset($this->params[$paramName])) < throw new CliException('Param with name "' . $paramName . '" is not set!'); >> >Теперь нам в классе Summator достаточно отнаследоваться от этого класса и он значительно упростится:
ensureParamExists('a'); $this->ensureParamExists('b'); > public function execute() < echo $this->getParam('a') + $this->getParam('b'); > >
Запустим скрипт снова и убедимся, что все успешно отработало:
Давайте создадим по аналогии скрипт, который будет вычитать из аргумента x аргумент y.
ensureParamExists('x'); $this->ensureParamExists('y'); > public function execute() < echo $this->getParam('x') - $this->getParam('y'); > >
А теперь давайте попробуем не указать один из аргументов – получим ошибку.
Вот таким вот нехитрым образом мы с вами научились создавать простейшие программы для запуска в консоли на PHP. А в следующем уроке мы с вами научимся запускать эти команды по расписанию.