- Building Java API Docs With DocFX
- Building the doclet #
- Building documentation #
- Publishing the documentation #
- How to document your Java REST api
- What is Swagger?
- Why documenting our Java REST API’s?
- How does Swagger look like?
- Is it hard the documentation maintenance with Swagger?
- How to add Swagger to your API?
- Conclusion
Building Java API Docs With DocFX
For some time, at docs.microsoft.com, we’ve been using a non-standard way to document Java APIs. For example, if you take a look at this page, you will notice that it’s a regular API document. Behind the scenes, it was built with the help of Doxygen (generates structured docs from Java code), code2yaml (transforms Doxygen output into YAML) and DocFX (transforms YAML into static HTML).
This is when we decided that we need to overhaul the pipeline a bit — in consultation with Microsoft Cloud Developer Advocate Bruno Borges and Azure SDK engineer Jonathan Giles, we’ve determined that the best way to do this would be through a doclet. At a fundamental level, we would essentially be plugging into the standard Javadoc tooling instead of trying to abide to a less common standard. In collaboration with our engineering teams, we’ve built a DocFX doclet, that would produce the structured content that DocFX can ingest while consuming the output produced by standard Java documentation tooling.
In this post, I will describe how you can generate beautiful Java API documentation with a Javadoc-based extension.
Building the doclet #
First, clone the repository with the doclet locally. Once you have a copy, make sure that you have the Java Development Kit installed on your machine. The installation process might be different, depending on your platform. And of course, once you have Java installed, you also need to install Apache Maven — this is what we use to build the project. For macOS, this is as simple as:
Thank you our lord and savior Homebrew for making the installation process a breeze here. Now we are ready to build. Set the context of your terminal to the folder where you cloned the repo, and run:
When the build completes, we need to make sure that we generate a JAR file. Maven can help us here too:
We are ready to use the doclet — the JAR is now located in the targets folder, within the location where you cloned the repository.
Building documentation #
For a demo, let’s use the Azure Functions Java library, available on GitHub. Clone the repository locally, and once the process completes, execute the following javadoc call in the terminal:
javadoc \ -encoding UTF-8 \ -docletpath /some/path/docfx-doclet/target/docfx-doclet-1.0-SNAPSHOT-jar-with-dependencies.jar \ -doclet com.microsoft.doclet.DocFxDoclet \ -sourcepath /some/path/azure-functions-java-library/src/main/java \ -outputpath /some/path/yml-test \ -subpackages com.microsoft.azure.functions \ | Parameter | Description |
|---|---|
| -encoding | Encoding for the generated documentation. |
| -docletpath | Path to the doclet that we built with Maven earlier in the post. |
| -doclet | The ID of the doclet being used. This should be a constant com.microsoft.doclet.DocFxDoclet . |
| -sourcepath | The path to the source code where the package that needs to be documented is located. |
| -outputpath | The path where the generated YAML files should be placed. |
| -subpackages | The list of subpackages that need to be documented, separated by a colon ( : ). |
There are two optional parameters that you can specify:
| Parameter | Description |
|---|---|
| -excludepackages | List of excluded packages, separated by a colon ( : ). For example: com\.msdn\..*:com\.ms\.news\..* . |
| -excludeclasses | List of classes that need to be excluded, separated by a colon ( : ). For example: .*SomeClass:com\.ms\..*AnyClass . |
We’re all ready to start experimenting with the generated documentation within DocFX!
Publishing the documentation #
With the Mono runtime installed, we can now initialize a new DocFX documentation set — just run the following command in the terminal:
Alternatively, if you would like to run this quickly (with no custom settings), you can run the command with the -q argument. On command success, you will have a new documentation set provisioned in the directory, to which the context was set in the terminal. Move all the previously-generated *.yml files into the docfx_project/api directory in the documentation set.
To build the content, set the context of the terminal inside the docfx_project folder, and run:
Last step is us actually serving the generated files on a local server. To do that, run:
mono /path/to/docfx.exe serve _site Here, _site is the name of the folder where the generated HTML files were placed. In the terminal, DocFX will tell you the URL where you can access the served site (it’s usually https://localhost:8080 ).
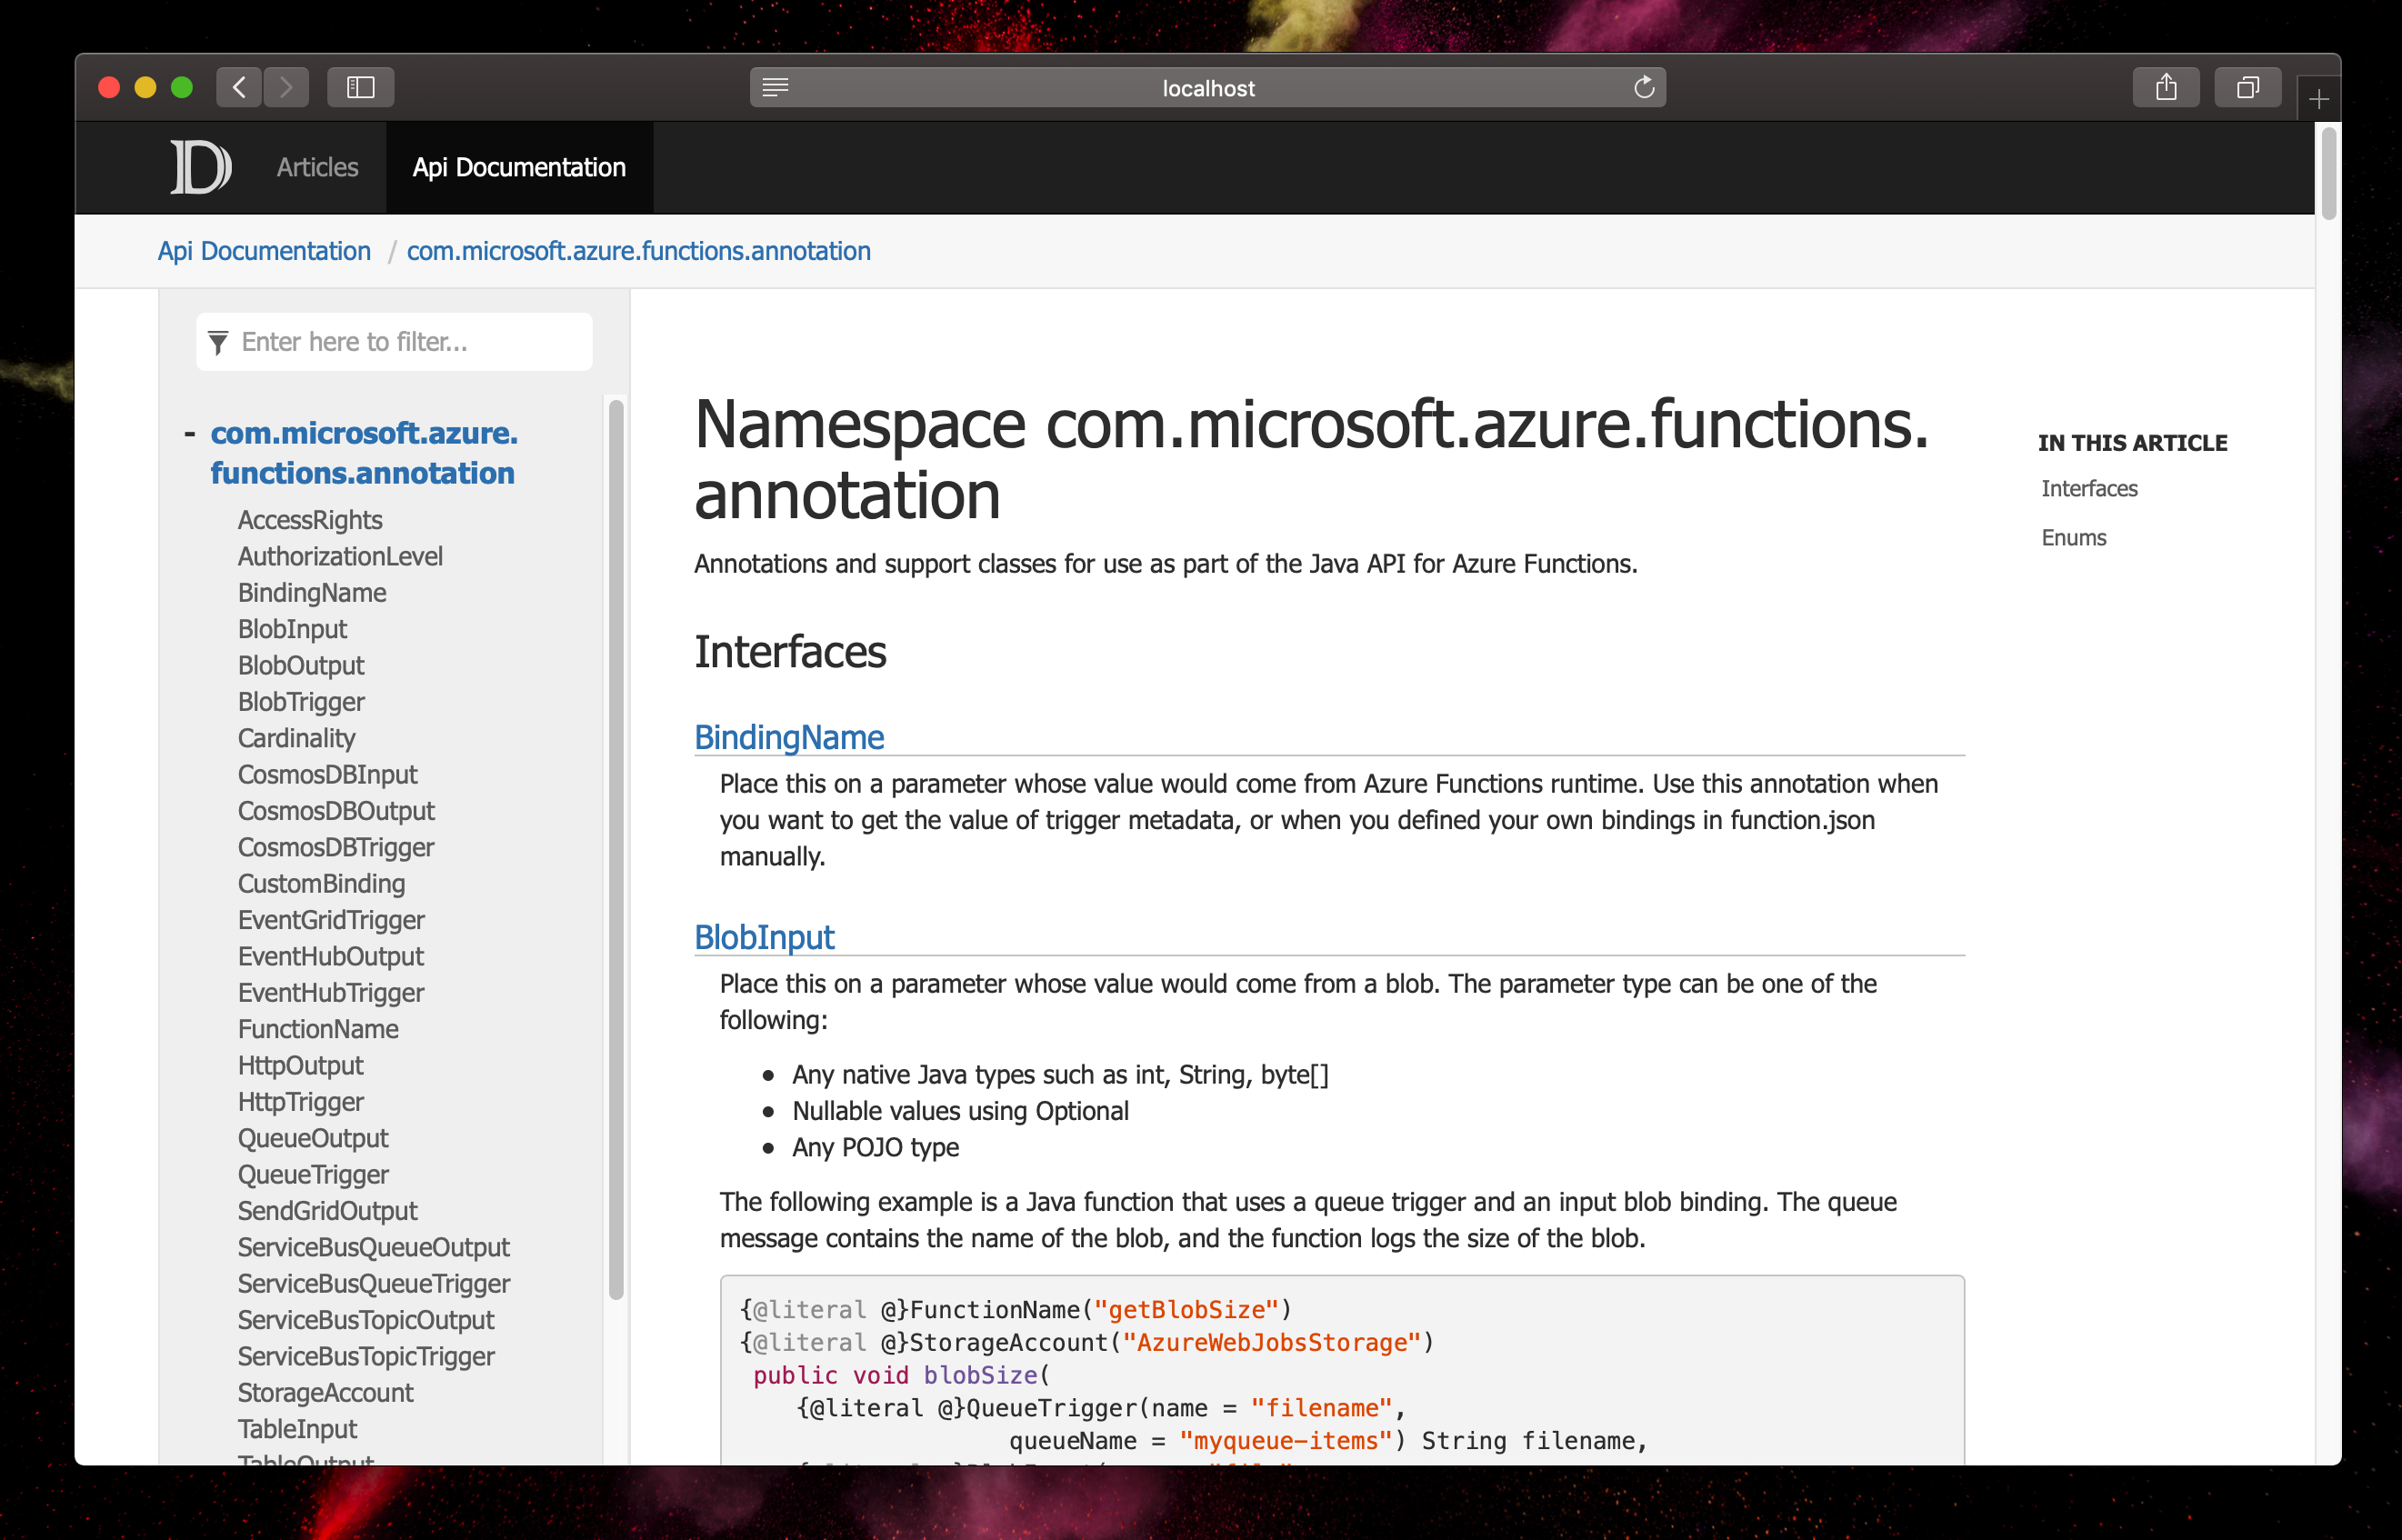
That’s it! You now have Java API documentation inside DocFX, with no content loss, and preserving the structure of your familiar Javadoc comments!
I am an engineer and product manager, spending inordinate amounts of time tinkering with code, exploring local (and less local) trails, discovering APIs, and having conversations in technical communities.
How to document your Java REST api
In this post, we are going to explore how to document our Java REST API using Swagger. It’s important to have good documentation that is easy to maintain and that is easy to share with your team and with your stakeholders and Swagger it’s a good way to achieve these goals.
What is Swagger?
Swagger it’s a platform that one of the things that we can do is to document our Java REST API’s using Swagger UI. It provides us more functionalities that we can explore in their documentation like designing APIs, however, we are not going to cover them in this article. I will share my experience using it to document a REST API.
Why documenting our Java REST API’s?
Having documentation that is attached to the code it’s a good thing because when you do changes in your code you are forced to also change the documentation.
@Api(produces = "application/json", value = "Operations related with the pet store") public class PetServiceController If the documentation is far from the code there are more possibilities that when you change something you don’t update the documentation.
With this way of documenting we achieve that the consumers of this documentation learn about:
How does Swagger look like?
When you have Swagger in place working you will be able to share to developers from other teams, other product managers/product owners, and other stakeholders a good up to date documentation of the different endpoints of your API and also with ready to use examples to get familiar with.
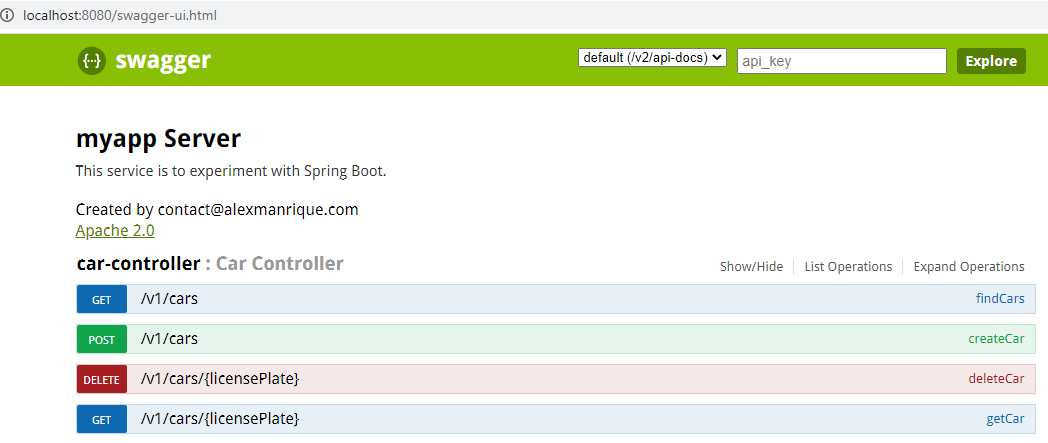
In the following link you can see a live example of a pet store API using Swagger UI.
Is it hard the documentation maintenance with Swagger?
Because Swagger is attached to the code, if developers are changing the API, if in their pull request they have not updated the code to show the changes we can request them to update them.
If the documentation is in a wiki page is more difficult to remember to update the documentation, but if we have it in the code the developer is forced to keep it up to date.
If we check the stars that has the Swagger UI repository in Github, they have 18,6k stars, so the odds that the project is discontinued are low.
How to add Swagger to your API?
We need to add in the pom.xml file of your Maven project the following dependencies. As we said in the article managing maven dependencies it’s a good practice to use tag to set the version of dependency that we are going to use in the whole project.
properties> swagger.version>1.5.20swagger.version> build.artifacts.classifier/> properties> dependencymanagement> dependency> groupId>io.swaggergroupId> artifactId>swagger-jaxrsartifactId> version>$swagger.version>version> dependency> dependency> groupId>io.swaggergroupId> artifactId>swagger-annotationsartifactId> version>$swagger.version>version> dependency> Then after it we have to create a controller that extends ApiListingResource class and set the path in the annotation where the swagger file with the API specification will be placed.
import io.swagger.jaxrs.listing.ApiListingResource; import javax.ws.rs.Path; @Path("/api-docs/swagger." ) public class SwaggerApiController extends ApiListingResource > Then in the class that extends Application class we have to initialize Swagger using the previous controller that we have defined.
public class ServiceApplication extends Application private final SetObject> singletons = new HashSet<>(); public ServiceApplication(@Context ServletConfig sc) initializeSwagger(sc); buildRestControllers(); > private void buildRestControllers() singletons.add(new SwaggerApiController()); > private void initializeSwagger(ServletConfig sc) Info info = new Info() .title("my jaxrs api") .description("my jaxrs service") .contact(new Contact().email("contact@alexmanrique.com").name("manriqueapps")); Swagger swagger = new Swagger().info(info); BeanConfig beanConfig = new BeanConfig(); beanConfig.setResourcePackage("com.manriqueapps"); beanConfig.setInfo(info); beanConfig.setBasePath("/myjaxrs-service"); beanConfig.configure(swagger); new SwaggerContextService() .withServletConfig(sc) .withScanner(beanConfig) .updateSwagger(swagger) .initScanner(); > @Override public SetObject> getSingletons() return new HashSet<>(singletons); > > Then we have to define in the web.xml file the servlet-mapping for the different Swagger urls.
servlet-mapping> servlet-name>resteasy-servletservlet-name> url-pattern>/v1/*url-pattern> url-pattern>/api-docs/*url-pattern> url-pattern>/swagger/*url-pattern> servlet-mapping> context-param> param-name>resteasy.providersparam-name> param-value> io.swagger.jaxrs.listing.SwaggerSerializers param-value> context-param> In the different operations of our service we have to use the annotation @ApiOperation to explain what the operation is doing or @ApiResponse to document the possible responses that the operation can return.
@Api(produces = "application/json", value = "Operations related with the pet store") public class PetServiceController @ApiOperation(value = "Create a new pet", response = YourResponseEntity.class) @ApiResponses(value = @ApiResponse(code = 200, message = "Successfully created a new Pet"), @ApiResponse(code = 401, message = "You are not authorized to view the resource"), @ApiResponse(code = 403, message = "Accessing the resource you were trying to reach is forbidden"), @ApiResponse(code = 404, message = "The resource you were trying to reach is not found"), @ApiResponse(code = 500, message = "Application failed to process the request") public PetResponse createPet (CreateRequest petRequest) // > > We have to define also an HTML file that will load all the operations of the API using the swagger.json file that we are generating (This file needs to be placed in the webapp directory in your Java maven project)
HTML for static distribution bundle build --> DOCTYPE html> html lang="en"> head> meta charset="UTF-8"> title>Swagger UItitle> link href="https://fonts.googleapis.com/css?family=Open+Sans:400,700|Source+Code+Pro:300,600|Titillium+Web:400,600,700" rel="stylesheet"> link rel="stylesheet" type="text/css" href="https://unpkg.com/swagger-ui-dist@3/swagger-ui.css" > link rel="icon" type="image/png" href="https://unpkg.com/swagger-ui-dist@3/favicon-32x32.png" sizes="32x32" /> link rel="icon" type="image/png" href="https://unpkg.com/swagger-ui-dist@3/favicon-16x16.png" sizes="16x16" /> style> html box-sizing: border-box; overflow: -moz-scrollbars-vertical; overflow-y: scroll; > *, *:before, *:after box-sizing: inherit; > body margin:0; background: #fafafa; > style> head> body> div id="swagger-ui">div> script src="https://unpkg.com/swagger-ui-dist@3/swagger-ui-bundle.js">script> script src="https://unpkg.com/swagger-ui-dist@3/swagger-ui-standalone-preset.js">script> script> window.onload = function() // Build a system const ui = SwaggerUIBundle( url: "../../api-docs/swagger.json", dom_id: '#swagger-ui', deepLinking: true, presets: [ SwaggerUIBundle.presets.apis, SwaggerUIStandalonePreset ], plugins: [ SwaggerUIBundle.plugins.DownloadUrl ], layout: "StandaloneLayout" >) window.ui = ui > script> body> html> Conclusion
In this post, we have seen why it’s important to document our API and how Swagger can help us to achieve this objective. If you want to see how to use Swagger with Spring boot in this post I explain how to do a Hello world with Spring boot and the API that the app deploys is using Swagger. You can find the code for the Spring boot hello world with Swagger in the following link.