- How to Align Image in HTML?
- Align Image in HTML Using CSS
- Center Alignment (horizontally center)
- Middle Alignment (vertically center)
- Top Alignment
- Bottom Alignment
- Left Alignment
- Right Alignment
- Align Image in HTML Using the Align Attribute
- Syntax :
- Left Alignment
- Right Alignment
- Browser Support
- Conclusion
- HTML Tag
- Browser Support
- Attributes
- How to Center an Image Vertically and Horizontally with CSS
- Here’s an interactive scrim about how to center an image vertically and horizontally:
- Centering an Image Horizontally
- Text-Align
- Margin: Auto
- Display: Flex
- Centering an Image Vertically
- Display: Flex
- Position: Absolute & Transform Properties
- Step 1: Define Position Absolute
- Step 2: Define Top & Left Properties
- Step 3: Define the Transform Property
- HTML Tag
- Browser Support
- Attributes
How to Align Image in HTML?

Image alignment is a technique for repositioning images on our web pages ( top , bottom , right , left , and centre ). We could align the image using the align attribute or using CSS. In this article, we are going to see both methods of image alignment.
Align Image in HTML Using CSS
Center Alignment (horizontally center)
Set the left and right margins to auto and make the image into a block element to center it.

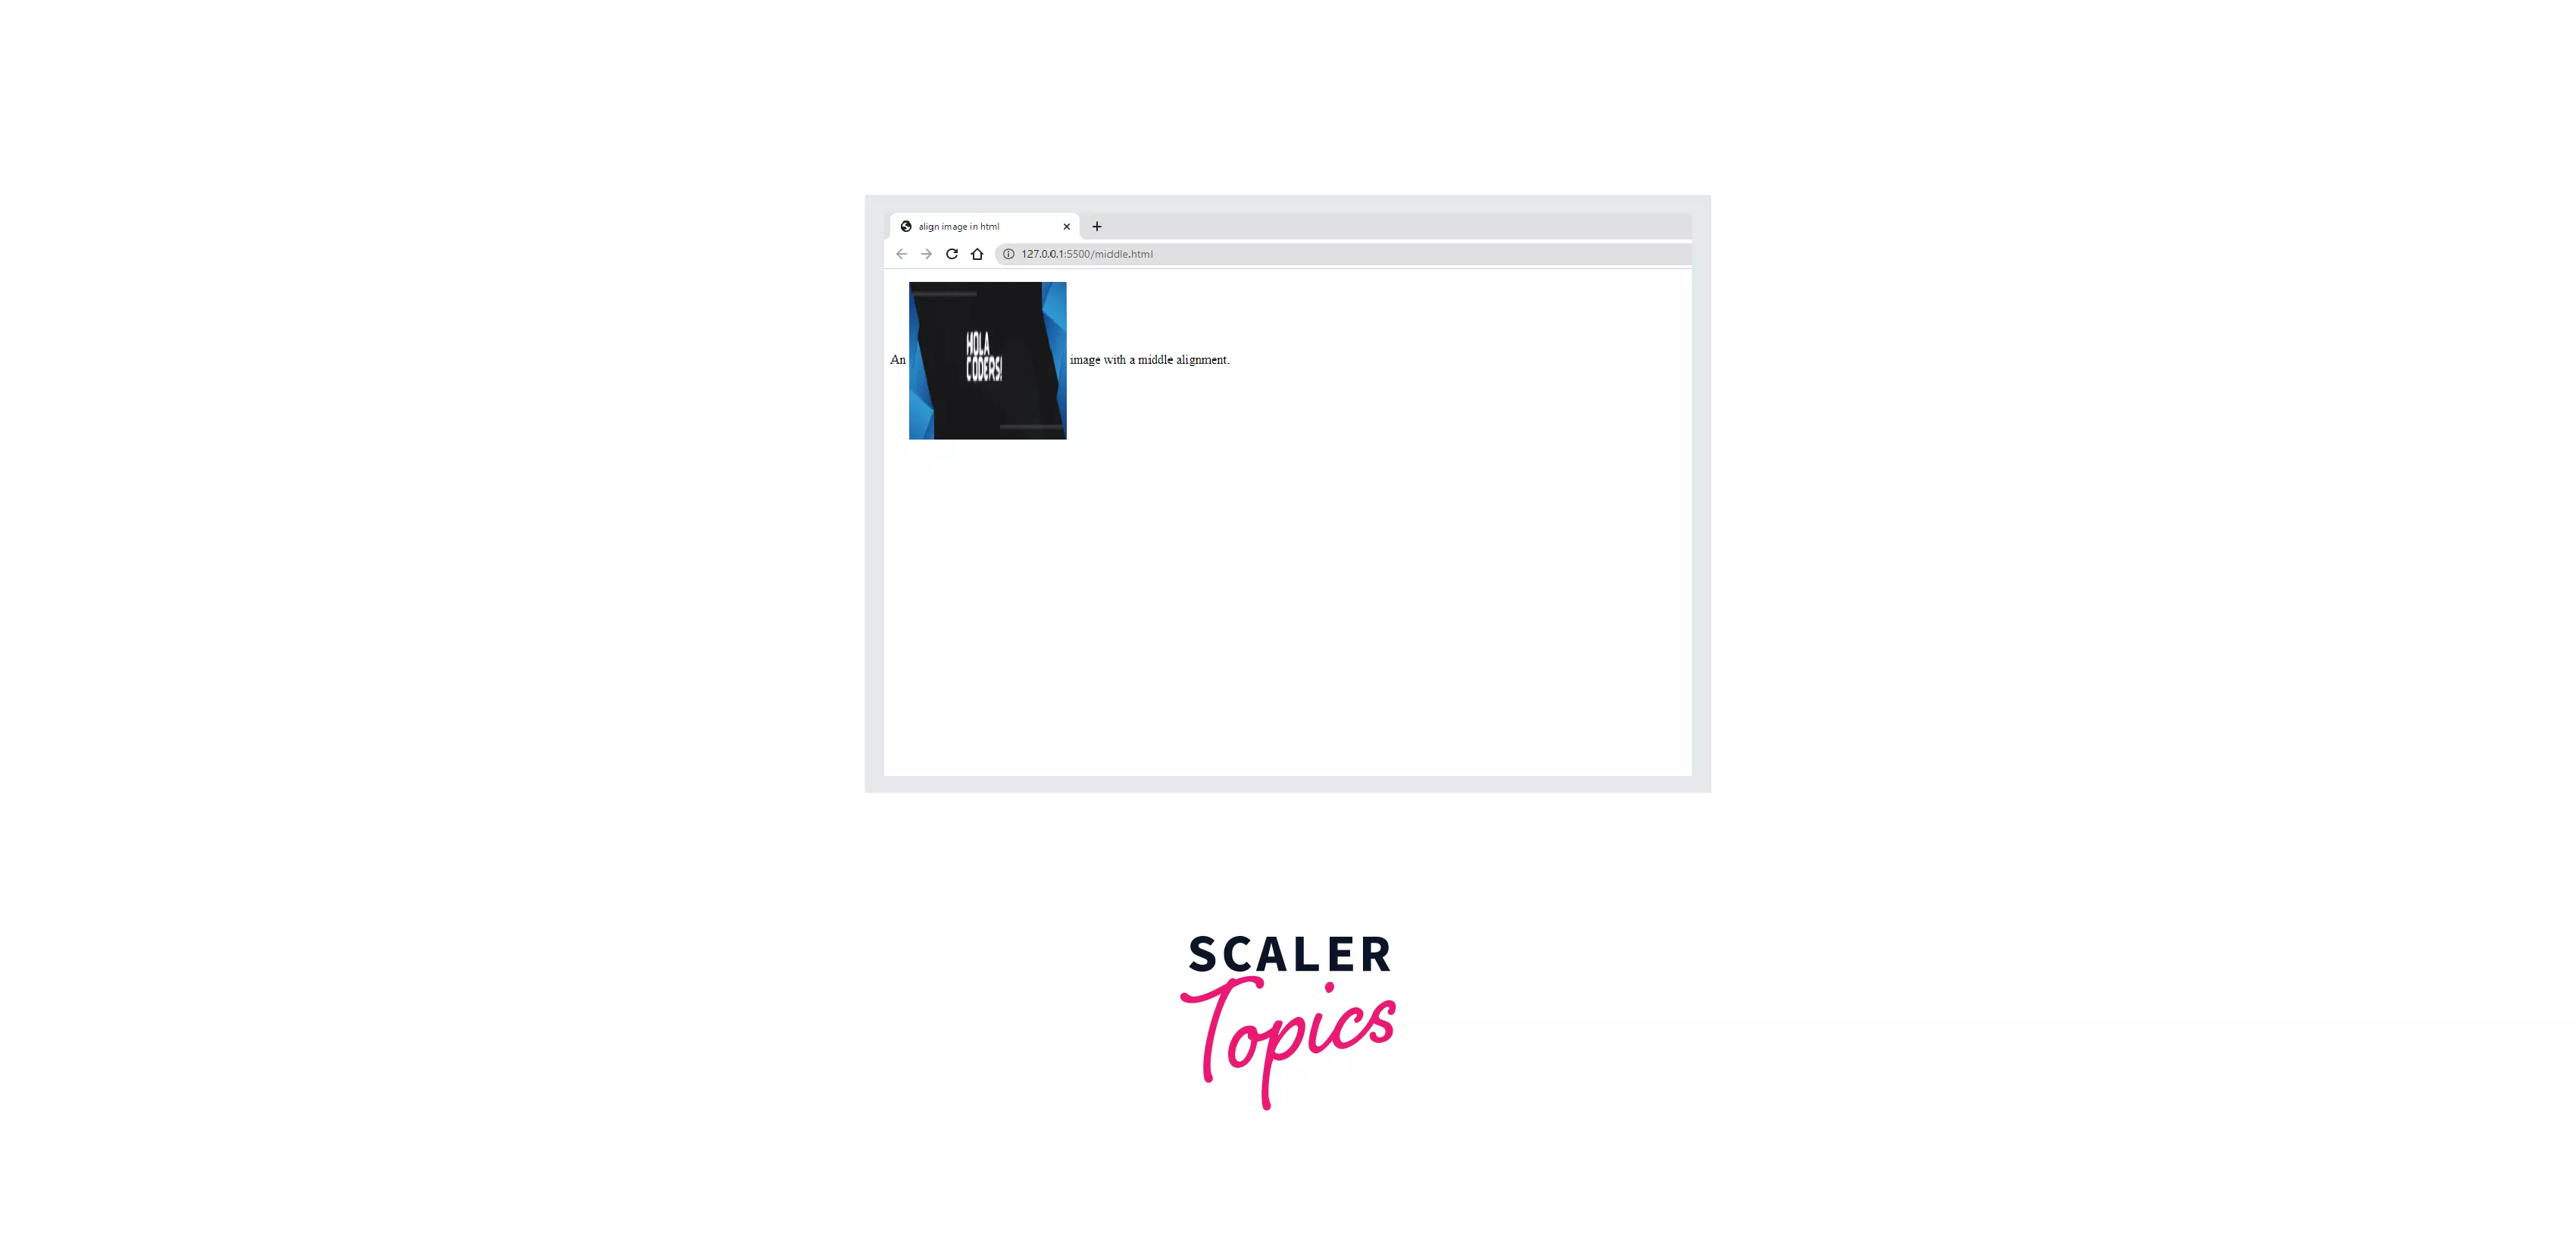
Middle Alignment (vertically center)
Set the vertical-align as middle.
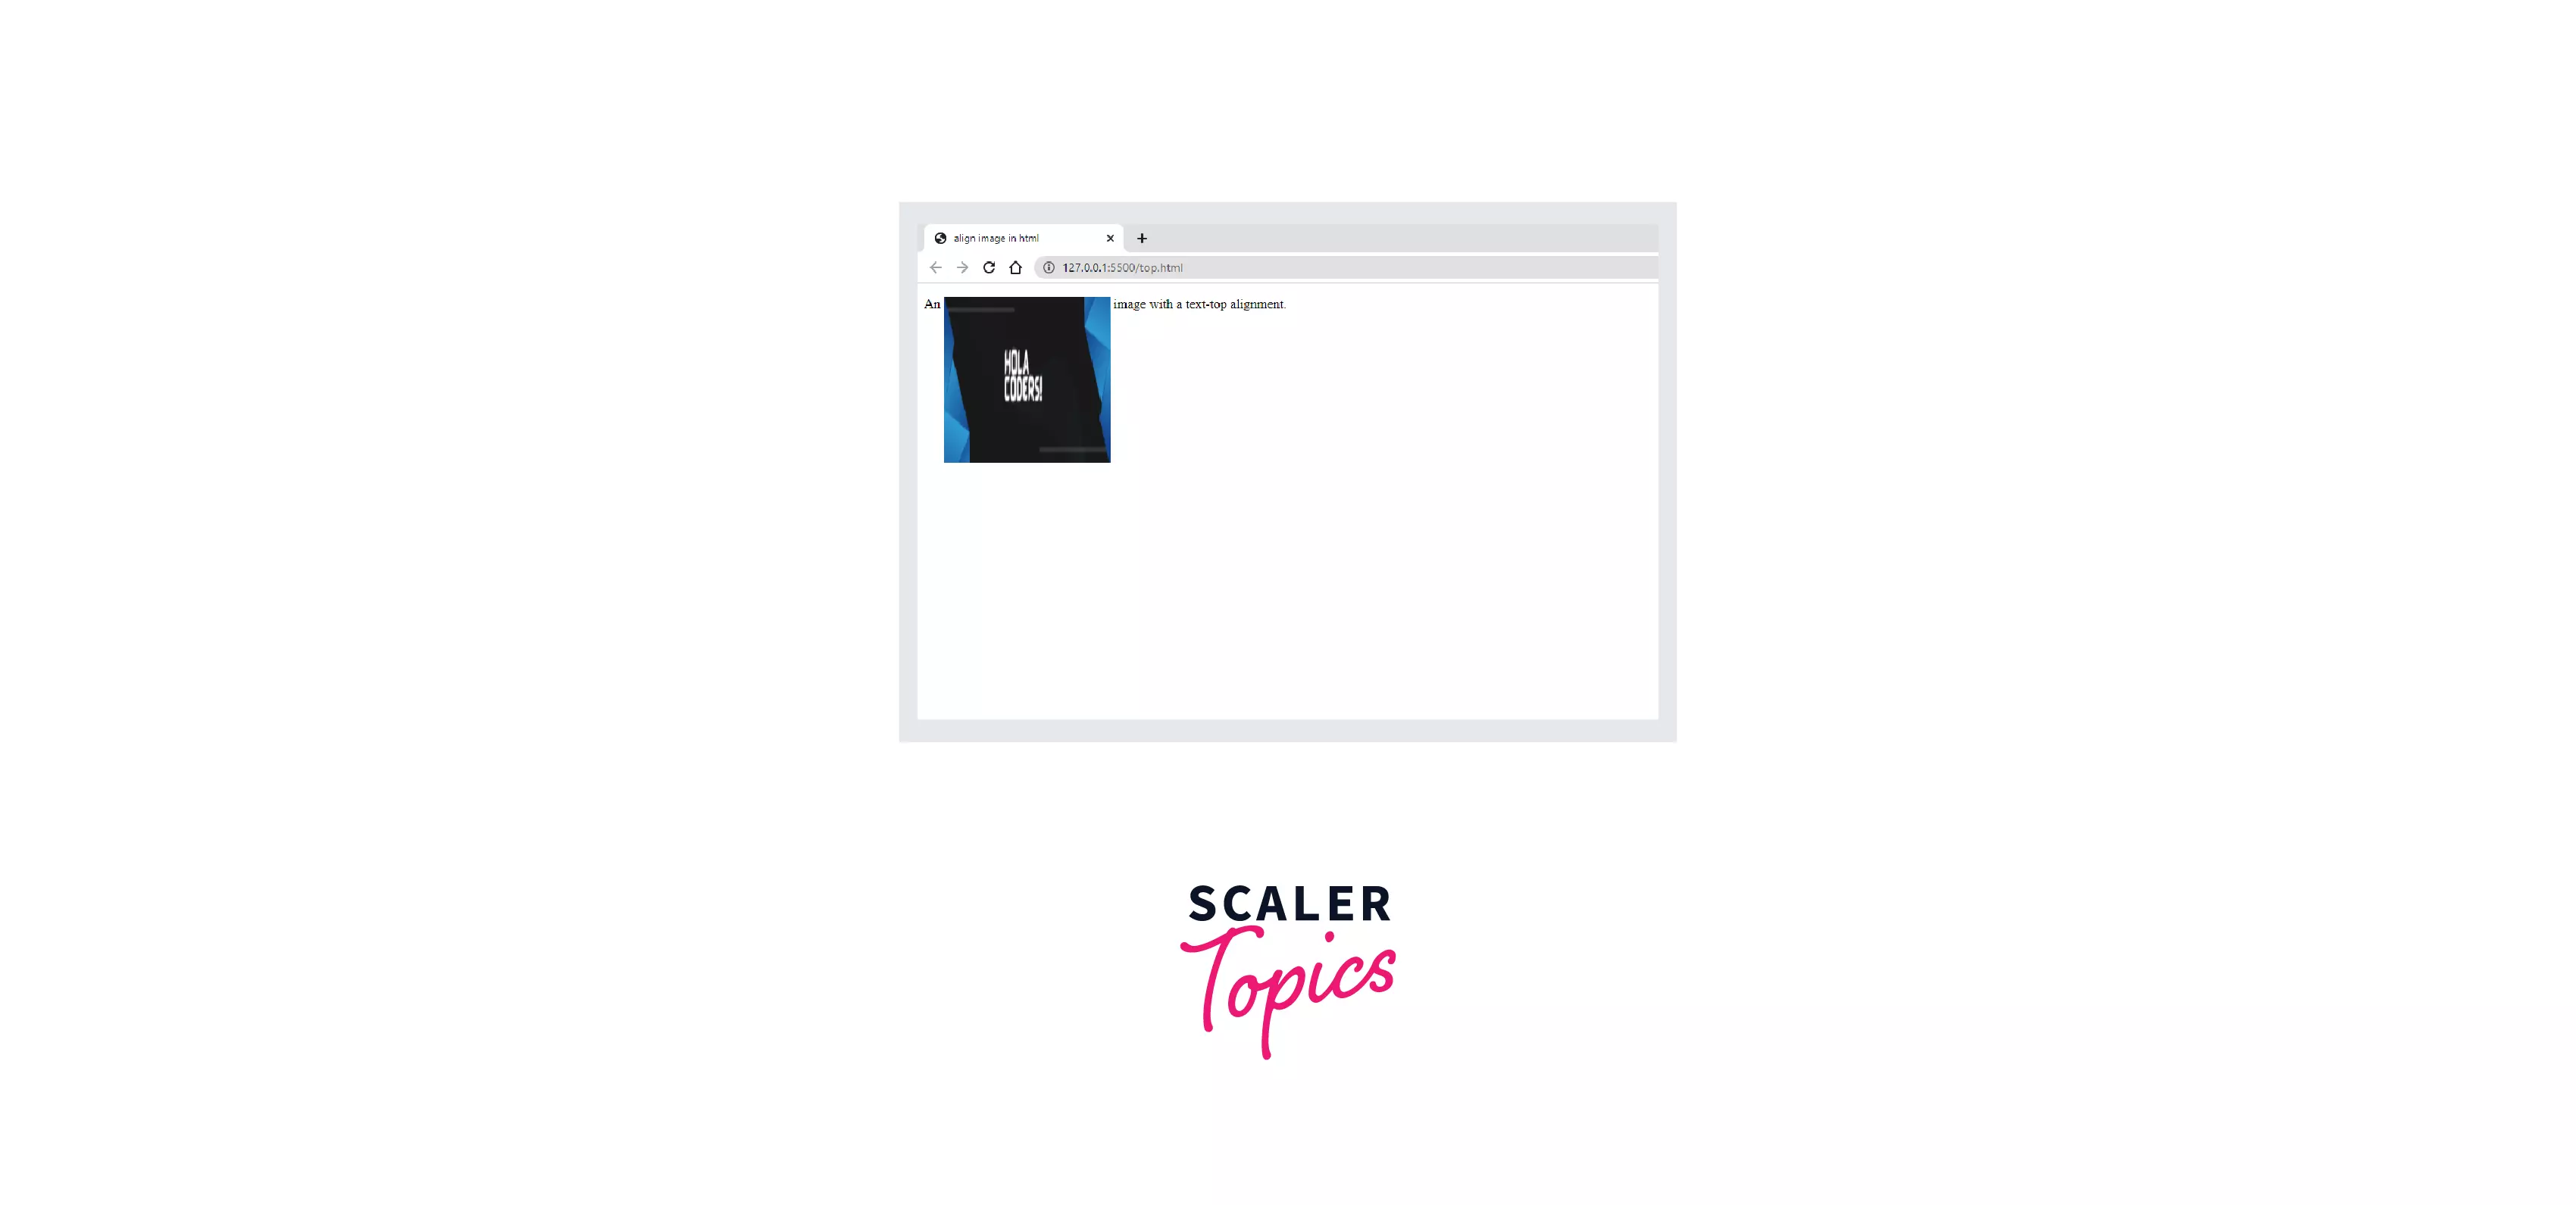
Top Alignment
Set the vertical-align as text-top.
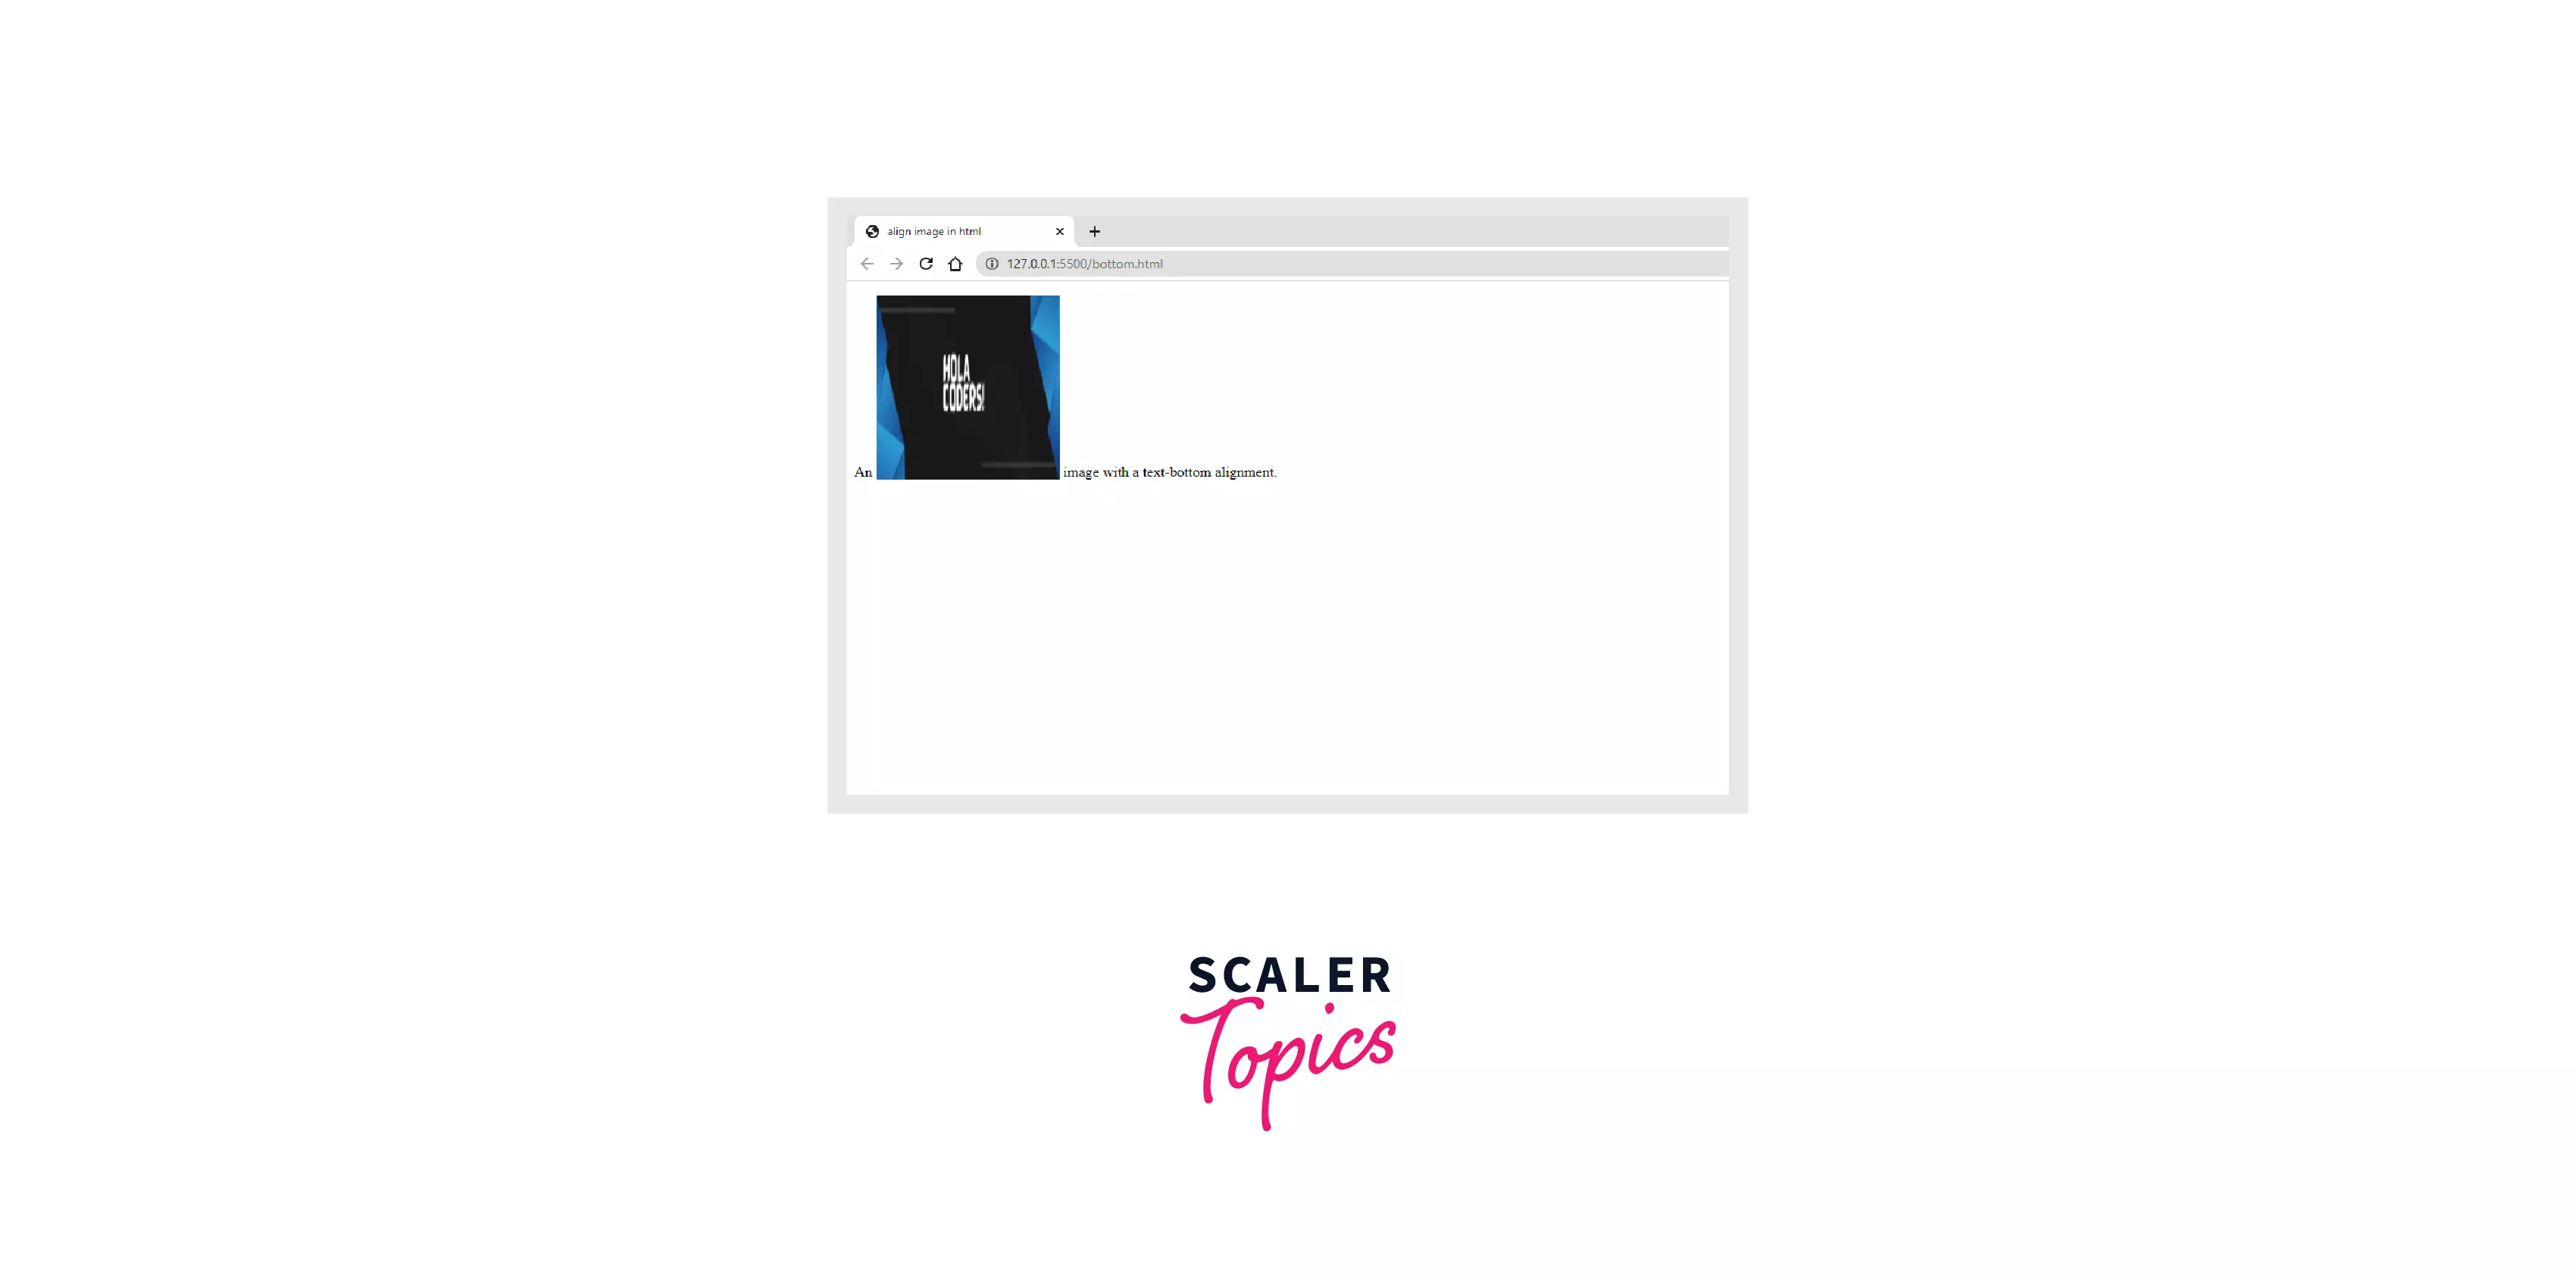
Bottom Alignment
Set the vertical-align as text-bottom.
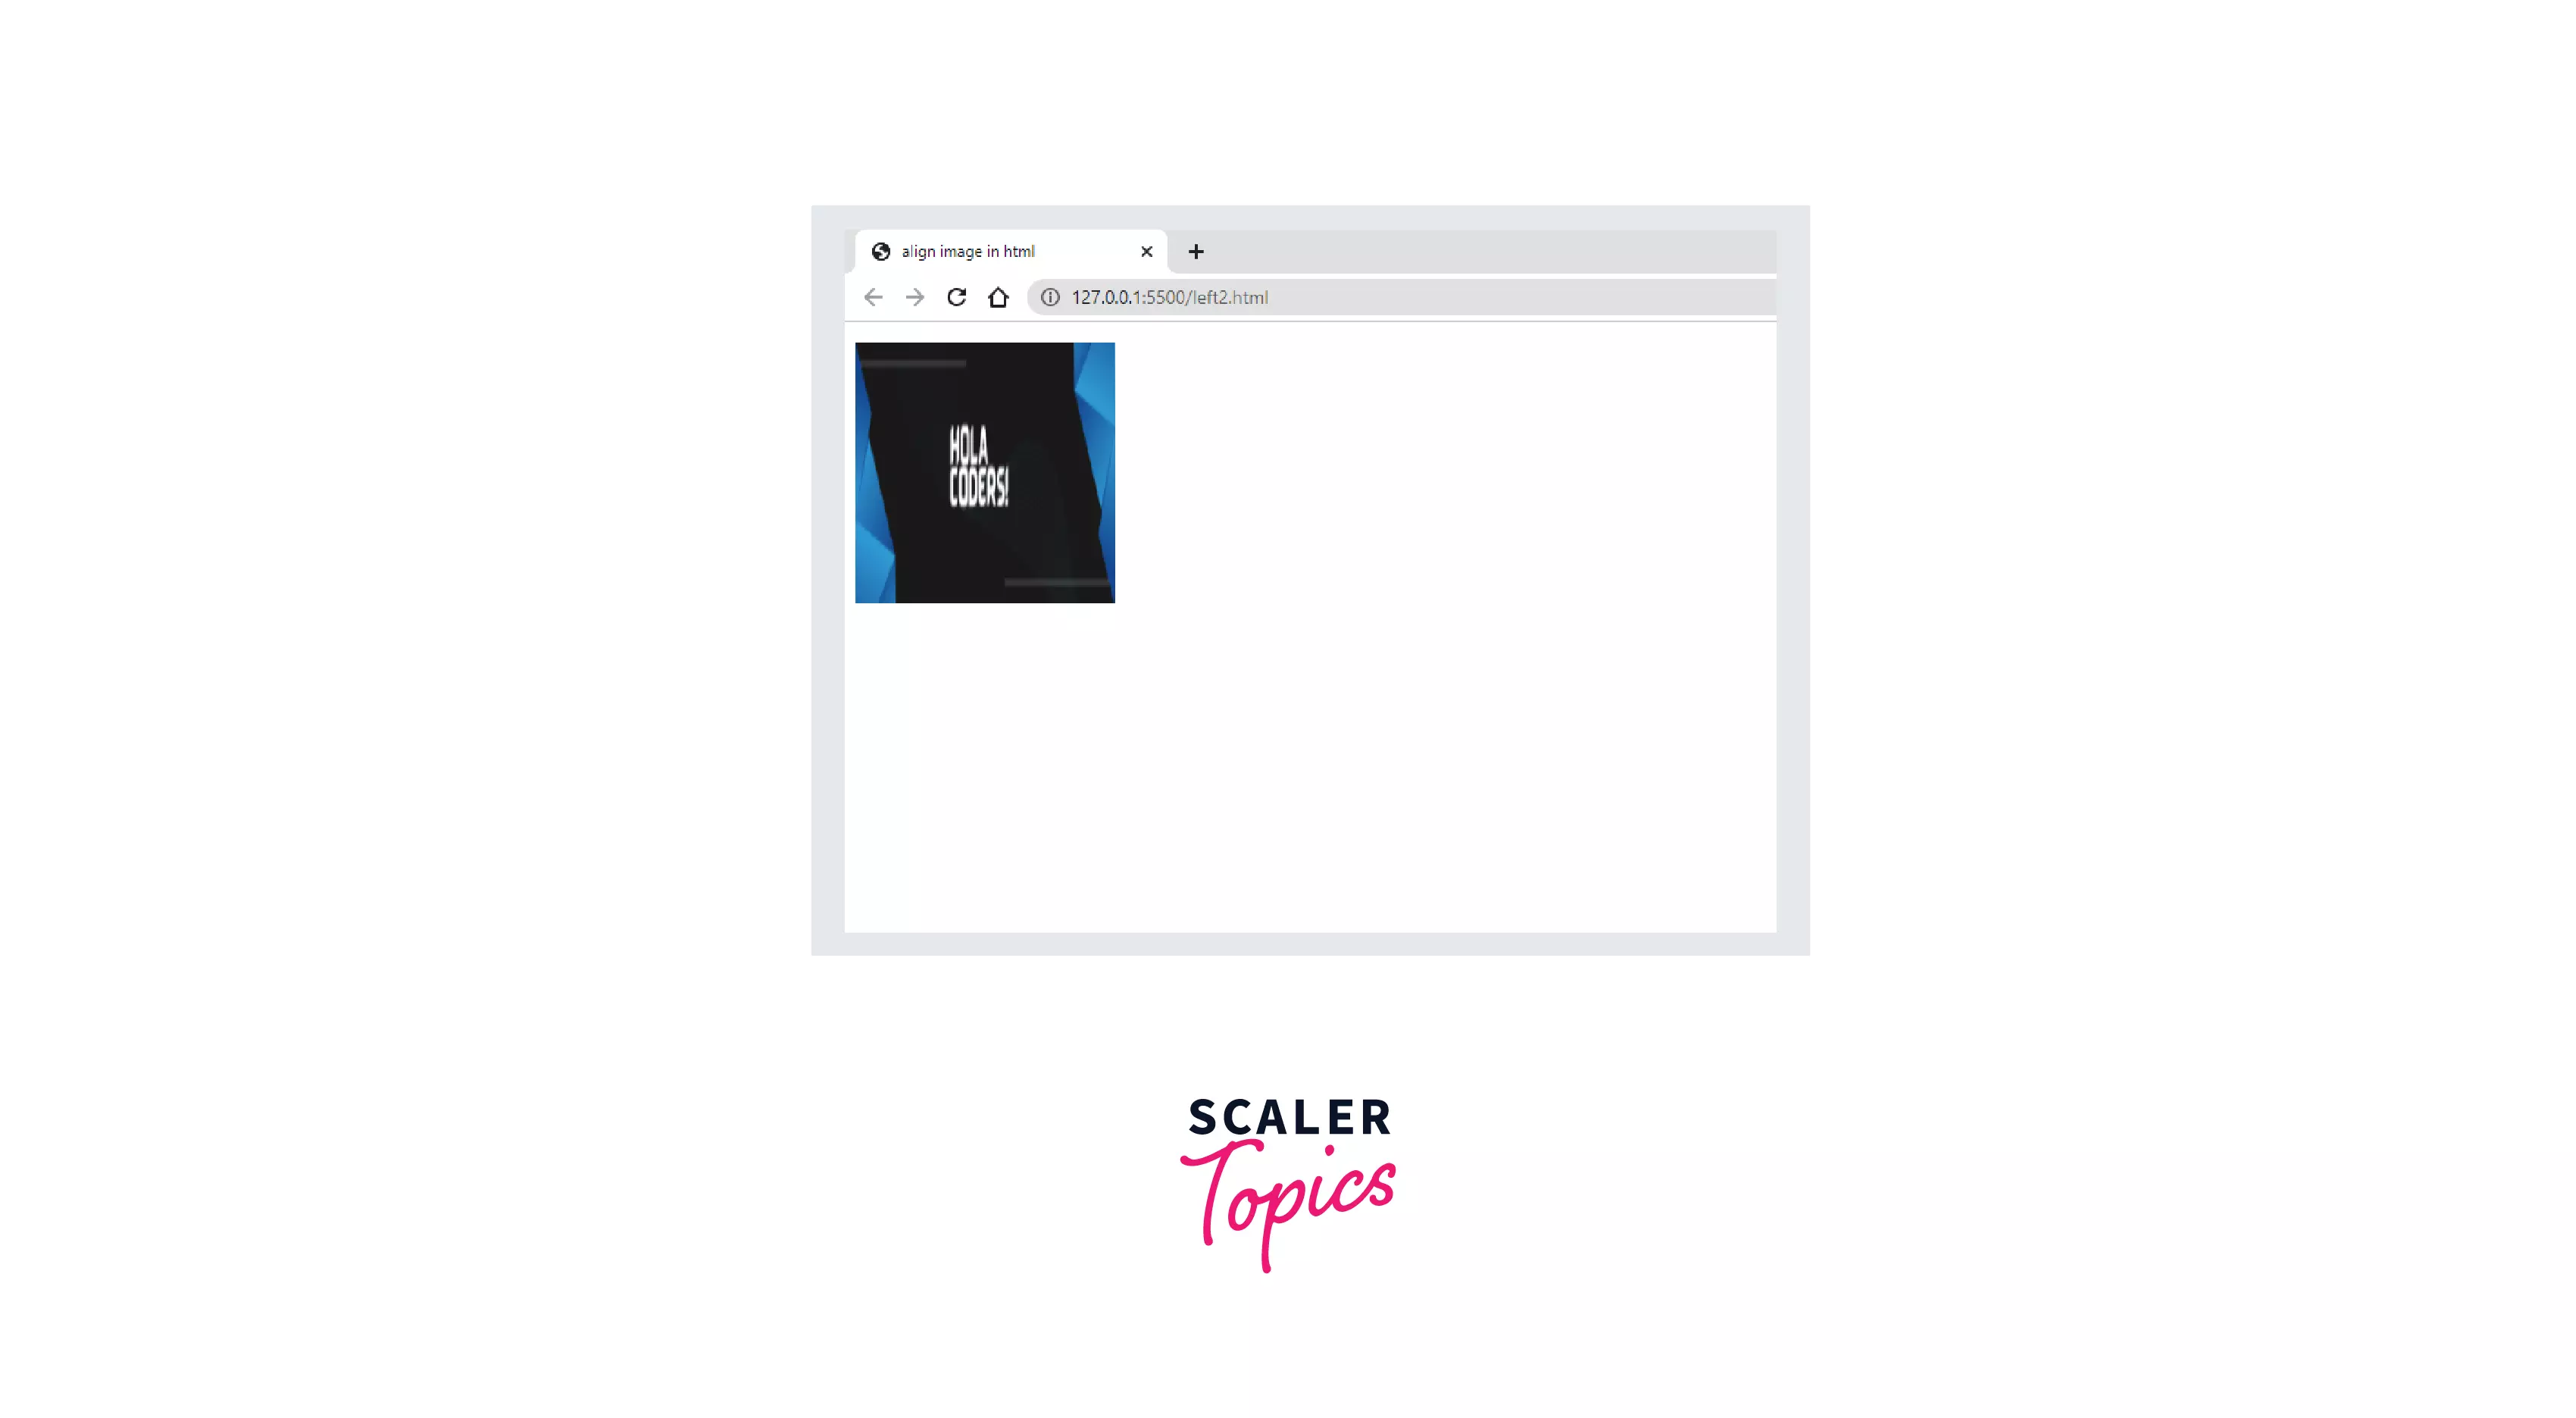
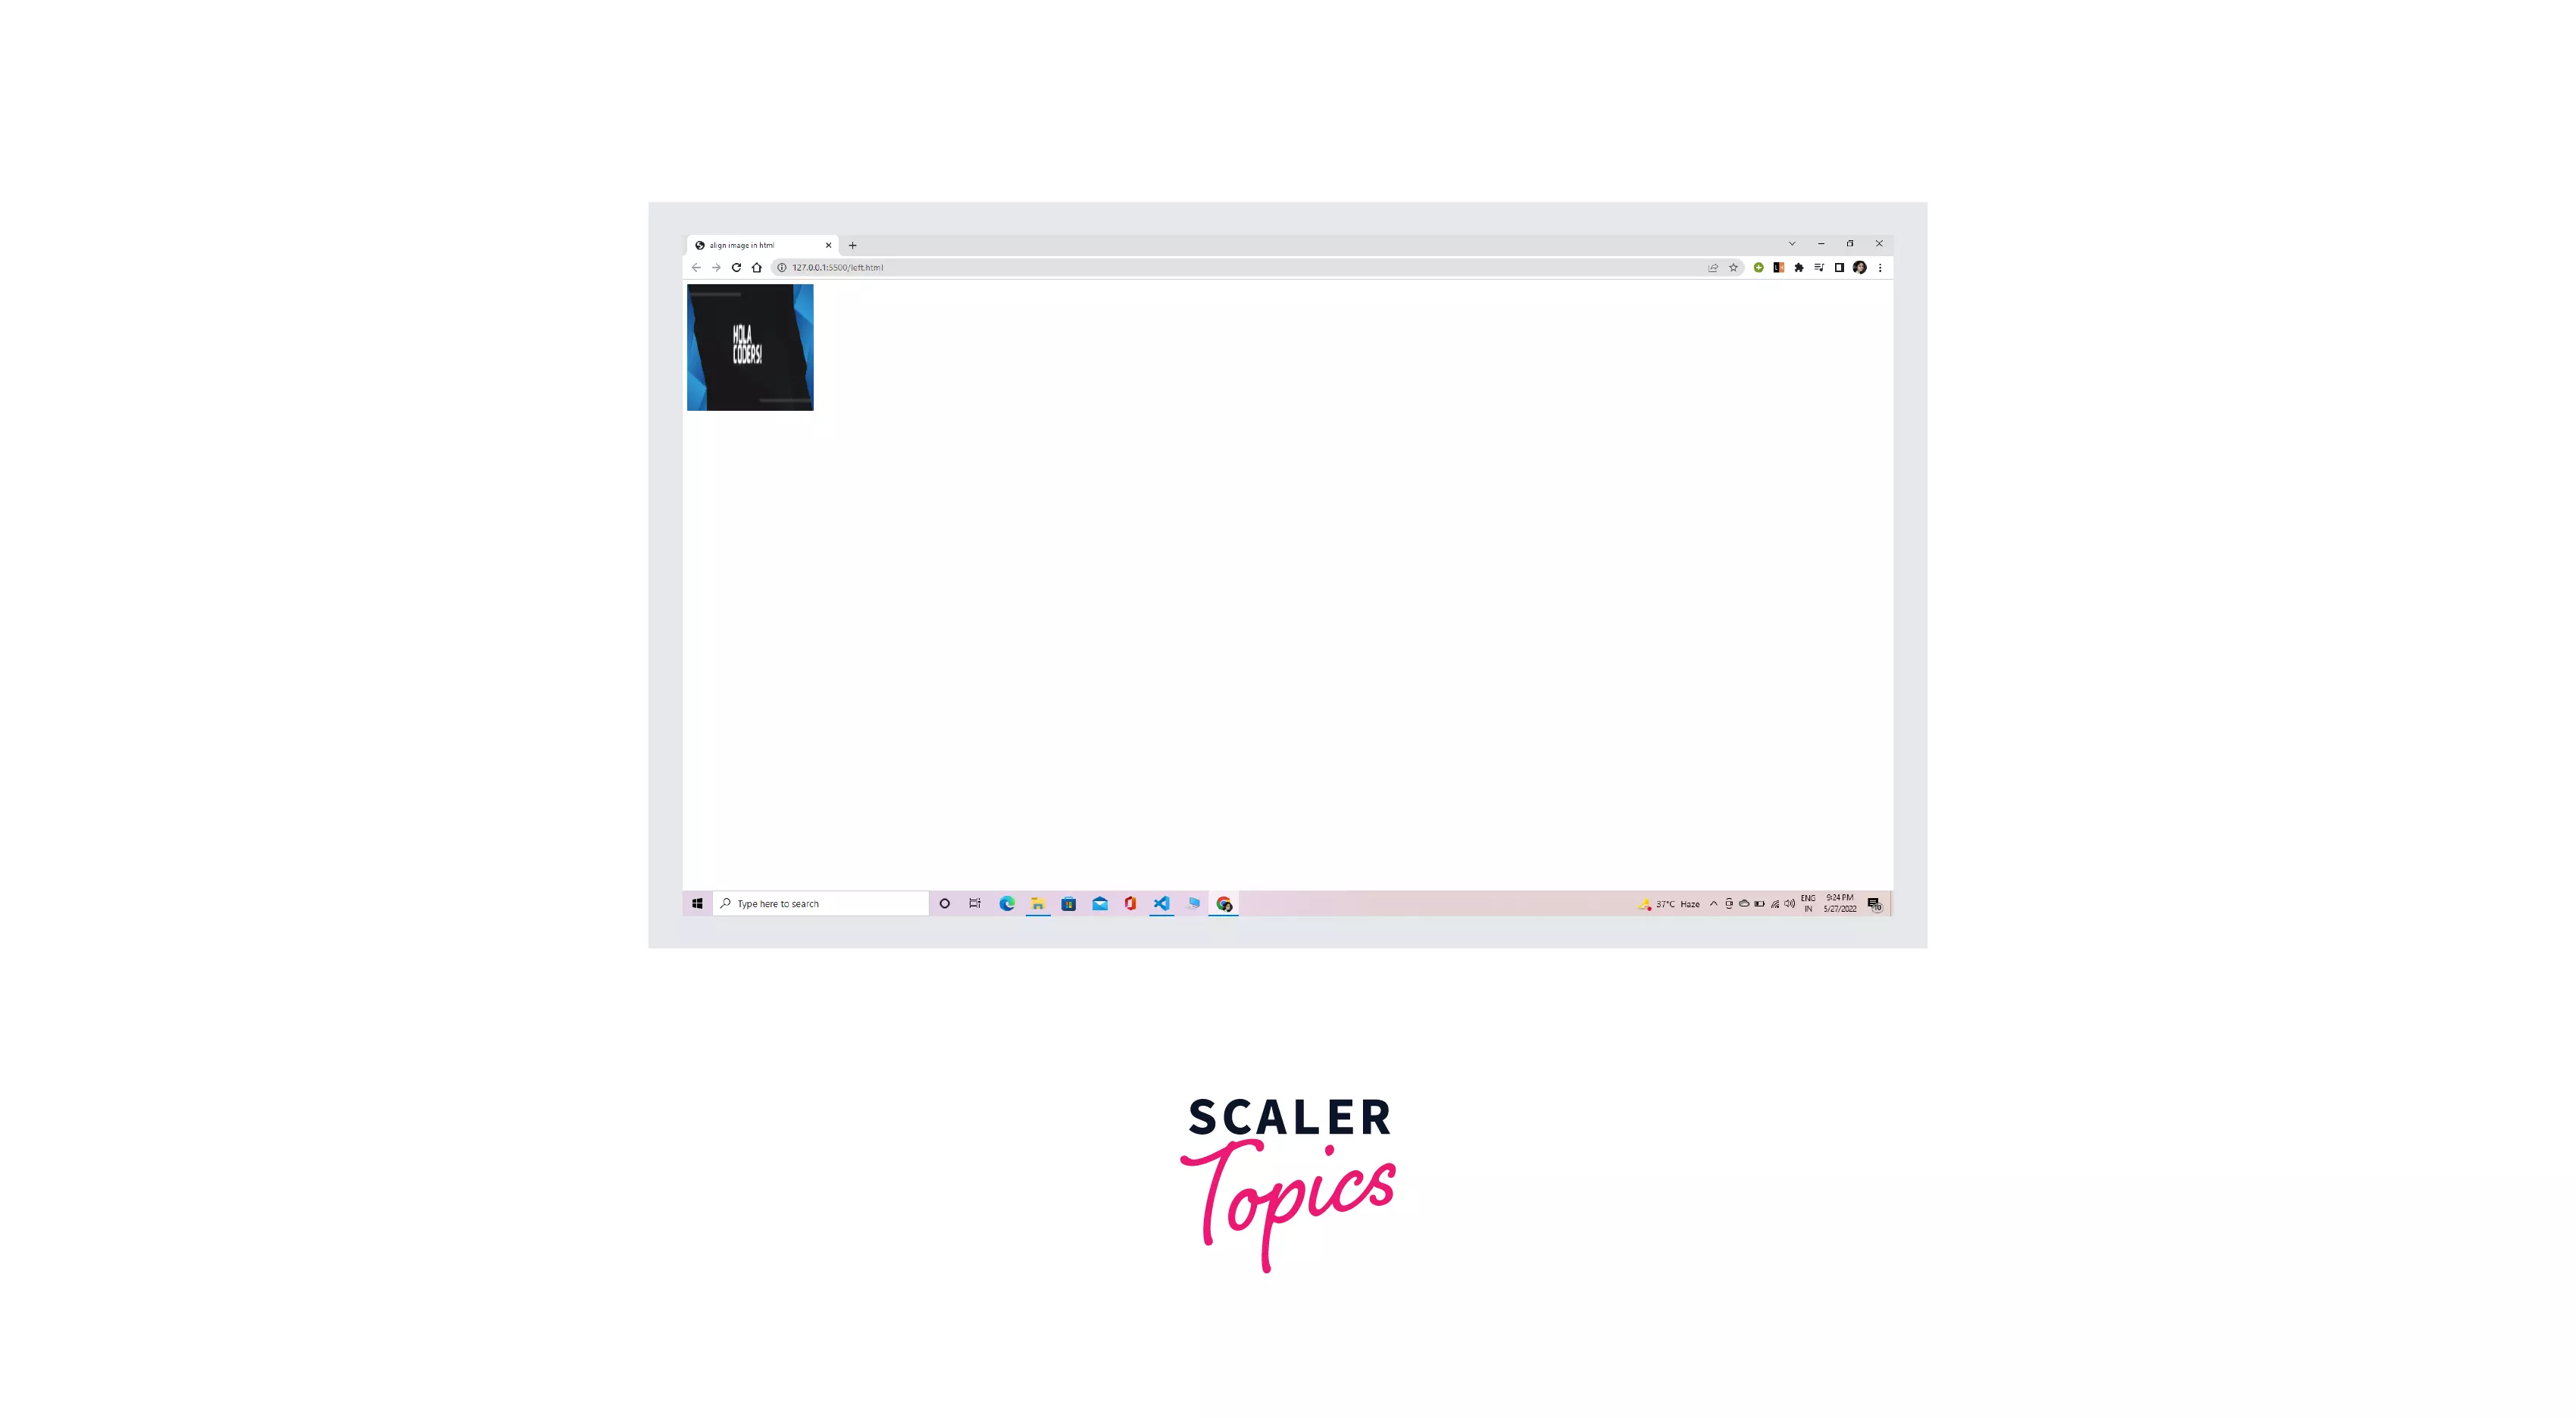
Left Alignment
Set the text-align as left.
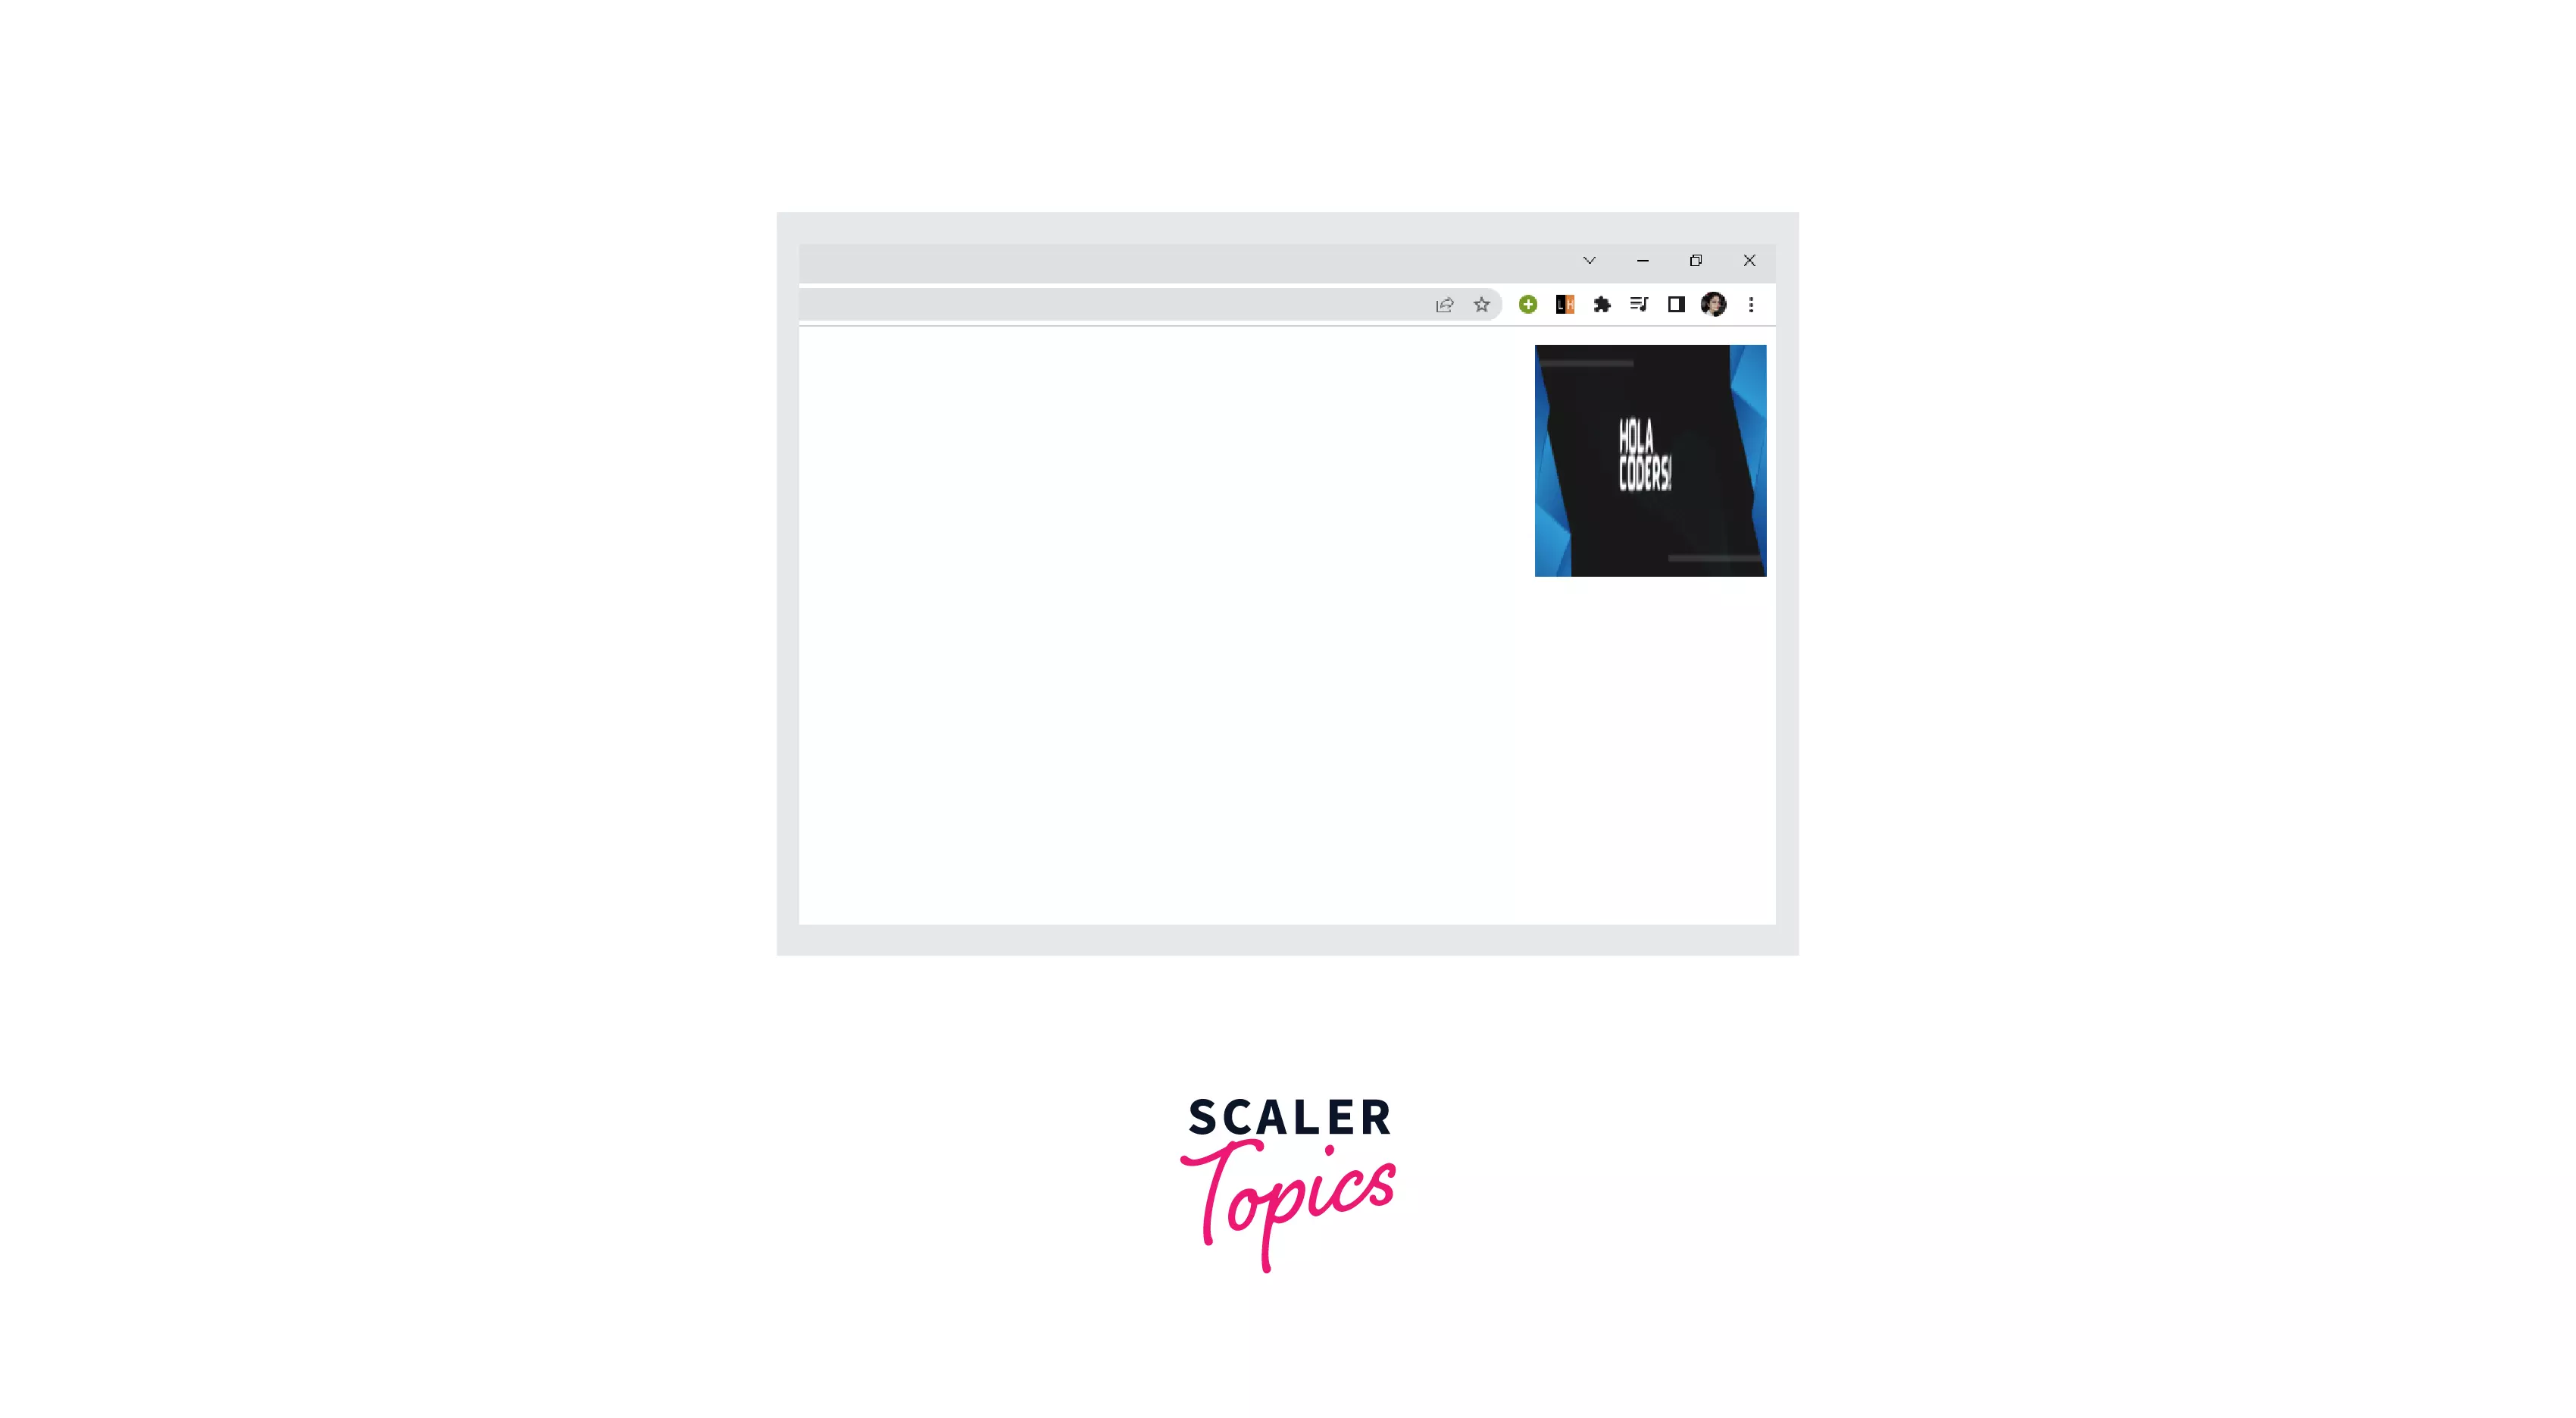
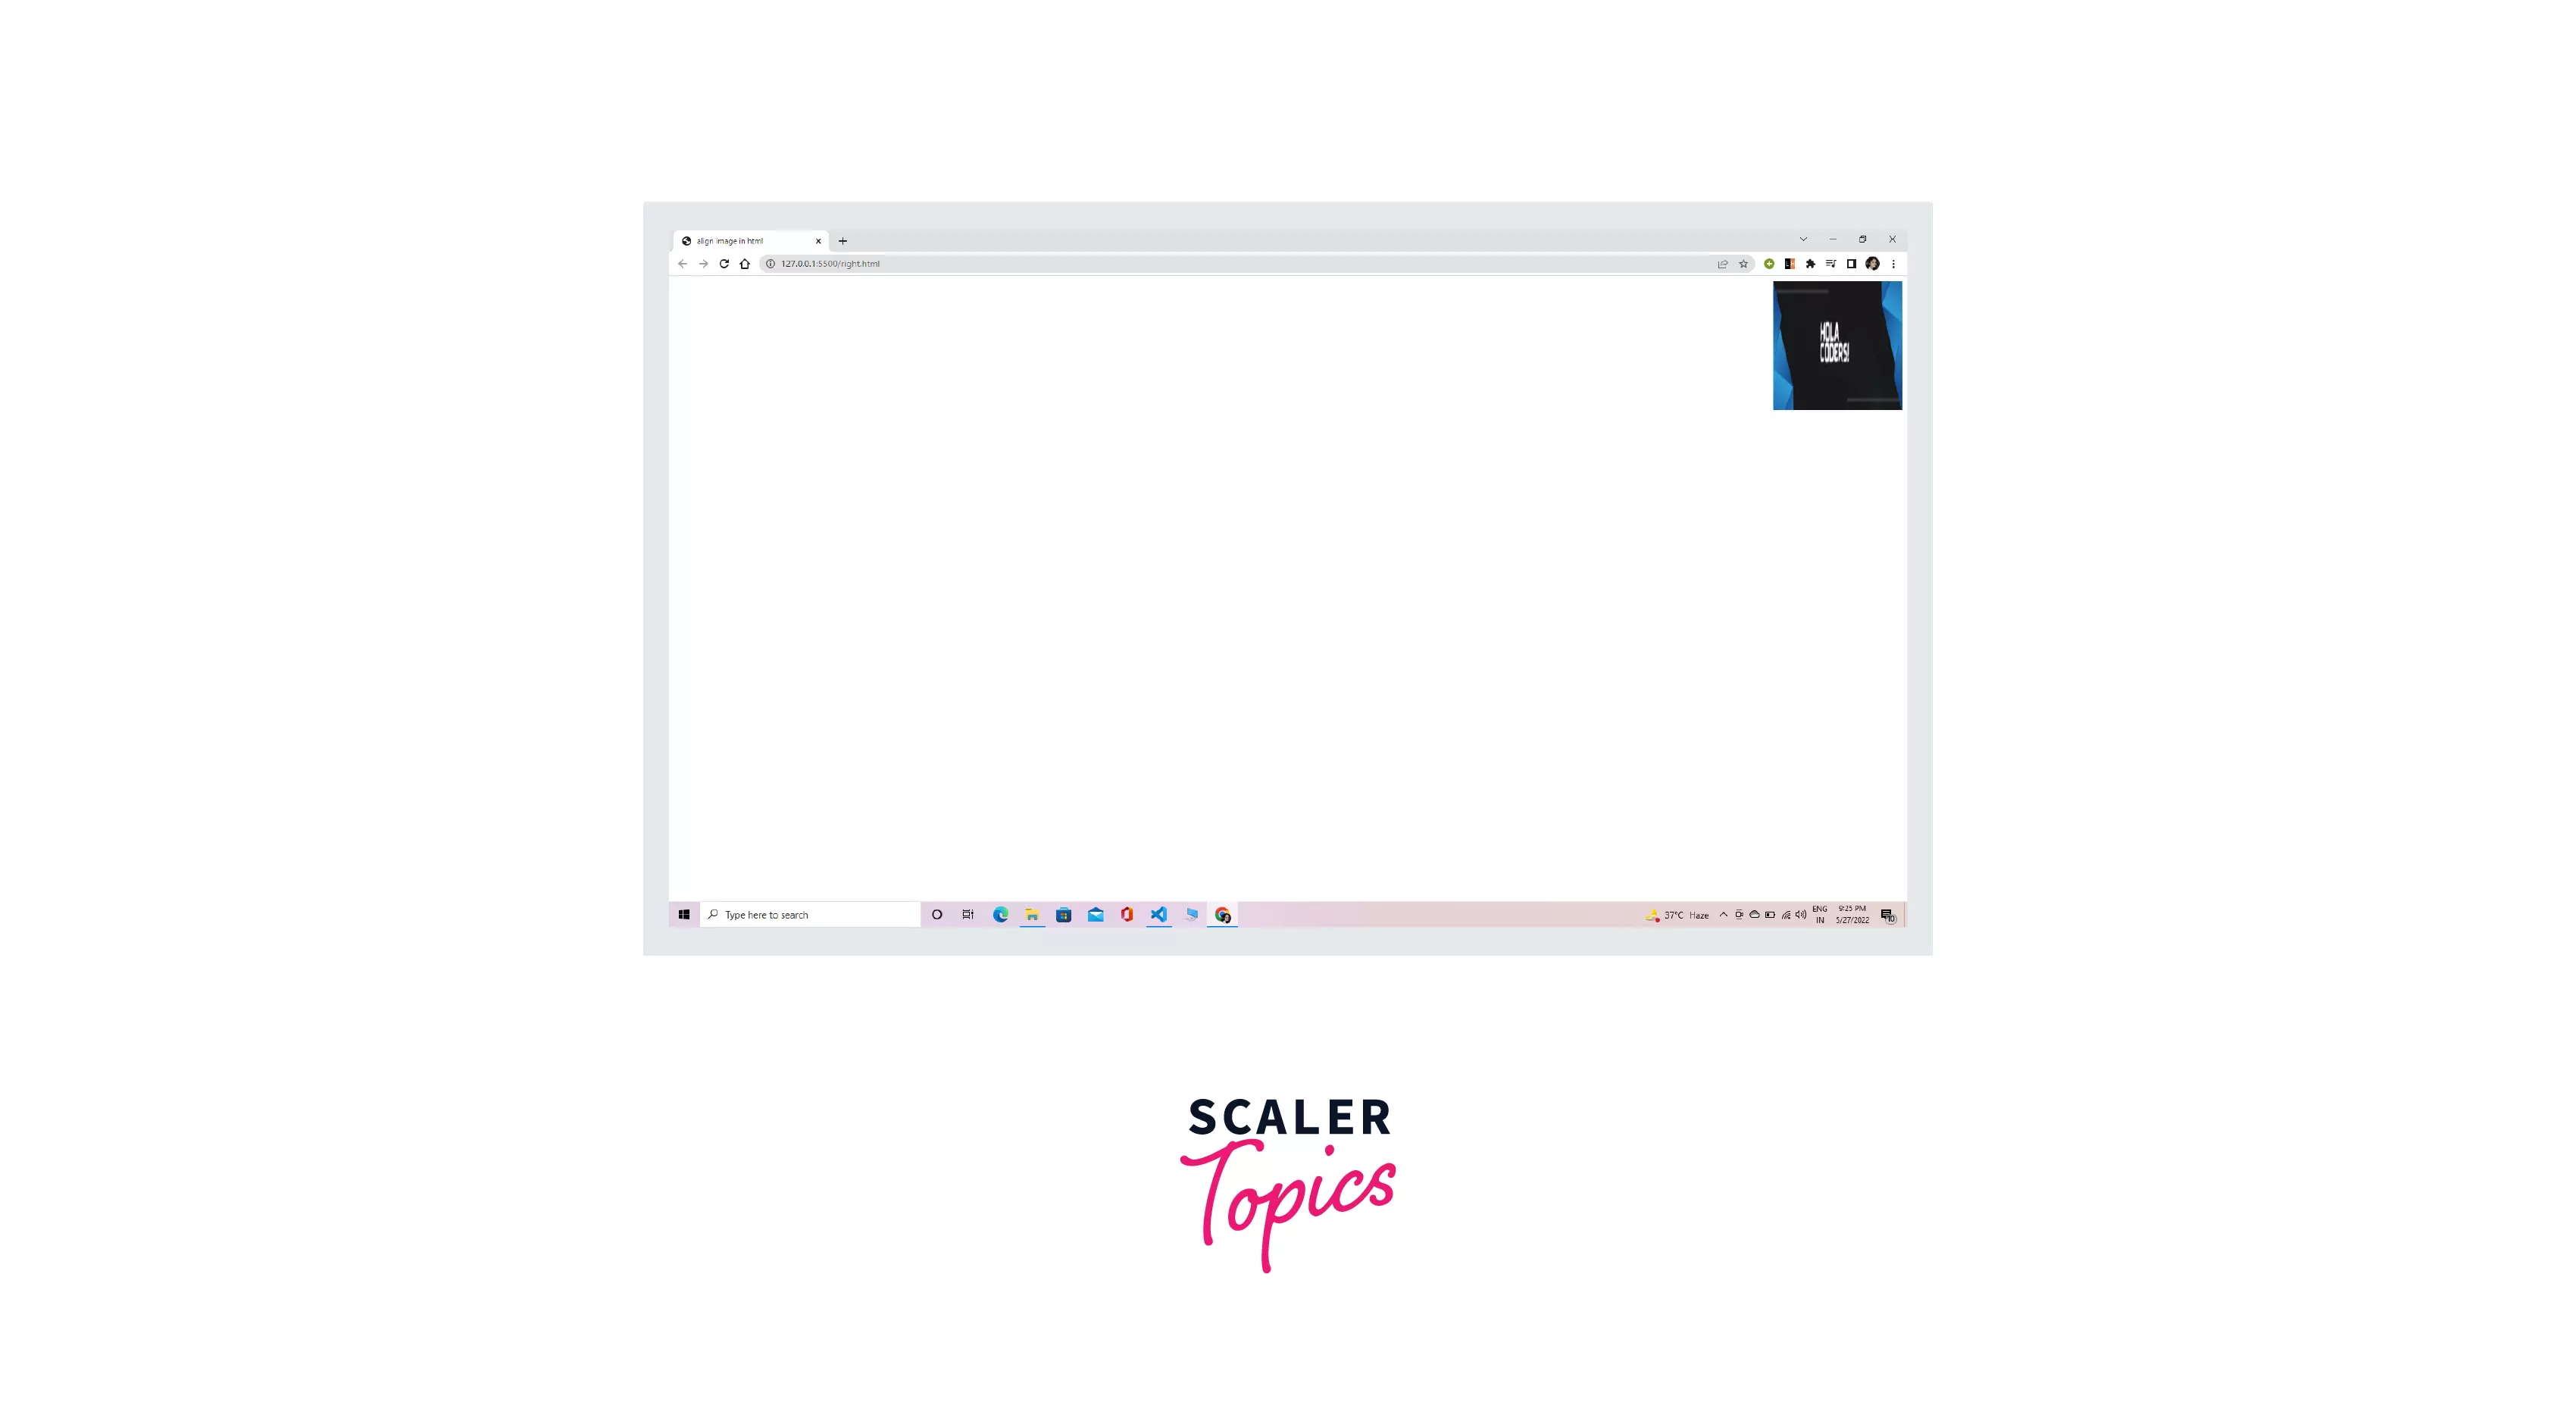
Right Alignment
Align Image in HTML Using the Align Attribute
The align attribute indicates how an image should be aligned concerning its container. To align the image, we use the align attribute. element is an inline element. However, the align attribute has been deprecated since HTML4 as HTML is not meant for formatting. So you should always use CSS for image alignment.
Syntax :
| Attribute Values | Description |
|---|---|
| left | Its purpose is to align the image to the left. |
| right | Its purpose is to align the image to the right. |
Left Alignment
We Use the attribute value left to align the image to the left.
Right Alignment
We use the attribute value right to align the image to the right.
Browser Support
| Browser | Version |
|---|---|
| Google Chrome | 38 and higher |
| Firefox | 38 and higher |
| Safari | 9.1 and higher |
| Microsoft Edge | 13 and higher |
| Internet Explorer | 10 |
Conclusion
- We have looked at many examples of image alignment using CSS and the align attribute.
- align attribute is not supported since HTML4 , so we should always use CSS for image alignment.
HTML ![]() Tag
Tag

The tag is used to embed an image in an HTML page.
Images are not technically inserted into a web page; images are linked to web pages. The tag creates a holding space for the referenced image.
The tag has two required attributes:
- src — Specifies the path to the image
- alt — Specifies an alternate text for the image, if the image for some reason cannot be displayed
Note: Also, always specify the width and height of an image. If width and height are not specified, the page might flicker while the image loads.
Tip: To link an image to another document, simply nest the tag inside an tag (see example below).
Browser Support
Attributes
| Attribute | Value | Description |
|---|---|---|
| alt | text | Specifies an alternate text for an image |
| crossorigin | anonymous use-credentials | Allow images from third-party sites that allow cross-origin access to be used with canvas |
| height | pixels | Specifies the height of an image |
| ismap | ismap | Specifies an image as a server-side image map |
| loading | eager lazy | Specifies whether a browser should load an image immediately or to defer loading of images until some conditions are met |
| longdesc | URL | Specifies a URL to a detailed description of an image |
| referrerpolicy | no-referrer no-referrer-when-downgrade origin origin-when-cross-origin unsafe-url | Specifies which referrer information to use when fetching an image |
| sizes | sizes | Specifies image sizes for different page layouts |
| src | URL | Specifies the path to the image |
| srcset | URL-list | Specifies a list of image files to use in different situations |
| usemap | #mapname | Specifies an image as a client-side image map |
| width | pixels | Specifies the width of an image |
How to Center an Image Vertically and Horizontally with CSS

Cem Eygi

Many developers struggle while working with images. Handling responsiveness and alignment is particularly tough, especially centering an image in the middle of the page.
So in this post, I will be showing some of the most common ways to center an image both vertically and horizontally using different CSS properties.
Here’s an interactive scrim about how to center an image vertically and horizontally:
I’ve gone over the CSS Position and Display properties in my previous post. If you’re not familiar with those properties, I recommend checking out those posts before reading this article.
Here’s a video version if you want to check it out:
Centering an Image Horizontally
Let’s begin with centering an image horizontally by using 3 different CSS properties.
Text-Align
The first way to center an image horizontally is using the text-align property. However, this method only works if the image is inside a block-level container such as a :
Margin: Auto
Another way to center an image is by using the margin: auto property (for left-margin and right-margin).
However, using margin: auto alone will not work for images. If you need to use margin: auto , there are 2 additional properties you must use as well.
The margin-auto property does not have any effects on inline-level elements. Since the tag is an inline element, we need to convert it to a block-level element first:
Secondly, we also need to define a width. So the left and right margins can take the rest of the empty space and auto-align themselves, which does the trick (unless we give it a width of 100%):
Display: Flex
The third way to center an image horizontally is by using display: flex . Just like we used the text-align property for a container, we use display: flex for a container as well.
However, using display: flex alone will not be enough. The container must also have an additional property called justify-content :
The justify-content property works together with display: flex , which we can use to center the image horizontally.
Finally, the width of the image must be smaller than the width of the container, otherwise, it takes 100% of the space and then we can’t center it.
Important: The display: flex property is not supported in older versions of browsers. See here for more details.
Centering an Image Vertically
Display: Flex
For vertical alignment, using display: flex is again really helpful.
Consider a case where our container has a height of 800px, but the height of the image is only 500px:
Now, in this case, adding a single line of code to the container, align-items: center , does the trick:
The align-items property can position elements vertically if used together with display: flex .
Position: Absolute & Transform Properties
Another method for vertical alignment is by using the position and transform properties together. This one is a bit complicated, so let’s do it step by step.
Step 1: Define Position Absolute
Firstly, we change the positioning behavior of the image from static to absolute :
Also, it should be inside a relatively positioned container, so we add position: relative to its container div.
Step 2: Define Top & Left Properties
Secondly, we define the top and left properties for the image, and set them to 50%. This will move the starting point(top-left) of the image to the center of the container:
Step 3: Define the Transform Property
But the second step has moved the image partially outside of its container. So we need to bring it back inside.
Defining a transform property and adding -50% to its X and Y axis does the trick:
There are other ways to center things horizontally and vertically, but I’ve explained the most common ones. I hope this post helped you understand how to align your images in the center of the page.
If you want to learn more about Web Development, feel free to visit my Youtube Channel for more.
HTML ![]() Tag
Tag
The tag is used to embed an image in an HTML page.
Images are not technically inserted into a web page; images are linked to web pages. The tag creates a holding space for the referenced image.
The tag has two required attributes:
- src — Specifies the path to the image
- alt — Specifies an alternate text for the image, if the image for some reason cannot be displayed
Note: Also, always specify the width and height of an image. If width and height are not specified, the page might flicker while the image loads.
Tip: To link an image to another document, simply nest the tag inside an tag (see example below).
Browser Support
Attributes
| Attribute | Value | Description |
|---|---|---|
| alt | text | Specifies an alternate text for an image |
| crossorigin | anonymous use-credentials | Allow images from third-party sites that allow cross-origin access to be used with canvas |
| height | pixels | Specifies the height of an image |
| ismap | ismap | Specifies an image as a server-side image map |
| loading | eager lazy | Specifies whether a browser should load an image immediately or to defer loading of images until some conditions are met |
| longdesc | URL | Specifies a URL to a detailed description of an image |
| referrerpolicy | no-referrer no-referrer-when-downgrade origin origin-when-cross-origin unsafe-url | Specifies which referrer information to use when fetching an image |
| sizes | sizes | Specifies image sizes for different page layouts |
| src | URL | Specifies the path to the image |
| srcset | URL-list | Specifies a list of image files to use in different situations |
| usemap | #mapname | Specifies an image as a client-side image map |
| width | pixels | Specifies the width of an image |