- Adding Google Docs to website
- Google Slides to Markdown?
- Embedding Google Slides in Hugo
- Hugo shortcodes
- The gdocs shortcode
- HTML code
- Moral of the story
- Adding Google Docs to website
- Google Slides to Markdown?
- Embedding Google Slides in Hugo
- Hugo shortcodes
- The gdocs shortcode
- HTML code
- Moral of the story
- Related
- Данные из Google Таблиц на вашем сайте
- 1. Открываем Таблицу Google
- 2. Открываем меню Tools — Script Editor…
- 3. Добавляем скрипт
- 4. Публикация как Web Application
- Пример работы на фронтенде
- Бонусы для читателей
- Вставить google docs в html
Adding Google Docs to website
Given that the Academic website theme comes with a place to upload talks, I thought I might as well upload the slides for my Senior Honors presentation. Unfortunately, this was a slightly more difficult task than I anticipated. The default format for slides in Hugo appears to be Markdown slides, which is fine, except when your talk was made in Google Slides.
Google Slides to Markdown?
My first thought was that there must be some tool to convert a Google slides talk into a Markdown document. For whatever reason, there are several tools (like this GitHub repo) to go the other direction, from Markdown to Google slides. I found a GitHub repo gdocs2md that claimed to go in the other direction, but the script provided doesn’t currently run (if anyone is a whiz at Google Apps and wants to take a stab at fixing up this code, it would be a great tool!). There is a Google Drive add-on called GD2md-html that converts Google Docs to Markdown or HTML, which should be useful for the future, but it doesn’t help with Google Slides.
Embedding Google Slides in Hugo
Having abandoned the idea of just converting my current slides into Markdown and going on my merry way, I started looking for a way to embed the Google Slides themselves into my website.
Hugo shortcodes
Hugo has certain snippets called shortcodes that are designed to address the problem of having to add raw HTML into Markdown. These shortcodes help render a content file according to a template created by Hugo. For example, the shortcode figure adds HTML functionality to the Markdown image syntax. There are shortcodes for Instagram ( instagram ), Vimeo ( vimeo ) and Twitter ( tweet ).
The gdocs shortcode
One of these shortcodes, gdocs , allows you to embed all Google doc types (Slides, Docs, Sheets, etc.) into your website. The HTML code for the shortcode can be found in the hugo-academic GitHub repo: https://github.com/gcushen/hugo-academic/blob/master/layouts/shortcodes/gdocs.html.
I tried inserting the following into the index.md file for my talk below the line with three + signs:
I got the URL by going to my Google Slides, and clicking File > Publish to the web. I selected Embed and copied the link following src= .
Unfortunately, this didn’t result in anything showing up on my page besides a large blank space where I assume Hugo was trying to put my presentation. I tried some variations on the above code, including adding src= before the URL (no change), and moving the entire code snippet above the +++ line in index.md (results in the error » unmarshal failed: Near line 65 (last key parsed ‘image’): bare keys cannot contain ‘
HTML code
At this point, I was feeling pretty discouraged, when I happened upon a Hugo forum post with the HTML code someone used to embed a Google Slides presentation. I have hardly any familiarity with HTML, but clearly shortcodes and I weren’t getting along very well, so I decided to give it a shot. I copied and pasted the code from the forum, replacing the URL following src= with my link from above, and voila! My slides appeared on the post.
Here is the code for reference:
Moral of the story
It seems like shortcodes can be a really valuable feature of Hugo, especially should I ever need to include a video of some kind (or if I actually start using Twitter again and tweet something worth sharing, two improbable events). In the case of Google Docs/Sheets/etc., however, just using the HTML code snippet seems like the easiest option (and is a good motivation to learn HTML at a later date).
Adding Google Docs to website
Given that the Academic website theme comes with a place to upload talks, I thought I might as well upload the slides for my Senior Honors presentation. Unfortunately, this was a slightly more difficult task than I anticipated. The default format for slides in Hugo appears to be Markdown slides, which is fine, except when your talk was made in Google Slides.
Google Slides to Markdown?
My first thought was that there must be some tool to convert a Google slides talk into a Markdown document. For whatever reason, there are several tools (like this GitHub repo) to go the other direction, from Markdown to Google slides. I found a GitHub repo gdocs2md that claimed to go in the other direction, but the script provided doesn’t currently run (if anyone is a whiz at Google Apps and wants to take a stab at fixing up this code, it would be a great tool!). There is a Google Drive add-on called GD2md-html that converts Google Docs to Markdown or HTML, which should be useful for the future, but it doesn’t help with Google Slides.
Embedding Google Slides in Hugo
Having abandoned the idea of just converting my current slides into Markdown and going on my merry way, I started looking for a way to embed the Google Slides themselves into my website.
Hugo shortcodes
Hugo has certain snippets called shortcodes that are designed to address the problem of having to add raw HTML into Markdown. These shortcodes help render a content file according to a template created by Hugo. For example, the shortcode figure adds HTML functionality to the Markdown image syntax. There are shortcodes for Instagram ( instagram ), Vimeo ( vimeo ) and Twitter ( tweet ).
The gdocs shortcode
One of these shortcodes, gdocs , allows you to embed all Google doc types (Slides, Docs, Sheets, etc.) into your website. The HTML code for the shortcode can be found in the hugo-academic GitHub repo: https://github.com/gcushen/hugo-academic/blob/master/layouts/shortcodes/gdocs.html.
I tried inserting the following into the index.md file for my talk below the line with three + signs:
I got the URL by going to my Google Slides, and clicking File > Publish to the web. I selected Embed and copied the link following src= .
Unfortunately, this didn’t result in anything showing up on my page besides a large blank space where I assume Hugo was trying to put my presentation. I tried some variations on the above code, including adding src= before the URL (no change), and moving the entire code snippet above the +++ line in index.md (results in the error ” unmarshal failed: Near line 65 (last key parsed ‘image’): bare keys cannot contain ‘
HTML code
At this point, I was feeling pretty discouraged, when I happened upon a Hugo forum post with the HTML code someone used to embed a Google Slides presentation. I have hardly any familiarity with HTML, but clearly shortcodes and I weren’t getting along very well, so I decided to give it a shot. I copied and pasted the code from the forum, replacing the URL following src= with my link from above, and voila! My slides appeared on the post.
Here is the code for reference:
Moral of the story
It seems like shortcodes can be a really valuable feature of Hugo, especially should I ever need to include a video of some kind (or if I actually start using Twitter again and tweet something worth sharing, two improbable events). In the case of Google Docs/Sheets/etc., however, just using the HTML code snippet seems like the easiest option (and is a good motivation to learn HTML at a later date).
Cecina Babich Morrow
Data Scientist
My research interests range from harnessing data to improve mental healthcare to understanding global patterns of macroecology.
Related
Данные из Google Таблиц на вашем сайте
Для тех, кто пользуется Google Таблицами, есть хорошая новость — ниже описано решение, которое позволит импортировать данные из таблицы на ваш сайт.
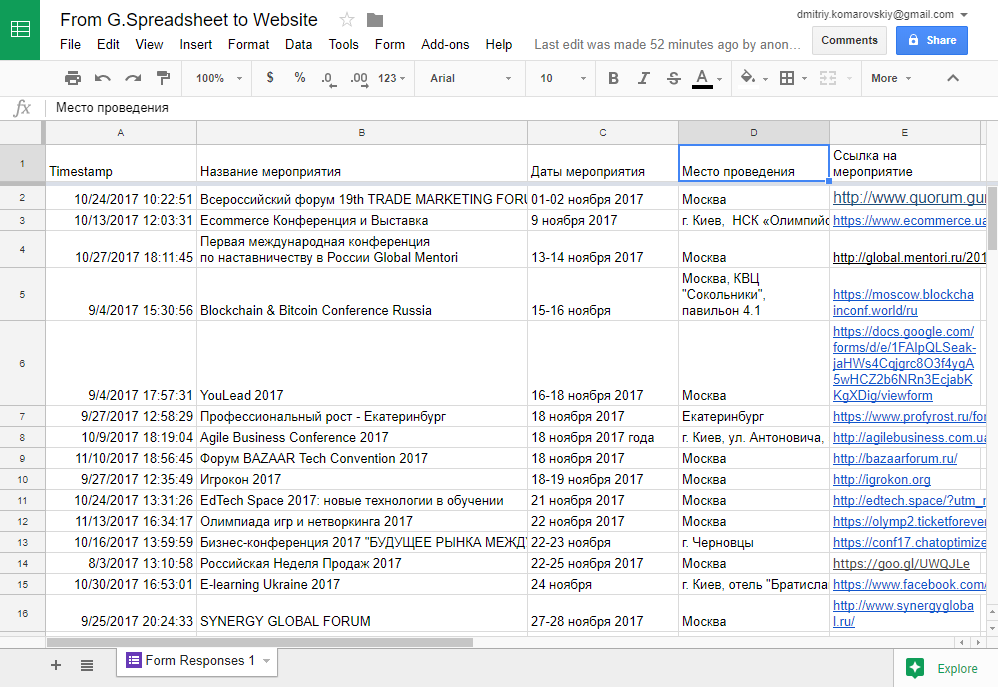
1. Открываем Таблицу Google
Для примера, я возьму таблицу, в которую падают результаты из Google Формы.
2. Открываем меню Tools — Script Editor…
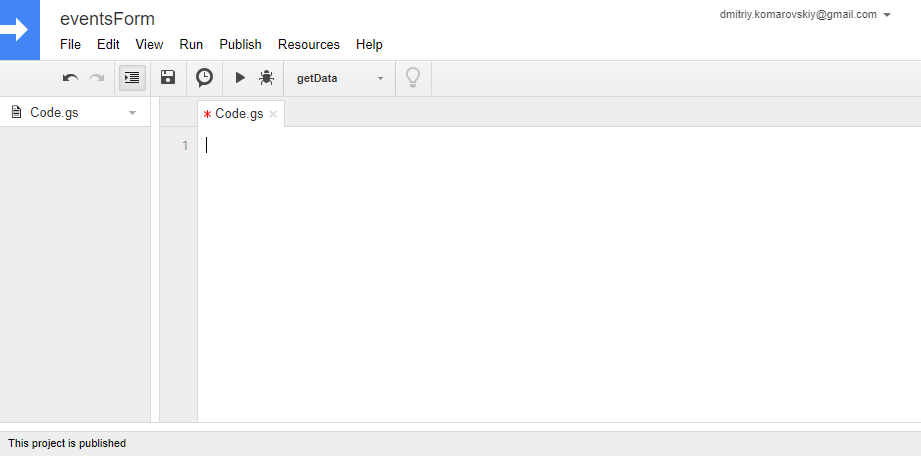
3. Добавляем скрипт
var ss = SpreadsheetApp.getActiveSpreadsheet(), // spreadsheet s = ss.getActiveSheet(); // sheet function getData() < var result = [], range = 'A:E', // диапазон ячеек, который хотим выгружать values = s.getRange(range).getValues(), last_row = parseInt(s.getLastRow()); for (var i = 1; i < last_row; i++) < result.push(values[i]); >return result; > function doGet() < var data = getData(); if(!data) < data = ''; >return ContentService.createTextOutput( JSON.stringify()).setMimeType(ContentService.MimeType.JSON); > При необходимости переопределите переменную “range”.
Если вы захотите доработать скрипт, ссылки на документацию:
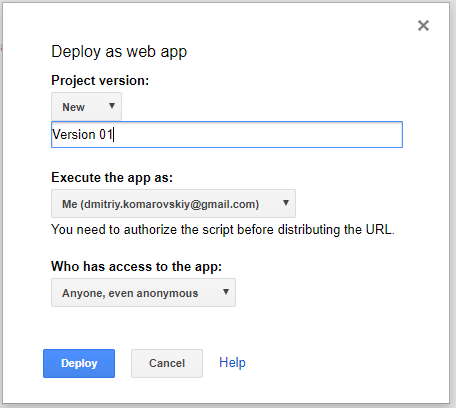
4. Публикация как Web Application
Открываем меню Publish — Deploy as web app…
Вводим название новой версии проекта (например 1).
Меняем значение для “Who has access to the app” на “Anyone, even anonymous”
Нажимаем “Deploy”.
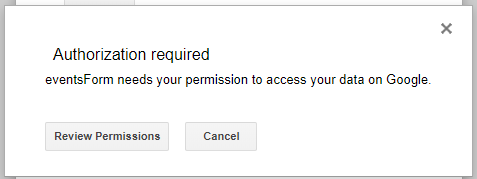
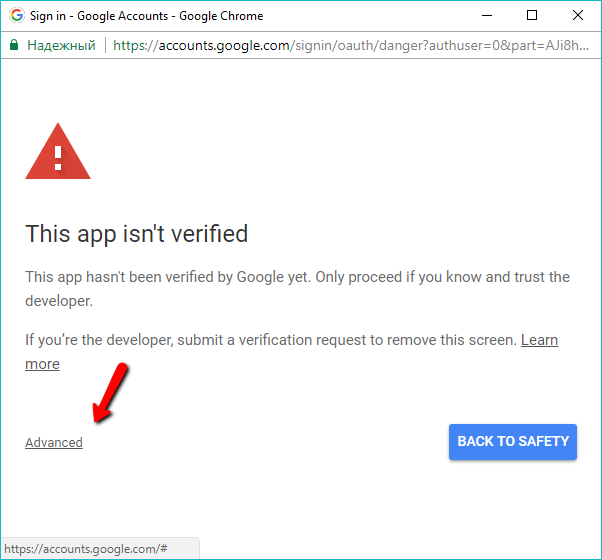
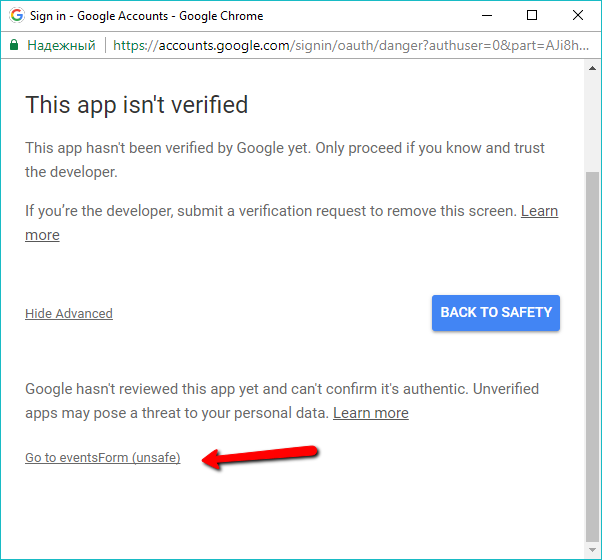
При первом деплое, нужно пройти процесс авторизации. Описывать не буду, покажу скриншотами.
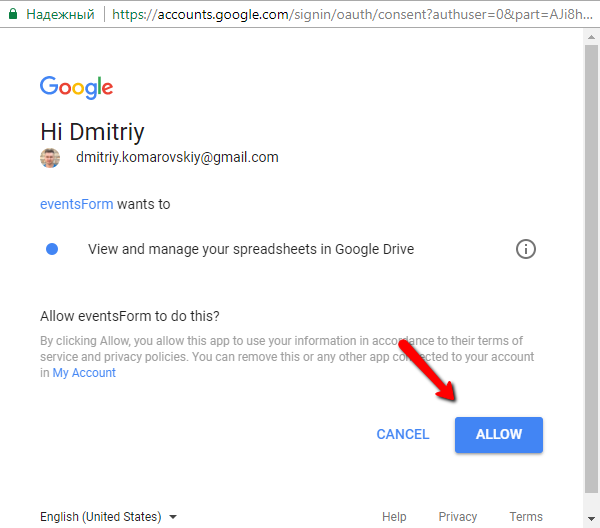
Далее вам будет показан попап с ссылкой на ваш web app:
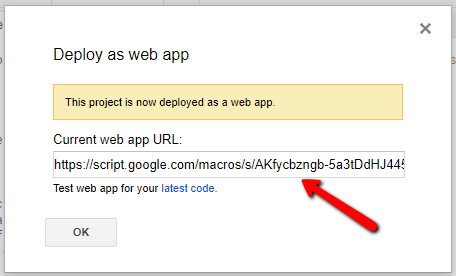
Вам нужно скопировать эту ссылку.
Можете сразу открыть её в браузере. Приложение должно вернуть содержание выбранного диапазона таблицы в формате JSON:
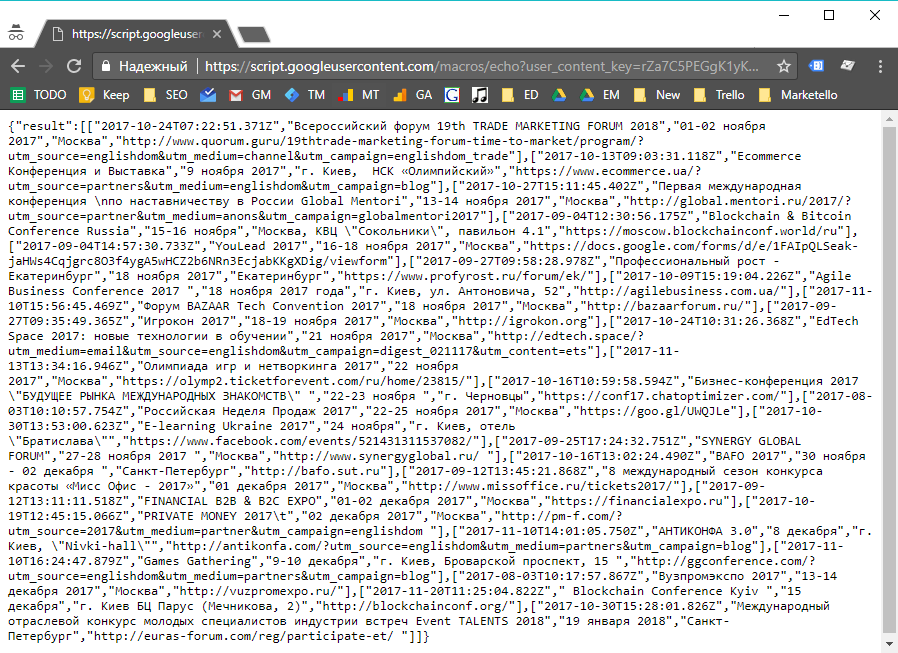
То есть любым GET-запросом к этому веб-приложению вы можете получить данные Таблицы. Можно с бекенда или фронтенда, в зависимости от потребностей бизнеса.
Пример работы на фронтенде
Ссылка на l.englishdom.com/google-s.html
Для простоты восприятия скрипта, я не стал делать дополнительное оформление выводимой информации.
На странице используются:
(function () < var app = "https://script.google.com/macros/s/AKfycbzngb-5a3tDdHJ445o5LxqeN63V_ihhF_Nxlkz3gxLyMeG3MA/exec", output = '', xhr = new XMLHttpRequest(); xhr.open('GET', app); xhr.onreadystatechange = function() < if (xhr.readyState !== 4) return; if (xhr.status == 200) < try < var r = JSON.parse(xhr.responseText), result = r["result"]; for (var i = 0; i < result.length; i++)< var obj = r["result"][i]; output += obj.join("
") + "
"; > > catch(e) <> > document.getElementById('info').innerHTML = output; > xhr.send() >)()
Бонусы для читателей

Мы дарим бесплатный доступ на три месяца изучения английского с помощью наших онлайн-курсов. Для этого просто перейдите по ссылке до 31 декабря 2017 года.

Будем рады видеть вас на индивидуальных занятиях курса «Английский для IT-специалистов».
Пройдите бесплатный вводный урок и получите комплексную обратную связь по своему уровню знаний, затем выбирайте преподавателя и программу обучения себе по душе!
Вставить google docs в html
 Наталья Пирязева
  09.12.2015
  7722
7722  2
2
Пирязева Наталья Владимировна,
преподаватель спецдисциплин
первой квалификационной категории
ТОГАПОУ «Промышленно-технологический колледж»
г.Мичуринск, Тамбовской области
Многостраничные документы смотрятся на странице сайта громоздко. Чтобы избавиться от утомительного прокручивания предлагаю воспользоваться инструментом «Источник» инфоблока «Текстовый блок».
Итак! начнем.
Шаг 1.
Создаем документ Word или можно воспользоваться любым, ранее созданным и сохраненным на локальном диске или внешнем носителе, документом, содержащим информацию, которую Вам нужно разместить на странице сайта.

Шаг 2.
Теперь загружаем гугл-диск.
Для этого вы должны быть зарегистрированы на сервисе гугл.
Процедура регистрации очень простая, как и на любом другом сервисе, которым Вы пользуетесь.
И так! регистрируемся.
Открываем страницу регистрации гугл-аккаунта и последовательно заполняем все обязательные поля.
Не забудьте поставить флажок в поле согласия с условиями пользования ресурсом.
Убедившись, что все данные внесены корректно и соответствуют всем необходимым параметрам, жмем (смело) кнопку «Далее».


Вот и все мы успешно прошли процедуру регистрации.
Шаг 4.
Заходим в аккаунт


Шаг 5.
Теперь используя значок приложений в верхнем правом углу переходим на гугл-диск.

Шаг 6.
Перейдя на страницу гугл-диска воспользуемся кнопкой «Создать» и активируем инструмент «Загрузить файл». откроется окно в котором переходя по структуре дерева папок находим нужный документ.

Вот и все. Мы благополучно завершили загрузку нашего документа на гугл-диск.
Еще одно преимущество хранения документов на гугл-диске состоит в том, что вы будете иметь возможность воспользоваться им с любого компьютера подключенного к Internet.

Теперь нам необходимо открыть и опубликовать наш документ для того чтобы он стал видимым для других пользователей сети.
Шаг 7.
Кликаем в области загрузки документа (нижний правый угол окна) по ссылке на ваш документ.


Шаг 12.
Выделяем (просто кликаем в поле с кодом) и копируем (используя комбинацию клавиш Ctrl+C(англ)) код из диалогового окна.
Теперь мы готовы к встраиванию кода на страницу УчПортфолио.
Переходим на страницу и открываем текстовый блок.
Жмем на кнопку «Источник» и извлекаем из буфера обмена скопированный html-код.
На выходе получаем документ заключенный в рамочку с элементом прокрутки для просмотра всего содержимого.
Шаг 13.
В итоге получается вот так…
