- Saved searches
- Use saved searches to filter your results more quickly
- License
- microsoft/vscode-jupyter
- Name already in use
- Sign In Required
- Launching GitHub Desktop
- Launching GitHub Desktop
- Launching Xcode
- Launching Visual Studio Code
- Latest commit
- Git stats
- Files
- README.md
- About
- Нативное редактирование Jupyter Notebooks в VS Code
- Начало работы
- Автозаполнение на базе AI
- Обозреватель переменных
- Подключение к удаленным серверам Jupyter
- Экспорт в виде кода Python
- Отладка
Saved searches
Use saved searches to filter your results more quickly
You signed in with another tab or window. Reload to refresh your session. You signed out in another tab or window. Reload to refresh your session. You switched accounts on another tab or window. Reload to refresh your session.
VS Code Jupyter extension
License
microsoft/vscode-jupyter
This commit does not belong to any branch on this repository, and may belong to a fork outside of the repository.
Name already in use
A tag already exists with the provided branch name. Many Git commands accept both tag and branch names, so creating this branch may cause unexpected behavior. Are you sure you want to create this branch?
Sign In Required
Please sign in to use Codespaces.
Launching GitHub Desktop
If nothing happens, download GitHub Desktop and try again.
Launching GitHub Desktop
If nothing happens, download GitHub Desktop and try again.
Launching Xcode
If nothing happens, download Xcode and try again.
Launching Visual Studio Code
Your codespace will open once ready.
There was a problem preparing your codespace, please try again.
Latest commit
Git stats
Files
Failed to load latest commit information.
README.md
Jupyter Extension for Visual Studio Code
A Visual Studio Code extension that provides basic notebook support for language kernels that are supported in Jupyter Notebooks today, and allows any Python environment to be used as a Jupyter kernel. This is NOT a Jupyter kernel—you must have Python environment in which you’ve installed the Jupyter package, though many language kernels will work with no modification. To enable advanced features, modifications may be needed in the VS Code language extensions.

| Link | Description |
|---|---|
| File an issue | Report problems and suggest enhancements |
| Go to docs | Jupyter extension and data science in VS Code documentation, tutorials, and more |
| Discussions | Post questions, and engage in community discussions |
Editing Jupyter notebooks in VS Code can also be done on the browser in two ways.
- The Jupyter extension has support for a web based interface provided by vscode.dev (which includes github.dev, available by typing ‘.’ when viewing a repo on github.com)
- The Jupyter extension can be installed on VS Code in GitHub Codespaces the same way it is done locally (or sync your VS Code settings to have your extensions installed automatically on Codespaces).
The Jupyter Extension will automatically install the following extensions by default to provide enhanced Jupyter notebook experiences in VS Code.
- Jupyter Keymap — to provide Jupyter-consistent keymaps
- Jupyter Notebook Renderers — to provide renderers for MIME types such as latex, plotly, vega, etc.
- Jupyter Cell Tags and Jupyter Slide Show — to provide the ability to tag cells in notebooks and support for presentations
You can also install the Jupyter PowerToys extension to try out experimental features (not installed by default). Extensions installed through the marketplace are subject to the Marketplace Terms of Use, and any or all of these extensions can be disabled or uninstalled.
- Step 1. Install VS Code
- Step 2. Install Anaconda/Miniconda or another Python environment in which you’ve installed the Jupyter package
- Since not working with Python, make sure to have a Jupyter Kernel that corresponds to the language you would like to use installed on your machine.
- Step 3. Install the Jupyter Extension and the Python Extension
- Step 4. Open or create a notebook file by opening the Command Palette ( Ctrl+Shift+P ) and select Jupyter: Create New Jupyter Notebook .

- Step 5. Select your kernel by clicking on the kernel picker in the top right of the notebook or by invoking the Notebook: Select Notebook Kernel command and start coding!


Working with other Languages
The Jupyter Extension supports other languages in addition to Python such as Julia, R, and C#.
- Step 1. Install VS Code
- Step 2. Since not working with Python, make sure to have a Jupyter kernelspec that corresponds to the language you would like to use installed on your machine.
- Step 3. Install the Jupyter Extension
- Step 4. Open or create a notebook file and start coding!
The Jupyter Extension uses the built-in notebook support from VS Code. This UI gives a number of advantages to users of notebooks:
- Out of the box support for VS Code’s vast array of basic code editing features like hot exit, find & replace, and code folding.
- Editor extensions like VIM, bracket colorization, linters and many more are available while editing a cell.
- Deep integration with general workbench and file-based features in VS Code like outline view (Table of Contents), breadcrumbs and other operations.
- Fast load times for Jupyter notebook (.ipynb) files. Any notebook file is loaded and rendered as quickly as possible, while execution-related operations are initialized behind the scenes.
- Includes a notebook-friendly diff tool, making it much easier to compare and see differences between code cells, output and metadata.
- Extensibility beyond what the Jupyter extension provides. Extensions can now add their own language or runtime-specific take on notebooks, such as the .NET Interactive Notebooks and Gather
- While the Jupyter extension comes packaged with a large set of the most commonly used renderers for output, the marketplace supports custom installable renderers to make working with your notebooks even more productive. To get started writing your own, see VS Code’s renderer api documentation.
Open the Command Palette (Command+Shift+P on macOS and Ctrl+Shift+P on Windows/Linux) and type in one of the following commands:
| Command | Description |
|---|---|
| Jupyter: Create New Jupyter Notebook | Creates a new Jupyter Notebook |
| Notebook: Select Notebook Kernel | Select or switch kernels within your notebook |
| Notebook: Change Cell Language | Change the language of the cell currently in focus |
| Jupyter: Export to HTML Jupyter: Export to PDF | Create a presentation-friendly version of your notebook in HTML or PDF |
To see all available Jupyter Notebook commands, open the Command Palette and type Jupyter or Notebook .
Context Keys for Key bindings
You can use the extension’s context keys in ‘when’ clauses. Here’s an example:
That keybinding states the jupyter.runAndDebugCell command should map to CTRL+I when not in the jupyter.webExtension .
Learn more about the rich features of the Jupyter extension:
- IntelliSense: Edit your code with auto-completion, code navigation, syntax checking and more.
- Jupyter Notebooks: Create and edit Jupyter Notebooks, add and run code/markdown cells, render plots, create presentation-friendly versions of your notebook by exporting to HTML or PDF and more.
The extension is available in multiple languages: de , en , es , fa , fr , it , ja , ko-kr , nl , pl , pt-br , ru , tr , zh-cn , zh-tw
Questions, issues, feature requests, and contributions
- If you have a question about how to accomplish something with the extension, please ask on Discussions. Our wiki can be a source of information as well.
- Any and all feedback is appreciated and welcome! If you come across a problem or bug with the extension, please file an issue.
- If someone has already filed an issue that encompasses your feedback, please leave a 👍 / 👎 reaction on the issue.
The Microsoft Jupyter Extension for Visual Studio Code collects usage data and sends it to Microsoft to help improve our products and services. Read our privacy statement to learn more. This extension respects the telemetry.telemetryLevel setting which you can learn more about at https://code.visualstudio.com/docs/supporting/faq#_how-to-disable-telemetry-reporting.
This project may contain trademarks or logos for projects, products, or services. Authorized use of Microsoft trademarks or logos is subject to and must follow Microsoft’s Trademark & Brand Guidelines. Use of Microsoft trademarks or logos in modified versions of this project must not cause confusion or imply Microsoft sponsorship. Any use of third-party trademarks or logos are subject to those third-party’s policies.
About
VS Code Jupyter extension
Нативное редактирование Jupyter Notebooks в VS Code
С октябрьским релелизом расширения Python, мы рады объявить о поддержке нативного редактирования Jupyter Notebooks в Visual Studio Code! Теперь вы можете напрямую редактировать файлы .ipynb и получать интерактивность Jupyter Notebooks с полной мощью VS Code.
Вы можете управлять исходным кодом, открывать несколько файлов и использовать такие функции, как IntelliSense, интеграцию с Git и управление несколькими файлами. Все они предлагают совершенно новые способы для дата-сайнтистов и разработчиков эффективно экспериментировать и работать с данными. Вы можете попробовать все это уже сегодня, загрузив последнюю версию расширения Python и создав/открыв Jupyter Notebook внутри VS Code.
Начиная с первой публикации наших практик в области анализа данных в VS Code одной из главных функций, которую запрашивали пользователи, являлся макет, похожий на блокнот, для редактирования собственных блокнотов Jupyter в VS Code. В оставшейся части этого поста мы рассмотрим эти новые возможности VS Code.
Начало работы
Для начала, расскажем как начать работу с Jupyter в VS Code.
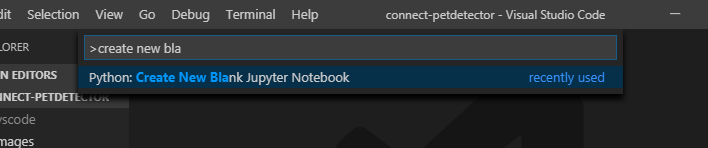
- Если у вас еще нет существующего файла Jupyter Notebook, откройте VS Code Command Palette с помощью сочетания клавиш CTRL+SHIFT+P (Windows) или Command+SHIFT+P (macOS) и запустите команду «Python: Create Blank New Jupyter Notebook».
- Если у вас уже есть файл Jupyter Notebook, это так же просто, как просто открыть этот файл в VS Code. Он автоматически откроется с новым нативным редактором Jupyter.
Открыв Jupyter Notebook, вы можете добавлять новые ячейки, писать код в ячейках, запускать ячейки и выполнять другие действия с блокнотом.
Автозаполнение на базе AI
Во время написания кода IntelliSense даст вам интеллектуальные подсказки прямо в ячейках. Кроме того, вы можете значительно расширить возможности своего редактора, установив наше расширение IntelliCode, чтобы получить IntelliSense на базе AI с более интеллектуальными предложениями автозаполнения, основанными на текущем контексте кода.
Обозреватель переменных
Еще одним преимуществом использования VS Code является то, что вы можете воспользоваться обозревателем переменных и средством просмотра графиков, нажав кнопку «Переменные» на панели инструментов блокнота. Обозреватель переменных поможет вам в реальном времени отслеживать текущее состояние переменных вашего блокнота.
Теперь вы можете просматривать свои наборы данных, фильтровать данные и даже экспортировать графики! Прошли те времена, когда вам приходилось вводить df.head() для просмотра данных.
Подключение к удаленным серверам Jupyter
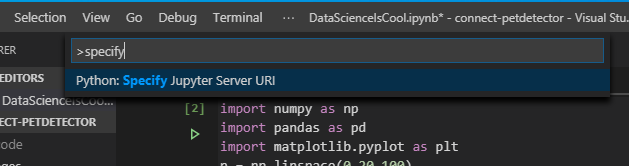
Когда файл блокнота Jupyter создается или открывается, VS Code автоматически создает сервер Jupyter локально по умолчанию. Если вы хотите использовать удаленный сервер Jupyter, это тоже просто и реализуется с помощью команды «Specify Jupyter server URI» через VS Code command palette и ввод URI сервера.
Экспорт в виде кода Python
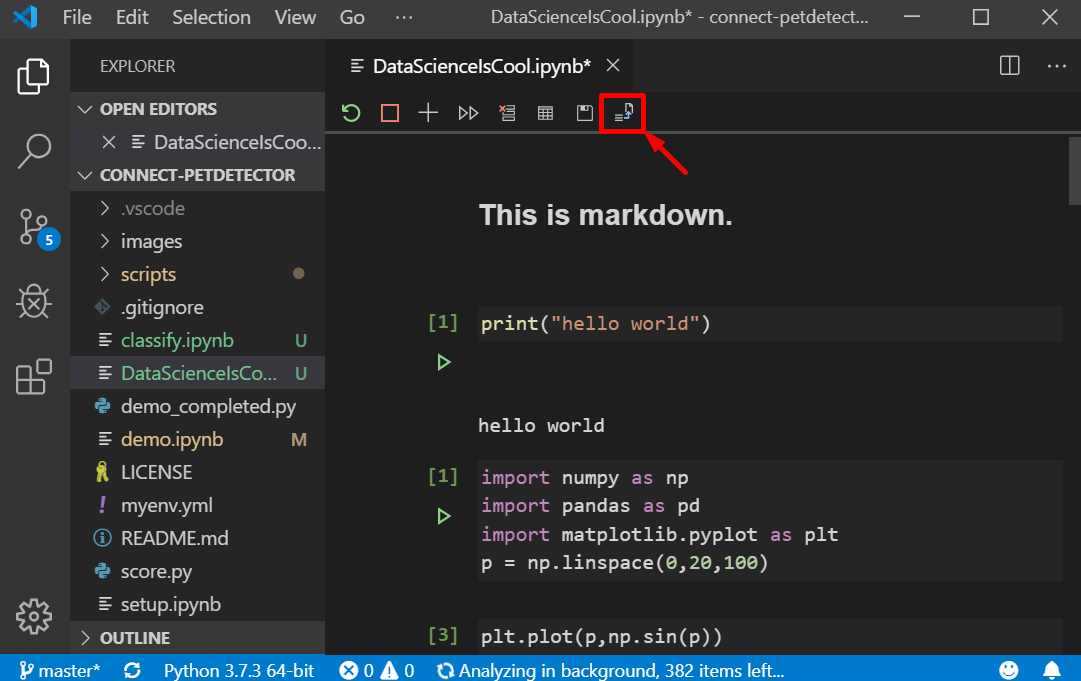
Когда вы будете готовы превратить эксперимент в боевой код Python, просто нажмите кнопку «Convert and Save as Python File» на верхней панели инструментов, и пусть расширение Python сделает всю работу за вас. Затем вы можете просмотреть этот код Python в нашем существующем интерактивном окне Python и продолжить работу с функциями расширения Python для дальнейшей подготовки своего кода к продакшену (например с встроенным отладчиком, рефакторингом, Visual Studio Live Share и Git source control.
Отладка
VS Code поддерживает отладку Jupyter Notebooks с помощью функции «Экспорт в виде кода Python», описанной в предыдущем разделе. Когда ваш код появится в интерактивном окне Python, вы можете использовать встроенный отладчик VS Code для отладки кода. Мы работаем над тем, чтобы добавить отладку ячейки в редактор Jupyter в следующем обновлении, так что следите за новостями!