- 5. Using Python on a Mac
- 5.1. Getting and Installing MacPython
- 5.1.1. How to run a Python script
- 5.1.2. Running scripts with a GUI
- 5.1.3. Configuration
- 5.2. The IDE
- 5.3. Installing Additional Python Packages
- 5.4. GUI Programming on the Mac
- 5.5. Distributing Python Applications on the Mac
- 5.6. Other Resources
- Download the latest version of Python
- Sources
- Alternative Implementations
- History
- Release Schedules
- Information about specific ports, and developer info
- OpenPGP Public Keys
- Other Useful Items
- Want to contribute?
- Установить python для mac os
- Первая программа
5. Using Python on a Mac
Python on a Mac running macOS is in principle very similar to Python on any other Unix platform, but there are a number of additional features such as the IDE and the Package Manager that are worth pointing out.
5.1. Getting and Installing MacPython
macOS used to come with Python 2.7 pre-installed between versions 10.8 and 12.3. You are invited to install the most recent version of Python 3 from the Python website (https://www.python.org). A current “universal binary” build of Python, which runs natively on the Mac’s new Intel and legacy PPC CPU’s, is available there.
What you get after installing is a number of things:
- A Python 3.12 folder in your Applications folder. In here you find IDLE, the development environment that is a standard part of official Python distributions; and PythonLauncher, which handles double-clicking Python scripts from the Finder.
- A framework /Library/Frameworks/Python.framework , which includes the Python executable and libraries. The installer adds this location to your shell path. To uninstall MacPython, you can simply remove these three things. A symlink to the Python executable is placed in /usr/local/bin/.
The Apple-provided build of Python is installed in /System/Library/Frameworks/Python.framework and /usr/bin/python , respectively. You should never modify or delete these, as they are Apple-controlled and are used by Apple- or third-party software. Remember that if you choose to install a newer Python version from python.org, you will have two different but functional Python installations on your computer, so it will be important that your paths and usages are consistent with what you want to do.
IDLE includes a help menu that allows you to access Python documentation. If you are completely new to Python you should start reading the tutorial introduction in that document.
If you are familiar with Python on other Unix platforms you should read the section on running Python scripts from the Unix shell.
5.1.1. How to run a Python script
Your best way to get started with Python on macOS is through the IDLE integrated development environment, see section The IDE and use the Help menu when the IDE is running.
If you want to run Python scripts from the Terminal window command line or from the Finder you first need an editor to create your script. macOS comes with a number of standard Unix command line editors, vim and emacs among them. If you want a more Mac-like editor, BBEdit or TextWrangler from Bare Bones Software (see http://www.barebones.com/products/bbedit/index.html) are good choices, as is TextMate (see https://macromates.com/). Other editors include Gvim (https://macvim.org/macvim/) and Aquamacs (http://aquamacs.org/).
To run your script from the Terminal window you must make sure that /usr/local/bin is in your shell search path.
To run your script from the Finder you have two options:
- Drag it to PythonLauncher
- Select PythonLauncher as the default application to open your script (or any .py script) through the finder Info window and double-click it. PythonLauncher has various preferences to control how your script is launched. Option-dragging allows you to change these for one invocation, or use its Preferences menu to change things globally.
5.1.2. Running scripts with a GUI
With older versions of Python, there is one macOS quirk that you need to be aware of: programs that talk to the Aqua window manager (in other words, anything that has a GUI) need to be run in a special way. Use pythonw instead of python to start such scripts.
With Python 3.9, you can use either python or pythonw.
5.1.3. Configuration
Python on macOS honors all standard Unix environment variables such as PYTHONPATH , but setting these variables for programs started from the Finder is non-standard as the Finder does not read your .profile or .cshrc at startup. You need to create a file ~/.MacOSX/environment.plist . See Apple’s Technical Document QA1067 for details.
For more information on installation Python packages in MacPython, see section Installing Additional Python Packages .
5.2. The IDE
MacPython ships with the standard IDLE development environment. A good introduction to using IDLE can be found at http://www.hashcollision.org/hkn/python/idle_intro/index.html.
5.3. Installing Additional Python Packages
There are several methods to install additional Python packages:
- Packages can be installed via the standard Python distutils mode ( python setup.py install ).
- Many packages can also be installed via the setuptools extension or pip wrapper, see https://pip.pypa.io/.
5.4. GUI Programming on the Mac
There are several options for building GUI applications on the Mac with Python.
PyObjC is a Python binding to Apple’s Objective-C/Cocoa framework, which is the foundation of most modern Mac development. Information on PyObjC is available from https://pypi.org/project/pyobjc/.
The standard Python GUI toolkit is tkinter , based on the cross-platform Tk toolkit (https://www.tcl.tk). An Aqua-native version of Tk is bundled with OS X by Apple, and the latest version can be downloaded and installed from https://www.activestate.com; it can also be built from source.
wxPython is another popular cross-platform GUI toolkit that runs natively on macOS. Packages and documentation are available from https://www.wxpython.org.
PyQt is another popular cross-platform GUI toolkit that runs natively on macOS. More information can be found at https://riverbankcomputing.com/software/pyqt/intro.
5.5. Distributing Python Applications on the Mac
The standard tool for deploying standalone Python applications on the Mac is py2app. More information on installing and using py2app can be found at https://pypi.org/project/py2app/.
5.6. Other Resources
The MacPython mailing list is an excellent support resource for Python users and developers on the Mac:
Another useful resource is the MacPython wiki:
Download the latest version of Python


All Python releases are Open Source. Historically, most, but not all, Python releases have also been GPL-compatible. The Licenses page details GPL-compatibility and Terms and Conditions.
Sources
For most Unix systems, you must download and compile the source code. The same source code archive can also be used to build the Windows and Mac versions, and is the starting point for ports to all other platforms.
Download the latest Python 3 source.
Alternative Implementations
This site hosts the «traditional» implementation of Python (nicknamed CPython). A number of alternative implementations are available as well.
History
Python was created in the early 1990s by Guido van Rossum at Stichting Mathematisch Centrum in the Netherlands as a successor of a language called ABC. Guido remains Python’s principal author, although it includes many contributions from others.
Release Schedules
See Status of Python Versions for all an overview of all versions, including unsupported.
Information about specific ports, and developer info
OpenPGP Public Keys
Source and binary executables are signed by the release manager or binary builder using their OpenPGP key. Release files for currently supported releases are signed by the following:
- Thomas Wouters (3.12.x and 3.13.x source files and tags) (key id: A821E680E5FA6305)
- Pablo Galindo Salgado (3.10.x and 3.11.x source files and tags) (key id: 64E628F8D684696D)
- Steve Dower (Windows binaries) (key id: FC62 4643 4870 34E5)
- Łukasz Langa (3.8.x and 3.9.x source files and tags) (key id: B269 95E3 1025 0568)
- Ned Deily (macOS binaries, 3.7.x / 3.6.x source files and tags) (key ids: 2D34 7EA6 AA65 421D, FB99 2128 6F5E 1540, and Apple Developer ID DJ3H93M7VJ)
- Larry Hastings (3.5.x source files and tags) (key id: 3A5C A953 F73C 700D)
- Benjamin Peterson (2.7.z source files and tags) (key id: 04C3 67C2 18AD D4FF and A4135B38)
Release files for older releases which have now reached end-of-life may have been signed by one of the following:
- Anthony Baxter (key id: 0EDD C5F2 6A45 C816)
- Georg Brandl (key id: 0A5B 1018 3658 0288)
- Martin v. Löwis (key id: 6AF0 53F0 7D9D C8D2)
- Ronald Oussoren (key id: C9BE 28DE E6DF 025C)
- Barry Warsaw (key ids: 126E B563 A74B 06BF, D986 6941 EA5B BD71, and ED9D77D5)
You can import a person’s public keys from a public keyserver network server you trust by running a command like:
or, in many cases, public keys can also be found at keybase.io. On the version-specific download pages, you should see a link to both the downloadable file and a detached signature file. To verify the authenticity of the download, grab both files and then run this command:
gpg --verify Python-3.6.2.tgz.asc
Note that you must use the name of the signature file, and you should use the one that’s appropriate to the download you’re verifying.
Other Useful Items
- Looking for 3rd party Python modules? The Package Index has many of them.
- You can view the standard documentation online, or you can download it in HTML, PostScript, PDF and other formats. See the main Documentation page.
- Information on tools for unpacking archive files provided on python.org is available.
- Tip: even if you download a ready-made binary for your platform, it makes sense to also download the source. This lets you browse the standard library (the subdirectory Lib) and the standard collections of demos (Demo) and tools (Tools) that come with it. There’s a lot you can learn from the source!
- There is also a collection of Emacs packages that the Emacsing Pythoneer might find useful. This includes major modes for editing Python, C, C++, Java, etc., Python debugger interfaces and more. Most packages are compatible with Emacs and XEmacs.
Want to contribute?
Want to contribute? See the Python Developer’s Guide to learn about how Python development is managed.
- About
- Applications
- Quotes
- Getting Started
- Help
- Python Brochure
- All releases
- Source code
- Windows
- macOS
- Other Platforms
- License
- Alternative Implementations
- Docs
- Audio/Visual Talks
- Beginner’s Guide
- Developer’s Guide
- FAQ
- Non-English Docs
- PEP Index
- Python Books
- Python Essays
- Diversity
- Mailing Lists
- IRC
- Forums
- PSF Annual Impact Report
- Python Conferences
- Special Interest Groups
- Python Logo
- Python Wiki
- Code of Conduct
- Community Awards
- Get Involved
- Shared Stories
- Arts
- Business
- Education
- Engineering
- Government
- Scientific
- Software Development
- Python News
- PSF Newsletter
- PSF News
- PyCon US News
- News from the Community
- Python Events
- User Group Events
- Python Events Archive
- User Group Events Archive
- Submit an Event
- Developer’s Guide
- Issue Tracker
- python-dev list
- Core Mentorship
- Report a Security Issue
Установить python для mac os
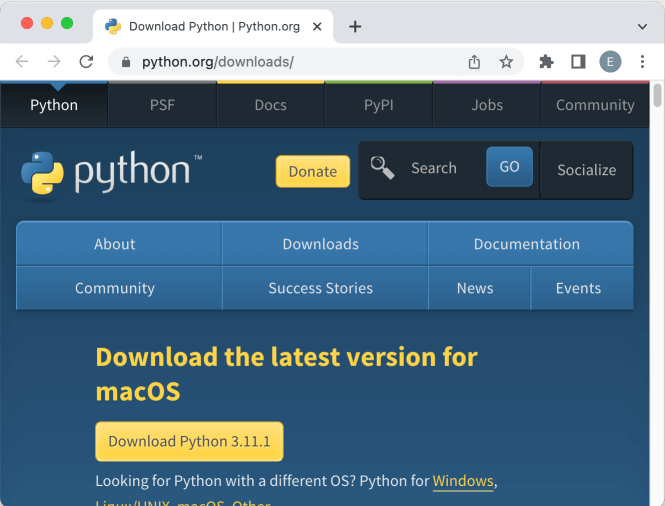
Для создания программ на Python нам потребуется интерпретатор. Для его установки перейдем на страницу https://www.python.org/downloads/ и найдем ссылку на загрузку последней версии языка:

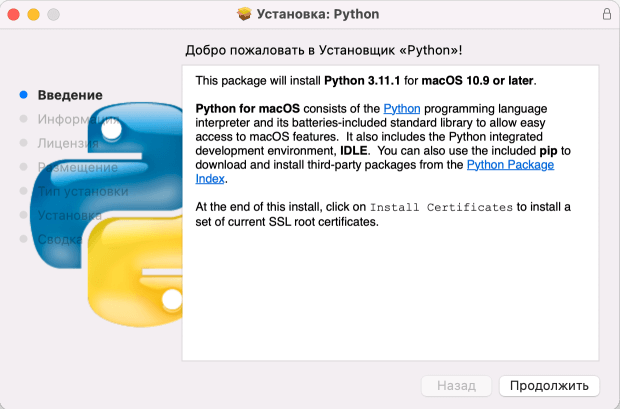
Если текущая ОС — Mac OS, то по адресу https://www.python.org/downloads/ будет предложено загрузить графический установщик для MacOS. Загрузим, запустим его и выполним пошаговую установку:
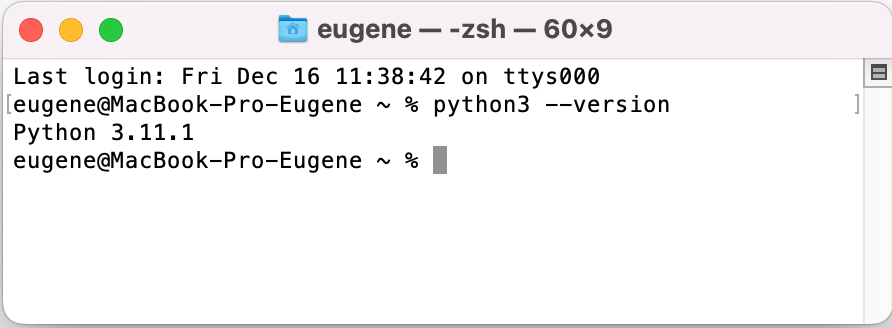
Для обращения к интерпретатору Python на MacOS применяется команда python3 . Напримерб после установки интерпретатора проверим его версию командой
Первая программа
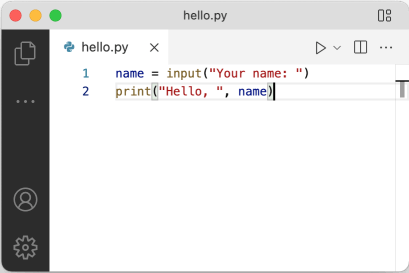
Сначала определим где-нибудь на жестком диске для скриптов папку python . А в этой папке создадим новый текстовый файл, который назовем hello.py . По умолчанию файлы с кодом на языке Python, как правило, имеют расширение py .
Откроем этот файл в любом текстовом редакторе и добавим в него следующий код:
name = input("Your name: ") print("Hello, ", name)Скрипт состоит из двух строк. Первая строка с помощью функции input() ожидает ввода пользователем своего имени. Введенное имя затем попадает в переменную name .
Вторая строка с помощью функции print() выводит приветствие вместе с введенным именем.
Теперь запустим командную строку/терминал и с помощью команды cd перейдем к папке, где находится файл с исходным кодом hello.py (например, в моем случае это папка «/Users/eugene/Documents/python»).
cd /Users/eugene/Documents/python
Далее для выполнения скрипта hello.py передадим его интерпретатору python:
В итоге программа выведет приглашение к вводу имени, а затем приветствие.