- Примеры отправки AJAX JQuery
- GET запрос
- Код можно сократить используя функцию $.get
- Код файла index.php
- POST запросы
- Или сокращенная версия – функция $.post
- Код файла index.php
- Отправка формы через AJAX
- Код файла handler.php
- Работа с JSON
- Короткая версия
- Код файла json.php
- Возможные проблемы
- Выполнение JS загруженного через AJAX
- Или
- Дождаться выполнения AJAX запроса
- Отправка HTTP заголовков
- Обработка ошибок
- Комментарии 4
- Simple Messaging System With PHP MySQL (Free Download)
- TABLE OF CONTENTS
- PHP MYSQL MESSAGING SYSTEM
- PART 1) DATABASE
- 1A) USERS TABLE
- 1B) MESSAGES TABLE
- PART 2) PHP MESSAGE LIBRARY
- 2A) INITIALIZE
- 2B) MESSAGING FUNCTIONS
- PART 3) MESSAGING AJAX HANDLER
- PART 4) MESSAGING PAGE
- PART 5) MESSAGING JAVASCRIPT
- DOWNLOAD & NOTES
- SUPPORT
- EXAMPLE CODE DOWNLOAD
- EXTRA BITS & LINKS
- IMPROVEMENT IDEAS
- MESSAGE TO MULTIPLE USERS
- COMPATIBILITY CHECKS
- LINKS & REFERENCES
- THE END
Примеры отправки AJAX JQuery
AJAX позволяет отправить и получить данные без перезагрузки страницы. Например, делать проверку форм, подгружать контент и т.д. А функции JQuery значительно упрощают работу.
Полное описание функции AJAX на jquery.com.
GET запрос
Запрос идет на index.php с параметром « text » и значением « Текст » через метод GET.
По сути это то же самое что перейти в браузере по адресу – http://site.com/index.php?text=Текст
В результате запроса index.php вернет строку «Данные приняты – Текст», которая будет выведена в сообщении alert.
$.ajax(< url: '/index.php', /* Куда пойдет запрос */ method: 'get', /* Метод передачи (post или get) */ dataType: 'html', /* Тип данных в ответе (xml, json, script, html). */ data: , /* Параметры передаваемые в запросе. */ success: function(data) < /* функция которая будет выполнена после успешного запроса. */ alert(data); /* В переменной data содержится ответ от index.php. */ >>);Код можно сократить используя функцию $.get
$.get('/index.php', , function(data)< alert(data); >);Код файла index.php
echo 'Данные приняты - ' . $_GET['text'];GET запросы могут кэшироваться браузером или сервером, чтобы этого избежать нужно добавить в функцию параметр – cache: false .
POST запросы
$.ajax(< url: '/index.php', method: 'post', dataType: 'html', data: , success: function(data) < alert(data); >>);Или сокращенная версия – функция $.post
$.post('/index.php', , function(data)< alert(data); >);Код файла index.php
echo 'Данные приняты - ' . $_POST['text'];POST запросы ни когда не кэшироваться.
Отправка формы через AJAX
При отправке формы применяется функция serialize() , подробнее на jquery.com.
Она обходит форму и собирает названия и заполненные пользователем значения полей и возвращает в виде массива – .
- Кнопки формы по которым был клик игнорируются, в результате функции их не будет.
- serialize можно применить только к тегу form и полям формы, т.е. $(‘div.form_container’).serialize(); – вернет пустой результат.
Пример отправки и обработки формы:
Код файла handler.php
if (empty($_POST['login'])) < echo 'Укажите логин'; >elseif (empty($_POST['password'])) < echo 'Укажите пароль'; >else
Работа с JSON
Идеальный вариант когда нужно работать с массивами данных.
Короткая версия
$.getJSON('/json.php', function(data) < alert(data.text); alert(data.error); >);$.getJSON передает запрос только через GET.
Код файла json.php
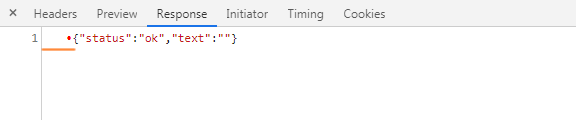
header('Content-Type: application/json'); $result = array( 'text' => 'Текст', 'error' => 'Ошибка' ); echo json_encode($result);Возможные проблемы
При работе с JSON может всплыть одна ошибка – после запроса сервер отдал результат, все хорошо, но метод success не срабатывает. Причина кроется в серверной части (PHP) т.к. перед данными могут появится управляющие символы, например:
Из-за них ответ считается не валидным и считается как ошибочный запрос. В таких случаях помогает очистка буфера вывода ob_end_clean (если он используется на сайте).
. // Очистка буфера ob_end_clean(); header('Content-Type: application/json'); echo json_encode($result, JSON_UNESCAPED_UNICODE); exit();Выполнение JS загруженного через AJAX
В JQuery реализована функция подгруздки кода JS через AJAX, после успешного запроса он будет сразу выполнен.
Или
Дождаться выполнения AJAX запроса
По умолчанию в JQuery AJAX запросы выполняются асинхронно. Т.е. запрос не задерживает выполнение программы пока ждет результатов, а работает параллельно. Простой пример:
var text = ''; $.ajax( < url: '/index.php', method: 'get', dataType: 'html', success: function(data)< text = data; >>); alert(text); /* Переменная будет пустая. */Переменная text будет пустая, а не как ожидается текст который вернул index.php Чтобы включить синхронный режим нужно добавить параметр async: false .
Соответственно синхронный запрос будет вешать прогрузку страницы если код выполняется в страницы.
var text = ''; $.ajax( < url: '/index.php', method: 'get', dataType: 'html', async: false, success: function(data)< text = data; >>); alert(text); /* В переменной будет результат из index.php. */Отправка HTTP заголовков
$.ajax(< url: '/index.php', method: 'get', dataType: 'html', headers: , success: function(data) < console.dir(data); >>);В PHP они будут доступны в массиве $_SERVER , ключ массива переводится в верхний регистр с приставкой HTTP_ , например:
Обработка ошибок
Через параметр error задается callback-функция, которая будет вызвана в случаи если запрашиваемый ресурс отдал 404, 500 или другой код.
$.ajax(< url: '/index.php', method: 'get', dataType: 'json', success: function(data)< console.dir(data); >, error: function (jqXHR, exception) < if (jqXHR.status === 0) < alert('Not connect. Verify Network.'); >else if (jqXHR.status == 404) < alert('Requested page not found (404).'); >else if (jqXHR.status == 500) < alert('Internal Server Error (500).'); >else if (exception === 'parsererror') < alert('Requested JSON parse failed.'); >else if (exception === 'timeout') < alert('Time out error.'); >else if (exception === 'abort') < alert('Ajax request aborted.'); >else < alert('Uncaught Error. ' + jqXHR.responseText); >> >);Комментарии 4
В примере Отправка формы через AJAX страница перезагружается. Видимо нужно добавить return false после $.ajax(<>);
$("#form").on("submit", function() $.ajax( url: '/handler.php',
method: 'post',
dataType: 'html',
data: $(this).serialize(),
success: function(data) $('#message').html(data);
>
>);
return false;
>);
$("#form").on("submit", function(e).
e.preventDefault();
>)У меня вообще не работали POST запросы, особенно для меня, для начинающего было очень сложно, работали только GET, очень долго голову ломал почему так происходит. Нашёл пример на другом сайте, который работал долго сравнивал и думал почему так. Здесь пример не работает, а на другом сайте рабочий пример оказался.
Так вот:
$.ajax( url: ‘/index.php’,
method: ‘post’,
dataType: ‘html’,
data: ,
success: function(data) alert(data);
>
>);
Оказывается чтобы у меня заработали именно POST запросы надо было поменять строчку:
«method: ‘post’,» на:
«type: ‘post’,» и всё сразу заработало после этого. А я ведь ни один день ломал голову из-за этой ошибки!
Simple Messaging System With PHP MySQL (Free Download)
Welcome to a tutorial on how to create a simple messaging system with PHP and MYSQL. Want to add a “send message” or “private message” feature to your website? There are quite a number of things we need to cover – The database, PHP library, AJAX handler, and HTML page. Let us walk through a step-by-step example in this guide – Read on!
TABLE OF CONTENTS
PHP MYSQL MESSAGING SYSTEM
All right, let us now get into the steps of building a messaging system with PHP MYSQL.

PART 1) DATABASE
1A) USERS TABLE
-- (A) USERS CREATE TABLE `users` ( `user_id` bigint(20) NOT NULL, `user_name` varchar(255) NOT NULL ) ENGINE=InnoDB DEFAULT CHARSET=utf8mb4; ALTER TABLE `users` ADD PRIMARY KEY (`user_id`); ALTER TABLE `users` MODIFY `user_id` bigint(20) NOT NULL AUTO_INCREMENT, AUTO_INCREMENT=1; INSERT INTO `users` (`user_id`, `user_name`) VALUES (1, 'Joe Doe'), (2, 'Jon Doe'), (3, 'Joy Doe');If you already have an existing users table, feel free to ignore this – This is only a dummy table for example.
1B) MESSAGES TABLE
-- (B) MESSAGES CREATE TABLE `messages` ( `user_from` bigint(20) NOT NULL, `user_to` bigint(20) NOT NULL, `date_send` datetime NOT NULL DEFAULT current_timestamp(), `date_read` datetime DEFAULT NULL, `message` text NOT NULL ) ENGINE=InnoDB DEFAULT CHARSET=utf8mb4; ALTER TABLE `messages` ADD PRIMARY KEY (`user_from`, `user_to`, `date_send`), ADD KEY `date_read` (`date_read`);- user_from Sent from (User ID). Partial primary key.
- user_to Sent to (User ID). Partial primary key.
- date_send The time when the message is sent. Partial primary key.
- date_read The time when the message is read.
- message The message itself.
PART 2) PHP MESSAGE LIBRARY
2A) INITIALIZE
pdo = new PDO( "mysql:host=".DB_HOST.";dbname=".DB_NAME.";charset=".DB_CHARSET, DB_USER, DB_PASSWORD, [ PDO::ATTR_ERRMODE => PDO::ERRMODE_EXCEPTION, PDO::ATTR_DEFAULT_FETCH_MODE => PDO::FETCH_ASSOC ]); > // (B) DESTRUCTOR - CLOSE DATABASE CONNECTION function __destruct () < if ($this->stmt !== null) < $this->stmt = null; > if ($this->pdo !== null) < $this->pdo = null; > > // (C) EXECUTE SQL QUERY function query ($sql, $data=null) : void < $this->stmt = $this->pdo->prepare($sql); $this->stmt->execute($data); > // . > // (G) DATABASE SETTINGS - CHANGE TO YOUR OWN! define("DB_HOST", "localhost"); define("DB_NAME", "test"); define("DB_CHARSET", "utf8mb4"); define("DB_USER", "root"); define("DB_PASSWORD", ""); // (H) MESSAGE OBJECT $_MSG = new Message(); // (I) ACT AS USER session_start(); $_SESSION["user"] = ["id" => 1, "name" => "Joe Doe"]; // $_SESSION["user"] = ["id" => 2, "name" => "Jon Doe"]; // $_SESSION["user"] = ["id" => 3, "name" => "Joy Doe"];- (A, B, H) When $_MSG = new Message() is created, the constructor connects to the database. The destructor closes the connection.
- (C) query() A helper function to run an SQL query.
- (G) The database settings, remember to change these to your own.
- (I) To “login” and test as different users. If you don’t have a user system, I will leave some links below.
2B) MESSAGING FUNCTIONS
// (D) GET ALL USERS & NUMBER OF UNREAD MESSAGES function getUsers ($for) < // (D1) GET USERS $this->query("SELECT * FROM `users` WHERE `user_id`!=?", [$for]); $users = []; while ($r = $this->stmt->fetch()) < $users[$r["user_id"]] = $r; >// (D2) COUNT UNREAD MESSAGES $this->query( "SELECT `user_from`, COUNT(*) `ur` FROM `messages` WHERE `user_to`=? AND `date_read` IS NULL GROUP BY `user_from`", [$for]); while ($r = $this->stmt->fetch()) < $users[$r["user_from"]]["unread"] = $r["ur"]; >// (D3) RESULTS return $users; > // (E) GET MESSAGES function getMsg ($from, $to, $limit=30) < // (E1) MARK ALL AS "READ" $this->query( "UPDATE `messages` SET `date_read`=NOW() WHERE `user_from`=? AND `user_to`=? AND `date_read` IS NULL", [$from, $to]); // (E2) GET MESSAGES $this->query( "SELECT m.*, u.`user_name` FROM `messages` m JOIN `users` u ON (m.`user_from`=u.`user_id`) WHERE `user_from` IN (. ) AND `user_to` IN (. ) ORDER BY `date_send` DESC LIMIT 0, $limit", [$from, $to, $from, $to]); return $this->stmt->fetchAll(); > // (F) SEND MESSAGE function send ($from, $to, $msg) < $this->query( "INSERT INTO `messages` (`user_from`, `user_to`, `message`) VALUES (. )", [$from, $to, strip_tags($msg)] ); return true; >- (D) getUsers($for) Takes the perspective of user $for . Get all other users and the number of unread messages.
- (E) getMsg($from, $to, $limit) Get the messages between $from and $to . Use $limit to limit the number of messages, or build your own pagination.
- (F) send($from, $to, $msg) Send a message.
PART 3) MESSAGING AJAX HANDLER
getMsg($_POST["uid"], $_SESSION["user"]["id"]); if (count($msg)>0) < foreach ($msg as $m) < $out = $m["user_from"] == $_SESSION["user"]["id"]; ?> > break; // (B) SEND MESSAGE case "send": echo $MSG->send($_SESSION["user"]["id"], $_POST["to"], $_POST["msg"]) ? "OK" : $MSG->error ; break; >> PART 4) MESSAGING PAGE
PART 5) MESSAGING JAVASCRIPT
var msg = < // (A) HELPER - AJAX FETCH ajax : (data, after) => < // (A1) FORM DATA let form = new FormData(); for (const [k,v] of Object.entries(data)) < form.append(k, v); >// (A2) FETCH fetch("3-ajax-msg.php", < method:"POST", body:form >) .then(res => res.text()) .then(txt => after(txt)) .catch(err => console.error(err)); >, // (B) SHOW MESSAGES uid : null, // current selected user show : uid => < // (B1) SET SELECTED USER ID msg.uid = uid; // (B2) GET HTML ELEMENTS let hForm = document.getElementById("uSend"), hTxt = document.getElementById("mTxt"), hUnread = document.querySelector(`#usr$.uUnread`), hMsg = document.getElementById("uMsg"); // (B3) SET SELECTED USER for (let r of document.querySelectorAll(".uRow")) < if (r.id=="usr"+uid) < r.classList.add("now"); >else < r.classList.remove("now"); >> // (B4) SHOW MESSAGE FORM hForm.style.display = "flex"; hTxt.value = ""; hTxt.focus(); // (B5) AJAX LOAD MESSAGES hMsg.innerHTML = ""; msg.ajax(< req : "show", uid : uid >, txt => < hMsg.innerHTML = txt; hUnread.innerHTML = 0; >); >, // (C) SEND MESSAGE send : () => < let hTxt = document.getElementById("mTxt"); msg.ajax(< req : "send", to : msg.uid, msg : hTxt.value >, txt => < if (txt == "OK") < msg.show(msg.uid); hTxt.value = ""; >else < alert(txt); >>); return false; > >;
- ajax() A support function, does an AJAX call to 3-ajax-msg.php .
- show() Fired when a user is selected. AJAX fetch the messages and show them.
- send() Self-explanatory. Send a message.
DOWNLOAD & NOTES
Here is the download link to the example code, so you don’t have to copy-paste everything.
SUPPORT
600+ free tutorials & projects on Code Boxx and still growing. I insist on not turning Code Boxx into a «paid scripts and courses» business, so every little bit of support helps.
EXAMPLE CODE DOWNLOAD
Click here for the source code on GitHub gist, just click on “download zip” or do a git clone. I have released it under the MIT license, so feel free to build on top of it or use it in your own project.
EXTRA BITS & LINKS
That’s all for the tutorial, and here is a small section on some extras and links that may be useful to you.
IMPROVEMENT IDEAS
- Not real time – For the lost souls, you need to refresh the page to show new messages. This is a “private messaging system”, not a “live chat system”. Big difference. Although it is possible to turn this into a live chat with WebSockets.
- Anti-Spam – In your project, add anti-spam and anti-harassing features. Give users the ability to block another user and ignore messages.
- User Login – Once again, check out the links below if you don’t have a user system.
MESSAGE TO MULTIPLE USERS
- Introduce new database tables.
- message_group The main “message group” table with a running message_group_id .
- message_group_users Pretty much ties user_id to message_group_id .
- createGroup() Add a new chat group.
- sendGroup() Send a message to the group.
- getGroup() Get all messages within the group.
Of course, you will also have to deal with a lot more spam and rules – What happens when a user wants to leave the group? What happens to groups that have no users left? Should there be an “admin” for the group? How to prevent people from harassing and adding people who already left the group? How to stop people from creating too many groups?
COMPATIBILITY CHECKS
This example will work on most modern browsers.
LINKS & REFERENCES
THE END
Thank you for reading, and we have come to the end. I hope that it has helped you to better understand, and if you want to share anything with this guide, please feel free to comment below. Good luck and happy coding!