- How to create and use a HTML checkbox ?
- Base Demo
- Syntax
- Value
- Default
- If Set
- Visual / Styling
- Css
- Switch
- Button
- Keyboard Navigation
- How to
- How to change the state programmatically
- How to use a checkbox to enable or disable other Form elements
- Aria Role
- Documentation / Reference
- Checkbox in HTML
- Introduction to Checkbox in HTML
- What is Checkbox in HTML?
- Usage of Checkbox in HTML
- How to Create a Checkbox in HTML?
- Labels for Checkboxes in HTML
- Form Attributes
- Disabling a Checkbox in HTML
- Checkbox vs Radio Buttons in HTML
- Working Dynamically with an HTML Checkbox
- Browser Support
- Conclusion
How to create and use a HTML checkbox ?
The HTML checkbox form control can only have two checked states (via its checked attribute):
If you want to get always a value for a property (ie false or true), you can:
Base Demo
This demo shows that if the checkbox is checked, the property given by the name attribute (with value property-name ) will be added to the data send by the form with the default value of on
Syntax
The syntax of a checkbox is:
checked is the optional checked attribute (default to false ) that sets the state of the checkbox (How to change it programmatically)
Value
If a checkbox is unchecked when its form is submitted, the field data is just not sent.
There is no not-checked value
Default
The default value is on and never changes.
document.querySelector("input").addEventListener("click", function()< console.log(`The checkbox is checked ? $`); console.log(`The value is $`); >); If Set
If the value attribute is set, this value will be send instead
document.querySelector("form").addEventListener("submit", function(event)< event.preventDefault(); let formData = new FormData(this); let i = 0; for (let entry of formData) < i++; console.log(`Entry $`); console.log(entry); > console.log(`Number of field sent: $`); >); Visual / Styling
Css
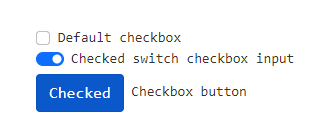
Switch
Button
Keyboard Navigation
You may navigate with the tab key because a input (and alos checkbox) is by default focusable. You still may change the order of navigation via the tabindex value.
the third tab will get you on the next interactive element in the iframe (ie a link) — the code is rendered in a iframe
How to
How to change the state programmatically
The checked attribute of the input checkbox element permits:
function toggleCheckBox(event) < event.preventDefault(); if (event.target.checkbox.checked)< event.target.checkbox.checked = false; event.target.button.innerHTML= "Check the checkbox"; >else < event.target.checkbox.checked = true; event.target.button.innerHTML= "Uncheck the checkbox"; >> How to use a checkbox to enable or disable other Form elements
Example of a legend with a checkbox that controls whether or not the fieldset is enabled
Aria Role
With aria role, you need to handle programmatically the state of each attribute as seen in this example 3)
[role='checkbox'][aria-checked='false']:before < content: '\00a0\00a0'; width: 14px; height: 14px; border: 1px solid hsl(0, 0%, 66%); border-radius: 0.2em; background-image: linear-gradient(to bottom, hsl(300, 3%, 93%), #fff 30%); >[role='checkbox'][aria-checked='true']:before < content: url('/_media/web/html/checkbox_checked.png'); >[role='checkbox'].focus
Sandwich Condiments Lettuce Tomato Mustard Sprouts Documentation / Reference
FormData is a web api object that represent the data of a form that should be send if the form is submited. Therefore if you have a checkbox that is not checked, formdata will not collect it. You can.
checked is an HTML attribute that indicates via its value (true or false — default to true) if the form control element is checked. It’s used: in a checkbox or radio button select optionselected.
control form elements are element that are used specifically inside a form. They are used: to specify a key and a value. to layout the form to submit or reset it field set [optional] that.
An inputinput element of a form control that permits to define a scalar value inputFull list Ref Doc The type attribute defined: the default behavior the design of the element. and the.
HTML The label html element represents a caption for a control item in a form (user interface). idfor A click on the label: will bring focus on the control element. propagates to the control.
legend is an element that represents a caption for the fieldset element. Example of a legend with a checkbox that controls whether or not the fieldset is enabled .
A radio represents a serie of mutually-exclusive choices in a form. It is an input element of type radio. A radio is round to distinguish from the square checkbox. As the checkbox, the state.
This page shows you how you can create a checkbox in React. This example is written in JSX and shows you a controlled component. The react forms components input accept a value attribute that is used.
Checkbox in HTML

One of the attributes of the input tag in HTML is the checkbox . They have the visual of square boxes that the frontend user can dynamically check off. The HTML checkbox comes in handy when we want the user to provide numerous inputs. Checkboxes increase the user interaction with the site.
Introduction to Checkbox in HTML
Take a look at the following scenario-
You want to order a Subway sandwich from an online food ordering app. There is an extensive list of vegetables that you can add to your sandwich. You might like several toppings such as Tomato, Onion, and Lettuce. As a user, you pick these three to be added to your sandwich out of the entire list of vegetables.
This is so convenient when you want to pick multiple veggies, right? The feature that made this experience so easy for you is nothing but a checkbox in HTML !
This tutorial will take you through Checkbox in HTML and how to create a checkbox in HTML.
What is Checkbox in HTML?
Checkbox in HTML is one of the attributes of the input tag. They look like square boxes which can be ticked dynamically in the frontend. The HTML checkbox proves to be very useful when we want to take multiple inputs from the user. When users encounter a checkbox question, they pick their desirable options out of the entire list by checking/ticking these text boxes. The data of the ticked checkboxes is then collected when the question or form is submitted and stored in the backend.
Syntax of HTML Checkbox
The basic syntax of the checkbox in HTML looks like this –
If you want to display a pre-checked value in your form using a checkbox in HTML, the syntax would be modified slightly and would look like this-
Usage of Checkbox in HTML
As we saw in the scenario, while ordering a sandwich, we came across checkboxes allowing us to choose multiple options from the given list of available options.
So the usage of checkboxes in HTML is pretty evident. We use them when we want to accept multiple inputs from the user. In the given scenario, it was about veggies being added to a sandwich.
Another example to understand this better could be-
You are filling up a form to join a coding class. They want to know which languages you are familiar with out of the given list of languages that they teach in their class. If the available options are- Java, Python, C, and JavaScript, and you only know Java and Python, you will be ticking the checkboxes next to these two options.
The checked attribute in a checkbox is a boolean attribute. Boolean means nothing but true or false . So if a checkbox is ticked, the data for the same will be considered as a valid input and stored in the backend. The unchecked checkbox will not be considered an input. We can also manipulate the “ checked ” attribute by using JavaScript, which we will look at in the upcoming section.
How to Create a Checkbox in HTML?
We can add labels to checkboxes to make the text trigger the checkboxes. We can even disable checkboxes based on our requirements. We can also use them with form tags and with the form attribute.
Let’s move ahead and see how we can do that. The below example code will be used to understand the different things you can do with the checkbox in HTML throughout the tutorial.
We will refer to it as “ example code ”.
The simplest way to create a checkbox in HTML is by using the input tag. We have set the input type to “ checkbox ” as you can see in the example code. The name attribute lets us give a name to the checkbox, and with the value attribute, we specify the value it holds. These attributes come in handy when we work with JavaScript in the backend. They help us to add checkboxes easily.
Labels for Checkboxes in HTML
By now, you know how to create a simple, checked, and unchecked checkbox in HTML.
Looking at the example code above, you will notice that we have created “ labels ” for every checkbox. You must be wondering why we have done that.
Well, if you simply create a checkbox without a label, the checkbox will only get ticked or triggered by specifically clicking on the checkbox only and not on the text you associate with it. This can result in a bad user experience. So to improve this, we make use of labels. Adding a label to a checkbox in HTML ensures that it triggers the checkbox when a user clicks on the text as well. Thus, that is what the label element does in the example code and using it. You can customize your label for your HTML checkbox.
Form Attributes
The checkbox in HTML can be either used on its own or along with the “ form ” attribute. So now, what is this form attribute all about? Let’s take a look!
We can associate the checkboxes to a form using the form attribute in the input tag. This attribute is mostly used when the checkboxes are not present inside a form tag, but the contents need to be submitted. Let’s go back to the example code and look at the checkboxes having the ids- veg2 and veg3 .
You will notice that we have added the form attribute in the input target and set it equal to “ myForm ”.
After the four checkboxes, we have a “ Submit ” button at the end. So now, after a user makes their choice and clicks on the submit button, the checkboxes with the form attribute will submit the respective contents to the backend.
The action attribute of the form element should contain the URL where you want your submitted values to be stored. That is how we can accept the user data using the form attribute in the input tag even when the checkboxes are not present inside the form tag.
Disabling a Checkbox in HTML
Sometimes, certain vegetables may not be available while you are placing your order for the sandwich. In those cases, the vegetables that are out of stock are greyed out, and the associated checkboxes are disabled. You can easily disable a checkbox in HTML by using the “ disabled ” attribute. This can be added directly to the input tag based on the availability or given criteria.

Refer to the example code and pay attention to the checkbox having >veg4 . The vegetable, in context, is Capsicum . It was not available, and hence we have used the “ disabled ” attribute in the input tag to make it known. In the frontend, it will be greyed out, and the checkbox will be unclickable.
It will look something like this-

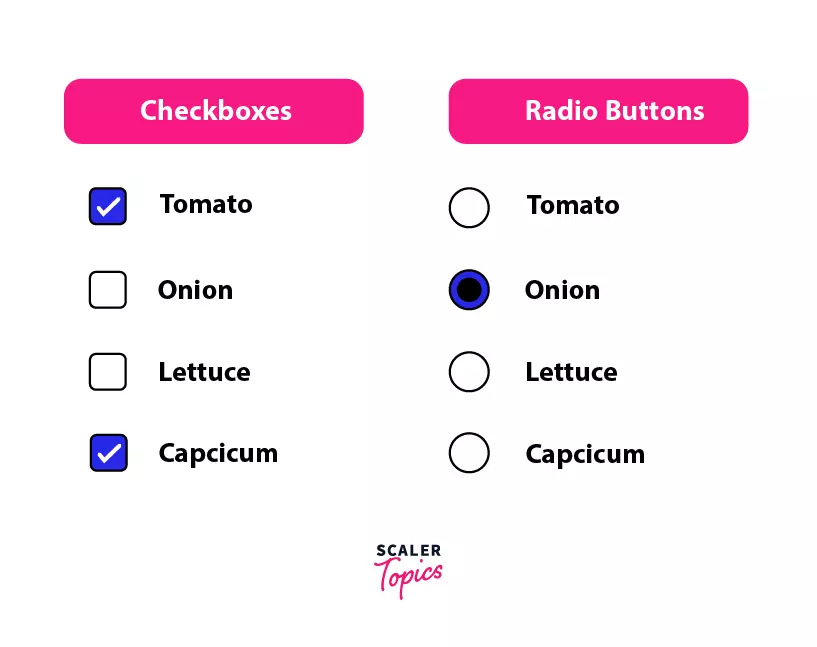
Checkbox vs Radio Buttons in HTML
To use the checkbox in HTML appropriately, it is essential to understand the difference between checkboxes and radio buttons. The significant difference between the two is that a radio button only allows the selection of one option whereas the checkbox in HTML allows the selection of multiple options from the given list of options.
The checkbox element has been designed to allow as many selections as you like. So it is suitable in a scenario where the problem statement requires multiple answers for one question. For example, in our scenario, a person can like eating more than one vegetable. Hence, using the HTML checkbox in this situation is the right choice.
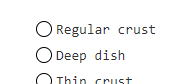
In contrast, the radio button allows only one selection at a time, i.e., when the user tries to select another option, the new option will get selected, and the first one will get deselected. This is suitable for questions that can only have one correct selection. There is no way to select multiple options when working with radio buttons. Try out the following code to see how radio buttons work differently than a checkbox in HTML-
Working Dynamically with an HTML Checkbox
DOM or Document Object Model comes in handy when we want to do manipulations using JavaScript. While working with a checkbox in HTML, we can use DOM to make sure whether a checkbox is checked or not by implementing some logic. We can also add some conditions which would only allow two checkboxes to be checked. Let’s go back to our example code and look at checkboxes with the ids- veg1, veg2 , and veg3 .
- You might notice an attribute “ onclick ” in the input tag, which we haven’t discussed yet.
- The “ onclick ” is an event attribute. The event that we are working on within the case of checkboxes is the mouse event.
- So basically, what this attribute will do is that when we click on the checkboxes, it will call the function ValidateSelection() .
- ValidateSelection() is a JavaScript method.
- The code was written after the tag contains the logic to allow only two checkboxes to be selected.
- The code also ensures a relevant modal message is displayed when the user tries to check more than two checkboxes
The Output will look like this –
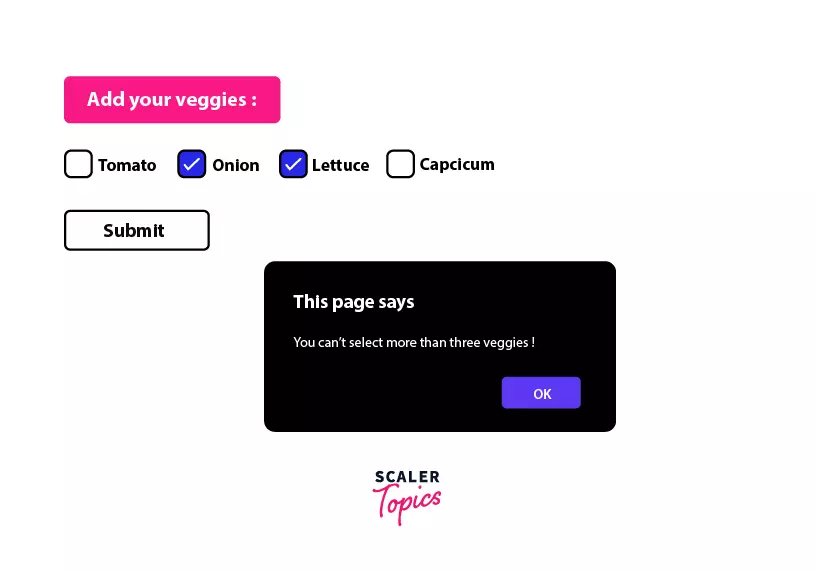
So this is how you can use JavaScript to dynamically make the HTML checkbox work.
Browser Support
A checkbox in HTML is supported by the following browsers-
- Google Chrome
- Mozilla Firefox
- Opera
- Safari
- Windows Explorer
Conclusion
- This is one of the most useful HTML elements and has retained the most of its original capabilities, but as with anything on web, we have grown to make checkboxes use much more.
- Checkboxes are helpful when a user can choose multiple options from a limited number of choices.
- The attributes used for HTML checkboxes are type, name, value, and checked Checkboxes in HTML are an excellent way to give your users options while choosing from a group of options. So wait no more and try them out yourself!