- File uploads with HTML
- Hiding the button
- Further customization
- Getting information on files
- Limiting accepted file types
- The Uploadcare uploader
- Don’t miss the next article
- Wake up, Neo.
- Next up
- Resize and rotate images using JavaScript
- Developing an HTML5 file uploader with a PHP back end
- Creating responsive images with image-set
- Get off the ground with Next.js
- 20 Best CSS & Javascript File Upload Examples
- Drag & Drop
- File Upload & Image Preview
- Upload CSS Animation Ui
- File Upload Plugin
- File Upload With Style And Pure CSS
- Drag And Drop Upload Form Stylized (Html & CSS Only)
- Image Upload With Preview
- Nice Upload Form)
- Custom Animated Input File
- Bootstrapped Styled File Browse Button
- Pure CSS File Upload Field
- File Upload Dialog
- Image Uploader
- Dropzone Upload
- File Upload – Day 031
- A Simple Upload Form
- Box Content Uploader
- Bootstrap Multi Step Form With Progress Bar
- Attach Or Upload Files Modal
- Mock-up: Photos Using React, Fluxify And Bootstrap
- Related Posts :
- Drag and Drop File Upload Using HTML, CSS and JavaScript
- CSS Code For Drag and Drop File Upload
- JavaScript Code For Drag and Drop File Upload
- Final Output Of Drag and Drop File Upload Using JavaScript:
- Codepen Preview:
File uploads with HTML
It is quite common for websites or apps to allow a user to upload files as a feature or part of a feature. For example, HTML file uploads could be used to allow users to upload avatars, or allow an internal team to upload photos of products to a website or app. In this tutorial we will briefly look at file uploads, and how to set this up in your coding. This tutorial assumes some knowledge and understanding of coding and web development. This post is meant as a brief overview. Let’s get into it!
Luckily for us, HTML provides a fairly simple solution which enables us to upload files, the element! Taking a look at this, a limited example of how we’d code an upload file button in HTML could look like this:
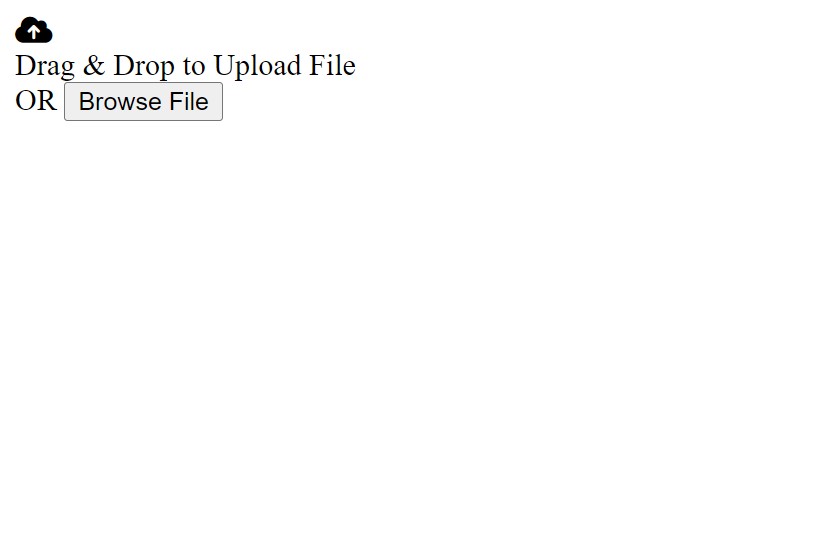
label for="photo">Choose a photo!label> input type="file" id="photo" name="photo" accept="image/*">You should see the following if you run an HTML page on a localhost server:

Clicking on the Choose File button should bring up your Operating System’s file selection option.
If we wanted to customize the text within the button to something other than Choose File we could do something like:
span> File Upload input type="file" id="photo" name="photo" accept="image/png, image/jpeg"> span>That gets us the button and the ability to choose the file. How would we direct the file to our server once it’s selected? To direct the file, we would make the button part of a form which would then activate a Script (could be JavaScript, PHP, etc). The logic in this Script would then tell the server what to do with the file once it’s uploaded. We won’t go over those kinds of Scripts in this post. However, the code to link to the Script would look something like this:
form action="yourScript"> input type="file" id="myFile" name="filename"> input type="submit"> form>Hiding the button
In some instances, you may want to hide a file upload button. The way to do this typically relies on CSS.
This is one way to do it, we could attach the CSS to our input and do the following:
input opacity: 0; z-index: -1; position: absolute; >- opacity: 0 — makes the input transparent.
- z-index: -1 — makes sure the element stays underneath anything else on the page.
- position: absolute — make sure that the element doesn’t interfere with sibling elements.
We would set this as the default CSS Then we would write a short Script that would change the CSS once someone selected a file, so that the user could see a Submit button, for instance.
There are a couple of other potential CSS options:
These options should be avoided, as they do not work well with accessibility readers. Opacity: 0 is the preferred method.
Further customization
There is a very good chance that we would want to change the look of our file upload buttons from the rather ugly grey default buttons to something a bit more pleasing to the eye.
As one would guess, button customization involves CSS.
We know that we can put the input in the tags to customize the text that appears on the button. Another method is the tags.
input type="file" name="file" id="file" class="myclass" /> label for="file">Choose a filelabel>.myclass + label font-size: 2em; font-weight: 700; color: white; background-color: green; border-radius: 10px; display: inline-block; > .myclass:focus + label, .myclass + label:hover background-color: purple; >This will get us a green button that will turn purple when we hover the mouse cursor over it, it should look like this:

However, we are now presented with a problem! How do we get rid of the default input option on the left (since we would only want the one custom button)? Remember how we learned how to hide buttons earlier? We can put that into practice now.
Add the following CSS to the previous CSS code:
.myclass width: 0.1px; height: 0.1px; opacity: 0; overflow: hidden; position: absolute; z-index: -1; > 
Getting information on files
There may be instances in which we want to gather information about files which the user is uploading to our server. Every file includes file metadata, which can be read once the user uploads said file(s). File metadata can include things such as the file’s MIME type (what kind of media it is), file name, size, date the file was last modified. let’s take a quick look at how we could pull up file metadata — this will involve some JavaScript.
input type="file" multiple onchange="showType(this)">function showType(fileInput) const files = fileInput.files; for (const i = 0; i files.length; i++) const name = files[i].name; const type = files[i].type; alert('Filename: ' + name + ' , Type: ' + type); > >If we run this code, we will see a Choose File button. When we choose a file from our device, a browser popup box will appear. The browser popup will inform us of the filename and file type. Of course there is logic that we can write to change the type of file metadata that you gather, and what happens with it, depending on our needs.
Limiting accepted file types
We, of course, can think of many instances where one would want to limit which kinds of files the user can choose to upload to your server (security considerations among the many reasons to consider).
Limiting accepted file types is quite easy — to do this we make use of the accept attribute within the element. An example of how we would do this is:
input type="file" id="photo" name="photo" accept=".jpg,.jpeg,.png">We can specify which specific file formats you want to accept, like we did above, or we can simply do:
There are ways you can limit formats and file types for other types of files as well, but we won’t cover everything here.
The Uploadcare uploader
Uploadcare features a handy File Uploader feature. The Uploadcare File Uploader is responsive, mobile-ready, and easy to implement. For full details on our File Uploader please visit https://uploadcare.com/docs/uploads/file-uploader/
Once you get your Uploadcare keys, the quickest way to implement the File Uploader is via CDN like so:
script> UPLOADCARE_PUBLIC_KEY = 'demopublickey'; script> script src="https://ucarecdn.com/libs/widget/3.x/uploadcare.full.min.js" charset="utf-8"> script>And there you have it! That was a brief overview on the basics of uploading files to a server using HTML. Now get out there and try implementing what we’ve learned in a project!
Don’t miss the next article
Wake up, Neo.
Next up
Resize and rotate images using JavaScript
Learn to resize, rotate, zoom in and out images using JavaScript. Sample code included! Just copy, paste and tweak it!
Developing an HTML5 file uploader with a PHP back end
Read this hands-on guide on how to create an HTML5 file uploader and find out if you should use a ready-made one
Creating responsive images with image-set
Using image-set for resolution switching, art direction and speeding up loading of web pages
Get off the ground with Next.js
Everything you need to know to write your first Next.js app: from learning Next.js to different deployment options!
20 Best CSS & Javascript File Upload Examples
File upload is a common feature in mobile and web development that almost every app needs. File upload capability enables your users to place their files on your site. These files might be images, videos, PDFs, or files of any other type. Collecting files directly through a form on your site is great for acquiring documents such as resume, portfolios or images and videos such as screenshots and screen-captures through customer support forms. So in this post I’ve gathered 20 best CSS & Javascript File Upload Examples for inspiration to improve file upload UI and UX design.
Drag & Drop

File Upload & Image Preview

Upload CSS Animation Ui

File Upload Plugin

File Upload With Style And Pure CSS

Drag And Drop Upload Form Stylized (Html & CSS Only)

Image Upload With Preview

Nice Upload Form)

Custom Animated Input File

Bootstrapped Styled File Browse Button

Pure CSS File Upload Field

File Upload Dialog

Image Uploader

Dropzone Upload

File Upload – Day 031

A Simple Upload Form

Box Content Uploader

Bootstrap Multi Step Form With Progress Bar

Attach Or Upload Files Modal

Mock-up: Photos Using React, Fluxify And Bootstrap

Related Posts :
Drag and Drop File Upload Using HTML, CSS and JavaScript
Hey friends, today we will see how to make this great drag and drop File Upload Using Html, Css, and JavaScript. We create this drag and drop using JavaScript and Html and Css uses for creating project structure. The demo is available at the bottom of the page.

Now let’s see the general use of this project. Sometimes you may want to collect file inputs from your website user. So this project is a nice page for users to upload files and they can also drag and drop files on this page.

Do you want to learn HTML to JavaScript? 🔥
If yes, then here is our Master Frontend: Zero to Hero eBook! 📚 In this eBook, you’ll learn complete HTML, CSS, Bootstrap, and JavaScript from beginner to advance level. 💪 It includes 450 Projects with source code.
Now let’s use CSS to style it.
CSS Code For Drag and Drop File Upload
Paste the CSS Codes below:
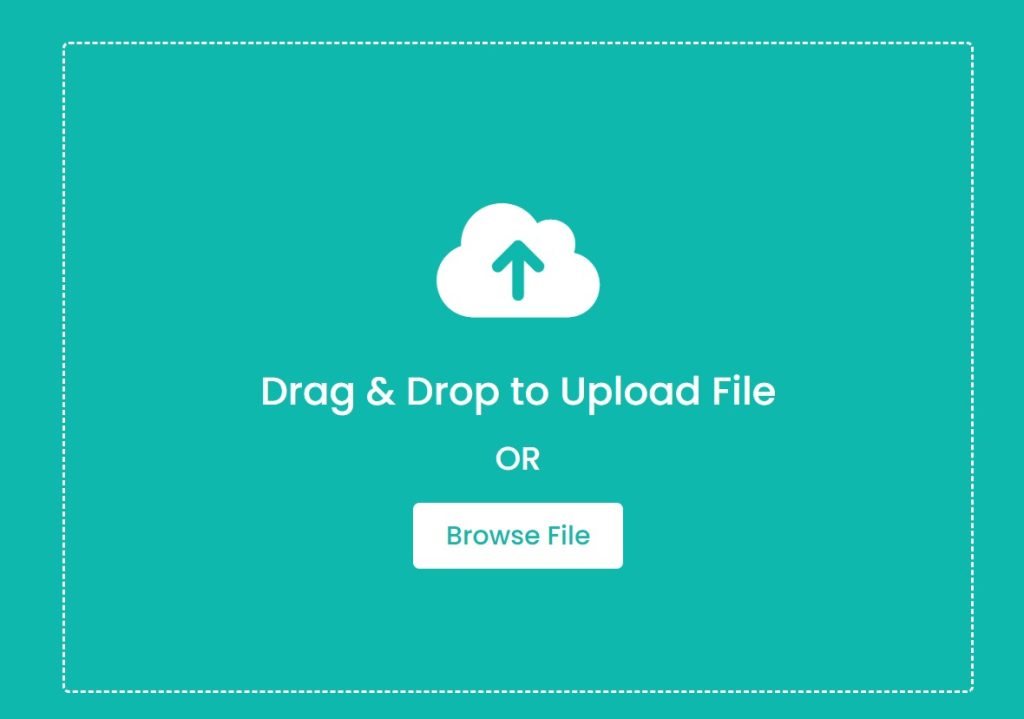
@import url(‘https://fonts.googleapis.com/css2?family=Poppins:[email protected];300;400;500;600;700&display=swap’); * < margin: 0; padding: 0; box-sizing: border-box; font-family: "Poppins", sans-serif; >body < display: flex; align-items: center; justify-content: center; min-height: 100vh; background: #0fb8ac; >.drag-area < border: 2px dashed #fff; height: 500px; width: 700px; border-radius: 5px; display: flex; align-items: center; justify-content: center; flex-direction: column; >.drag-area.active < border: 2px solid #fff; >.drag-area .icon < font-size: 100px; color: #fff; >.drag-area header < font-size: 30px; font-weight: 500; color: #fff; >.drag-area span < font-size: 25px; font-weight: 500; color: #fff; margin: 10px 0 15px 0; >.drag-area button < padding: 10px 25px; font-size: 20px; font-weight: 500; border: none; outline: none; background: #fff; color: #0fb8ac; border-radius: 5px; cursor: pointer; >.drag-area img
Step1:We will first add a few new Google Fonts to our drag-and-drop share file. Then, using the universal selector, we will set the padding and margin to “zero,” the box-sizing property will be used to set the box size to “border-box,” and the font-family property will be used to set the font family to “Poppins.” We will then add various typeface styles to our upload file.
The display will now be changed to “flex” using the body tag selector, and the items will be center-aligned using the align item property. We’ll change the background to “sea-green” using the background property.

Step 2: Now we will establish a border of 2px dashed with white color inside the drag area using the class selector (.drag-area). The display property is used to change the display to “flex” and the dimensions are 500 and 700 pixels, respectively.
In a similar manner, we’ll style the icon and set the font size and weight to 30 px and 500 px, respectively, and the colour to white in other sections of the piece. Similar styling will be added to both the browse button and the button inside our drag region.
Now we add JavaScript for functionality
JavaScript Code For Drag and Drop File Upload
//selecting all required elements const dropArea = document.querySelector(".drag-area"), dragText = dropArea.querySelector("header"), button = dropArea.querySelector("button"), input = dropArea.querySelector("input"); let file; //this is a global variable and we'll use it inside multiple functions button.onclick = ()=> < input.click(); //if user click on the button then the input also clicked >input.addEventListener("change", function()< //getting user select file and [0] this means if user select multiple files then we'll select only the first one file = this.files[0]; dropArea.classList.add("active"); showFile(); //calling function >); //If user Drag File Over DropArea dropArea.addEventListener("dragover", (event)=>< event.preventDefault(); //preventing from default behaviour dropArea.classList.add("active"); dragText.textContent = "Release to Upload File"; >); //If user leave dragged File from DropArea dropArea.addEventListener("dragleave", ()=>< dropArea.classList.remove("active"); dragText.textContent = "Drag & Drop to Upload File"; >); //If user drop File on DropArea dropArea.addEventListener("drop", (event)=>< event.preventDefault(); //preventing from default behaviour //getting user select file and [0] this means if user select multiple files then we'll select only the first one file = event.dataTransfer.files[0]; showFile(); //calling function >); function showFile()< let fileType = file.type; //getting selected file type let validExtensions = ["image/jpeg", "image/jpg", "image/png"]; //adding some valid image extensions in array if(validExtensions.includes(fileType))< //if user selected file is an image file let fileReader = new FileReader(); //creating new FileReader object fileReader.onload = ()=>< let fileURL = fileReader.result; //passing user file source in fileURL variable let imgTag = ` `; //creating an img tag and passing user selected file source inside src attribute dropArea.innerHTML = imgTag; //adding that created img tag inside dropArea container > fileReader.readAsDataURL(file); >else < alert("This is not an Image File!"); dropArea.classList.remove("active"); dragText.textContent = "Drag & Drop to Upload File"; >>
 The first thing we’ll do is make a constant variable using the const keyword, and then we’ll store the values of the HTML elements we’ll be choosing from the document inside of it. All HTML elements will be chosen using the query-selector technique.
As soon as a user clicks the button to input data, we will generate a onclick function. Once clicked, the folders will be selected. In order to make a drag area, we will add an active class to the drag and drop file. Automatic file uploading occurs as soon as the user drags a file over the desired region.
Final Output Of Drag and Drop File Upload

And that’s all for this project!
Now we have completed our Drag and Drop File Upload. Here is our updated output with JavaScript. I hope you like the Drag and Drop File Upload. you can see the output video and project screenshots. See our other blogs and gain knowledge in front-end development.
In this post, we learn how to create a Drag and Drop File Upload Using HTML, CSS, and JavaScript. If we made a mistake or any confusion, please drop a comment to reply or help you learn easily.