- Updating php ini file
- Table of Contents
- How to Edit Your php.ini File
- Overview
- Editing in EasyApache 3
- Editing in EasyApache 4
- Directives
- Additional Documentation
- Updating php ini file
- Read and Update Config file (INI File) in PHP
- $section
- $section
- Share this:
- Like this:
- 5 thoughts on “ Read and Update Config file (INI File) in PHP ”
- How to Change PHP Settings in your Hosting Account
- How to view your current PHP settings
- Server API: Apache
- Server API: CGI
- Increasing PHP memory in the php.ini
- Modifying the PHP.INI file
- Common Problems when Updating your php.ini file
- I don’t have a php.ini file!
- I made changes to the php.ini file, however I do not see the changes!
- Considering a VPS or Dedicated Server?
- Что нужно сделать, чтобы php.ini на сервере обновилось и вступило в силу?
Updating php ini file
Did you find this document helpful?
Would you like to provide more feedback on this document?
Table of Contents
How to Edit Your php.ini File
Last modified: July 19, 2022
Overview
You can update the settings of your server’s php.ini file to help secure your server. The method to use depends on your version of EasyApache.
- You must also use other security measures with these settings. When you use these alone, your server’s security is at risk. Malicious users can bypass most hardening measures.
- Apache reads all files with the .ini file extension. If you have a custom .ini file, you must update it manually.
Editing in EasyApache 3
On systems that run EasyApache 3, the /usr/local/lib/ directory contains your server’s php.ini file.
Editing in EasyApache 4
We recommend only editing these files with WHM’s MultiPHP INI Editor interface (WHM » Home » Software » MultiPHP INI Editor). This ensures that an operable version of PHP exists on the system.
On systems that run EasyApache 4, each version of PHP uses a separate php.ini file. You must make changes separately to each file. Each file exists in the /opt/cpanel/ea-php72/root/etc/php.ini file, where 72 is the PHP version number.
Directives
| Directive | Description | Recommended value |
|---|---|---|
| safe_mode | This directive helps solve many problems that occur with using PHP in a shared hosting environment. It compares the PHP script’s UID with the UIDs of files and directories that it tries to access. If the UIDs don’t match, the system doesn’t allow the script access. |
- This setting only affects servers that use the mod_php Apache module.
- If your system runs EasyApache 4, change this directive in the Editor Mode section of WHM’s MultiPHP INI Editor interface (WHM >> Home >> Software >> MultiPHP INI Editor).
Do not rely on this security measure alone. It is trivial to send false referrer information.
If your system runs EasyApache 4, change this directive in the Editor Mode section of WHM’s MultiPHP INI Editor interface (WHM » Home » Software » MultiPHP INI Editor).
Additional Documentation
Updating php ini file
PHP, Drupal, jQuery Tutorials Demo & Downloads!
Read and Update Config file (INI File) in PHP
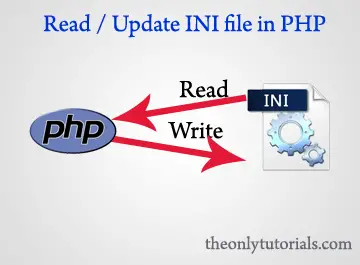
To parse / read INI file in PHP is very simple, there is a default function called parse_ini_file() which will read and return all the values as an array.
To update or edit the INI file through PHP is little difficult, you cannot simply update the exact value in the INI, instead you have to re-write the entire INI file.
First, let’s look at an example INI file:
[user_details] username=agurchand email=test@test.com website=www.tutorialsmade.com [other_websites] web1=agurchand.com web2=theonlytutorials.com
The below script will read the INI file and print it on the page.
$values)< echo "$section
"; foreach($values as $key=>$value)< echo $key."=".$value."
"; > echo "
"; > ?>
Let’s jump to the script which will read as well write the INI file.
(readupdate.php)
//this is the function going to update your ini file function update_ini_file($data, $filepath) < $content = ""; //parse the ini file to get the sections //parse the ini file using default parse_ini_file() PHP function $parsed_ini = parse_ini_file($filepath, true); foreach($data as $section=>$values)< //append the section $content .= "[".$section."]n"; //append the values foreach($values as $key=>$value) < $content .= $key."=".$value."n"; >> //write it into file if (!$handle = fopen($filepath, 'w')) < return false; >$success = fwrite($handle, $content); fclose($handle); return $success; > ?>Open Config File
Read the comments in the above file to learn how the script works.
See the DEMO or Download the script to use it in your project.


Share this:
Like this:
5 thoughts on “ Read and Update Config file (INI File) in PHP ”
Hi Agurchand,
I am trying to use your ini solution on a raspberry pi but unfortunately I am having problems and believe it might be file permissions. I am using apache as the web server. Rather than copy the files into pi, I created new files using sudo nano and copied and pasted the code.
checked with ls -l
-rwxrwxrwx 1 www-data www-data 1726 Apr 5 21:37 parse_ini.php
-rwxrwxrwx 1 www-data www-data 1717 Apr 5 21:43 gmconfig.ini My ini file has 5 sections and each key/value is as follows key=value (no spaces)
Also I have no empty lines. Not sure where my problem is
Hi Agurchand,
I found where my problem is:
I have a number of key / values as follows:
vmon1=https://192.168.20.21/goform/motiondetect?cmd=set&md.active.enable=1′, auth=(‘admin’,’admin’)
I get an error because of the = in the middle of my value.
I have to wrap the value in ” ” and then your php script works when reading but when I click on update ini, the quotes I had in my config.ini are removed.
Hey your tuoairtls are great..Are you going to do any other tuoairtls besides forums? I would like 1 where users can chat like a chat room.I tried going through the tuoairtls and always something comes up while I am doing it, can you post the full source for all the files please?
Great job! It worked as intented but you have a little type mistake in (readupdate.php): Line 24: change “]n”; for “]\n”;
Line 27: change “n”; for “\n”; You forgot to put those ‘\’ in order to make the line break (‘\n’). Very good job really, it helped me A LOT.
How to Change PHP Settings in your Hosting Account
PHP is a scripting language used primarily on the web and is available on our shared, VPS, and Dedicated servers. PHP Hosting is highly customizable and has many settings that our users can modify themselves. This article will advise you how to change PHP settings in your php.ini file.
How to view your current PHP settings
To view your current PHP settings, create a PHPinfo page. If you’re not sure how to do this, please see How can I view my PHP settings using a PHPinfo page ?
The steps in updating the values listed in your PHP info page depend on how PHP is setup on your particular server. In general, PHP runs on our servers as either:
To find out how PHP is configured on your server, create a PHP info page (via the above instructions) and look at the “Server API” value. If the “Server API” is “CGI“, then PHP is running as “CGI module”. If “Apache” is listed, then your server is running PHP as an “Apache module”.
Server API: Apache
If your server runs PHP as an “Apache module“, you can change your PHP settings via a .htaccess file. A .htaccess file is a configuration file you can create and use to change many server settings, including PHP settings. The basic syntax to use in your .htaccess file for updating PHP settings is:
php_value Directive value
For example, if you wanted to change the max_input_time from 60 seconds to 120 seconds, add the following to your .htaccess file:
php_value max_input_time 120
After making this change, refresh your PHP info page, and you should see the changes. If you receive a 500 error, please double check the syntax you used as you may have made a misspelling.
If you don’t have a .htaccess file, you can simply create a new file named .htaccess. As the .htaccess file begins with a dot (.), it is considered a hidden file. If you are using the cPanel’s File Manager, please be sure to select the option to Show Hidden Files (dotfiles), otherwise you will not be able to see your .htaccess file. If you do not see this prompt when opening your File Manager, click the, “reset all interface settings” link at the bottom of your cPanel to reset your File Manager settings.
Server API: CGI
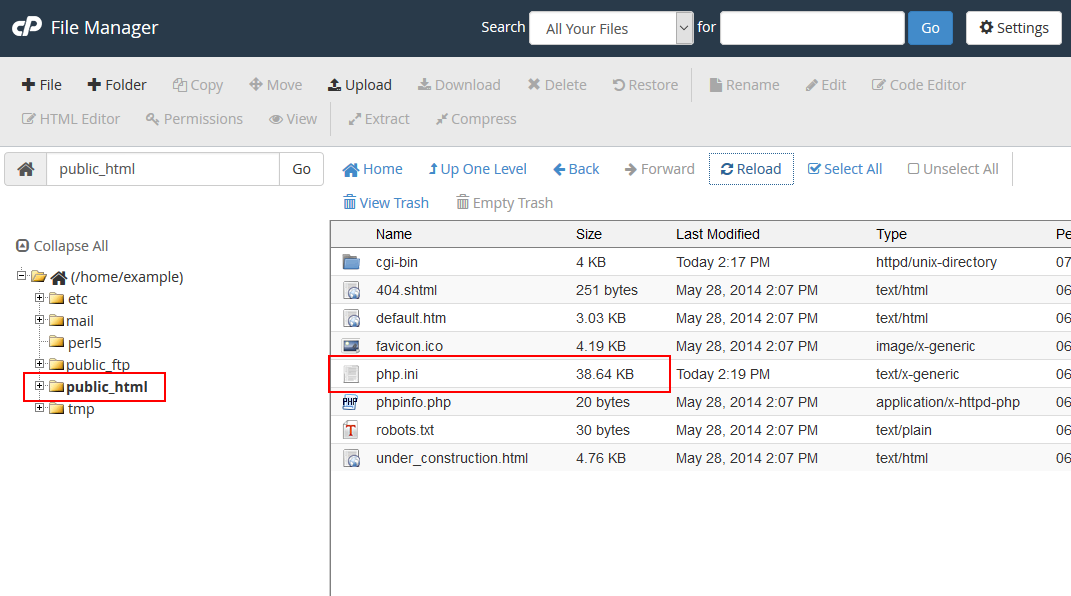
View of the php.ini in the File Manager
If your server runs PHP as a CGI module, you can change your local php.ini file in order to make modifications to your PHP setup. php.ini is a PHP configuration file with a list of PHP directives and their values. In the above example, we modified the max_input_time value. If you open your php.ini file and search for max_input_time, you should see something similar to:
;;;;;;;;;;;;;;;;;;; ; Resource Limits ; ;;;;;;;;;;;;;;;;;;; max_execution_time = 30 max_input_time = 60 memory_limit = 256M upload_max_filesize = 10M
To change the max_input_time from 30 seconds to 120, for example, simply change 30 to 120 and save the file. Refresh your PHP info page, and you should see the changes.
Increasing PHP memory in the php.ini
A common issue when using free open source software or other PHP intensive programs is the “exhausted memory” error. If you have a PHP memory error on your site, you can increase the memory limit PHP uses for the scripts. To learn how to change the memory limit in your php.ini, please see the following link.
Modifying the PHP.INI file
Here is a quick step-by-step tutorial on editing the PHP.INI file.
Find the File Manager in File section of the cPanel. Review our tutorial on using the Code Editor within the File manager if you’re looking on information how to use it.
Navigate to the directory where you will either save or edit the PHP.INI file and then select the file and use the Code Editor. To open the file, you can click on it to select the file and then click on the Code Editor icon in the menu bar of the File Manager. You can also right-click with your mouse and select Code Editor from the menu that appears.
Common Problems when Updating your php.ini file
I don’t have a php.ini file!
Only users running on a server with PHP loaded as a “CGI module” will have a php.ini file. The php.ini file by default will be located at public_html/php.ini. If you do not see a file named php.ini in your public_html, please contact our Support Department and request that we create one for you.
I made changes to the php.ini file, however I do not see the changes!
The php.ini file is not recursive. Updating your php.ini values in public_html/php.ini will not affect PHP files in subfolders of your public_html, such as public_html/staff. To correct this problem, you can make your php.ini file recursive so that it affects all sub folders. More help on this can be found in How can I make my php.ini file recursive?
Considering a VPS or Dedicated Server?
With a VPS or dedicated server, a site owner can truly customize the server to their exact specification. If you are on a Shared Hosting account, and are thinking about upgrading from to a VPS or dedicated server, click here to read more about a VPS vs dedicated server.
Что нужно сделать, чтобы php.ini на сервере обновилось и вступило в силу?
Доброго времени! На удаленном сервере установил VestaCP, зашел в phpmyadmin через него. Сервер на Debian 9. Когда пытаюсь загрузить свой дамп базы, который больше чем 2,048Кб получаю ошибку. /etc/php/7.0/php.ini изменил, post_max_size и upload_max_filesize выставил на 200Мб. Какие действия мне нужно сделать дальше, чтобы изменения вступили в силу?
Простой 4 комментария

Очень зависит от:
1. В каком режиме запускается `PHP`: модуль сервера (Апач, . ). `FPM`, CGI
2. Какой `php.ini` подхватывается по-умолчанию — может зависеть от кучи настроек, которые могут храниться в переменных окружения
3. Какой уровень доступа для администрирования: имеются права на перезапуск демона или это виртуальный хостинг, где не позволят перестартовать демона (конечно, если он используется).
т.е. в Вашем вопросе недостаточно данных для постановки диагноза

Константин , в этом и дело, что я сам не знаю) VestaCP установил дефолтный. Сижу через ssh в VDS от имени админа, могу подключиться по FTP.
Adik Izat, посмотрите в настройках Весты, там должно быть по поводу сервера и способа подключения.
Ищите в Весте перезапуск сервера или FPM.
Также, смотрите в панели Веста настройки про файл `php.ini` и вносите изменения именно в тот, который нужно 🙂
Все остальные танцы — из командной строки, но на ту же тему.
Самый жёсткий вариант — «хитрый ход ленивого админа» — перезапуск системы, должен помочь 😀
Константин , проблемы то изначально и не было оказывается) Я менял файл php.ini по ftp, бросал обратно на сервак через FileZilla и пробовал service apache2 restart. Из-за того, что изменения не вступили в силу думал что делаю что-то не так. Потом зайдя в зиллу внизу увидел ошибку перемещения файла на сервер. То есть я мог скачать файл с сервера, но обратно закачать не смог. Поменял через nano и перезапустил апач, все заработало.