- Установка JAVA
- Установка Java plugin для браузера
- 9 Manual Installation and Registration of Java Plugin for Linux
- Plugin Installation
- Notes
- How To Enable Java In Web Browser On Ubuntu Linux
- Google Chrome
- Mozilla Firefox
- How to Enable Java plugin support on Firefox on Linux
- Method 1 : Enable Java plugin Support on Firefox through Oracle Java
- 1) Install Oracle Java
- 2) Locate Firefox
- 3) Enable Java applet on Firefox
- 4) Create symbolic link to enable Java in Firefox
- Method 2 : Enable Java plugin Support on Firefox through Oracle Java
- 1) Install OpenJDK
Установка JAVA
Первое, что нужно сделать — это с помощью браузера зайти на сайт java.com и скачать подходящую, 32-х битную или 64-битную, версию Oracle Java для Linux. Скачиваем архив в формате tar.gz. На выходе должно получиться нечто похожее на jre-8u45-linux-x64.tar.gz. После окончания загрузки откройте эмулятор терминала и авторизуйтесь в качестве суперпользователя.
Создайте пустую папку в каталоге /opt/java/$, подставляя в $ версию Oracle Java, которую вы скачали:
Перейдите в свеже созданный каталог:
Распакуйте архив с Oracle Java из каталога, в который ваш браузер его поместил. Скорее всего он располагается в папке Downloads в вашем домашнем каталоге:
И наконец удалите архив — он нам больше не нужен
Однако, для быстрого доступа к исполняемым файлам Oracle Java, стоит сделать символические ссылки (ярлыки) на них в каталоге /usr/bin:
# for i in \
$(find /opt/java/$ -type f -executable)
do ln -svi $ /usr/bin
done
Проверить, все ли сделано правильно можно введя команду
Эта команда позволяет узнать версию java. Если выводом команды будет та версия Oracle Java, которую вы ожидали увидеть, то все прошло хорошо. Аналогично производится и обновление Oracle Java на Linux. Вы просто скачиваете новый архив, распаковываете, заменяете символические ссылки. Удалять старый каталог или нет — решать вам.
Несколько слов о JAVA_HOME. Некоторые приложения, а точнее их скрипты запуска, вместо того, что адрессовать Java, используя переменную окружения $, используют переменную окружения $. Соответственно во избежания проблем, лучше эту переменную установить. Сделать это не сложно — нужно поместить в каталог /etc/profile.d/ файл с названием java.sh (имя значения не имеет, а вот расширение должно быть обязательно «.sh») следующего содержания, заменяя $ на ту версию Oracle Java, которую вы устанавливаете:
П.с. если вы ищите образ Oracle Java для запуска в docker, загядывайте на наш Docker Hub. Там вы найдете готовы образы и Dockerfile’ы
Установка Java plugin для браузера
Если вы в процессе работы наткнулись на сообщения вида «для вашего браузера не установлен java plugin» или «установите java plugin», то этот раздел для вас. Данное сообщение говорит нам о том, что браузер не может самостоятельно обработать запрашиваемый контент и нуждается в расширении — Java плагине. Но, как вы наверное знаете, поддержка NPAPI плагинов была удалена из Google Chrome, начиная с версии 35, и из Mozilla Firefox, начиная с версии 52. А java plugin как раз использует интерфейс NPAPI.
Для решения этой проблемы вы либо скачиваете и отдельно устанавливаете старую версию Firefox или Chrome и устанавливаете java plugin туда, либо можете воспользоваться одним из браузеров, поддерживающих NPAPI. Среди них PaleMoon — небезызвестный форк Firefox, и Midori — отличный легковесный браузер на движке WebKit.
Приведенная ниже инструкция будет работать как для Pale Moon любых версий, так и для Midori и Firefox версии 52 и ниже. Установка Java plugin’а заключается в простом создании символической ссылки (ярлыка) на плагин из каталога, в который вы установили Oracle Java.
# ln -svi \
/opt/java/$/lib/amd64/libnpjp2.so \
/usr/lib/mozilla/plugins/
Иногда вам придется произвести еще одно маленькое действие, если ваш дистрибьютер не позаботился о правильном задании переменных окружения. После установки браузера — перелогинтесь (выйтиде/зайдите в систему) и проверьте в терминале, установлена ли переменная окружения MOZ_PLUGIN_PATH
$ env | grep MOZ_PLUGIN_PATH
Результатом выполнения этой команды должно быть что-то вроде «/usr/lib/mozilla/plugins» — то место, где мы создавали символическую ссылку. Если вывод пустой, то добавьте в каталог «/etc/profile.d/» файл с названием, например «mozilla-common.sh» точно так, как мы это делали на этапе установки переменной окружения JAVA_HOME. Только, соответственно вместо JAVA_HOME мы устанавливаем переменную MOZ_PLUGIN_PATH:
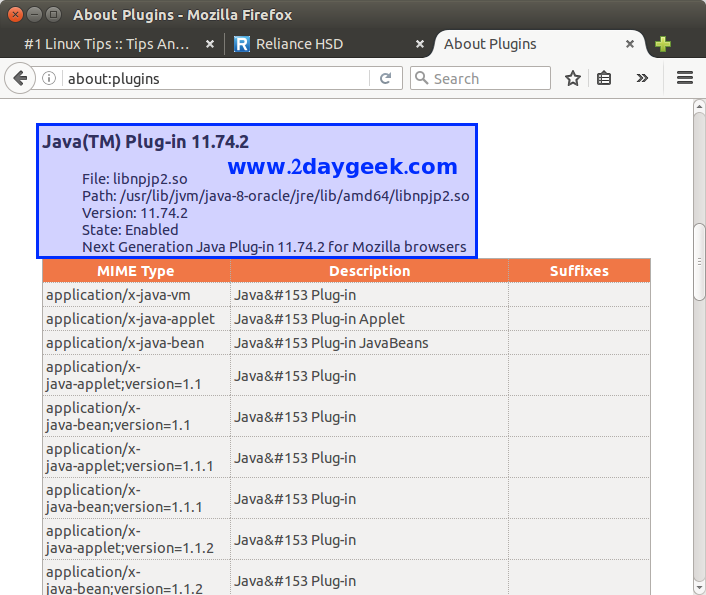
После перелогинтесь. Запустите Pale Moon, Midori или Firefox, Откройте специальную страницу-тестер. Она поможет проверить корректноть установки java plugin и в случае успеха отобразит текущую версию Oracle Java.
9 Manual Installation and Registration of Java Plugin for Linux
Many browser vendors have removed NPAPI based plugin support. Therefore, the Java Plugin will not register with any modern browsers, such as Firefox ( Firefox 52+) and Chrome (Chrome 42+).
Manually linking the Java plugin libraries to the Mozilla plugins directory may cause the Firefox browser to crash on Linux during startup, due to incompatibilities with ‘glibc’ versions in JDK 8u191 and later releases. The crash might also occur if the link was manually created for an earlier JRE and a user updates to JDK 8u191 or later releases. For more information, see the Known Issues section of the JDK 8u191 release notes .
This page describes how to install and register the Java plugin.
This page has these topics:
See «JDK 8 and JRE 8 Installation Start Here» for general information about installing JDK 8 and JRE 8.
Plugin Installation
When you install the Java platform, the Java plugin file is included as part of that install. If you want to use Java within Firefox, you need to manually create a symbolic link from the plugin file in the release to one of the locations that Firefox expects. To make the plugin available to all users, create the link inside of the Firefox application’s directory, in the plugins subdirectory. Alternatively, you can create the symbolic link in your home directory, in ~/.mozilla/plugins . In the remainder of this document, the text, «Firefox plugins directory«, implies either of these locations.
This release provides the Next-Generation Java plugin. If you have been using the classic plugin, see «Notes» for further information.
The location of the plugin file for Linux varies according to the processor architecture of the underlying platform, as shown in the following table.
| Processor Architecture | Location of File |
|---|---|
| 32-bit | j re1.8.0 version /lib/i386/libnpjp2.so |
| 64-bit | jre1.8.0_ version /lib/amd64/libnpjp2.so |
If you are using a 32-bit Firefox, you should use the 32-bit Java Plugin (from the lib/i386 directory). To determine which version of Firefox you are running, launch the application, and select the menu item Help > About Mozilla Firefox. At the bottom of the window is a version string line that contains either «Linux i686» (32-bit) or «Linux x86_64» (64-bit).
To install the Java Plugin follow these steps:
- Exit Firefox.
- Uninstall any previous installations of Java Plugin. Only one Java Plugin can be used at a time. When you want to use a different plugin, or version of a plugin, remove the symbolic links to any other versions and create a fresh symbolic link to the new one. Remove the symbolic links (or move them to another directory) to javaplugin-oji.so and libnpjp2.so from the Firefox plugins directory.
- Create a symbolic link to the Java Plugin in the Firefox plugins directory. For a 32-bit plugin:
$ cd Firefox/plugins $ ln -s JRE/lib/i386/libnpjp2.so .
$ cd Firefox/plugins $ ln -s JRE/lib/amd64/libnpjp2.so .
Notes
The classic plugin file was located here:
JRE/plugin/i386/javaplugin-oji.so
This file should no longer be used and all symbolic links to it should be removed.
How To Enable Java In Web Browser On Ubuntu Linux
Enable Java Plugin on Firefox. Enable and configure Java Plugin on Firefox and Chrome web browser. Follow these instructions to enable Java in your web browser on Ubuntu Linux.
Google Chrome
- Become the root user by running the su command and then enter the super-user password.
Type: sudo -s - Create a directory called plugins if you do not have it.
Type: mkdir -p /opt/google/chrome/plugins - Go to Google chrome plugins directory before you make the symbolic link.
Type: cd /opt/google/chrome/plugins - Create a symbolic link.
Type: ln -s /usr/local/java/jre1.7.0/lib/amd64/libnpjp2.so - Restart your browser and test Java
Mozilla Firefox
- Exit Firefox browser if it is already running.
- Uninstall any previous installations of Java Plugin.
Only one Java Plugin can be used at a time. When you want to use a different plugin, or version of a plugin, remove the symbolic links to any other versions and create a fresh symbolic link to the new one. - Become the root user by running the su command and then enter the super-user password.
Type: sudo -s - Create a directory called plugins if you do not have it.
Type: mkdir -p /usr/lib/mozilla/plugins - Go to Mozilla plugins directory before you make the symbolic link.
Type: cd /usr/lib/mozilla/plugins - Create a symbolic link to the libnpjp2.so file in the browser plugins directoryln -s /usr/local/java/jre1.7.0/lib/amd64/libnpjp2.so
ln -s /usr/local/java/jre1.7.0/lib/i386/libnpjp2.so - Restart your browser and test Java
Example [Firefox]
-
- If Firefox is installed at this directory:
/usr/lib/ - And if the Java is installed at this directory:
/usr/java/ - Then type in the terminal window to go to the browser plug-in directory:
/usr/lib//plugins - Enter the following command to create a symbolic link to the Java Plug-in for the Mozilla browser.
ln -s /usr/java//lib/i386/libnpjp2.so
You can also view support.mozilla.org for more help on using Java on Firefox.
How to Enable Java plugin support on Firefox on Linux
Many web pages use Java applets for interactive content such as online games, WebEx (Online meeting), etc. By default all the browsers disabled the plugin due to security issue and still you want to enable to access the trusted web sites. We can enable it on browser by following below procedures. Make sure you system should have installed Oracle JAVA before proceeding to enable the JAVA Applet.
Method 1 : Enable Java plugin Support on Firefox through Oracle Java
1) Install Oracle Java
Make sure you system should have installed Oracle JAVA before proceeding to enable the JAVA Applet.
# java -version java version "1.8.0_74" Java(TM) SE Runtime Environment (build 1.8.0_74-b02) Java HotSpot(TM) 64-Bit Server VM (build 25.74-b02, mixed mode)
2) Locate Firefox
First we need to locate the Firefox installation location to create plugin directory.
# whereis firefox firefox: /usr/bin/firefox /usr/lib/firefox /etc/firefox /usr/share/man/man1/firefox.1.gz
3) Enable Java applet on Firefox
Navigate to Menu >> Add-ons >> Plugins >> Oracle JAVA, Search Java(TM) Platform, If Java is disabled, click on Never Activate to open its drop-down menu and select the option to activate Java. The recommended (default) option is Ask to Activate, which lets you run Java when prompted.
4) Create symbolic link to enable Java in Firefox
If you didn’t find Java(TM) Platform plugin, use the below method to enable it.
[Check Java installed location] # update-alternatives --config java There are 3 choices for the alternative java (providing /usr/bin/java). Selection Path Priority Status ------------------------------------------------------------ 0 /usr/lib/jvm/java-8-oracle/jre/bin/java 1072 auto mode 1 /usr/lib/jvm/java-6-openjdk-amd64/jre/bin/java 1061 manual mode 2 /usr/lib/jvm/java-7-openjdk-amd64/jre/bin/java 1071 manual mode * 3 /usr/lib/jvm/java-8-oracle/jre/bin/java 1072 manual mode Press to keep the current choice[*], or type selection number: [Create a directory called plugins if you do not have it] # mkdir -p /usr/lib/firefox-addons/plugins [Navigate to Plugins directory] # cd /usr/lib/firefox-addons/plugins [Create a symbolic link] # ln -s /usr/lib/jvm/java-8-oracle/jre/lib/amd64/libnpjp2.so

Restart the Firefox browser and verify.
Method 2 : Enable Java plugin Support on Firefox through Oracle Java
1) Install OpenJDK
Simply fire the below commands to install openJDK & Java plugin support on firefox.
[Install openJRE] $ sudo apt-get install openjdk-8-jre [Install Java Plugin] $ sudo apt-get install icedtea-8-plugin

Enjoy…)
- If Firefox is installed at this directory: