- Android — Text To Speech
- Example
- Преобразование текста в речь на Android
- Изменение языка
- Изменение громкости
- Изменение скорости
- Android TextToSpeech with Examples
- Android TextToSpeech Example
- activity_main.xml
- MainActivity.java
- Output of Android TextToSpeech Example
- Android Text to Speech (TTS)
- Text to speech Engine
- Read the words
- Control Text to Speech Engine parameters
Android — Text To Speech
Android allows you convert your text into voice. Not only you can convert it but it also allows you to speak text in variety of different languages.
Android provides TextToSpeech class for this purpose. In order to use this class, you need to instantiate an object of this class and also specify the initListener. Its syntax is given below −
private EditText write; ttobj=new TextToSpeech(getApplicationContext(), new TextToSpeech.OnInitListener() < @Override public void onInit(int status) < >>);
In this listener, you have to specify the properties for TextToSpeech object , such as its language ,pitch e.t.c. Language can be set by calling setLanguage() method. Its syntax is given below −
The method setLanguage takes an Locale object as parameter. The list of some of the locales available are given below −
| Sr.No | Locale |
|---|---|
| 1 | US |
| 2 | CANADA_FRENCH |
| 3 | GERMANY |
| 4 | ITALY |
| 5 | JAPAN |
| 6 | CHINA |
Once you have set the language, you can call speak method of the class to speak the text. Its syntax is given below −
ttobj.speak(toSpeak, TextToSpeech.QUEUE_FLUSH, null);
Apart from the speak method, there are some other methods available in the TextToSpeech class. They are listed below −
addSpeech(String text, String filename)
This method adds a mapping between a string of text and a sound file.
This method returns a Locale instance describing the language.
This method checks whether the TextToSpeech engine is busy speaking.
This method sets the speech pitch for the TextToSpeech engine.
setSpeechRate(float speechRate)
This method sets the speech rate.
This method releases the resources used by the TextToSpeech engine.
This method stop the speak.
Example
The below example demonstrates the use of TextToSpeech class. It crates a basic application that allows you to set write text and speak it.
To experiment with this example , you need to run this on an actual device.
| Steps | Description |
|---|---|
| 1 | You will use Android studio to create an Android application under a package com.example.sairamkrishna.myapplication. |
| 2 | Modify src/MainActivity.java file to add TextToSpeech code. |
| 3 | Modify layout XML file res/layout/activity_main.xml add any GUI component if required. |
| 4 | Run the application and choose a running android device and install the application on it and verify the results. |
Here is the content of src/MainActivity.java.
package com.example.sairamkrishna.myapplication; import android.app.Activity; import android.os.Bundle; import android.speech.tts.TextToSpeech; import android.view.View; import android.widget.Button; import android.widget.EditText; import java.util.Locale; import android.widget.Toast; public class MainActivity extends Activity < TextToSpeech t1; EditText ed1; Button b1; @Override protected void onCreate(Bundle savedInstanceState) < super.onCreate(savedInstanceState); setContentView(R.layout.activity_main); ed1=(EditText)findViewById(R.id.editText); b1=(Button)findViewById(R.id.button); t1=new TextToSpeech(getApplicationContext(), new TextToSpeech.OnInitListener() < @Override public void onInit(int status) < if(status != TextToSpeech.ERROR) < t1.setLanguage(Locale.UK); >> >); b1.setOnClickListener(new View.OnClickListener() < @Override public void onClick(View v) < String toSpeak = ed1.getText().toString(); Toast.makeText(getApplicationContext(), toSpeak,Toast.LENGTH_SHORT).show(); t1.speak(toSpeak, TextToSpeech.QUEUE_FLUSH, null); >>); > public void onPause() < if(t1 !=null)< t1.stop(); t1.shutdown(); >super.onPause(); > >
Here is the content of activity_main.xml
Here is the content of Strings.xml.
Here is the content of AndroidManifest.xml

Let’s try to run your application. I assume you have connected your actual Android Mobile device with your computer. To run the app from Android studio, open one of your project’s activity files and click Run icon from the toolbar. Before starting your application, android studio will display following window to select an option where you want to run your Android application.

Select your mobile device as an option and then check your mobile device which will display following screen.
Now just type some text in the field and click on the text to speech button below. A notification would appear and text will be spoken. It is shown in the image below −
Now type something else and repeat the step again with different locale. You will again hear sound. This is shown below −
Преобразование текста в речь на Android
Android предоставляет полезную функцию, которая преобразовывает текст в речь (TTS), и воспроизводит текст на разных языках. Это руководство объясняет, как создать данную функцию. В этом уроке я также объясню, как изменить тип языка, громкость и уровень скорости.
Ниже я представил видео конечного результата.
Я разработал простой интерфейс с одним полем ввода и кнопкой, чтобы вызвать событие, которое будет принимать текст из поля ввода и воспроизводить данный текст.
1. Создайте новый проект, выбрав File ⇒ New Android Project и заполните необходимые данные.
2. Реализация вашего основного класса активности из TextToSpeech.OnInitListener
public class AndroidTextToSpeechActivity extends Activity implements TextToSpeech.OnInitListener 3. Теперь добавьте следующий код в главный класс.
package com.androidhive.texttospeech; import java.util.Locale; import android.app.Activity; import android.os.Bundle; import android.speech.tts.TextToSpeech; import android.util.Log; import android.view.View; import android.widget.Button; import android.widget.EditText; public class AndroidTextToSpeechActivity extends Activity implements TextToSpeech.OnInitListener < /** Called when the activity is first created. */ private TextToSpeech tts; private Button btnSpeak; private EditText txtText; @Override public void onCreate(Bundle savedInstanceState) < super.onCreate(savedInstanceState); setContentView(R.layout.main); tts = new TextToSpeech(this, this); btnSpeak = (Button) findViewById(R.id.btnSpeak); txtText = (EditText) findViewById(R.id.txtText); // button on click event btnSpeak.setOnClickListener(new View.OnClickListener() < @Override public void onClick(View arg0) < speakOut(); >>); > @Override public void onDestroy() < // Don't forget to shutdown tts! if (tts != null) < tts.stop(); tts.shutdown(); >super.onDestroy(); > @Override public void onInit(int status) < if (status == TextToSpeech.SUCCESS) < int result = tts.setLanguage(Locale.US); if (result == TextToSpeech.LANG_MISSING_DATA || result == TextToSpeech.LANG_NOT_SUPPORTED) < Log.e("TTS", "This Language is not supported"); >else < btnSpeak.setEnabled(true); speakOut(); >> else < Log.e("TTS", "Initilization Failed!"); >> private void speakOut() < String text = txtText.getText().toString(); tts.speak(text, TextToSpeech.QUEUE_FLUSH, null); >>Изменение языка
Вы можете изменить язык, используя функцию SetLanguage (). На данный момент поддерживаются многие языки.
tts.setLanguage(Locale.CHINESE); // Chinese languageИзменение громкости
Вы можете изменить уровень громкости, используя функцию setPitch (). По умолчанию значение равно 1.0.
Изменение скорости
Частоту воспроизведения можно установить с помощью функции setSpeechRate (). По умолчанию значение равно 1.0.
Android TextToSpeech with Examples
In android, by using TextToSpeech class we can easily convert our text into voice and it supports different types of speaking languages. We can choose the speaking language based on our requirements in the android application.
Generally, the android TextToSpeech instance can only be used to synthesize text once it has completed its initialization so implement TextToSpeech.OnInitListener to notify the completion of initialization.
During the initialization, we can set the audio pitch rate, audio speed, type of language to speak, etc. based on our requirements.
Following is the code snippet of converting text to voice using TextToSpeech class in android applications.
public class MainActivity extends AppCompatActivity implements TextToSpeech.OnInitListener <
.
TextToSpeech textToSpeech ;
@Override
public void onInit( int status) <
if (status == TextToSpeech. SUCCESS ) <
int result = textToSpeech .setLanguage(Locale. US );
String text = speakText .getText().toString();
textToSpeech .speak(text, TextToSpeech. QUEUE_FLUSH , null , null );
>
>
.
>
If you observe above code, we used TextToSpeech.OnInitListener to notify the completion of initialization and used TextToSpeech class to convert entered text to voice.
Now we will see how to use the TextToSpeech component to convert the given text to speech conversion in android application with examples.
Android TextToSpeech Example
Following is the example of converting the given text to voice using an android TextToSpeech object.
Create a new android application using android studio and give names as TextSpeechExample. In case if you are not aware of creating an app in android studio check this article Android Hello World App.
Once we create an application, open activity_main.xml file from \res\layout folder path and write the code like as shown below.
activity_main.xml
< LinearLayout xmlns: android = "http://schemas.android.com/apk/res/android"
android :orientation= "vertical" android :layout_width= "match_parent"
android :layout_height= "match_parent" >
< TextView
android :id= "@+id/fstTxt"
android :layout_width= "wrap_content"
android :layout_height= "wrap_content"
android :layout_marginLeft= "100dp"
android :layout_marginTop= "150dp"
android :text= "Enter Text to Speak"/>
< EditText
android :id= "@+id/txtSpeak"
android :layout_width= "wrap_content"
android :layout_height= "wrap_content"
android :layout_marginLeft= "100dp"
android :ems= "10"/>
< Button
android :id= "@+id/btnSpeech"
android :layout_width= "wrap_content"
android :layout_height= "wrap_content"
android :layout_marginLeft= "100dp"
android :text= "Speak"/>
Now open your main activity file MainActivity.java from \java\com.tutlane.textspeechexample path and write the code like as shown below
MainActivity.java
package com.tutlane.textspeechexample;
import android.os.Build;
import android.speech.tts.TextToSpeech;
import android.support.v7.app.AppCompatActivity;
import android.os.Bundle;
import android.util.Log;
import android.view.View;
import android.widget.Button;
import android.widget.EditText;
import java.util.Locale;
public class MainActivity extends AppCompatActivity implements TextToSpeech.OnInitListener Button speakBtn ;
EditText speakText ;
TextToSpeech textToSpeech ;
@Override
protected void onCreate(Bundle savedInstanceState) super .onCreate(savedInstanceState);
setContentView(R.layout. activity_main );
speakText = (EditText) findViewById(R.id. txtSpeak );
speakBtn = (Button)findViewById(R.id. btnSpeech );
textToSpeech = new TextToSpeech( this , this );
speakBtn .setOnClickListener( new View.OnClickListener() @Override
public void onClick(View v) texttoSpeak();
>
>);
>
@Override
public void onInit( int status) if (status == TextToSpeech. SUCCESS ) int result = textToSpeech .setLanguage(Locale. US );
if (result == TextToSpeech. LANG_MISSING_DATA || result == TextToSpeech. LANG_NOT_SUPPORTED ) Log.e( "error" , "This Language is not supported" );
> else texttoSpeak();
>
> else Log.e( "error" , "Failed to Initialize" );
>
>
@Override
public void onDestroy() if ( textToSpeech != null ) textToSpeech .stop();
textToSpeech .shutdown();
>
super .onDestroy();
>
private void texttoSpeak() String text = speakText .getText().toString();
if ( "" .equals(text)) text = "Please enter some text to speak." ;
>
if (Build.VERSION. SDK_INT >= Build.VERSION_CODES. LOLLIPOP ) textToSpeech .speak(text, TextToSpeech. QUEUE_FLUSH , null , null );
>
else textToSpeech .speak(text, TextToSpeech. QUEUE_FLUSH , null );
>
>
>
If you observe above code, we are converting the text to speech conversion using TextToSpeech class.
Output of Android TextToSpeech Example
When we run the above example in the android emulator we will get a result like as shown below.
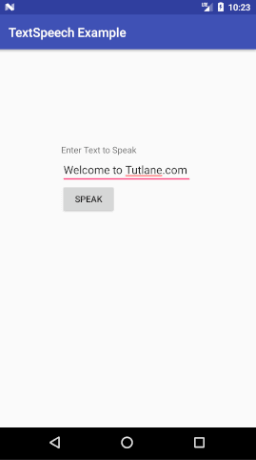
If you observe the above result, once we enter text and click on the Speak button, the entered text converted to voice based on the language which we selected in the application.
This is how we can convert text to speech in android applications using TextToSpeech object based on our requirements.
Android Text to Speech (TTS)
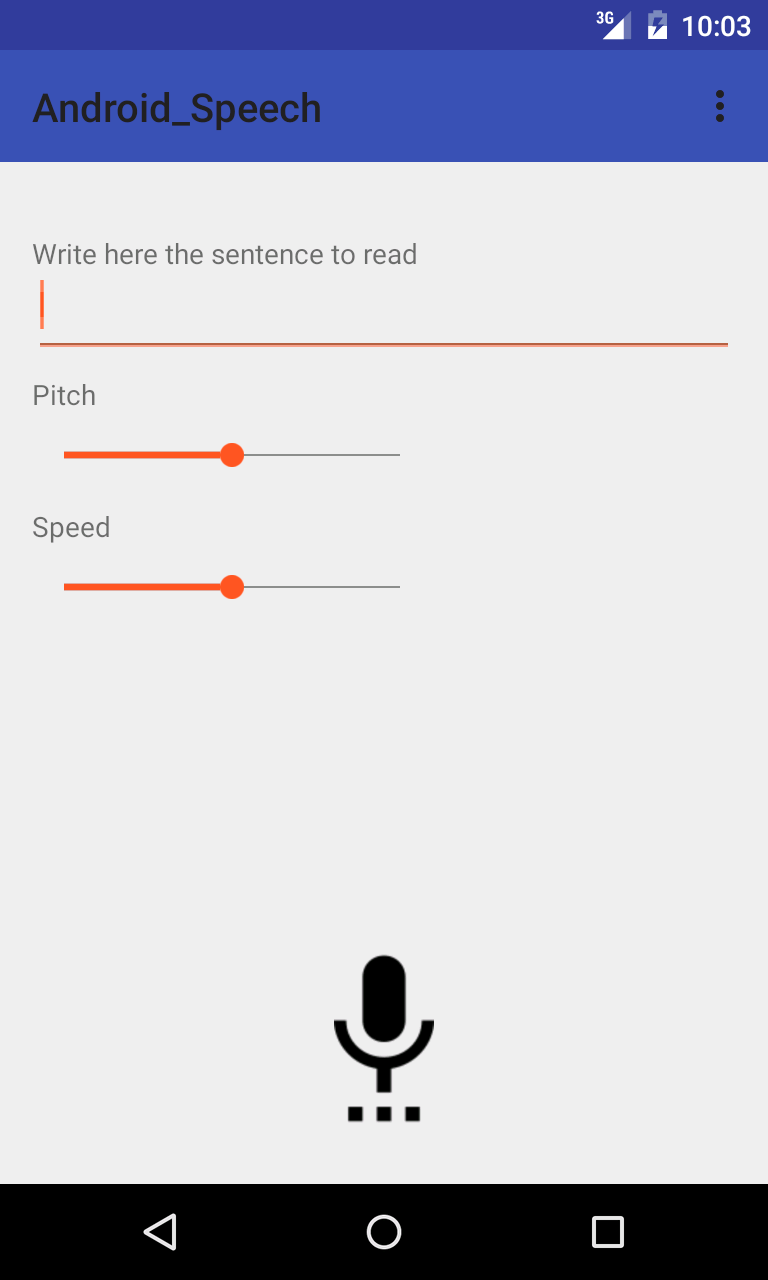
This post describes how to use text to speech (TTS) in Android. It isn’t so common to find a post explaining how to use it and it is a part of Android not much covered. In my opinion, TTS is very interesting because it can add some nice features to an app. Text to Speech is a feature of Android platform that can be used to “read” the words and make the app talking, or more in detail to synthesize
text. In this post, i want to cover how to implement TTS in Android and how we can control some interesting aspects of speech engine. We want to code an app that has a EditText widget so that we write the words that have to be read and some controls to modify the speech engine.
Text to speech Engine
The first thing we have to do to use the TTS in our app is initialise the engine. The class that controls the engine is called TextToSpeech,
engine = new TextToSpeech(this, this);
where the first parameter is the Context and the other one is the listener. The listener is used to inform our app that the engine is ready to be used. In order to be notified we have to implement TextToSpeech.OnInitListener, so we have:
public class MainActivity extends Activity implements TextToSpeech.OnInitListener < . @Override public void onInit(int status) < Log.d(&Speech&, &OnInit - Status [&+status+&]&); if (status == TextToSpeech.SUCCESS) < Log.d(&Speech&, &Success!&); engine.setLanguage(Locale.UK); >> >
We use the onInit as callback method, and when the engine is ready, we set the default language that the engine used to read our sentence.
Read the words
Now our engine is ready to be used, we need simply pass the string we want to read. To this purpose, we use an EditText so that the user can edit his string and when he clicks on the microphone the app start reading. Without detailing too much the code because is trivial we focus our attention when user clicks on the microphone button:
speechButton.setOnClickListener(new View.OnClickListener() < @Override public void onClick(View v) < speech(); >>);
Control Text to Speech Engine parameters
We can have more control on how the engine read the sentence. We can modify for example the pitch and the speech rate. In the app, for example we used two seek bars to control the pitch and rate. If we want to set the voice pitch we can use setPitch passing a float value. On the other hand, if we want to change the speech rate we can use setSpeechRate . In our app, we read this value from two seek bars and the speech method become: