- HTML Tables
- Example
- Define an HTML Table
- Example
- Table Cells
- Example
- Table Rows
- Example
- Table Headers
- Example
- HTML Exercises
- HTML Table Tags
- LEARN MORE
- COLOR PICKER
- Report Error
- Thank You For Helping Us!
- Improved table shapes
- Add a table to a diagram
- Add a table title when you insert a table
- Add text to table cells
- Add a cross-functional flowchart (table)
- Add columns and rows
- Use a keyboard shortcut to copy a table row
- Move rows in a table
- Resize rows and columns in a table shape
- Resize all swimlane titles
- Delete rows or columns
- Use the keyboard to delete a row
- Merge and unmerge cells
- HTML tables are still available
- HTML Table Borders
- How To Add a Border
- Example
- Collapsed Table Borders
- Example
- Style Table Borders
- Example
- Round Table Borders
- Example
- Example
- Dotted Table Borders
- Example
- Border Color
- Example
- COLOR PICKER
- Report Error
- Thank You For Helping Us!
HTML Tables
HTML tables allow web developers to arrange data into rows and columns.
Example
| Company | Contact | Country |
|---|---|---|
| Alfreds Futterkiste | Maria Anders | Germany |
| Centro comercial Moctezuma | Francisco Chang | Mexico |
| Ernst Handel | Roland Mendel | Austria |
| Island Trading | Helen Bennett | UK |
| Laughing Bacchus Winecellars | Yoshi Tannamuri | Canada |
| Magazzini Alimentari Riuniti | Giovanni Rovelli | Italy |
Define an HTML Table
A table in HTML consists of table cells inside rows and columns.
Example
| Company | Contact | Country |
|---|---|---|
| Alfreds Futterkiste | Maria Anders | Germany |
| Centro comercial Moctezuma | Francisco Chang | Mexico |
Table Cells
Each table cell is defined by a
tag.
Everything between
are the content of the table cell.
Example
Note: A table cell can contain all sorts of HTML elements: text, images, lists, links, other tables, etc.
Table Rows
Each table row starts with a
tag.
Example
You can have as many rows as you like in a table; just make sure that the number of cells are the same in each row.
Note: There are times when a row can have less or more cells than another. You will learn about that in a later chapter.
Table Headers
th stands for table header.
Example
Let the first row be table header cells:
By default, the text in elements are bold and centered, but you can change that with CSS.
HTML Exercises
HTML Table Tags
| Tag | Description |
|---|---|
| Defines a table | |
| Defines a header cell in a table | |
| Defines a row in a table | |
| Defines a cell in a table | |
| Defines a table caption | |
| Specifies a group of one or more columns in a table for formatting | |
| Specifies column properties for each column within a element | |
| Groups the header content in a table | |
| Groups the body content in a table | |
| Groups the footer content in a table |
For a complete list of all available HTML tags, visit our HTML Tag Reference.
LEARN MORE

COLOR PICKER


Report Error
If you want to report an error, or if you want to make a suggestion, do not hesitate to send us an e-mail:
Thank You For Helping Us!
Your message has been sent to W3Schools.
Top Tutorials
Top References
Top Examples
Get Certified
W3Schools is optimized for learning and training. Examples might be simplified to improve reading and learning. Tutorials, references, and examples are constantly reviewed to avoid errors, but we cannot warrant full correctness of all content. While using W3Schools, you agree to have read and accepted our terms of use, cookie and privacy policy.
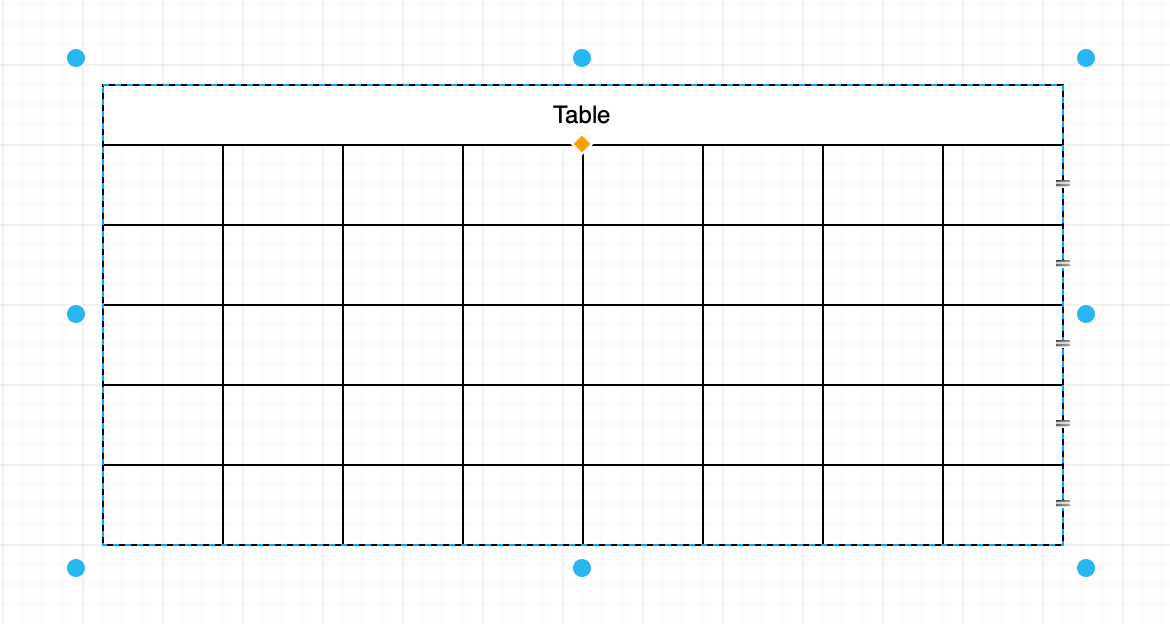
Improved table shapes
Tables have been overhauled in draw.io to be much more flexible and robust than the old HTML tables you previously used. With the new tables, you can choose from various layouts, drag to resize rows and columns, move rows by dragging them, and build cross-functional flowcharts within a table and its cells.
Tip: The entity shape used in UML entity relationship diagrams has also been updated to take advantage of the updated table features.
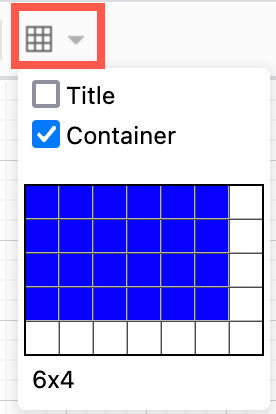
Add a table to a diagram
Use the table tool in the toolbar to add a table to your diagram as you would in Microsoft Word or Google Docs.

- With nothing selected in your diagram, click on the Table tool in the toolbar.
- Hover over the squares until the number of rows and columns you want are highlighted, then click to insert a table on the drawing canvas. You can add more rows and columns later.
Add a table title when you insert a table
- Hold down Shift and click on the Table tool in the toolbar.
- Hover over the squares until the number of rows and columns you want are highlighted, then click to insert a table on the drawing canvas. This will automatically add a title row that spans all of the columns.
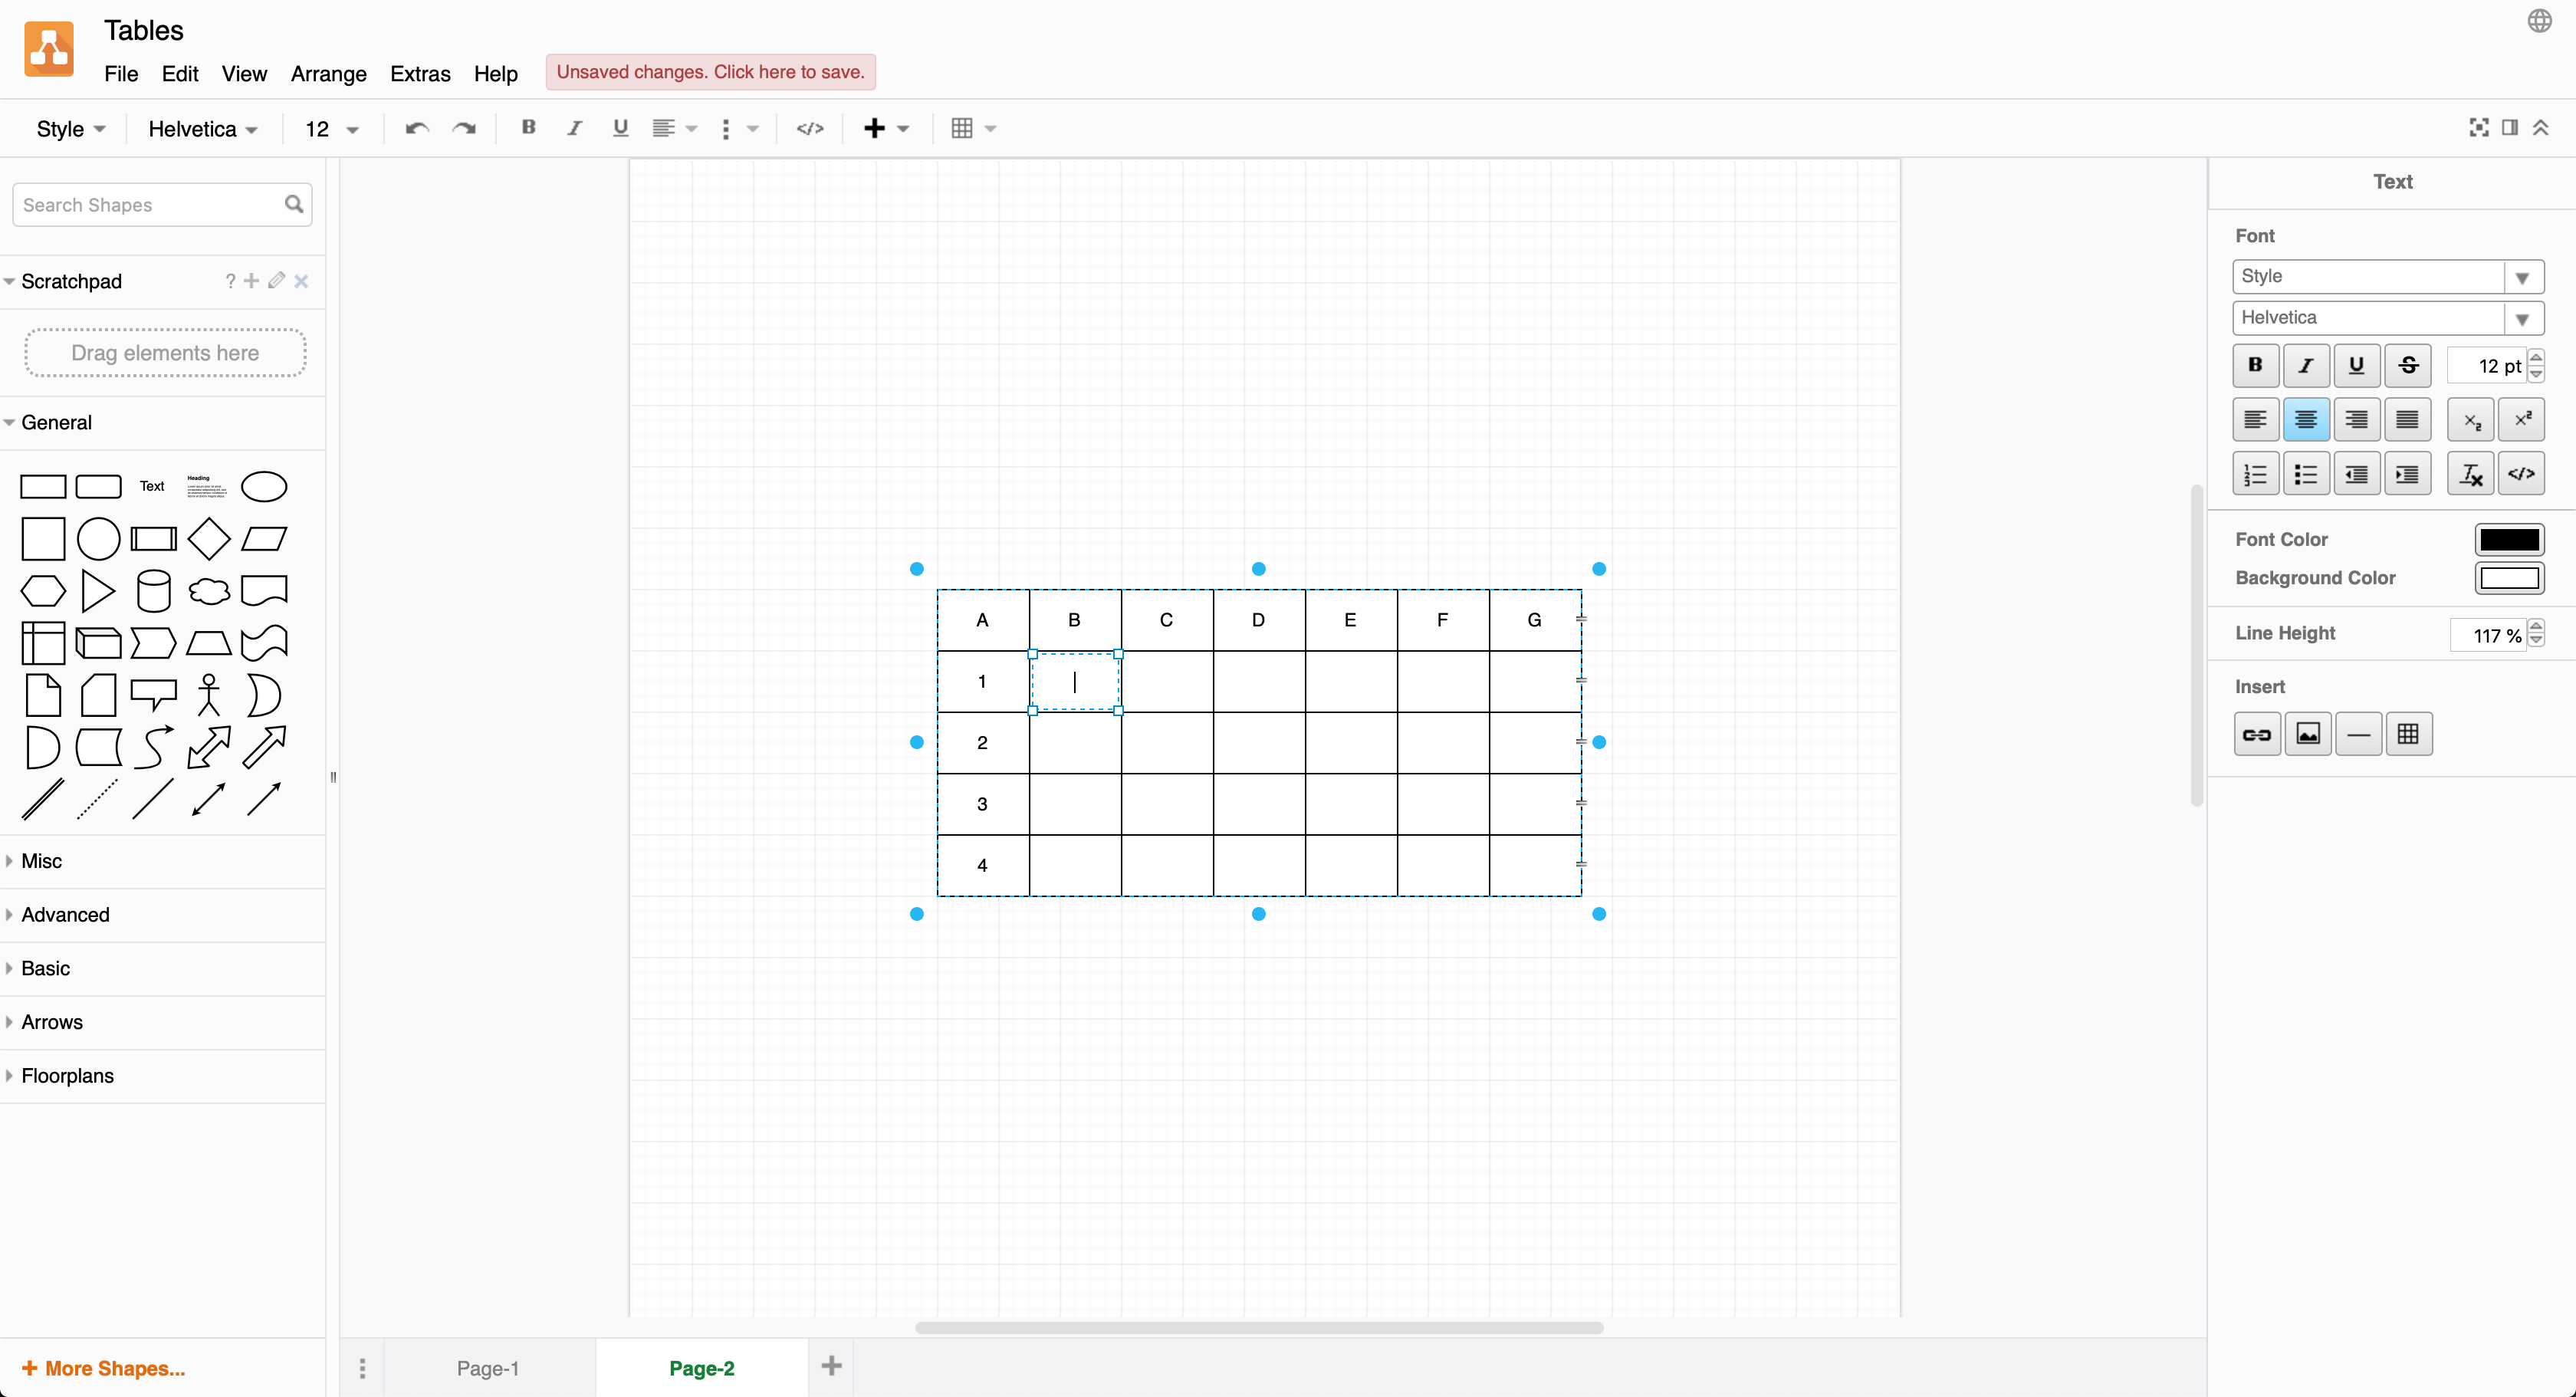
Add text to table cells
Click once to select the table, then click again on a cell to select it. Enter your text just like you would a shape label.
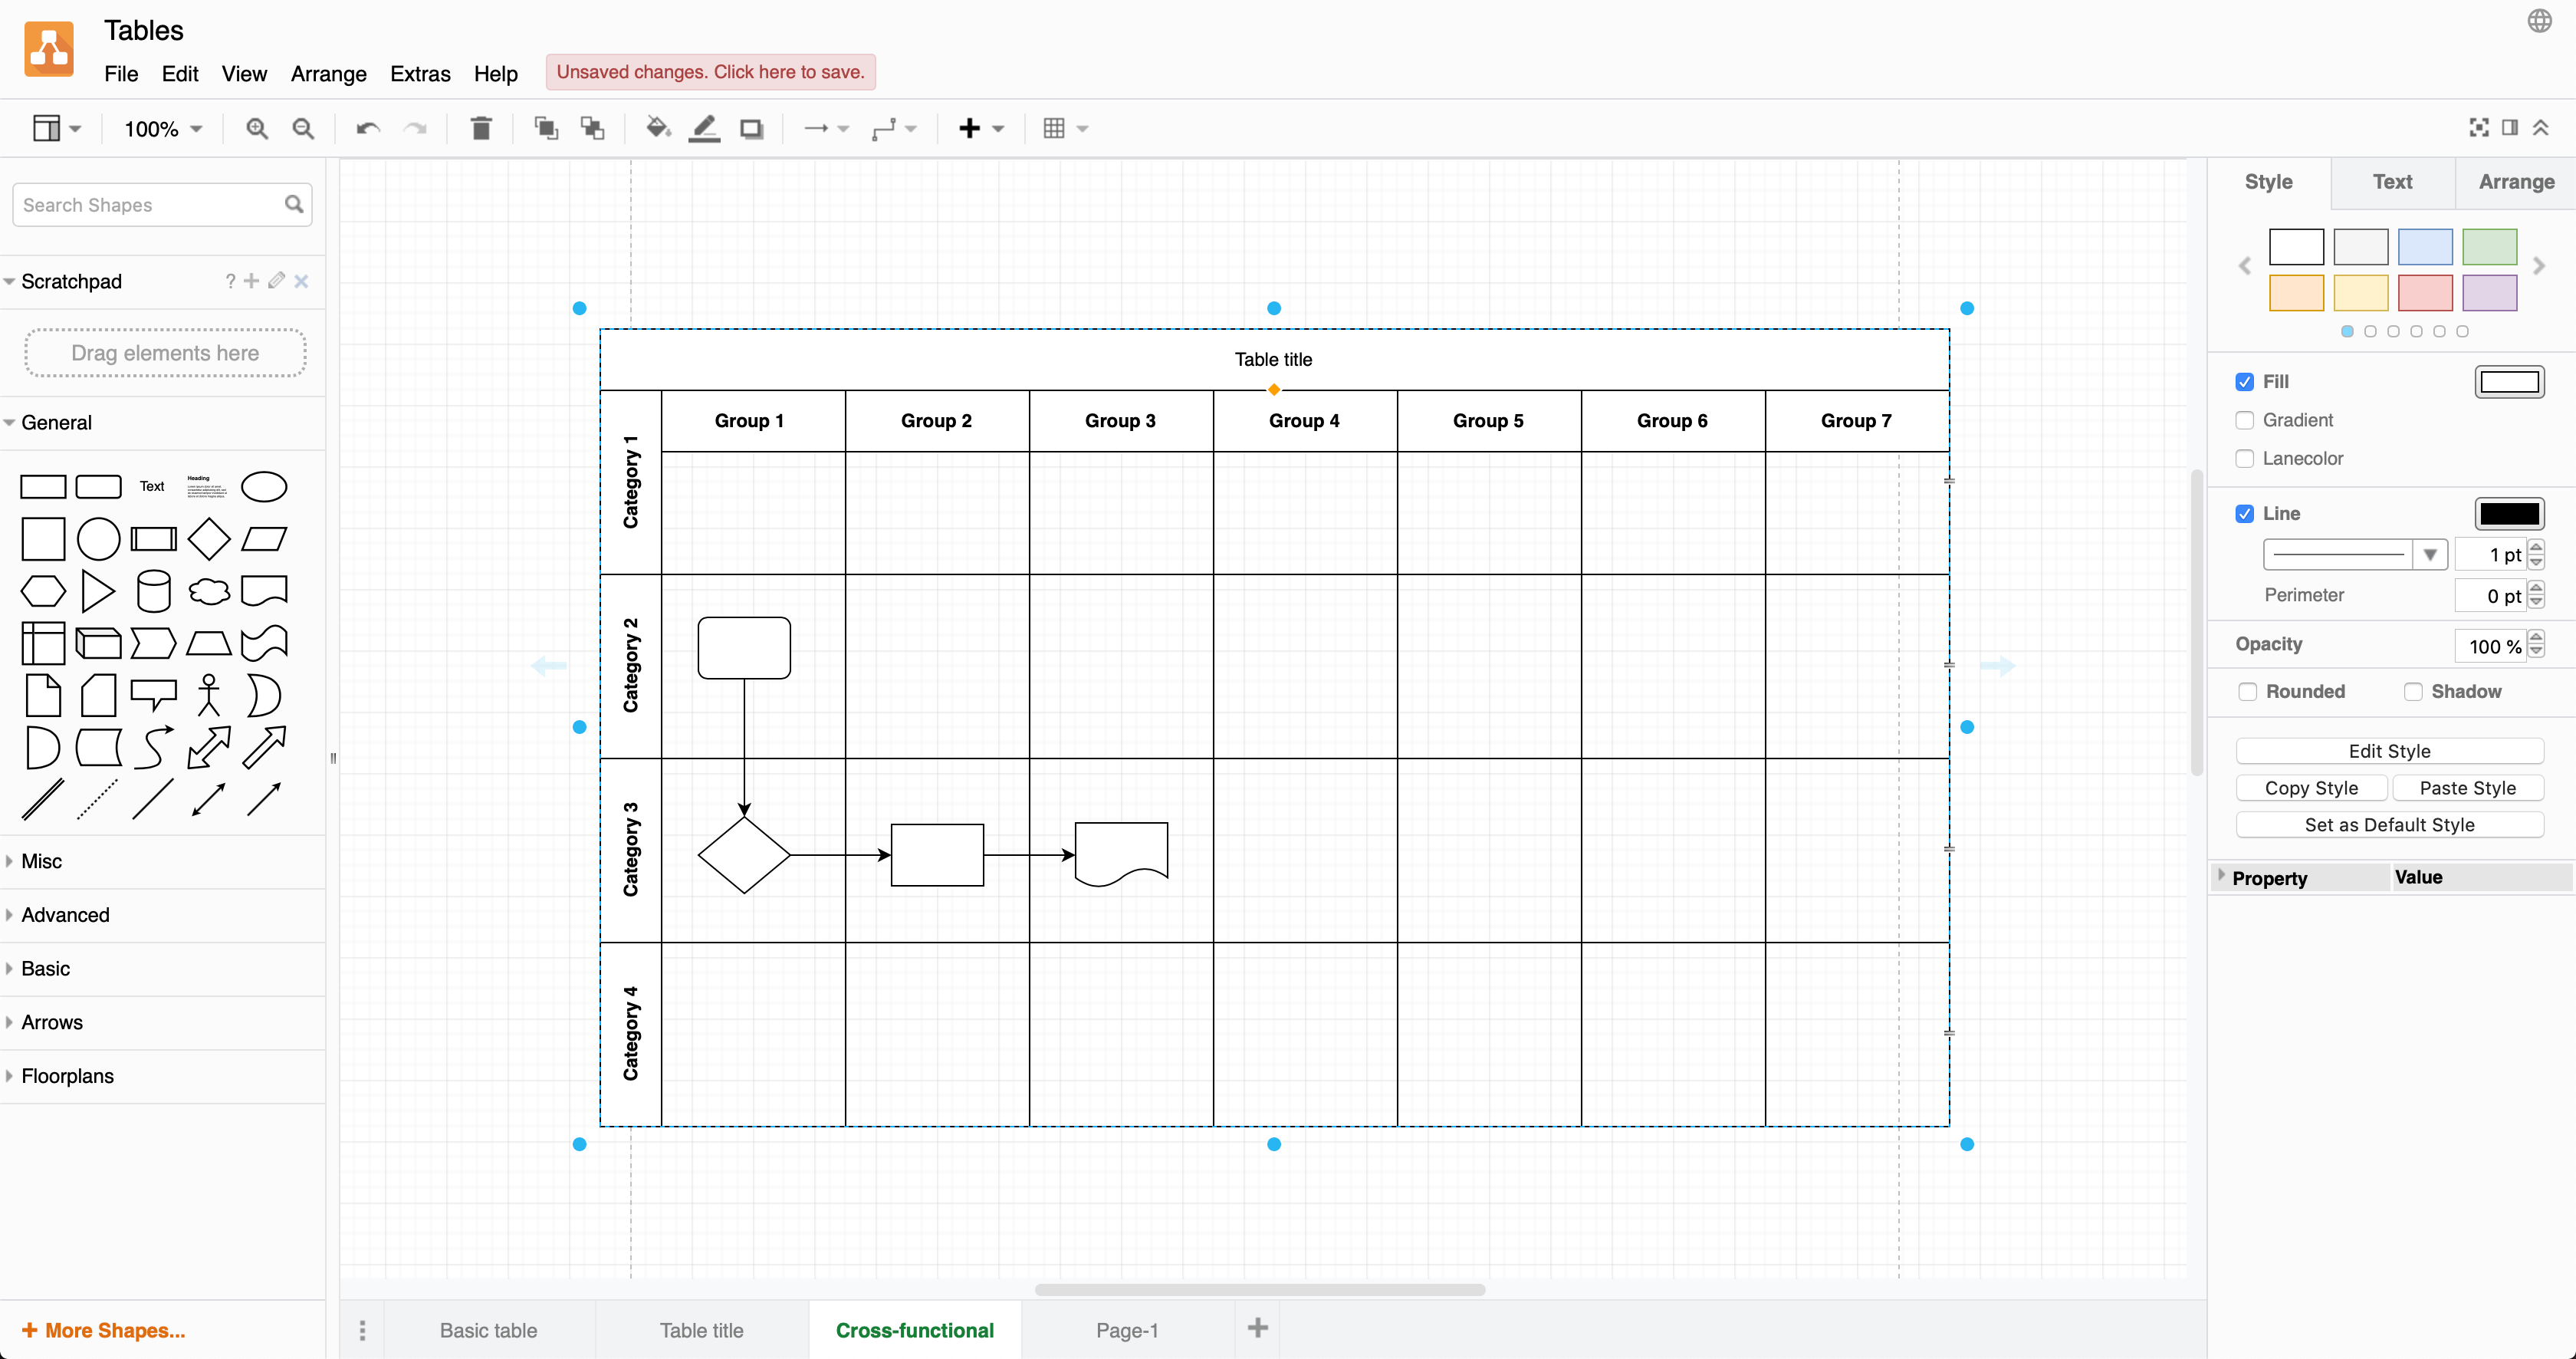
Add a cross-functional flowchart (table)
Cross-functional flowcharts use categories to group steps in a business process, for example, how steps are assigned to different functional groups (such as departments), or stages of approval. Each category is represented by a vertical or horizontal swimlane. As standard flow charts are unable to show this information, many businesses prefer to use cross-functional flowcharts.
Create a table with horizontal and vertical swimlanes, where you can add process steps into the cells of the table, and join them with connectors to show the process flow.
- With nothing selected in your diagram, click on the Table tool in the toolbar.
- Select the Container checkbox, or hold down the Ctrl / Cmd key while you select a table with the number of rows and columns you need. Click to add the table with cross-functional swimlanes to the drawing canvas.
- Select the table, click on a title cell, then enter the title text. If you are entering one of the row titles, as you enter the text will be centred — it will move into position when you finish adding the text.
As the cells in a cross-functional table function as container shapes, you can add shapes to them. Build your flowchart by placing the steps in their cells and then joining them with connectors.
Add columns and rows
- Select a cell inside of a table.
- Select the Arrange tab in the format panel on the right.
- Use the table tools to add a column or row before or after your selected cell or row. If you have selected the entire table, this will add a row or column at before the beginning or at the end of the table.
Use a keyboard shortcut to copy a table row
- Click on a cell in your table, then click on it again to select the row.
- Hold down either Ctrl or Cmd , grab and drag a copy of the row to a new position in the table, or press Enter .
Move rows in a table
You can drag rows to new positions in the updated tables, either by selecting and grabbing the row itself, or using the reposition icon that looks like two horizontal lines on the right border of each row.
- Select the row — click to select a cell, then click again to select the row — then drag it to a new position.
- Alternatively, select the table (not a cell or a row/column), then grab and drag the row’s reposition icon.
Note: The reposition icons on the right double as connection points. If you try to drag the reposition icons without first selecting the table, you’ll attach a fixed connector at that point.
Resize rows and columns in a table shape
Make sure you don’t grab the reposition icon on the right border of a row — this will move a row, rather than resize the column.
You can also resize the table keeping all of its cells relative to each other — this is behaviour is enabled by default.
- Select the table, then drag the round handle at the side of the table instead of the final column or row border.
- Drag the orange diamond in the middle of the table below the table title row.
If you don’t want to resize the other cells, change the table properties.
- Select the table (not a cell or a row/column).
- In the format panel on the right, expand the Properties section.
- Ensure the checkboxes for Resize last row and Resize last column are selected.
Resize all swimlane titles
When you resize a cell in a cross-functional table, you will resize only that particular column’s or row’s title cell. You can resize all row or column titles at once so they are consistent.
Delete rows or columns
- Select a cell inside of a table.
- Select the Arrange tab in the format panel on the right.
- Use the table tools to delete the selected column or row.
Use the keyboard to delete a row
- Click on a cell in the table, then click on it again to select the row.
- Press the Delete key, or right click and select Delete from the context menu.
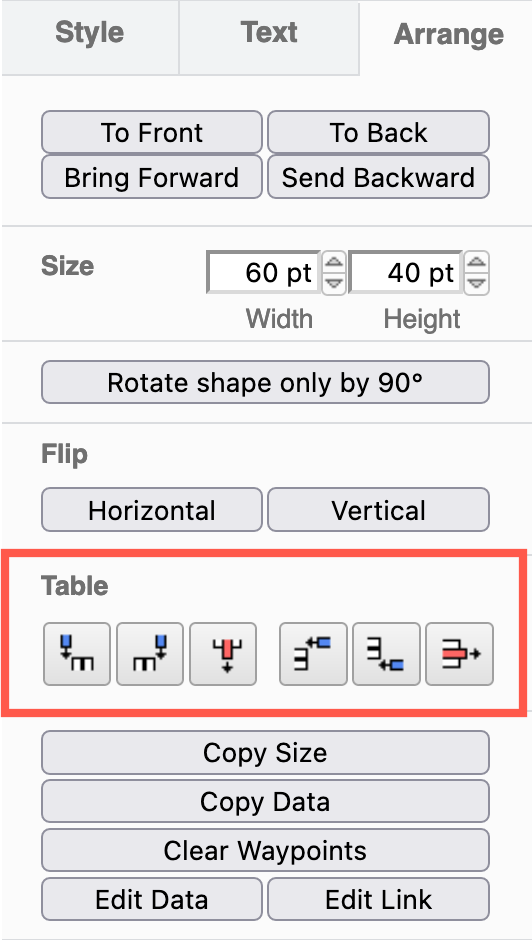
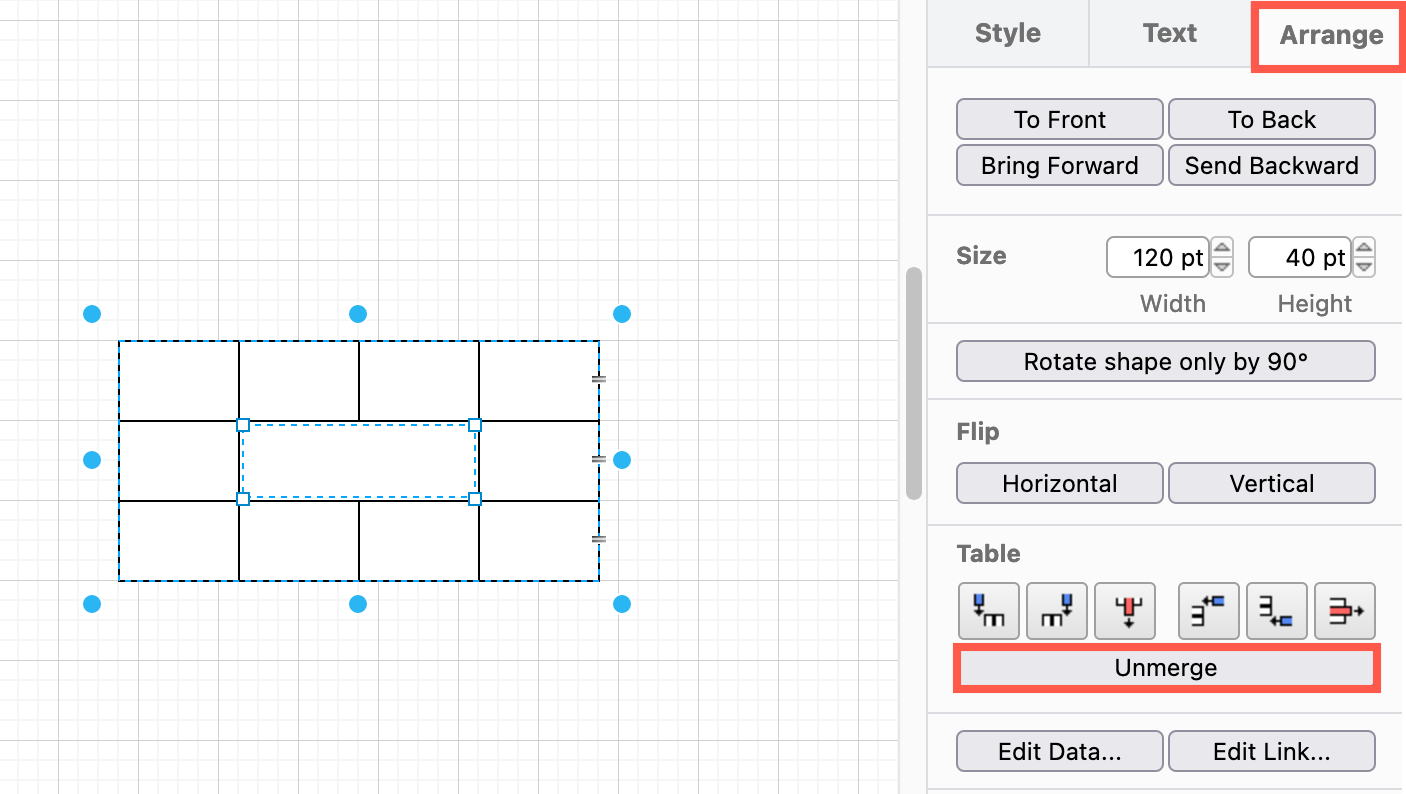
Merge and unmerge cells
Merge adjacent cells and unmerge merged table cells via the Arrange tab in the format panel, or using the Table tool in the Sketch whiteboard-like editor theme.
- Merge is only available when you have selected multiple adjacent table cells.
- Unmerge is only available when you have selected a merged cell in a table.
HTML tables are still available
The HTML table shapes are still available in the Misc shape library (part of the General shape library). Hover over the shapes to see their names.
HTML Table Borders
HTML tables can have borders of different styles and shapes.
How To Add a Border
To add a border, use the CSS border property on table , th , and td elements:
Example
Collapsed Table Borders
To avoid having double borders like in the example above, set the CSS border-collapse property to collapse .
This will make the borders collapse into a single border:
Example
Style Table Borders
If you set a background color of each cell, and give the border a white color (the same as the document background), you get the impression of an invisible border:
Example
table, th, td <
border: 1px solid white;
border-collapse: collapse;
>
th, td <
background-color: #96D4D4;
>
Round Table Borders
With the border-radius property, the borders get rounded corners:
Example
Skip the border around the table by leaving out table from the css selector:
Example
Dotted Table Borders
With the border-style property, you can set the appearance of the border.
The following values are allowed:
Example
Border Color
With the border-color property, you can set the color of the border.
Example
COLOR PICKER
Report Error
If you want to report an error, or if you want to make a suggestion, do not hesitate to send us an e-mail:
Thank You For Helping Us!
Your message has been sent to W3Schools.
Top Tutorials
Top References
Top Examples
Get Certified
W3Schools is optimized for learning and training. Examples might be simplified to improve reading and learning. Tutorials, references, and examples are constantly reviewed to avoid errors, but we cannot warrant full correctness of all content. While using W3Schools, you agree to have read and accepted our terms of use, cookie and privacy policy.