Set Python 3 as your default “Python Version” on Windows 10/11
Python is a well-known programming language when it comes to solving Data Science related problems. It helps in easing down the work of Data Science with the help of its fast execution of codes because of its built Object-Oriented Programming but, there is a problem with this language as well.
Many Pythonists find it difficult to access the correct Python version because of too many Python versions present in their computer system. Due to this, they face problems in downloading the necessary packages in the correct Python version they want.
This leads to many problems in code executions as well as creates confusion for the computer to throw which version at what time.
Now, the question arises of how to resolve this issue and how to add the desired Python version say 3 as the default version on Windows 7/10/11.
The answer to this question is simple and given below. Just make sure that you have 2 or more 2 Python versions downloaded in the system to follow these steps of fixing the issue.
Steps to Change the Default Python Version on Windows 10/11 to Python 3
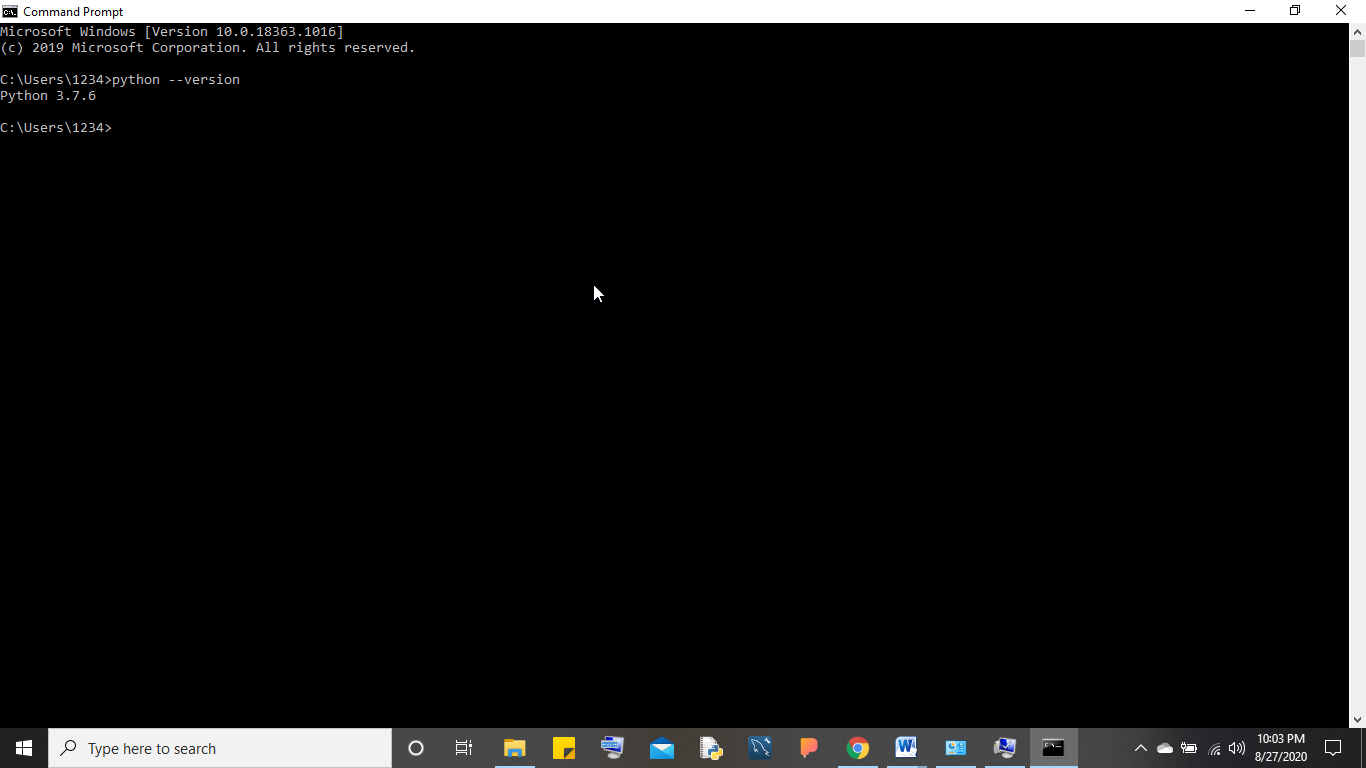
Open your command prompt and check the current Python version the system is using. This will help you get to know which version you are using right now and with which version you want to replace the same.
python —version
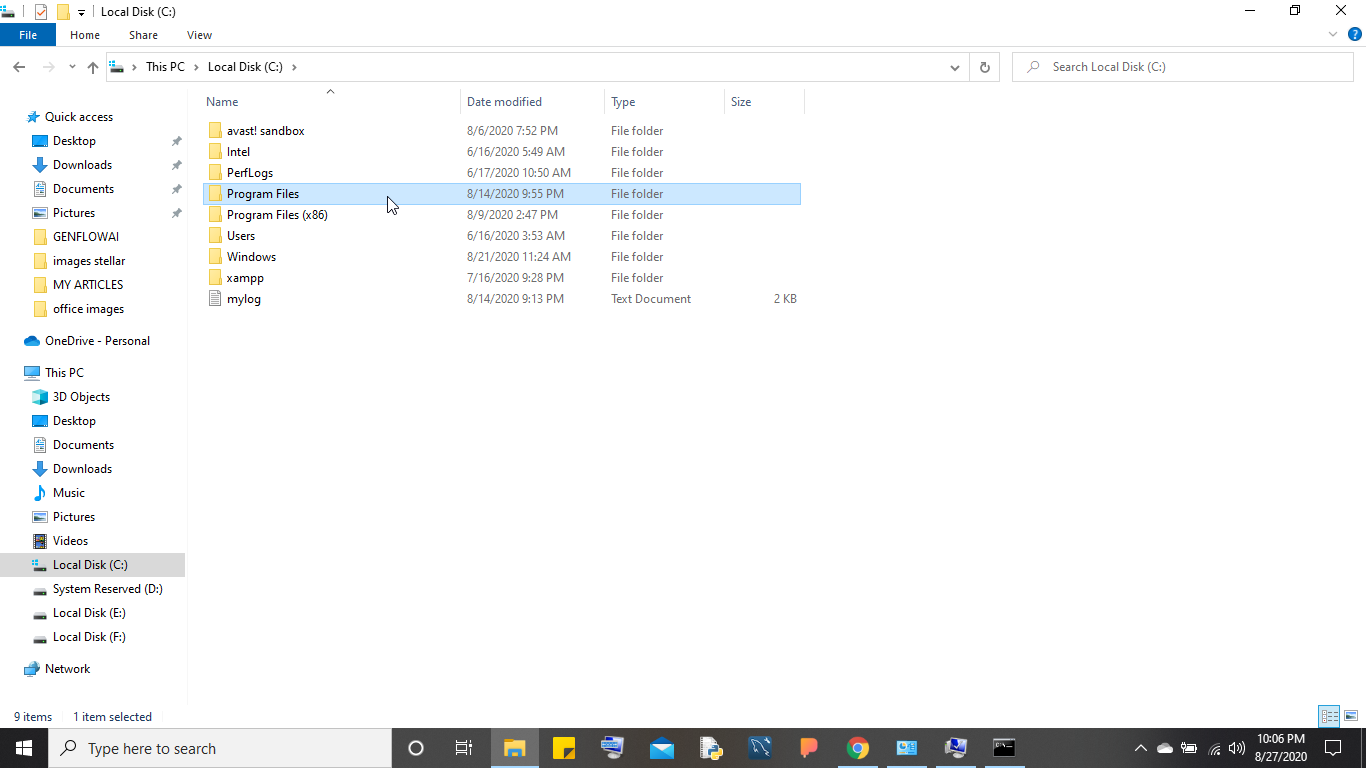
After checking the Python version find the path of your Python versions that will be present most probably in C Drive under the Program Files folder.
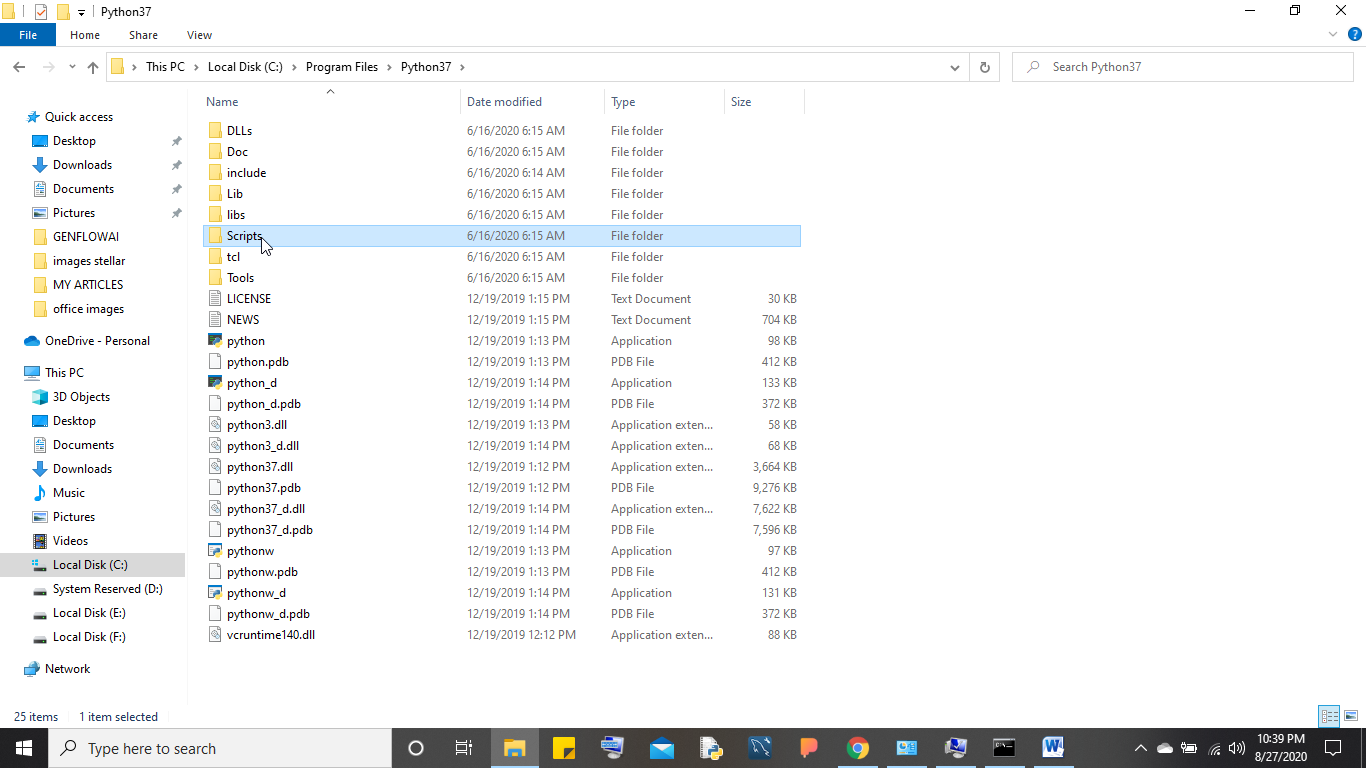
Open the Program Files folder and locate your Python versions. After locating the same click on the versions and copy the path of the scripts folder of all the Python versions installed.
Also, copy the path of the Program Files being present in C Drive.
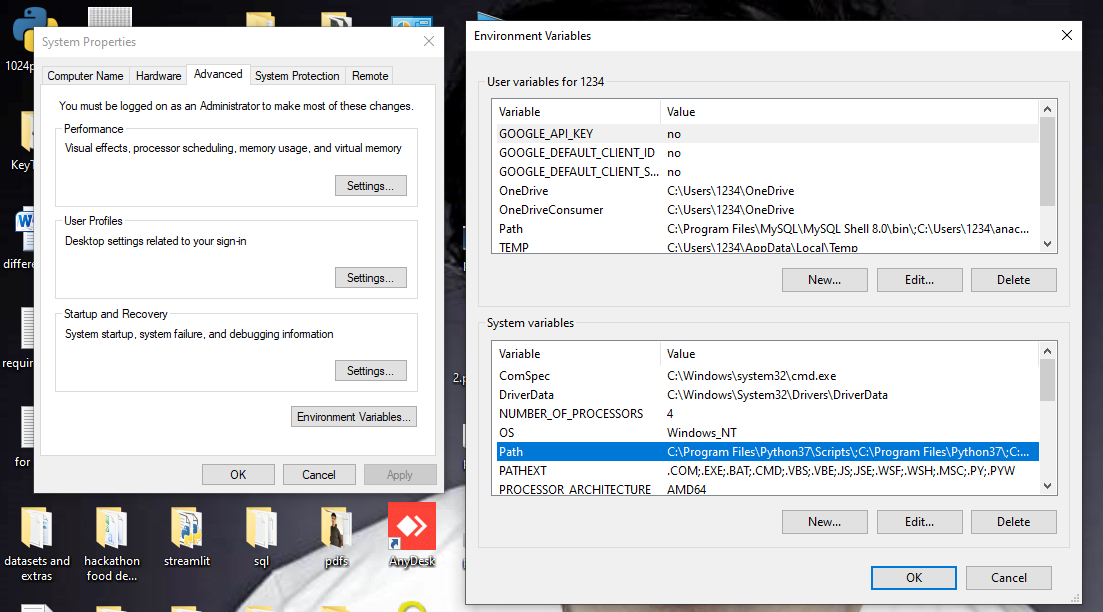
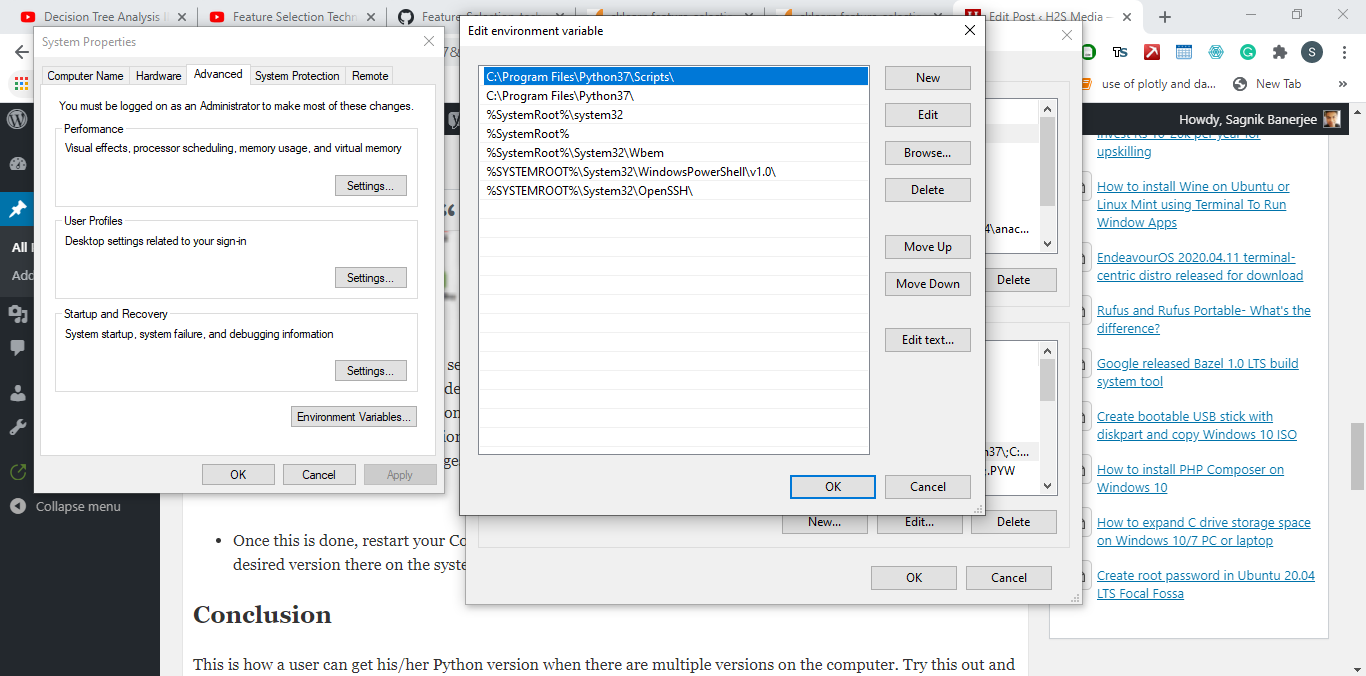
Once the paths are copied the next step is to locate your Environment Variables for the computer. This can be done by right-clicking on the “This PC” option of your computer and clicking on the Properties option. After clicking on the same click on Advanced System Settings under the Properties option.
Once done, a pop will come on the screen displaying various options out of which you need to click on the Environment Variables option. The Environment Variables will open up for you and you can see all the system variables present there.
The Environment Variablsegregatedgintendednto two different parts that are User Variables and System Variables. Just locate the Path option under the System Variables and click on the same.
After clicking on the Path option make sure to put the Scripts and Program Files path of different Python versions that you currently want to use and work in, and where you want to store all your necessary packages should be put first followed by others. Simply, click on the Browse button and select the path of the Script folder and the Python3 itself.
Note:Remove any other Python Version available in the System variables, for example, Python2. Select its path and click on the Delete button.
Press the OK button to save the changes in the Windowgovernmentalentaltal Variables.
Once this is done, restart your Command prompt and again type python —version . Now you will find the desired version there on the system and ready to be usable by the coder.
Conclusion
This is how a user can get his/her Python version when there are multiple versions on the computer. Try this out and start coding with your desired version.
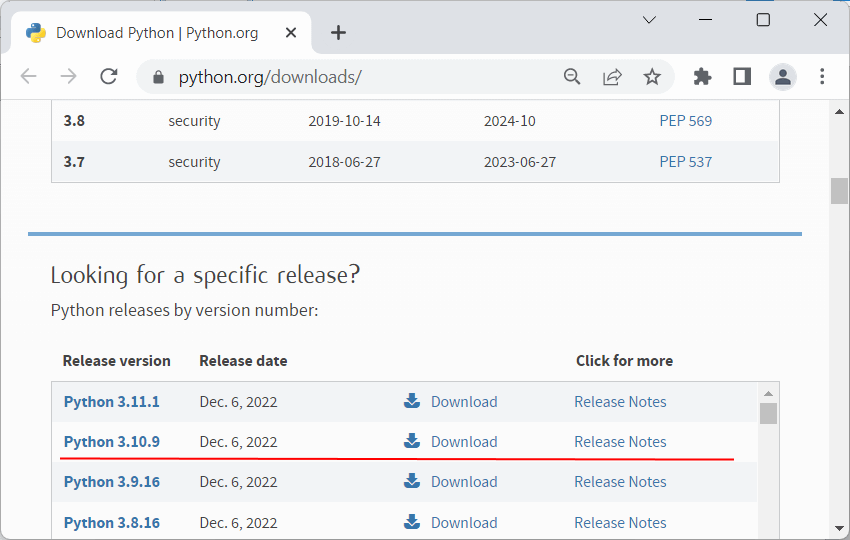
На одной рабочей машине одновременно может быть установлено несколько версий Python. Это бывает полезно, когда идет работа с некоторыми внешними библиотеками, которые поддерживают разные версии python, либо в силу каких-то других причин нам надо использовать несколько разных версий. Например, на момент написания статьи последней и актуальной является версия Python 3.11 . Но, допустим, необходимо также установить версию 3.10 , как в этом случае управлять отдельными версиями Python?
Windows
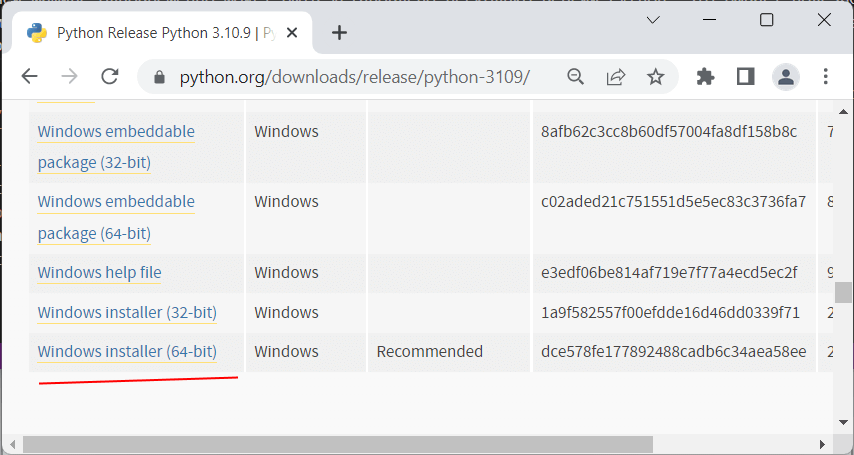
На странице загрузок https://www.python.org/downloads/ мы можем найти ссылку на нужную версию:
И также загрузить ее и установить:
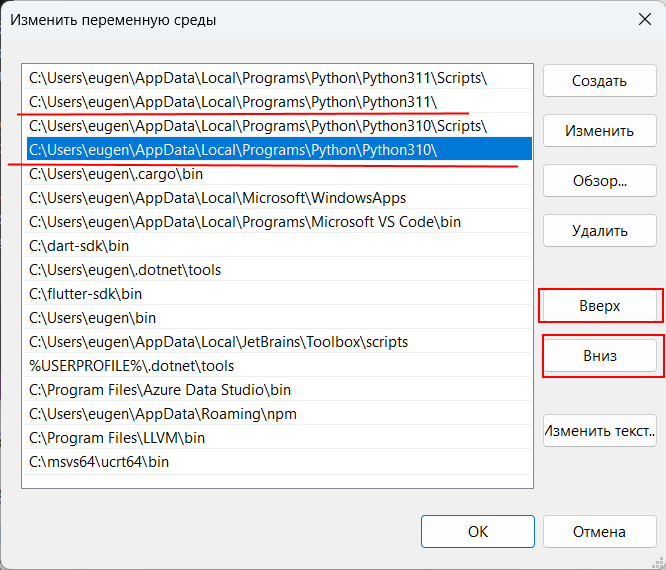
Чтобы при использовании интерпретатора Python не прописывать к нему весь путь, добавим при установке его в переменные среды. Но здесь надо учитывать, что в переменных среды может содержаться несколько путей к разным интерпретаторам Python:
Та версия Python, которая находится выше, будет версией по умолчанию. С помощью кнопки «Вверх» можно нужную нам версию переместить в начало, сделав версией по умолчанию. Например, в моем случае это версия 3.11. Соответственно, если я введу в терминале команду
python --version
или
py --version
то консоль отобразит версию 3.11:
C:\python>python --version Python 3.11.0
Для обращения к версии 3.10 (и всем другим версиям) необходимо использовать указывать номер версии:
C:\python>py -3.10 --version Python 3.10.9
например, выполнение скрипта hello.py с помощью версии 3.10:
Подобным образом можно вызывать и другие версии Python.
MacOS
На MacOS можно установить разные версии, например, загрузив с официального сайта пакет установщика для определенной версии.
Для обращения к определенной версии Python на MacOS указываем явным образом подверсию в формате python3.[номер_подверсии] . Например, у меня установлена версия Python 3.10. Проверим ее версию:
Аналогично обращении к версии python3.9 (при условии если она установлена)
К примеру выполнение скрипта hello.py с помощью версии python 3.10:
Linux
На Linux также можно установить одновременно несколько версий Python. Например, установка версий 3.10 и 3.11:
Одна из версий является версий по умолчанию. И для обращения к ней достаточно прописать python3 , например, проверим версию по умолчанию:
Для обращения к другим версиям надо указывать подверсию:
python3.10 --version python3.11 --version
Например, выполнение скрипта hello с помощью версии Python 3.10:
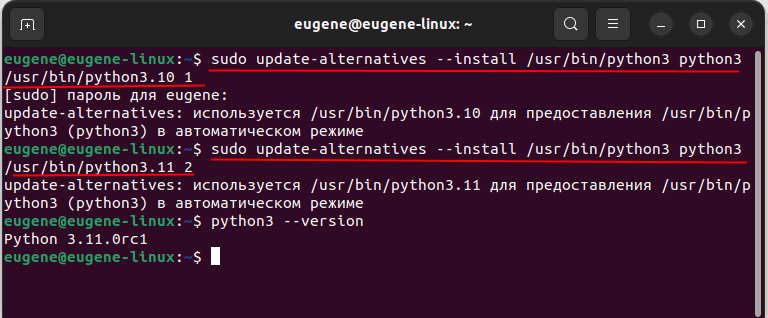
Но может сложиться ситуация, когда нам надо изменить версию по умолчанию. В этом случае применяется команда update-alternatives для связывания определенной версии Python с командой python3. Например, мы хотим установить в качестве версии по умолчанию Python 3.11. В этом случае последовательно выполним следующие команды:
Числа справа указывают на приоритет/состояние. Так, для версии 3.11 указан больший приоритет, поэтому при обращении к python3 будет использоваться именно версия 3.11 (в моем случае это Python 3.11.0rc1)
Switching between versions of python installed from microsoft store
So I installed python 3.9 and 3.7 from the microsoft store because I need both versions for certain projects, and I am wondering if it is possible to switch between which version of python I want my system to use.
1 answer
Hi @EMP_H , Yes, you should be able to switch between python versions. As a standard, it is recommended to use the python3 command or python3.7 to select a specific version. The py.exe launcher will automatically select the most recent version of Python you've installed. You can also use commands like py -3.7 to select a particular version, or py --list to see which versions can be used. HOWEVER, the py.exe launcher will only work if you are using a version of Python installed from python.org. When you install Python from the Microsoft Store, the py command is not included. Since you're using the Microsoft Store version of Python, you should use the python3 (or python3.7 ) command. Hope that helped. Please let us know if you have further questions. Best, Grace For information please read this FAQ doc for using python on windows.
Thanks for the valuable information. But how can we run program/script using particular interpreter. And if I have to run commands like converge run test_app.py (in py -3.7) but whenever I execute the command it usually getd executed by conda py -3.8.8 Please give suggestion on this..
# VS Code: Change Python version & select correct Interpreter
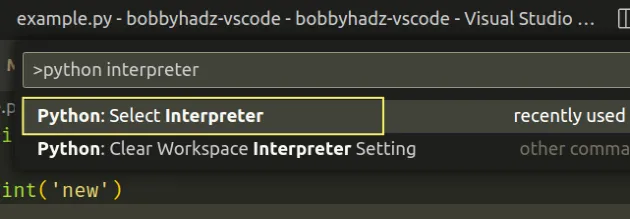
To change your Python version and select the correct Python interpreter in VS Code:
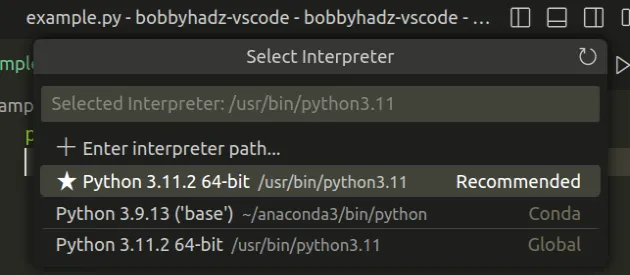
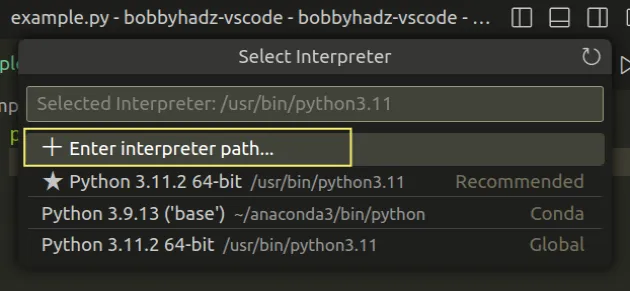
Type python interpreter and click on Python: Select Interpreter.
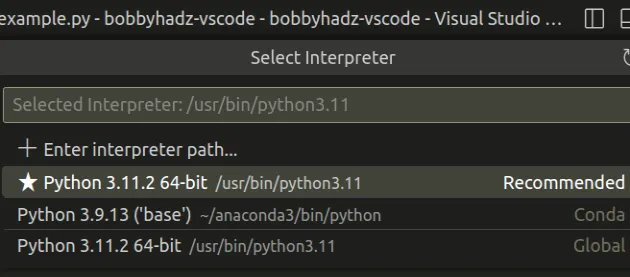
If you use an anaconda distribution, the correct interpreter will have ('base') in its name as shown in the screenshot.
For example, "Python 3.9.13 ('base') ~/anaconda3/bin/python".
Notice that the path to the interpreter on your machine is contained in each option.
Selecting an interpreter sets which Python interpreter is used by the Python extension in the workspace (project).
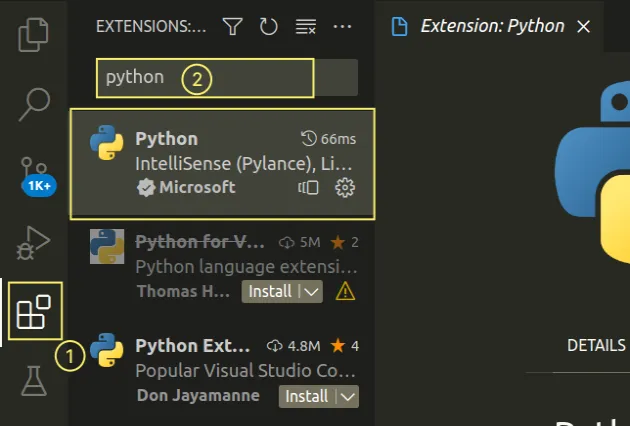
Make sure you have the Python extension by Microsoft installed.
Click on Extensions in the left sidebar.
You can also open the Extensions menu by pressing:
Ctrl + Shift + X on Windows or Linux
Command + Shift + X on macOS
Type python.
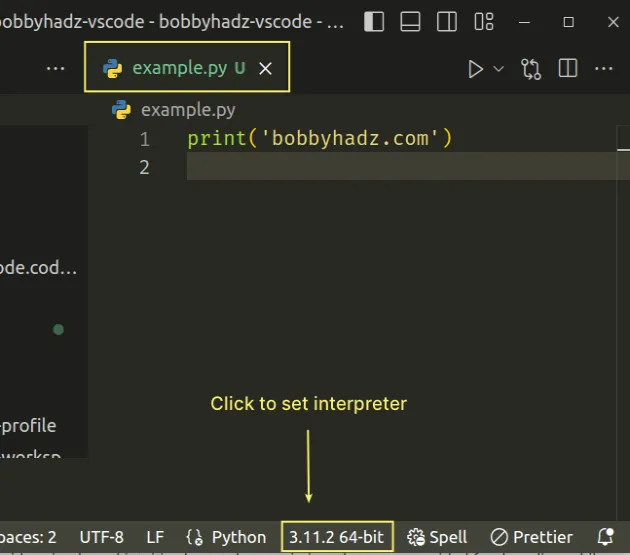
# Setting the Python interpreter via the Status Bar
You can also use the status bar to set the Python interpreter and change the Python version:
Make sure to open a Python file, otherwise, the Python version won't show in the status bar at the bottom.
# Explicitly specifying the path to the Python interpreter in VS Code
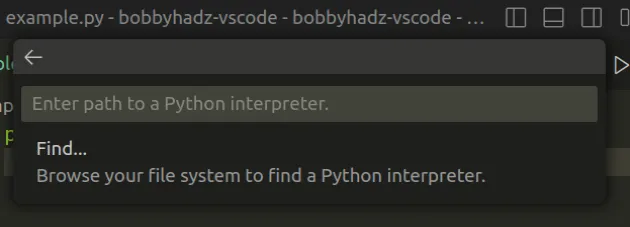
If you aren't able to set the Python version and interpreter using the previous two approaches or your preferred Python interpreter doesn't show up in the menu, you have to specify the complete path to the interpreter.
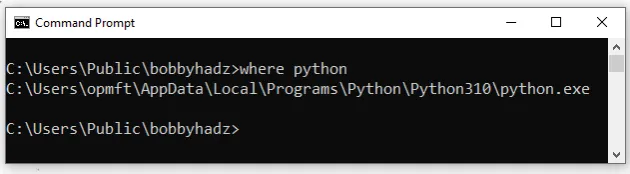
Open your terminal and issue the where python command.
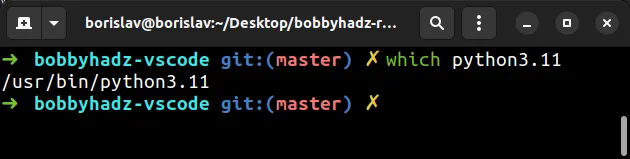
On Linux and macOS, use the which python command instead.
If you want to get the path to a specific Python version, issue the command scoped to the specific interpreter, e.g. which python3.11 or where python 3.11 .
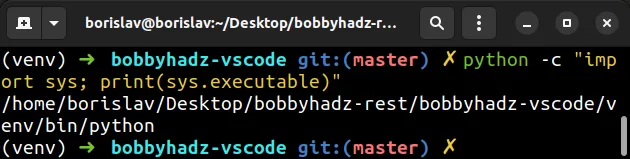
If you aren't able to find the path to the Python interpreter, try issuing the following command.
Copied!
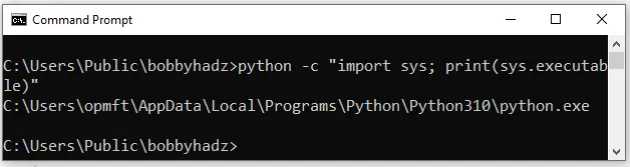
python -c "import sys; print(sys.executable)"
And here is a screenshot of running the command on Windows.
Make note of the complete path to the interpreter.
Type python interpreter and click on Python: Select Interpreter.
# Setting the Default interpreter Path
If you still aren't able to set the correct Python interpreter:
Make note of the complete path to the interpreter as shown in the previous subheading.
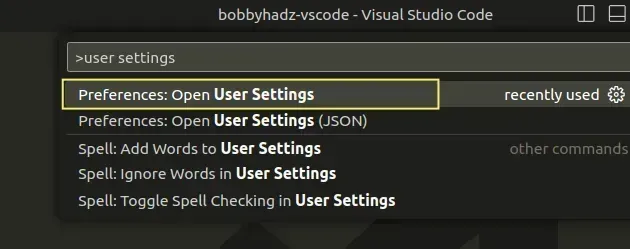
Press Ctrl + Shift + P (or Command + Shift + P on macOS).
You can also open the settings screen by pressing Ctrl + , on Windows and Linux or Cmd + , on macOS.
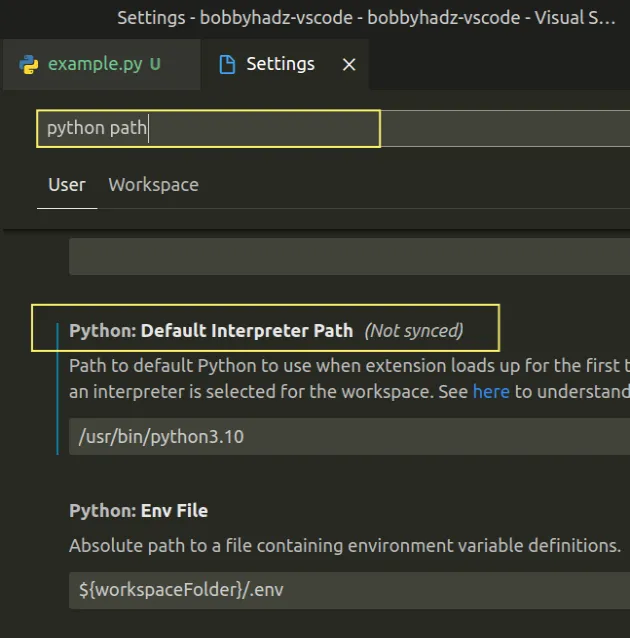
Type python path and scroll to the Python: Default interpreter Path setting.
On Windows, the path might be something similar to:
Make sure to paste the correct absolute path as shown in the previous subheading.
The python.defaultInterpreterPath setting is read by the Python extension.
The setting should point to the default Python to use when the extension loads up for the first time.
If you select an interpreter for the workspace, the setting is no longer used.
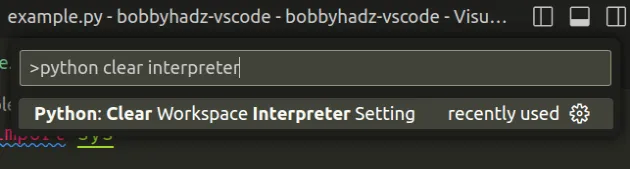
For example, I can clear my interpreter by:
Typing python clear interpreter and clicking on Python: Clear Workspace Interpreter Setting.
Then, the Python extension will use the python.defaultInterpreterPath setting.
If you set your interpreter by using the command palette or by clicking on the Python version in the status bar at the bottom (as shown previously), then the python.defaultInterpreterPath is no longer read by the extension.
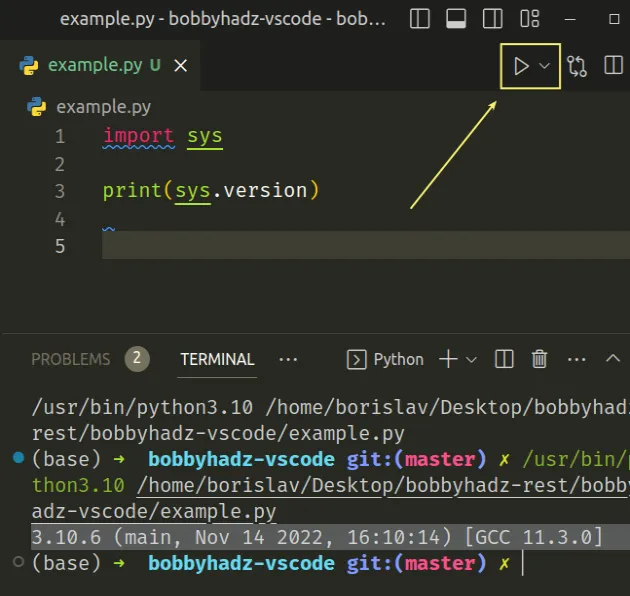
I've cleared my selected Python interpreter, so if I click on the Run button, I can see that the correct Python version is printed.
I used the following code to print the version of the Python interpreter within a module.
Copied!
import sys print(sys.version)
You can click on the Run Python File button in the top right corner to run the code and print the active version of the Python interpreter.
If you get the error message "Linter pylint is not installed", check out my other article:
# Additional Resources
You can learn more about the related topics by checking out the following tutorials:
I wrote a book in which I share everything I know about how to become a better, more efficient programmer.