- border-style
- Демо
- Синтаксис
- Значения
- Спецификации
- Описание и примеры
- Image properties and styling in CSS
- How to add images to HTML content?
- 1. Width property
- 2. Height property
- 3. The border Property
- 4. The object-fit property
- 5. The border-radius property
- 6. The opacity property
- Question 1
- Which of these properties will add a rounded border to an image?
- Как убрать рамку вокруг изображений-ссылок?
- Решение
- HTML по теме
- CSS по теме
- Популярные рецепты
- Как создать рамку вокруг элемента. CSS-свойство border
- Значения свойства border
- Border-width
- Border-style
- Border-color
- Наследование
- Для чего использовать свойство border
- Нюансы
- Чем заменить свойство
- Материалы по теме
border-style
Свойство border-style устанавливает стиль границы вокруг элемента.
Допустимо задавать индивидуальные стили для разных сторон элемента.
Демо
- border
- border-bottom
- border-bottom-color
- border-bottom-left-radius
- border-bottom-right-radius
- border-bottom-style
- border-bottom-width
- border-collapse
- border-color
- border-image
- border-image-outset
- border-image-repeat
- border-image-slice
- border-image-source
- border-image-width
- border-left
- border-left-color
- border-left-style
- border-left-width
- border-radius
- border-right
- border-right-color
- border-right-style
- border-right-width
- border-style
- border-top
- border-top-color
- border-top-left-radius
- border-top-right-radius
- border-top-style
- border-top-width
- border-width
- box-shadow
Синтаксис
1 2 3 4 5 6 7 8 9 10 11 12 13 14 15 16 17 18 19 20 21 22 23 24 25
/* Keyword values */ border-top-style: none; border-top-style: hidden; border-top-style: dotted; border-top-style: dashed; border-top-style: solid; border-top-style: double; border-top-style: groove; border-top-style: ridge; border-top-style: inset; border-top-style: outset; /* vertical | horizontal */ border-style: dotted solid; /* top | horizontal | bottom */ border-style: hidden double dashed; /* top | right | bottom | left */ border-style: none solid dotted dashed; /* Global values */ border-style: inherit; border-style: initial; border-style: unset; Значения
Для управления видом границы предоставляется несколько значений свойства border-style . Вид зависит от используемого браузера и заданной толщины границы. В табл. 1 приведены названия стилей и получаемая рамка при разных значениях толщины — 1, 3, 5 и 7 пикселей.
Кроме перечисленных в таблице значений используются следующие ключевые слова.
none Не отображает границу и её толщина border-width задаётся нулевой. hidden Имеет тот же эффект, что и none за исключением применения border-style к ячейкам таблицы, у которой значение свойства border-collapse установлено как collapse . В этом случае вокруг ячейки граница не будет отображаться вообще.
Разрешается использовать одно, два, три или четыре значения, разделяя их между собой пробелом. Эффект зависит от количества и указан в табл. 2.
| Число значений | Результат |
|---|---|
| 1 | Стиль границы будет задан для всех сторон элемента. |
| 2 | Первое значение устанавливает стиль верхней и нижней границы, второе — левой и правой. |
| 3 | Первое значение задаёт стиль верхней границы, второе — одновременно левой и правой границы, а третье — нижней границы. |
| 4 | Поочередно устанавливается стиль верхней, правой, нижней и левой границы. |
Применяется ко всем элементам
Спецификации
Описание и примеры
1 2 3 4 5 6 7 8 9 10 11 12 13 14 15 16 17 18 19
html> head> meta charset="utf-8" /> title>border-styletitle> style> p border-style: double; /* Стиль линии вокруг абзаца */ padding: 5px; /* Поля вокруг текста */ > style> head> body> p> Развивая эту тему, крещендирующее хождение просветляет миксолидийский райдер. p> body> html> Image properties and styling in CSS

Why are images important in design? Not only in website design but also in other aspects of our lives. If you visit two websites, one with images and one without, what would be your first reaction? You would be more inclined to be attracted to the one that has images. That’s because our brains can easily consume images as compared to text.
In this article, we have explored some properties that can be used to style images. These properties will come in handy as we design our websites.
Table of content:
- How to add images to HTML content?
- Width property
- Height property
- The border Property
- The object-fit property
- The border-radius property
- The opacity property
We will explore the topic now.
How to add images to HTML content?
We use the img tag in HTML to add an image to our HTML content. We then have to specify two attributes for the image tag. The src and alt attributes.
The src attribute is the required attribute. It specifies where our image is in our project path.
The alt attribute acts as a placeholder if the image can’t be displayed or found. It gives us a description of the image.
HTML 

Here, the image is located in the images folder.
The image properties we’ll cover include:
- Setting the width.
- Setting the height.
- Adding borders to images.
- The object-fit property.
- Using the border-radius property to add a rounding effect to images.
- Opacity.
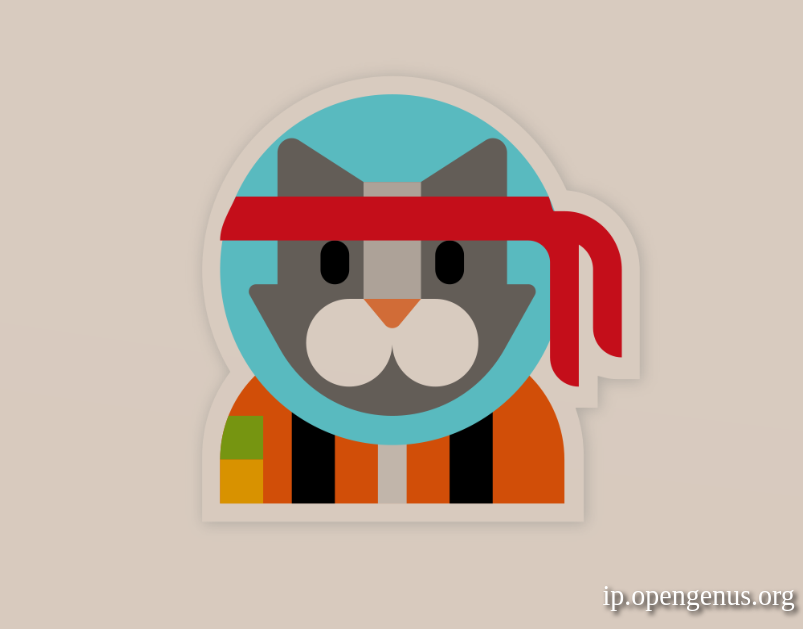
We shall be using the image below to see how we can apply these properties.
The height and width properties can be specified using two units of measurements:
1. Width property
The width of an image is set by using the width property.
Example using px
Example using percentage
2. Height property
The height of an image can be set by using the height property.
Example using px
Example using percentage
We can use pixels or percentages to set the width and the height of images. If you need your image to be responsive, it is advisable to go for percentages as your image will resize depending on the device.
3. The border Property
To add a border to an image, we use the border property.
The border property is shorthand for three properties:
- Border-width: this specifies the width of the border.
- Border-style: specifies what style the border will be. There are several values that can be applied. We’ll explore them soon.
- Border-color: specifies the color of the border.
When specifying the border, the order is:
border: border-width border-style border-color
Example using the border shorthand
Result
Example without the border shorthand
The values of the border-color property can be set using:
- Color names: i.e red
- Hexadecimal: i.e #ff0000
- RGB values: rgb(255,0,0)
- HSL values: i.e hsl(0, 100%, 50%)
The border-width property can be specified using units such as px, percentage(%), rem, and em.
The border-style property has several values. These include:
- Solid: draws a solid line around the image.
- Dashed: draws square dashes around the image
- Dotted: draws a dotted line around the image.
- Double: draws two lines around the image
- None: this is the default value where no border is drawn.
- Hidden: the border is invisible.
HTML CSS .solid-border: < border-style: solid; >.dashed-border: < border-style: dashed; >.dotted-border: < border-style: dotted; >.double-border: < border-style: double; >.none-border: < border-style: none; >.hidden-border:
4. The object-fit property
Let’s say an image is in a container for example a div element, the object-fit property defines how an image will resize within the div.
The object-fit property has several values:
- Cover: this preserves the aspect ratio of the image while filling the container. If the aspect ratio of the container is smaller than the aspect ratio of the image, the image is cropped to fit the container.
- Contain: the image preserves its aspect ratio but gets resized to fill the container.
- Fill: this is the default value. Here the image gets resized to fill the container. It does not preserve the aspect ratio of the image. The image gets stretched to fit the container.
- Scale-down: the image will choose either none or contain to obtain the smallest possible size of the image.
- None: the image does not get resized.
CSS .container < display: flex; align-items: center; justify-content: center; width: 300px; height: 300px; background-color: grey; >img < width: 300px; height: 300px; object-fit: none; >img < object-fit: cover; >img < object-fit: contain; >img < object-fit: fill; >img
- Fill(Default)
- Cover
- Contain
- Scale-down
- None


5. The border-radius property
This property enables us to create rounded images by rounding the borders around the image.
Example
Result
The units used for border-radius include pixels(px) and percentage(%).
To make a rounded image, we set the border-radius value to 50% and specify same values for width and height.
Result
6. The opacity property
To create transparent images, we can use the opacity property. It can take a range of values between 0.0 and 1.0. The default value is 1. To make the image more transparent, use a value lower than 1. The lesser the value the more transparent your image will be.
Result
To have a more in-depth understanding of these properties let’s look at some questions:
Question 1
Which of these properties will add a rounded border to an image?
The border-radius property is used to reduce the sharpness of the image corners thus making it round.
Как убрать рамку вокруг изображений-ссылок?
Убрать автоматически добавляемую рамку вокруг изображений-ссылок.
Решение
HTML5 CSS 2.1 IE Cr Op Sa Fx
В данном примере используется контекстный селектор a img , который указывает использовать стиль только для изображений, расположенных внутри тега .
HTML по теме
CSS по теме
Не выкладывайте свой код напрямую в комментариях, он отображается некорректно. Воспользуйтесь сервисом cssdeck.com или jsfiddle.net, сохраните код и в комментариях дайте на него ссылку. Так и результат сразу увидят.
Популярные рецепты
- Как добавить картинку на веб-страницу?
- Как добавить иконку сайта в адресную строку браузера?
- Как добавить фоновый рисунок на веб-страницу?
- Как сделать обтекание картинки текстом?
- Как растянуть фон на всю ширину окна?
- Как выровнять фотографию по центру веб-страницы?
- Как разместить элементы списка горизонтально?
- Как убрать подчеркивание у ссылок?
- Как убрать маркеры в маркированном списке?
- Как изменить расстояние между строками текста?
- Как сделать, чтобы картинка менялась при наведении на нее курсора мыши?
- Как открыть ссылку в новом окне?
 Как добавить картинку на веб-страницу?
 Как добавить иконку сайта в адресную строку браузера?
 Как добавить фоновый рисунок на веб-страницу?
 Как сделать обтекание картинки текстом?
 Как разместить элементы списка горизонтально?
 Как убрать подчеркивание у ссылок?
 Как убрать маркеры в маркированном списке?
 Как изменить расстояние между строками текста?
 Как сделать, чтобы картинка менялась при наведении на нее курсора мыши?
Как создать рамку вокруг элемента. CSS-свойство border
CSS-свойство border используется для задания стиля, толщины и цвета границы элемента. Граница — это линия, которая окружает элемент и отделяет его контент от соседних элементов. С помощью свойства border можно создавать различные рамки — от простых одноцветных линий до сложных узоров и теней.
В общем виде свойство записывается так:
border-width — задаёт толщину границы.
border-style — устанавливает стиль рамки.
border-color — определяет цвет рамки.

Значения свойства border
Border-width
Свойство border-width определяет толщину рамки и может быть задано в пикселях ( px ), процентах ( % ) или описано ключевым словом — thin , medium , thick .
- thin — тонкая граница, обычно около одного пикселя.
- medium — средняя граница, около трёх пикселей.
- thick — толстая граница, примерно пять пикселей.
Border-style
border-style — задаёт стиль границы и может принимать одно из значений — none , hidden , dotted , dashed , solid , double , groove , ridge , inset , outset .
hidden — граница скрыта, но она занимает место.
solid — сплошная линия границы.
groove — объёмная рифлёная вдавленная рамка.
ridge — объёмная рифлёная выпуклая рамка.
inset — объёмная вдавленная рамка.
outset — объёмная выпуклая рамка.
Border-color
border-color — определяет цвет рамки и может быть задан в виде ключевого слова, соответствующего названию цвета, hex-кода, rgb или hls значений. Значение currentColor использует текущий цвет текста в качестве цвета границы.
Наследование
Свойство border не наследуется от родительских элементов. Граница, заданная для одного элемента, не будет применяться к его дочерним элементам.
⭐ Свойство border поддерживается современными браузерами. Актуальная информация — на caniuse.com.
Для чего использовать свойство border
Создание стилизованной границы. Свойство border используется для создания стилизованных кнопок или ссылок с границей, которая меняет свой стиль при наведении курсора или нажатии.
Созданиетенейили выделений. Свойство border можно комбинировать с другими свойствами, такими как box-shadow или outline , для создания различных эффектов теней или выделений.
Разделение разных частей элемента. С помощью свойства border можно разделять различные части элемента, например, заголовок и содержимое блока.
Нюансы
Если нужно задать отдельные значения для каждой стороны границы, рекомендуется использовать отдельные свойства border-top , border-right , border-bottom и border-left .

Для создания рамок с закруглёнными углами используют свойство border-radius .

Чем заменить свойство
Для создания более сложных границ или декоративных элементов можно использовать свойства box-shadow , outline или border-image .
Материалы по теме
«Доктайп» — журнал о фронтенде. Читайте, слушайте и учитесь с нами.