- Отчетность в Java с использованием DynamicReports и JasperReports
- Отчетность на Java с использованием DynamicReports и JasperReports
- 1. Скачать DynamicReports
- 2. Источник данных отчета
- 3. Конструктор отчетов
- 4. Полный пример
- 5. Запустить его
- Reports in java
- Get started with java
- Install jsreport
- Create java project
- Render with java client
- Conclusion
- How To Create A Report In Java Using iReport Designer
- How to create a report in Java using iReport Designer Steps
- About How To Create A Report In Netbeans Using iReport Designer In Java
- Leave a Comment Cancel reply
Отчетность в Java с использованием DynamicReports и JasperReports
Отчетность на Java с использованием DynamicReports и JasperReports
В этом примере показано, как создать простой отчет с помощью DynamicReports и JasperReports. DynamicReports — это библиотека отчетов Java, которая позволяет создавать документы отчетов, которые можно экспортировать во многие популярные форматы. Он основан на известной библиотеке JasperReports.
Инструменты, используемые в этой статье:
- DynamicReports 3.1.3
- JasperReports 5.0.4
- MySQL 5.5
- Maven 3
- JDK 1.6.0
1. Скачать DynamicReports
Загрузите DynamicReports с официального сайтаwebsite. Если вы используете Maven, вы можете загрузить его из центрального репозитория Maven. Для проектов Maven добавьте следующую конфигурацию в файл pom.xml:
net.sourceforge.dynamicreports dynamicreports-core 3.1.3 mysql mysql-connector-java 5.1.25
2. Источник данных отчета
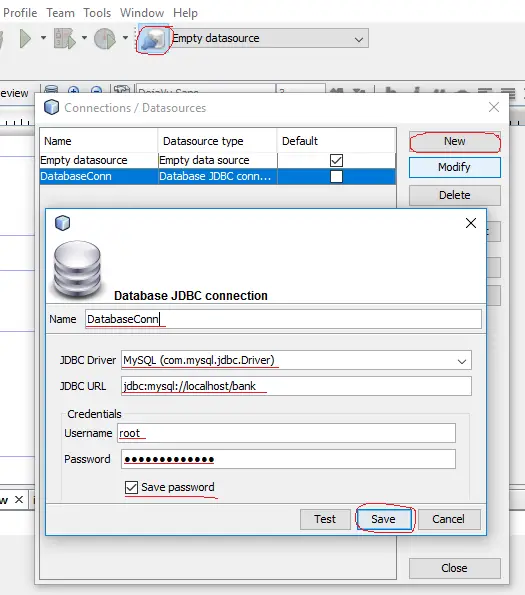
Подключитесь к базе данных MySQL с помощью драйвера JDBC.
Class.forName("com.mysql.jdbc.Driver"); Connection connection = DriverManager.getConnection("jdbc:mysql://hostname:port/dbname","username", "password"); 3. Конструктор отчетов
Предположим, что сервер MySql содержит таблицу клиентов базы данных, а таблица клиентов имеет следующую структуру:
Мы создадим отчет, который получит всех клиентов из таблицы, и данные будут помещены в отчет.
3.1 Create a new empty report object.
JasperReportBuilder report = DynamicReports.report();
3.2 Now create a report colum for each database column.
Columns.column("Customer Id", "id", DataTypes.integerType()) Первый параметр — это метка столбца, которая будет отображаться в заголовке отчета.
Второй параметр — это имя столбца, это имя должно совпадать с именем столбца базы данных.
Третий параметр — тип столбца Java.
3.3 Add the report columns.
report .columns( Columns.column("Customer Id", "id", DataTypes.integerType()), Columns.column("First Name", "first_name", DataTypes.stringType()), Columns.column("Last Name", "last_name", DataTypes.stringType()), Columns.column("Date", "date", DataTypes.dateType())) 3.4 Add a title text and a page number to the report.
.title(//title of the report Components.text("SimpleReportExample") .setHorizontalAlignment(HorizontalAlignment.CENTER)) .pageFooter(Components.pageXofY())//show page number on the page footer 3.5 Finally set the data source query and connection.
.setDataSource("SELECT id, first_name, last_name, date FROM customers ", connection); 4. Полный пример
package net.sf.dynamicreports.examples; import java.io.FileNotFoundException; import java.io.FileOutputStream; import java.sql.Connection; import java.sql.DriverManager; import java.sql.SQLException; import net.sf.dynamicreports.jasper.builder.JasperReportBuilder; import net.sf.dynamicreports.report.builder.DynamicReports; import net.sf.dynamicreports.report.builder.column.Columns; import net.sf.dynamicreports.report.builder.component.Components; import net.sf.dynamicreports.report.builder.datatype.DataTypes; import net.sf.dynamicreports.report.constant.HorizontalAlignment; import net.sf.dynamicreports.report.exception.DRException; public class SimpleReportExample < public static void main(String[] args) < Connection connection = null; try < Class.forName("com.mysql.jdbc.Driver"); connection = DriverManager.getConnection( "jdbc:mysql://hostname:port/dbname","username", "password"); >catch (SQLException e) < e.printStackTrace(); return; >catch (ClassNotFoundException e) < e.printStackTrace(); return; >JasperReportBuilder report = DynamicReports.report();//a new report report .columns( Columns.column("Customer Id", "id", DataTypes.integerType()), Columns.column("First Name", "first_name", DataTypes.stringType()), Columns.column("Last Name", "last_name", DataTypes.stringType()), Columns.column("Date", "date", DataTypes.dateType())) .title(//title of the report Components.text("SimpleReportExample") .setHorizontalAlignment(HorizontalAlignment.CENTER)) .pageFooter(Components.pageXofY())//show page number on the page footer .setDataSource("SELECT id, first_name, last_name, date FROM customers", connection); try < //show the report report.show(); //export the report to a pdf file report.toPdf(new FileOutputStream("c:/report.pdf")); >catch (DRException e) < e.printStackTrace(); >catch (FileNotFoundException e) < e.printStackTrace(); >> > 5. Запустить его
Запустите класс SimpleReportExample.
Reports in java
We are happy to announce jsreport has the java client now. The big thank you to the hedonCZ who made this possible.
Get started with java
Install jsreport
The first you need to install jsreport server. This can be as easy as this:
npm install @jsreport/jsreport-cli -g mkdir jsreportapp cd jsreportapp jsreport init jsreport configure jsreport start docker run -p 5488:5488 jsreport/jsreport Now you can open jsreport on the default http://localhost:5488 and prepare your first reports. You can find the tutorials here if you are new to jsreport.
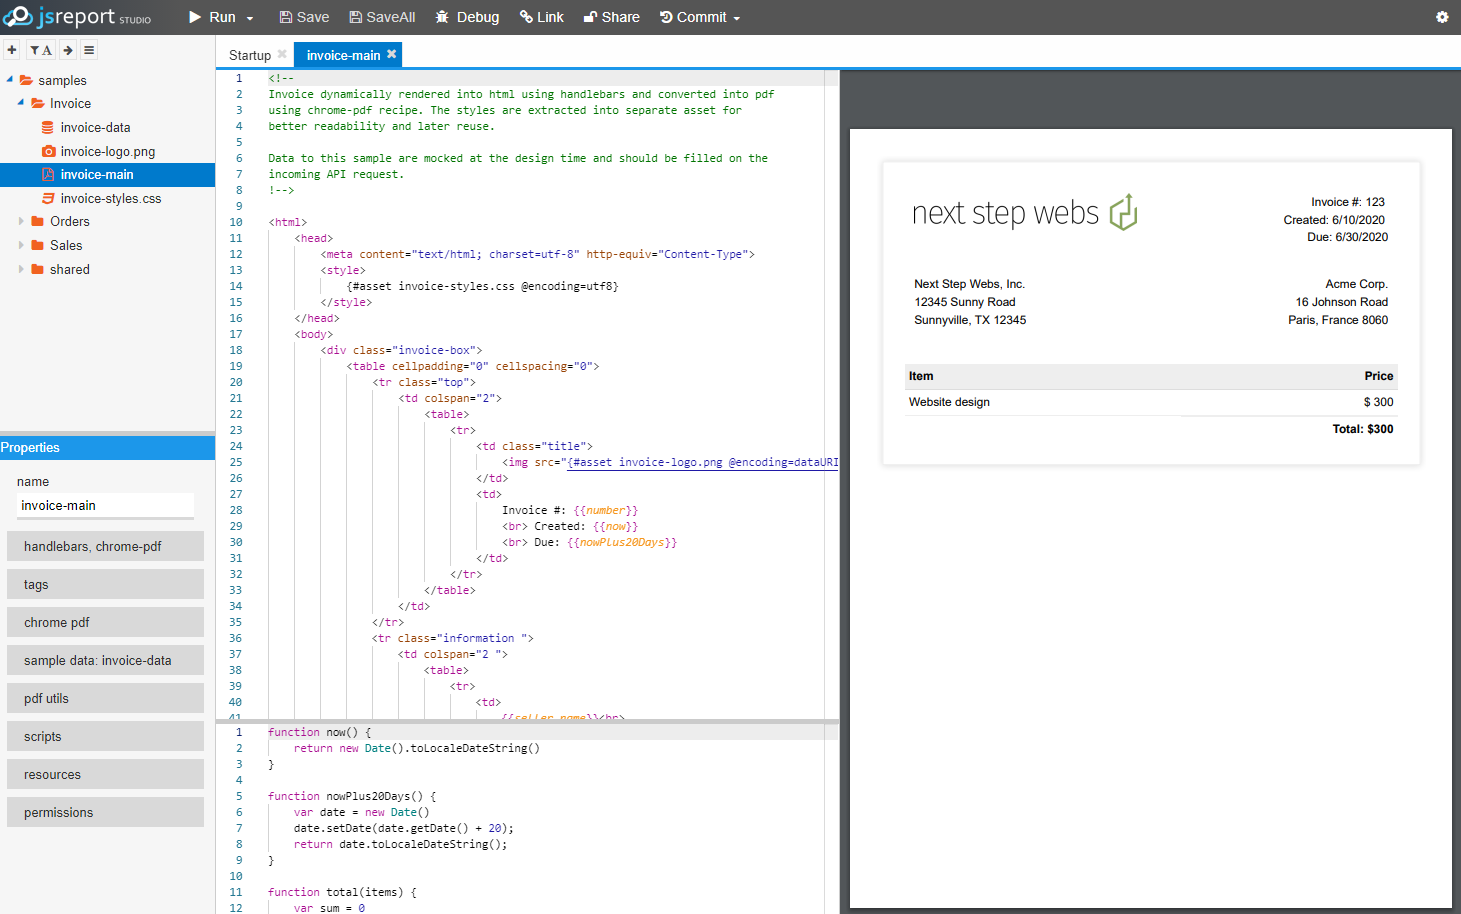
Create java project
Now create a basic java project and use maven to install jsreport-javaclient dependency.
dependency> groupId>io.github.hedonczgroupId> artifactId>jsreport-javaclientartifactId> version>1.0.2version> dependency> Render with java client
Then you can get the JsReportService interface and render the stored template.
JsReportService reportingService = new JsReportServiceImpl("http://localhost:5488"); Report report = reportingService.render("invoice-main", myDydata); Files.copy(report.getContent(), Paths.get("report.pdf")); The data can be any serializable object or hashmap representing the input data of the report.
Conclusion
I believe it was already a piece of cake for the java developers, to use jsreport rest API. However, I also believe this new java client makes the learning curve much shorter and the solutions less error-prone.
Please give it a try and let us know how you like it. If you are interested, the author happily accepts contributions and PRs.
How To Create A Report In Java Using iReport Designer
This tutorial entitled “How to create a report in Java using iReport Designer” will teach you on how to create or add a new report file inside your netbeans package. This tutorial also discuss on how to setup your database connection through your report designer.
A java report file has an extension “.jrxml” use in designing your report. After compiling your .jrxml file, it will create a new file with a new extension “.jasper”. The jasper file is use to display your report within your java program while it is running.
How to create a report in Java using iReport Designer Steps
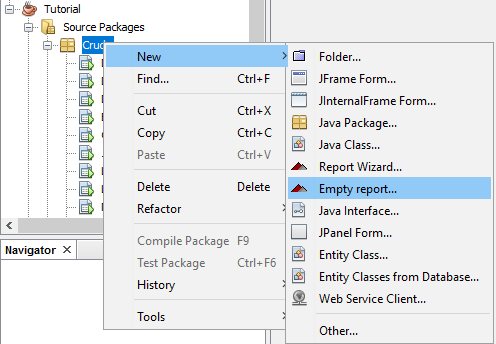
Right-click your source package, select New, and Select Empty Report. You can also select Report Wizard to create your report using wizard.
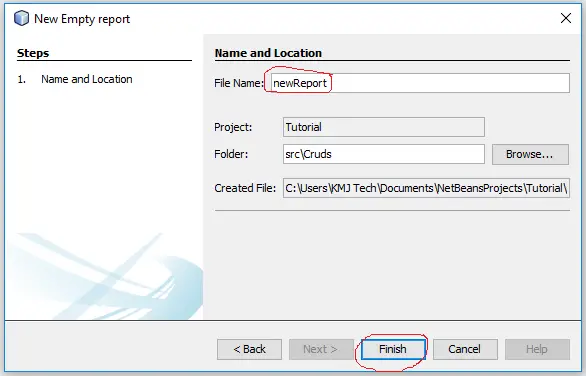
Input the file name of your report and click finish button. In my case, I used “newReport” as my filename.
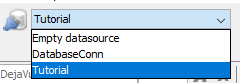
In the Netbeans tools, click the report datasource. The connections & datasources window will display, click the New and fill all the database information. In my example I used MySQL database.
Be sure to select your new created data source before designing your report.
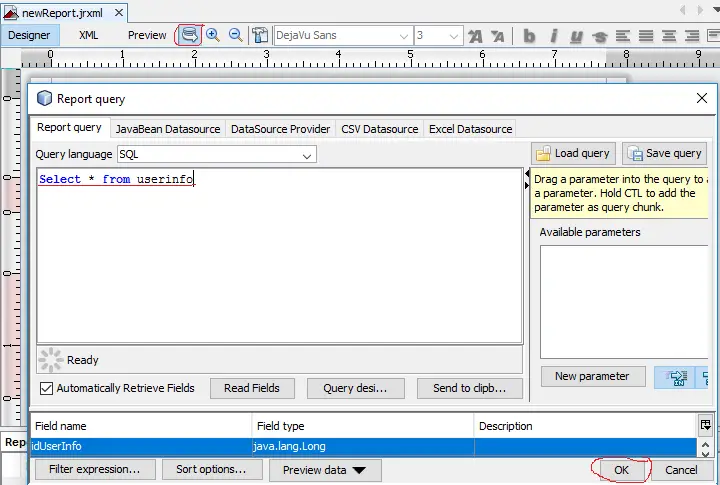
In your report designer, click the add query. Input your query and click the ok button.
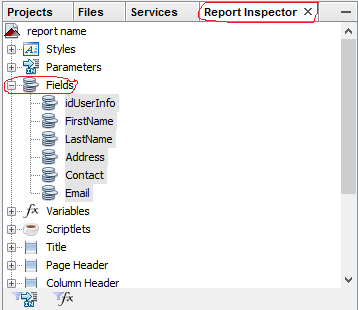
In the upper left of the netbeans window, click the Report Inspector and find the fields option. All the attributes you input in the query will display in the field option.
Highlight all the attributes displayed in the field and drag through your report designer under Detail1.
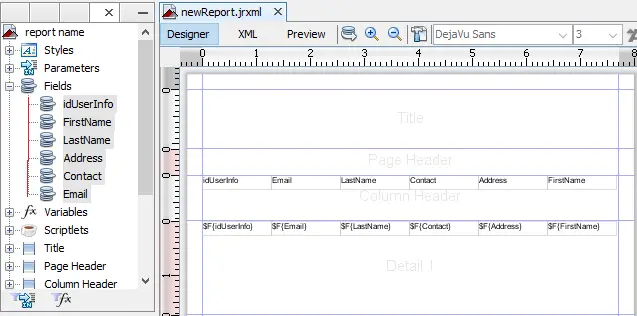
Design your report just look like the image below. All elements and object of the report is located in the Tool palette.

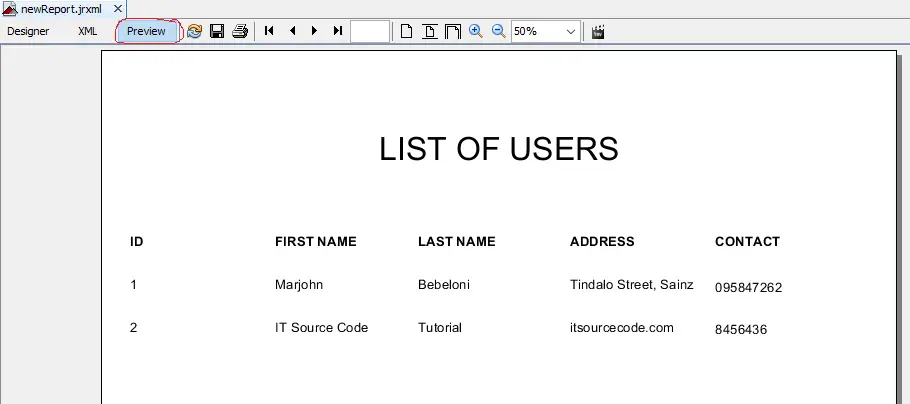
Click the preview button and the output should look like the image below.
About How To Create A Report In Netbeans Using iReport Designer In Java
Remember that this tutorial will teach you on how to create a report inside your Netbeans. In my next tutorial, I will discuss on how to display the report in your Java program. If you have questions and suggestions regarding on this topic, feel free to contact us.
Leave a Comment Cancel reply
You must be logged in to post a comment.