Hello Coders!! In this article, we will use HTML and CSS to create a «Read More Read Less» button. this Read More Button In Html Without Javascript Code so let’s Create this amazing mini project. The Read More and Read Less buttons are useful when you want to hide additional information while still giving visitors a sense of what the article or post is about. You might want to use these buttons in multiple posts or paragraphs. However, writing separate code for each button appears to be time-consuming. It may also have an impact on the performance of your website. In this tutorial, we will create a Read More Read Less button for multiple paragraphs using only a few lines of code. I hope you have a clear vision for the project. Let’s have a look at our Read More Read Less Button using HTML And CSS
Step1: Adding HTML Code
The HTML is hypertext markup language is the main structure of our webpage which will help us to display our content to the browser. All the HTML document must start with this helps the browser to understand the code written follows the lastest HTML format. The HTML document itself begin With and end with . The content that will be displayed in the brower comes under the body section .Inside the body tag main content lies. Let’s take a look at our HTML Code.
Read the full post
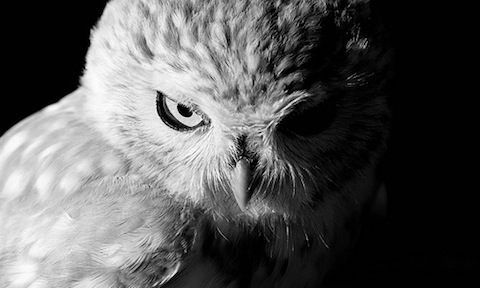
Owls are a group of birds that belong to the order Strigiformes, constituting 200 extant bird of prey species. Most are solitary and nocturnal, with some exceptions (e.g. the Northern Hawk Owl).
Owls hunt mostly small mammals, insects, and other birds, although a few species specialize in hunting fish. They are found in all regions of the Earth except Antarctica, most of Greenland and some remote islands. Though owls are typically solitary, the literary collective noun for a group of owls is a parliament. Owls are characterized by their small beaks and wide faces, and are divided into two families: the typical owls, Strigidae; and the barn-owls, Tytonidae.
First, we’ll use the H1 tag to add the main heading of our article. We’ll start with an article tag, then add an input of type «checkbox» inside it, and then use the label tag to add a label to our check box. We will now add an image to our article by using the image tag. Using the multiple paragraph tag, we will now add multiple pieces of content to our article. Now we have the added the basic structure of our webpage . Let’s us take a look at our HTML output. Before the code, you just need to add the CSS link to our HTML file so that we add styling to our website: Keep note that you must add this link under the head tag .
Cascading Style Sheets (CSS) is a markup language for describing the presentation of a document written in HTML or XML. CSS, like HTML and JavaScript, is a key component of the World Wide Web. Now we will look at our CSS code.
After we’ve added the CSS code, we’ll go over it step by step. To save time, you can simply copy this code and paste it into your IDE. Let us now examine our code step by step. Step1: We’ll use the HTML tag to set the background colour to white, and we will use the universal selector to set the padding and margin to zero. The box sizing was also defined as a border box. Now, we’ll style our article’s heading with the H1 tag. For our heading, we chose «Arial» as the font family. Our heading’s font size is «2 rem,» and the colour is «dark gray.» We also added a text shadow to the article’s heading.
Step2: We will now style the container of our image using the element selector (figure). Here, we’ve set the top and bottom margins to zero and the right margin to «1.3 rem.» We also included the transition in our container. Now, we use «img» to define the width as 100% of our image, and the height is set to auto.
Step3: Now, we use the body to set the maximum width of the article to 480px. Our article’s actual width is set to «90%,» and the font size is set to «75%.» The font family used here is sans-serif. Our article’s position is «relative.» Now, we will style the content of our article by defining the margin bottom of «3rem» and scaling the content with the zoom property. Now, we’ll use the float property to move the image to the left in the article figure, and the float property to move the paragraph to the right in the article section. Using the (last-type-of) selector, we also set the display to «none» and the visibility to «none.»
Step5: We will now style our checkbox with the input type «checkbox.» The border is set to «0» in this case. The height and width are both defined as «1px.» Padding is set to «zero,» and overflow is set to «hidden.» The position is now defined as «absolute,» and the text is aligned to the «centre.» Using the hover selector, we will now set the background colour to «black» and the font colour to «white.»
Step6: When the user clicks on the read more button, the width of our content is set to 100% using the checked selector. Also, when we set the visibility and display to «none» with the first-type-of selector and the visibility and display to «block» with the last-type-of selector. When we check the first type of selector, the content is hidden; when we check the last type of selector, the content is visible.
Now we have completed our css code and belowhere is the output after styling our webpage. Final Output Of Read More Button using HTML And CSS Only:- Read More Read Less Button using HTML And CSS The project is now finished, we have completed the Read More button using CSS Only. Now look at the live preview. Now We have Successfully created the Read More button using HTML and CSS. You can use this project directly by copying it into your IDE. We hope you understood the project, If you have any doubts feel free to comment!! If you find out this Blog helpful, then make sure to search Codewithrandom on Google for Front End Projects with Source codes and make sure to Follow the Code with Random Instagram page. follow : codewithrandom Written By : arun Code by : Pali Madra
Где display: inline-block задает тип элемента (в данном случае кнопка), padding задает отступы внутри кнопки, background-color задает цвет фона, color задает цвет текста, text-decoration: none убирает подчеркивание при наведении на кнопку, border-radius задает скругление углов, font-size задает размер шрифта, а transition задает плавное изменение цвета фона при наведении на кнопку.
Здравствуйте! Я позабыл уже как сделать часть текста открытой, а другую часть закрыть под ссылку «Читать далее». В интернете всё пишут о разных движках, а как сделать с обычным html кодом не нашёл, но помню раньше как то делал.
Кнопка «читать далее» Как добавить кнопку "Читать далее"? Там автоматически она создается, но при нажатии открывается.
Поставить круг по центру белого блока и поставить цифру «1» в центре самого круга Мне нужно поставить круг по центру белого блока и поставить цифру "1" по середине самого круга. Как.
Как средствами CSS поставить блок «Footer» в низ документа? Всем доброго вечера. Я чайник, так что не удивляйтесь. Задача такая — прижать блок "Footer" к низу.
Если в HTML коде есть токой фрагмент <input type="submit" value="button" onClick="">, что можно.
Как то недавно сам рыскал, но одним html не сделаешь. Вот с небольшим js вариант, жестоко вырезал из того что делал сам, поэтому на текст не обращай внимание.
divid="text"> h3onclick="toggle_show('bla-bla2')"style="margin-top:-10px; cursor:pointer; text-align:center;">Как войти в аккаунт?Где скачать Steam?/h3> divid="bla-bla2"style="display: none; "class="spoiler"> Необходимо скачать и установить Steam ahref="http://steampowered.com/download/SteamInstall.msi">http://steampowered.com/download/SteamInstall.msi/a> , далее ввести логин и пароль. /div> h3onclick="toggle_show('bla-bla3')"style="cursor:pointer;margin-top:35px; text-align:center;">Вы продаете ключи?/h3> divid="bla-bla3"style="display: none;"class="spoiler"> Да,иногда в наличии бывают ключи, следите за списком товаров,в основном продаются аккаунты. /div> h3onclick="toggle_show('bla-bla4')"style="cursor:pointer;margin-top:35px; text-align:center;">Как я могу оплатить товар?/h3> divid="bla-bla4"style="display: none;"class="spoiler"> Товар можете оплатить с помощью WebMoney(wmz,wmr,wme,wmu),Яндекс.деньги,Терминалы Оплаты наличными,Почтой России,QIWI,moneymail(rur),деньги@mail.ru, Единый кошелёк,ПЛАТЕЖ.РУ,RBK Money,CONTACT,EasyPay и другие. /div> h3onclick="toggle_show('bla-bla5')"style="cursor:pointer;margin-top:35px; text-align:center;">Как с вами связаться?/h3> divid="bla-bla5"style="display: none;"class="spoiler"> Все способы связи с нашими операторами вы можете найти в специальной странице. /div> h3onclick="toggle_show('bla-bla6')"style="cursor:pointer;margin-top:35px; text-align:center;">Когда я получу аккаунт, если приобрёл через онлайн магазин?/h3> divid="bla-bla6"style="display: none;"class="spoiler"> После оплаты в окне браузера при обновлении страницы вам станут доступны логин и пароль или получив письмо на свой email введёный при покупке. /div> h3onclick="toggle_show('bla-bla7')"style="cursor:pointer;margin-top:35px; text-align:center;">Когда вы бываете в сети?/h3> divid="bla-bla7"style="display: none;"class="spoiler"> Наш онлайн магазин работает 24/7/365.Служба поддержки старается быть в онлайне целый рабочий день. /div> h3onclick="toggle_show('bla-bla8')"style="cursor:pointer;margin-top:35px; text-align:center;">У меня возникли проблемы с аккаунтом, куда обращаться?/h3> divid="bla-bla8"style="display: none;"class="spoiler"> Пишите в STEAM Support. /div> h3onclick="toggle_show('bla-bla9')"style="cursor:pointer;margin-top:35px; text-align:center;">Вы работаете через гаранта?/h3> divid="bla-bla9"style="display: none;"class="spoiler"> Да, через любого гаранта с известного портала. /div> h3onclick="toggle_show('bla-bla10')"style="cursor:pointer;margin-top:35px; text-align:center;">Что такое SteamID?/h3> divid="bla-bla10"style="display: none;"class="spoiler"> SteamID это уникальный номер, который присваивается каждому пользователя Steam при создании. Имеет вид например: STEAM_0:1:11. /div> h3onclick="toggle_show('bla-bla11')"style="cursor:pointer;margin-top:35px; text-align:center;">Подскажите, чем же отличаются между собой 4dig ,5dig, 6dig, 7dig ,8 dig?/h3> divid="bla-bla11"style="display: none;"class="spoiler"> Количеством знаков в STEAM_ID и датой создания аккаунта. /div> /div>