- 1 Installing Oracle Java ME Embedded Software on the Raspberry Pi Board
- Downloading and Installing the PuTTY Terminal Emulator Program
- Preparing the Raspberry Pi Board
- Installing the Oracle Java ME Embedded Software
- Adding an HTTP Proxy for Network Connections on Raspberry Pi
- 1 Installing Oracle Java ME Embedded Software on the Raspberry Pi Board
- Downloading and Installing the PuTTY Terminal Emulator Program
- Preparing the Raspberry Pi Board
- Installing the Oracle Java ME Embedded Software
- Adding an HTTP Proxy for Network Connections on Raspberry Pi
1 Installing Oracle Java ME Embedded Software on the Raspberry Pi Board
This chapter describes installing the Oracle Java ME Embedded 8.1 software on the Raspberry Pi board, installing and using the Developer Agent program on the desktop host, configuring the Oracle Java ME Embedded system, connecting to the Raspberry Pi using a secure shell, and installing and running an Oracle Java ME Embedded application.
The following items are required for developing on the Raspberry Pi board:
- Raspberry Pi Rev. B or Rev. B+ 512 MB board
- Oracle Java ME Embedded 8.1 distribution
- Micro-USB power supply of 0.7 or greater amps, and 5 volts. Note that the power supply must have a micro -USB type B connector, not a regular USB or mini-USB connector.
- USB keyboard and mouse, as well as a monitor. If necessary for your monitor, use an HDMI-to-DVI video cable or adapter.
- SD card of 4 GB or greater. An SD-HC class 10 card is recommended. Do not use a high-speed SD card, because it may be too fast for the Raspberry Pi board.
- Ethernet cable with an RJ-45 connection, as well as a connection to a network with a DHCP server.
- A terminal emulator program, such as PuTTY, if you wish to connect to the board using the Application Management System (AMS) interface.
Downloading and Installing the PuTTY Terminal Emulator Program
Download the PuTTY terminal emulator program ( putty.exe ) from the following site:
The terminal emulator executable file is directly downloadable as putty.exe . The terminal emulator is used to connect to the AMS command-line interface (CLI) that sends commands to the board.
Using the PuTTY terminal emulator program is highly recommended. You can use any terminal program to connect to the CLI, however, Oracle cannot guarantee that other terminal programs work with the CLI in the same manner as PuTTY.
Preparing the Raspberry Pi Board
To develop applications on the Raspberry Pi board, you must first download and install the Wheezy variant of Raspbian Debian Linux on the Raspbian Pi board. To do this, follow these steps:
- Download the Raspbian Wheezy hard-float (Debian Linux) raw image ZIP file to your desktop from the following site: http://www.raspberrypi.org/downloads
- Unzip the distribution file, which creates a single disk image ( .img ) file.
- Mount the SD card to the desktop, and use a utility to write the disk image file to the SD card. Note that this is not the same as copying the file to the base-level directory on the SD card. Instead, it is similar to burning a disk image onto a CD-ROM or DVD-ROM. There are a number of utilities that will perform this action:
- For the Windows operating system, you can use the Disk Image Writer utility located at https://launchpad.net/win32-image-writer .
- For the Mac platform, use the RPi-sd Card Builder located at http://alltheware.wordpress.com/2012/12/11/easiest-way-sd-card-setup .
- For Linux, use the dd command. For more information, see http://en.wikipedia.org/wiki/Dd_(Unix) .
- Eject or unmount the SD card from the desktop computer.
- Connect the RJ-45 network cable, monitor, keyboard, and mouse.
- Install the SD card in the Raspberry Pi board.
- Connect power to the Raspberry Pi board. The red light on the Raspberry Pi board should glow, then in a few seconds, the green light should blink. The blinking green light indicates that the Raspberry Pi board is booting Linux.
- If the Linux installation was successful, the Raspberry Pi board will start and obtain a DHCP address.
- A configuration program ( raspi-config ) runs, which helps you expand the file system partition on the SD card, configure the keyboard and time zone, reset the default password, and so on. Use the up and down arrow keys to make a menu choice. Use the left or right arrow keys to select OK or Cancel . Press Return to run your choice. Note that the default user name is pi , and the default password is raspberry .
- You can perform an update, start the ssh server, and set the graphical desktop to automatically start, then click Finish . At this point, the board should reboot.
- Log in if necessary, and if you are using the desktop, start an LXTerminal.
- Run the ifconfig command to display the Raspberry Pi IP address. This is necessary so that you can access and control the board remotely. Remember this IP address; it will be used in the next set of steps.
Installing the Oracle Java ME Embedded Software
Starting from version 8, the Oracle Java ME Embedded software contains a different architecture than previous versions. With version 8, the user has the option to run a Developer Agent program on the desktop under Windows. Commands that are sent to the board from the Windows desktop are no longer sent directly across the network. Instead, they are sent to the Developer Agent program, which transmits all communication to and from the Oracle Java ME Embedded executable file on the Raspberry Pi board.
The Oracle Java ME Embedded ZIP archive consists of the following directories:
- /appdb: This directory is used on the Pi and contains internal Java libraries
- /bin : This directory is used on the Pi and contains executables and the jwc_properties.ini file
- /legal: This directory contains important legal documentation
- /lib : This directory contains the files needed to compile IMlets on the Raspberry Pi board.
- /util: This directory contains the Developer Agent program.
You must make two copies of the Oracle Java ME Embedded ZIP archive file. The first remains on the Windows desktop, while the second must be transferred to the Raspberry Pi board.
- Use an sftp client or scp command to transfer a copy of the Oracle Java ME Embedded ZIP archive to the Raspberry Pi board. For example, on a UNIX or Mac system, you can transfer the ZIP file using a command similar to the following:
$sftp pi@[IP address of board]
$ssh -l pi [IP address of board]
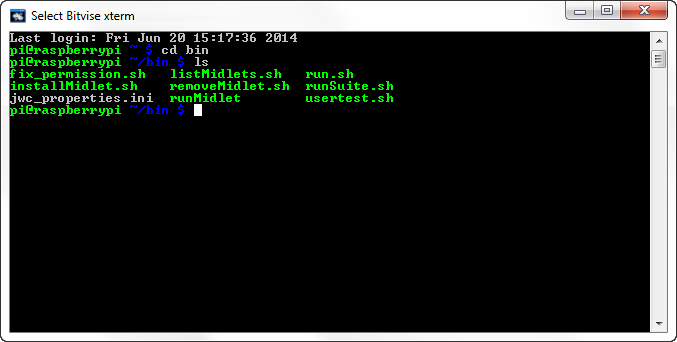
Figure 1-1 Raspberry Pi Bin Directory
Description of «Figure 1-1 Raspberry Pi Bin Directory»
pi@raspberry ~/bin $ fix_permission.sh
Adding an HTTP Proxy for Network Connections on Raspberry Pi
If an HTTP proxy server is required for the Java IMlets on Raspberry Pi to make network connections (such as for HTTP or apt-get ), then Oracle Java ME Embedded on Raspberry Pi can be configured by adding the following lines to the end of the bin/jwc_properties.ini file:
com.sun.midp.io.http.proxy.host = proxy.mycompany.com com.sun.midp.io.http.proxy.port = 80
1 Installing Oracle Java ME Embedded Software on the Raspberry Pi Board
This chapter describes installing the Oracle Java ME Embedded 8 software on the Raspberry Pi board, installing and using the Developer Agent program on the desktop host, configuring the Oracle Java ME Embedded system, connecting to the Raspberry Pi using a secure shell, and installing and running an Oracle Java ME Embedded application.
The following items are required for developing on the Raspberry Pi board:
- Raspberry Pi Rev. B 512 MB board
- Oracle Java ME Embedded 8 distribution
- Micro-USB power supply of .7 or greater amps, and 5 volts. Note that the power supply must have a micro -USB type B connector, not a regular USB or mini-USB connector.
- USB keyboard and mouse, as well as a monitor. If necessary for your monitor, use an HDMI-to-DVI video cable or adapter.
- SD card of 4 GB or greater. An SD-HC class 10 card is recommended. Do not use a high-speed SD card, because it may be too fast for the Raspberry Pi board.
- Ethernet cable with an RJ-45 connection, as well as a connection to a network with a DHCP server.
- A terminal emulator program, such as PuTTY, if you wish to connect to the board using the Application Management System (AMS) interface.
Downloading and Installing the PuTTY Terminal Emulator Program
Download the PuTTY terminal emulator program ( putty.exe ) from the following site:
The terminal emulator executable file is directly downloadable as putty.exe . The terminal emulator is used to connect to the AMS command-line interface (CLI) that sends commands to the board.
Using the PuTTY terminal emulator program is highly recommended. You can use any terminal program to connect to the CLI, however, Oracle cannot guarantee that other terminal programs work with the CLI in the same manner as PuTTY.
Preparing the Raspberry Pi Board
To develop applications on the Raspberry Pi board, you must first download and install the Wheezy variant of Raspbian Debian Linux on the Raspbian Pi board. To do this, follow these steps:
- Download the Raspbian Wheezy hard-float (Debian Linux) raw image ZIP file to your desktop from the following site: http://www.raspberrypi.org/downloads
- Unzip the distribution file, which creates a single disk image ( .img ) file.
- Mount the SD card to the desktop, and use a utility to write the disk image file to the SD card. Note that this is not the same as copying the file to the base-level directory on the SD card. Instead, it is similar to burning a disk image onto a CD-ROM or DVD-ROM. There are a number of utilities that will perform this action:
- For the Windows operating system, you can use the Disk Image Writer utility located at https://launchpad.net/win32-image-writer .
- For the Mac platform, use the RPi-sd Card Builder located at http://alltheware.wordpress.com/2012/12/11/easiest-way-sd-card-setup .
- For Linux, use the dd command. For more information, see http://en.wikipedia.org/wiki/Dd_(Unix) .
- Eject or unmount the SD card from the desktop computer.
- Connect the RJ-45 network cable, monitor, keyboard, and mouse.
- Install the SD card in the Raspberry Pi board.
- Connect power to the Raspberry Pi board. The red light on the Raspberry Pi board should glow, then in a few seconds, the green light should blink. The blinking green light indicates that the Raspberry Pi board is booting Linux.
- If the Linux installation was successful, the Raspberry Pi board will start and obtain a DHCP address.
- A configuration program ( raspi-config ) runs, which helps you expand the file system partition on the SD card, configure the keyboard and time zone, reset the default password, and so on. Use the up and down arrow keys to make a menu choice. Use the left or right arrow keys to select OK or Cancel . Press Return to run your choice. Note that the default user name is pi , and the default password is raspberry .
- You can perform an update, start the ssh server, and set the graphical desktop to automatically start, then click Finish . At this point, the board should reboot.
- Log in if necessary, and if you are using the desktop, start an LXTerminal.
- Run the ifconfig command to display the Raspberry Pi IP address. This is necessary so you can access and control the board remotely. Remember this IP address; it will be used in the next set of steps.
Installing the Oracle Java ME Embedded Software
Version 8 of the Oracle Java ME Embedded software contains a different architecture than previous versions. With version 8, the user has the option to run a Developer Agent program on the desktop under Windows. Commands that are sent to the board from the Windows desktop are no longer sent directly across the network. Instead, they are sent to the Developer Agent program, which transmits all communication to and from the Oracle Java ME Embedded executable file on the Raspberry Pi board.
The Oracle Java ME Embedded ZIP archive consists of the following directories:
- /appdb: This directory is used on the Pi and contains internal Java libraries
- /bin : This directory is used on the Pi and contains executables and the jwc_properties.ini file
- /legal: This directory contains important legal documentation
- /lib : This directory contains the files needed to compile IMlets on the Raspberry Pi board.
- /util: This directory contains the Developer Agent program.
You must make two copies of the Oracle Java ME Embedded ZIP archive file. The first remains on the Windows desktop, while the second must be transferred to the Raspberry Pi board.
- Use an sftp client or scp command to transfer one copy of the Oracle Java ME Embedded ZIP archive to the Raspberry Pi board. For example, on a UNIX or Mac system, you can transfer the ZIP file using a command similar to the following:
$sftp pi@[IP address of board]
$ssh -l pi [IP address of board]
Figure 1-1 Raspberry Pi Bin Directory
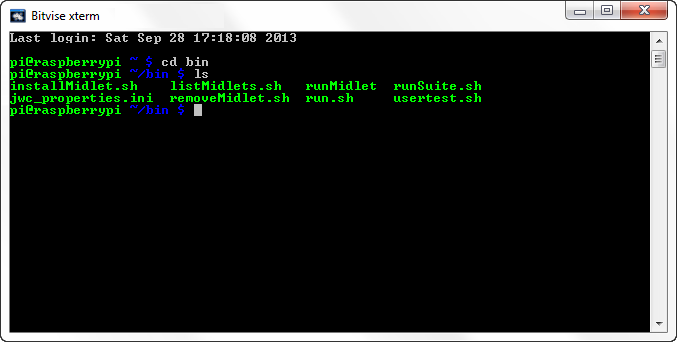
Description of «Figure 1-1 Raspberry Pi Bin Directory»
Adding an HTTP Proxy for Network Connections on Raspberry Pi
If an HTTP proxy server is required for the Java IMlets on Raspberry Pi to make network connections (such as for HTTP or apt-get ), then Oracle Java ME Embedded on Raspberry Pi can be configured by adding the following lines to the end of the bin/jwc_properties.ini file:
com.sun.midp.io.http.proxy.host = proxy.mycompany.com com.sun.midp.io.http.proxy.port = 80