- Tkinter Scrollbar
- Introduction to the Tkinter scrollbar widget
- Tkinter scrollbar widget example
- Summary
- Scrollable Frames in Tkinter
- Using a Canvas for scrolling
- A reusable ScrollableFrame class
- Horizontal scrolling with Tkinter
- Wrapping up
- Jose Salvatierra
- Виджет Tkinter Scrollbar в Python
- Методы Scrollbar
- Пример
Tkinter Scrollbar
Summary: in this tutorial, you’ll learn about the Tkinter Scrollbar widget and how to link it to a scrollable widget.
Introduction to the Tkinter scrollbar widget
A scrollbar allows you to view all parts of another widget whose content is typically larger than the available space.
Tkinter scrollbar widget is not a part of any other widgets such as Text and Listbox. Instead, a scrollbar is an independent widget.
To use the scrollbar widget, you need to:
The following shows how to create a scrollbar widget using the ttk.Scrollbar constructor:
scrollbar = ttk.Scrollbar( container, orient='vertical', command=widget.yview )Code language: Python (python)- The container is the window or frame on which the scrollbar locates.
- The orient argument specifies whether the scrollbar needs to scroll horizontally or vertically.
- The command argument allows the scrollbar widget to communicate with the scrollable widget.
The scrollable widget also needs to communicate back to the scrollbar about the percentage of the entire content area that is currently visible.
Every scrollable widget has a yscrollcommand and/or xscrollcommand options. And you can assign the scrollbar.set method to it:
widget['yscrollcommand'] = scrollbar.setCode language: Python (python)Tkinter scrollbar widget example
The Text widgets are one of several types of scrollable widgets. The following program illustrates a simple user interface that consists of Text and Scrollbar widgets:
import tkinter as tk from tkinter import ttk root = tk.Tk() root.resizable(False, False) root.title("Scrollbar Widget Example") # apply the grid layout root.grid_columnconfigure(0, weight=1) root.grid_rowconfigure(0, weight=1) # create the text widget text = tk.Text(root, height=10) text.grid(row=0, column=0, sticky=tk.EW) # create a scrollbar widget and set its command to the text widget scrollbar = ttk.Scrollbar(root, orient='vertical', command=text.yview) scrollbar.grid(row=0, column=1, sticky=tk.NS) # communicate back to the scrollbar text['yscrollcommand'] = scrollbar.set # add sample text to the text widget to show the screen for i in range(1,50): position = f' .0' text.insert(position,f'Line \n'); root.mainloop()Code language: Python (python)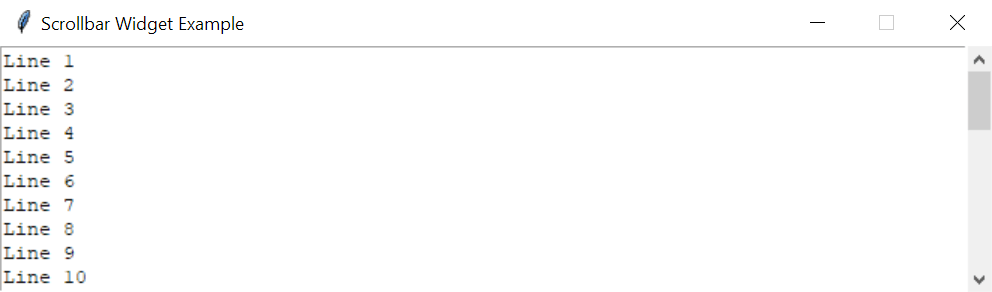
Summary
- Create a scrollbar with ttk.Scrollbar(orient, command)
- The orient can be ‘vertical’ or ‘horizontal’
- The command can be yview or xview property of the scrollable widget that links to the scrollbar.
- Set the yscrollcommand property of the scrollable widget so it links to the scrollbar.
Scrollable Frames in Tkinter

In Tkinter, only the Canvas widget is a natively scrollable container. That means that it can have an actual size larger than the screen size, and you can move the area you are viewing. That’s what scrolling really is!
The content (with the darkest background) is the «actual size», which usually is also the «scrollable area».
The scrollable frame is what the user sees, and you can think of it as a «window» that lets you see into the scrollable area.
Using a Canvas for scrolling
What we’ll be doing is creating a Canvas, and inside it creating a window.
The window can have as much content as we like, but it’s the Canvas that we’ll be placing inside our application.
That means that we’ll be able to set the Canvas size to whatever we want, and then when we scroll we’ll be moving along the window inside it.
In order to do so, we must also specify what the scrollable area will be. Often, the scrollable area matches the contents of the inner window—but it can also be different if we wish.
Let’s start off by creating all the widgets we’ll need. Those are:
- An application window (a tk.Tk object)
- A container frame for our canvas and scrollbar
- The canvas
- The scrollbar
- A frame that will become the scrollable frame
Almost all these widgets will work like normal Tkinter widgets (i.e. you place them in their container and then use Pack or Grid). However, the scrollable frame will behave differently. We will create it, giving it the canvas as its container, but instead of using Pack or Grid, we will using the canvas’ create_window method to create a window within the canvas that shows the scrollable frame’s content.
Creating the widgets is straightforward enough:
import tkinter as tk from tkinter import ttk root = tk.Tk() container = ttk.Frame(root) canvas = tk.Canvas(container) scrollbar = ttk.Scrollbar(container, orient="vertical", command=canvas.yview) scrollable_frame = ttk.Frame(canvas) Now let’s add some code that will call a function whenever the contents of the scrollable frame change. This is necessary because we must tell the canvas how large the frame will be, so that it knows how much it can scroll:
scrollable_frame.bind( "", lambda e: canvas.configure( scrollregion=canvas.bbox("all") ) ) The event we’re binding here triggers whenever the scrollable_frame changes size—i.e. usually when we add or remove widgets from within it.
Only when it changes size do we want to change any of the scrolling properties.
The change is we modify the canvas’ scrollregion to have a size of canvas.bbox(«all») .
Calling canvas.bbox(«all») gives us a 4-value tuple describing the position of two corners of a rectangle which is the scroll region.
Next up we have to tell the canvas to actually draw the scrollable_frame inside itself:
canvas.create_window((0, 0), window=scrollable_frame, anchor="nw") The values (0, 0) tell the canvas on which position to draw the window. The argument anchor=»nw» tells the canvas to place the frame’s top left corner on position (0, 0) .
Finally, we have to configure the canvas so that when its y-position changes, the scrollbar moves:
canvas.configure(yscrollcommand=scrollbar.set) Once you’ve done this, you can add elements to the scrollable_frame , and it’ll work as you’d expect!
Also, don’t forget to use Pack or Grid to add the container, canvas, and scrollbar to the application window.
The final code might look something like this:
import tkinter as tk from tkinter import ttk root = tk.Tk() container = ttk.Frame(root) canvas = tk.Canvas(container) scrollbar = ttk.Scrollbar(container, orient="vertical", command=canvas.yview) scrollable_frame = ttk.Frame(canvas) scrollable_frame.bind( "", lambda e: canvas.configure( scrollregion=canvas.bbox("all") ) ) canvas.create_window((0, 0), window=scrollable_frame, anchor="nw") canvas.configure(yscrollcommand=scrollbar.set) for i in range(50): ttk.Label(scrollable_frame, text="Sample scrolling label").pack() container.pack() canvas.pack(side="left", fill="both", expand=True) scrollbar.pack(side="right", fill="y") root.mainloop() A reusable ScrollableFrame class
To make creating scrollable frames a bit easier, you might be tempted to code up an easy to use class.
We’ve done it for you, so you don’t have to!
Here’s a ScrollableFrame class that you can just use as a normal frame!
import tkinter as tk from tkinter import ttk class ScrollableFrame(ttk.Frame): def __init__(self, container, *args, **kwargs): super().__init__(container, *args, **kwargs) canvas = tk.Canvas(self) scrollbar = ttk.Scrollbar(self, orient="vertical", command=canvas.yview) self.scrollable_frame = ttk.Frame(canvas) self.scrollable_frame.bind( "", lambda e: canvas.configure( scrollregion=canvas.bbox("all") ) ) canvas.create_window((0, 0), window=self.scrollable_frame, anchor="nw") canvas.configure(yscrollcommand=scrollbar.set) canvas.pack(side="left", fill="both", expand=True) scrollbar.pack(side="right", fill="y") If you wanted to use this class, remember to place things inside self.scrollable_frame , and not directly into an object of this class:
root = tk.Tk() frame = ScrollableFrame(root) for i in range(50): ttk.Label(frame.scrollable_frame, text="Sample scrolling label").pack() frame.pack() root.mainloop() Horizontal scrolling with Tkinter
Horizontal scrolling is somewhat rare because it results in weird UX, but sometimes it is unavoidable!
Fortunately, adding horizontal scrolling is relatively straightforward: simply replace the scrollbar-related parts that say y to say x .
Here’s the ScrollableFrame class with both horizontal and vertical scrolling:
import tkinter as tk from tkinter import ttk class ScrollableFrame(ttk.Frame): def __init__(self, container, *args, **kwargs): super().__init__(container, *args, **kwargs) canvas = tk.Canvas(self) scrollbar = ttk.Scrollbar(self, orient="vertical", command=canvas.yview) scrollbar_h = ttk.Scrollbar(self, orient="horizontal", command=canvas.xview) self.scrollable_frame = ttk.Frame(canvas) self.scrollable_frame.bind( "", lambda e: canvas.configure( scrollregion=canvas.bbox("all") ) ) canvas.create_window((0, 0), window=self.scrollable_frame, anchor="nw") canvas.configure(yscrollcommand=scrollbar.set) canvas.configure(xscrollcommand=scrollbar_h.set) scrollbar_h.pack(side="bottom", fill="x") scrollbar.pack(side="right", fill="y") canvas.pack(side="left", fill="both", expand=True)There are 3 added lines related to a new variable, scrollbar_h (for horizontal).
Wrapping up
That’s about it! Scrollable frames can be a tremendous pain, until you know how to make them. Even then, it looks weird because you don’t think that you’d use a Canvas (which suggests drawing) to enable scrolling on an unrelated component.
But now you know how they interact, and why it’s necessary.
If you’d like to learn much more about Tkinter and learn to build real-world projects, check out our GUI Development with Python and Tkinter course. It contains over 10 hours of premium content for you to learn everything that Tkinter has to offer.
Jose Salvatierra
Виджет Tkinter Scrollbar в Python
Виджет полосы прокрутки Tkinter – Scrollbar используется в Python для прокрутки вниз содержимого других виджетов, таких как listbox, text и canvas. Однако мы также можем создать горизонтальные полосы прокрутки для виджета Entry.
Синтаксис для использования виджета Scrollbar приведен ниже.
Список возможных вариантов приведен ниже.
| № | Вариант | Описание |
|---|---|---|
| 1 | activebackground | Цвет фона виджета, когда он находится в фокусе. |
| 2 | bg | Цвет фона виджета. |
| 3 | bd | Ширина границы виджета. |
| 4 | command | Это может быть процедура, связанная со списком, которая может вызываться каждый раз при перемещении полосы прокрутки. |
| 5 | cursor | Указатель мыши изменится на тип курсора, установленный для этого параметра, который может быть стрелкой, точкой и т. д. |
| 6 | elementborderwidth | Он представляет ширину границы вокруг стрелок и ползунка. Значение по умолчанию -1. |
| 7 | Highlightbackground | Цвет выделения фокуса, когда у виджета нет фокуса. |
| 8 | highlighcolor | Цвет выделения фокуса, когда виджет находится в фокусе. |
| 9 | highlightthickness | Он представляет толщину выделения в фокусе. |
| 10 | jump | Используется для управления поведением прыжка прокрутки. Если он установлен в 1, то обратный вызов вызывается, когда пользователь отпускает кнопку мыши. |
| 11 | orient | Он может быть установлен на ГОРИЗОНТАЛЬНЫЙ или ВЕРТИКАЛЬНЫЙ в зависимости от ориентации полосы прокрутки. |
| 12 | repeatdelay | Эта опция указывает продолжительность, до которой должна быть нажата кнопка, прежде чем ползунок начнет многократно перемещаться в этом направлении. По умолчанию 300 мс. |
| 13 | repeatinterval | Значение интервала повтора по умолчанию – 100. |
| 14 | takefocus | По умолчанию мы можем использовать этот виджет с помощью табулятора. Мы можем установить для этого параметра значение 0, если мы не хотим такого поведения. |
| 15 | troughcolor | Он представляет цвет желоба. |
| 16 | width | Он представляет ширину полосы прокрутки. |
Методы Scrollbar
Виджет предоставляет следующие методы.
| № | Метод | Описание |
|---|---|---|
| 1 | get() | Возвращает два числа a и b, которые представляют текущую позицию полосы прокрутки. |
| 2 | set(first, last) | Используется для подключения полосы прокрутки к другому виджету. Команда yscroll или xscrollcommand другого виджета для этого метода. |
Пример
from tkinter import * top = Tk() sb = Scrollbar(top) sb.pack(side = RIGHT, fill = Y) mylist = Listbox(top, yscrollcommand = sb.set ) for line in range(30): mylist.insert(END, "Number " + str(line)) mylist.pack( side = LEFT ) sb.config( command = mylist.yview ) mainloop()