- Tkinter PhotoImage
- Introduction to the Tkinter PhotoImage widget
- Tkinter PhotoImage file formats
- Summary
- Python. Работа с изображениями в tkinter.
- Python tkinter image icons
- Adding image using Label
- Using a Button to add image.
- PIL ( Python Imaging Library )
- Background Image of the window
- Width and height of the image
Tkinter PhotoImage
Summary: in this tutorial, you’ll learn how to use the Tkinter PhotoImage widget to display an image on another widget.
Introduction to the Tkinter PhotoImage widget
In Tkinter, some widgets can display an image such as Label and Button . These widgets take an image argument that allows them to display an image.
However, you can’t just simply pass the path to an image file to the image argument. Instead, you need to create a PhotoImage object and pass it the image argument.
To create a new PhotoImage object, you use the following syntax:
photo_image = tk.PhotoImage(file=path_to_image)Code language: Python (python)In this syntax, you pass the path to the image to the file argument to create a new PhotoImage object.
Alternatively, you pass a bytes object that contains image data to the data argument.
After creating a PhotoImage object, you can use it in other widgets that accept an image argument:
label = ttk.Label(root, image=photo_image)Code language: Python (python)It’s important to note that you keep the reference to the PhotoImage object in scope for as long as the image will be shown. Otherwise, the image won’t appear.
The following example attempts to display an image with the path ‘./assets/python.png’ on the root window:
import tkinter as tk from tkinter import ttk class App(tk.Tk): def __init__(self): super().__init__() python_image = tk.PhotoImage(file='./assets/python.png') ttk.Label(self, image=python_image).pack() if __name__ == "__main__": app = App() app.mainloop()Code language: Python (python)If you run the program, you’ll notice that the window doesn’t show the image.
That’s because the python_image is destroyed as soon as the __init__() is ended. Since the program has no reference to the PhotoImage object, the image vanishes even though you’ve packed it into the layout.
To fix this issue, you need to make sure the python_image doesn’t go out of scope after the __init__() method ends. For example, you can keep it in the instance of the App class such as self.python_image :
import tkinter as tk from tkinter import ttk class App(tk.Tk): def __init__(self): super().__init__() self.title('Tkinter PhotoImage Demo') self.geometry('320x150') self.python_image = tk.PhotoImage(file='./assets/python.png') ttk.Label(self, image=self.python_image).pack() if __name__ == "__main__": app = App() app.mainloop()Code language: Python (python)Tkinter PhotoImage file formats
Currently, the PhotoImage widget supports the GIF, PGM, PPM, and PNG file formats as of Tkinter 8.6.
To support other file formats such as JPG, JPEG, or BMP, you can use an image library such as Pillow to convert them into a format that the PhotoImage widget understands.
In fact, the Pillow library has a Tkinter-compatible PhotoImage widget located in the PIL.ImageTk module.
The following pip command installs the Pillow library:
pip install PillowCode language: Python (python)To use the Pillow library, you follow these steps:
First, import the Image and ImageTk classes:
from PIL import Image, ImageTkCode language: Python (python)Second, open the image file and create a new PhotoImage object:
image = Image.open('./assets/python.jpg') python_image = ImageTk.PhotoImage(image)Code language: Python (python)Third, assign the ImageTk.PhotoImage object to the image option:
image_label = ttk.Label(root, image=python_image)Code language: Python (python)The following program illustrates how to use the PhotoImage widget from the Pillow library:
import tkinter as tk from tkinter import ttk from PIL import Image, ImageTk class App(tk.Tk): def __init__(self): super().__init__() self.title('Tkinter PhotoImage Demo') self.image = Image.open('./assets/python.jpg') self.python_image = ImageTk.PhotoImage(self.image) ttk.Label(self, image=self.python_image).pack() if __name__ == '__main__': app = App() app.mainloop()Code language: Python (python)Summary
- Use the Tkinter PhotoImage widget to display an image for a Label or Button .
- Tkinter PhotoImage only supports the GIF, PGM, PPM, and PNG file formats.
- Use the PhotoImage widget from the PIL.ImageTk module to support other file formats.
Python. Работа с изображениями в tkinter.
На уроке Python. Работа с изображениями мы с вами научились загружать и отображать картинки, а также всяко извращаться с ними. Это мы делали при помощи библиотеки PIL. На уроке Python. GUI мы с вами при помощи библиотеки tkinter создавали виндовый интерфейс программы: всякие кнопочки, флажки, и прочие элементы управления. Но возникает вопрос: а нельзя ли при помощи tkinter как-то выводить изображение на виндовую форму? Можно. Например вот такая программа:
import tkinter from PIL import Image, ImageTk root = tkinter.Tk() # создаем рабочую область frame = tkinter.Frame(root) frame.grid() #Добавим метку label = tkinter.Label(frame, text="Hello, World!").grid(row=1,column=1) # вставляем кнопку but = tkinter.Button(frame, text="Кнопка").grid(row=1, column=2) #Добавим изображение canvas = tkinter.Canvas(root, height=400, width=700) image = Image.open("d:/3/Dscn0116.jpg") photo = ImageTk.PhotoImage(image) image = canvas.create_image(0, 0, anchor='nw',image=photo) canvas.grid(row=2,column=1) root.mainloop() 
Что интересно, PIL здесь нужен, чтобы загружать изображения типа jpg, gif-ы и png можно открыть и без него:
import tkinter root = tkinter.Tk() # создаем рабочую область frame = tkinter.Frame(root) frame.grid() #Добавим метку label = tkinter.Label(frame, text="Hello, World!").grid(row=1,column=1) # вставляем кнопку but = tkinter.Button(frame, text="Кнопка").grid(row=1, column=2) #Добавим изображение canvas = tkinter.Canvas(root, height=400, width=700) img = tkinter.PhotoImage(file = 'd:/3/Dscn0116.png') image = canvas.create_image(0, 0, anchor='nw',image=img) canvas.grid(row=2,column=1) root.mainloop()
А теперь попробуем при нажатии на кнопку сменить изображение:
import tkinter from PIL import Image, ImageTk root = tkinter.Tk() # создаем рабочую область frame = tkinter.Frame(root) frame.grid() # Добавим метку label = tkinter.Label(frame, text="Hello, World!").grid(row=1, column=1) image = Image.open("d://1//DSCN1128.png") photo = ImageTk.PhotoImage(image) def my_event_handler(): print("my_event_handler") image = Image.open("d://1//original.jpg") photo = ImageTk.PhotoImage(image) image = canvas.create_image(0, 0, anchor='nw', image=photo) canvas.grid(row=2, column=1) # вставляем кнопку but = tkinter.Button(frame, text="Кнопка", command=my_event_handler).grid(row=1, column=2) # Добавим изображение canvas = tkinter.Canvas(root, height=400, width=700) image = canvas.create_image(0, 0, anchor='nw', image=photo) canvas.grid(row=2, column=1) root.mainloop() Но не тут то было. При нажатии на кнопку изображение не меняется. Хотя, казалось бы, все написано правильно, и наш обработчик событий работает, наше сообщение, что мы выводим командой print выводится в окно сообщений. В чем же дело? А дело в сборщике мусора (garbage collector). Как только мы вышли из my_event_handler, локальные переменные тут же уничтожаются сборщиком мусора. Именно поэтому мы видим на форме ту же самую картинку, что и до нажатия на кнопку. Как же быть? Не использовать локальные переменные. Давайте объявим класс, пусть изображение и прочие объекты хранятся в его полях:
import tkinter from PIL import Image, ImageTk class App: def __init__(self): self.root = tkinter.Tk() # создаем рабочую область self.frame = tkinter.Frame(self.root) self.frame.grid() # Добавим метку self.label = tkinter.Label(self.frame, text="Hello, World!").grid(row=1, column=1) self.image = Image.open("d://1//DSCN1128.png") self.photo = ImageTk.PhotoImage(self.image) # вставляем кнопку self.but = tkinter.Button(self.frame, text="Кнопка", command=self.my_event_handler).grid(row=1, column=2) # Добавим изображение self.canvas = tkinter.Canvas(self.root, height=600, width=700) self.c_image = self.canvas.create_image(0, 0, anchor='nw', image=self.photo) self.canvas.grid(row=2, column=1) self.root.mainloop() def my_event_handler(self): print("my_event_handler") self.image = Image.open("d://1//original.jpg") self.photo = ImageTk.PhotoImage(self.image) self.c_image = self.canvas.create_image(0, 0, anchor='nw', image=self.photo) self.canvas.grid(row=2, column=1) app= App() Python tkinter image icons
![]()
There is a default icon comes with the window.
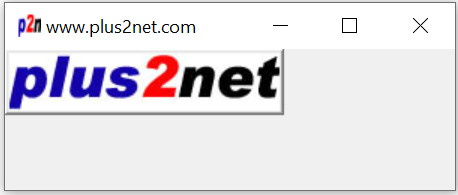
import tkinter as tk my_w=tk.Tk() my_w.geometry('300x100') my_w.title('www.plus2net.com') my_w.mainloop()Tkinter displaying icon or JPG PNG image in windows by using Label or button using PILLOW library
![]()
Escape the path by using two backslashes if you have any char with can be used with backslash. Here \f can be understood as form feed, so we used two backslashes.
import tkinter as tk my_w=tk.Tk() my_w.geometry('300x100') my_w.title('www.plus2net.com') my_w.iconbitmap('D:\\images\\favicon.ico') my_w.mainloop()Adding image using Label
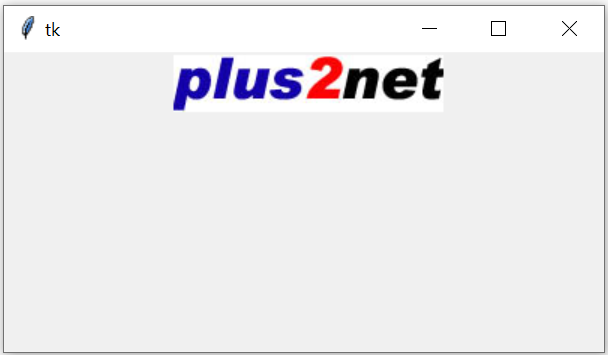
import tkinter as tk my_w = tk.Tk() my_w.geometry("400x200") l1 = tk.Label(my_w, width=15 ) l1.grid(row=1,column=1) my_img = tk.PhotoImage(file = "D:\\top2.png") l2 = tk.Label(my_w, image=my_img ) l2.grid(row=1,column=2) my_w.mainloop()Using a Button to add image.
We can place image over one Button
import tkinter as tk my_w=tk.Tk() my_w.geometry('300x100') my_w.title('www.plus2net.com') my_w.iconbitmap('D:\\images\\favicon.ico') my_img = tk.PhotoImage(file = "D:/images/top2.png") b1=tk.Button(my_w,image=my_img) b1.grid(row=1,column=1) my_w.mainloop()PIL ( Python Imaging Library )
from PIL import ImageTk, ImageIf PIL ( Python Image Library ) is not installed then use PIP to install it. You can check the status by using this command and check all installed libraries.
import tkinter as tk my_w=tk.Tk() from PIL import Image,ImageTk my_w.geometry('300x100') my_w.title('www.plus2net.com') my_img = ImageTk.PhotoImage(Image.open("D:/images/top2.jpg")) b1=tk.Button(my_w,image=my_img) b1.grid(row=1,column=1) my_w.mainloop()Background Image of the window
Change the path of the image used at my_img2.
To use JPG image we have to include PIL library.
import tkinter as tk from tkinter import ttk from PIL import Image,ImageTk my_w = tk.Tk() my_w.geometry("840x570") #my_img = tk.PhotoImage(file = "D:\\top2.png") my_img2 = ImageTk.PhotoImage(Image.open("D:\\my_data\\background1.jpg")) bg = tk.Label(my_w, image=my_img2) bg.place(x=0, y=0, relwidth=1, relheight=1) my_w.mainloop()my_img = tk.PhotoImage(file = "D:\\top2.png") Width and height of the image
import tkinter as tk my_w = tk.Tk() my_w.geometry("840x570") my_img = tk.PhotoImage(file = "H:\\top2.png") print(my_img.width(),my_img.height()) # Width and height of the image b1=tk.Button(my_w,image=my_img) b1.grid(row=1,column=1) my_w.mainloop()import tkinter as tk my_w=tk.Tk() from PIL import Image,ImageTk my_w.geometry('400x300') my_w.title('www.plus2net.com') my_img = ImageTk.PhotoImage(Image.open("H:/top2.jpg")) print(my_img.width(),my_img.height()) # Print width and height of the image b1=tk.Button(my_w,image=my_img) b1.grid(row=1,column=1,padx=20,pady=20) my_w.mainloop()import tkinter as tk my_w=tk.Tk() from PIL import Image,ImageTk my_w.geometry('400x300') my_w.title('www.plus2net.com') my_img = Image.open("H:/top2.jpg") # change the path of your image print(my_img.size) # Print the tuple with width and height of the image print('Width: ',my_img.size[0],' , Height: ',my_img.size[1]) my_img = ImageTk.PhotoImage(Image.open("H:/top2.jpg")) b1=tk.Button(my_w,image=my_img) b1.grid(row=1,column=1,padx=20,pady=20) my_w.mainloop()