- Tkinter Button activebackground
- Different Types of Color Values
- Example 1 – Tkinter Button – Change Active Background Color
- Conclusion
- How to Create an Image with an Active Background Using Tkinter in Python
- Displaying Images in Tkinter
- Creating a Background Label
- How To Use Images as Backgrounds
- Using Activebackground in Tkinter
- Changing Button Functionality with .bind in Tkinter
- Advantages and Disadvantages of Using Tkinter
- Other helpful code examples for creating an image with an active background in Tkinter
- Conclusion
- How to Change Background Color of Tkinter Button during Mouse Click?
- Python Tkinter Button – Change Background Color during Mouse Click
- Examples
- 1. Change button background to green color during mouse click
- 2. Change button background color to specified HEX color during mouse click
- 3. Change button background color to ‘red’ during mouse click
- Summary
Tkinter Button activebackground
Tkinter Button activebackground option sets the background color of button when the button is pressed and under the cursor.
In this tutorial, we will learn how to use activebackground option of Button() class with examples.
Different Types of Color Values
The value that has to be passed for this option is a string specifying the proportion of red, green, and blue in hexadecimal digits. You can also pass a standard color like red, green, black, white, etc.
Following are the different types of color values that you can provide to activebackground option.
#4 bits per color tkinter.Button(window_main, activebackground='#rgb') #f00, #8af #8 bits per color tkinter.Button(window_main, activebackground='#rrggbb') #ff853a #12 bits per color tkinter.Button(window_main, activebackground='#rrrgggbbb') #ff8aba53a #standard color names tkinter.Button(window_main, activebackground='red') #red, green, yellow, blue
Example 1 – Tkinter Button – Change Active Background Color
In the following program, we will change the active background color of Tkinter Button.
example.py – Python Program
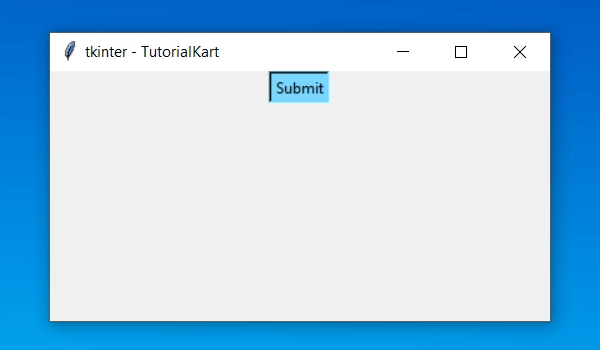
import tkinter window_main = tkinter.Tk(className='Tkinter - TutorialKart', ) window_main.geometry("400x200") button_submit = tkinter.Button(window_main, text ="Submit", activebackground='#78d6ff') button_submit.pack() window_main.mainloop() When you run the application, you will see the following window.
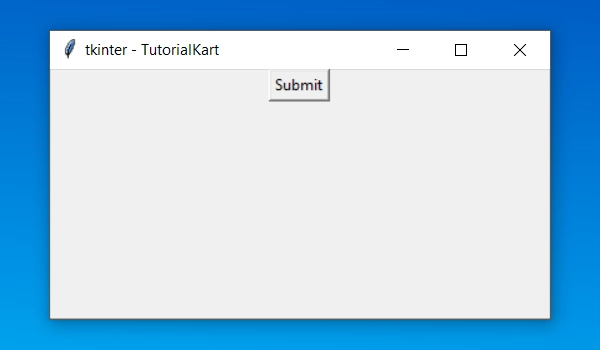
During the click on button, you will see the active background color set.
Conclusion
In this Python Tutorial, we learned about Tkinter Button option “activebackground” with the help of example Python programs.
How to Create an Image with an Active Background Using Tkinter in Python
Learn how to create visually appealing applications with Python’s Tkinter GUI framework by creating an image with an active background. Follow our step-by-step guide and code examples.
- Displaying Images in Tkinter
- Creating a Background Label
- How To Use Images as Backgrounds
- Using Activebackground in Tkinter
- Changing Button Functionality with .bind in Tkinter
- Advantages and Disadvantages of Using Tkinter
- Other helpful code examples for creating an image with an active background in Tkinter
- Conclusion
- How to set background image in Python using Tkinter?
- What is active background in Tkinter?
- Can Tkinter display images?
- How do I insert a JPEG image into a Python Tkinter window?
Tkinter is a popular GUI framework for Python that allows developers to create visually appealing applications. One of the features of Tkinter is the ability to display images with active backgrounds. In this article, we will discuss how to create an image with an active background using Tkinter in Python. We will cover the key points, important points, and helpful points related to this topic.
Displaying Images in Tkinter
The first step in creating an image with an active background is to display the image in Tkinter. Tkinter’s label widget can display images or text. To display an image in Tkinter, the Image and ImageTk modules from the Python Pillow package need to be imported.
from tkinter import * from PIL import Image, ImageTkroot = Tk()# Import image image = Image.open("example.jpg") photo = ImageTk.PhotoImage(image)# Display image on label widget label = Label(root, image=photo) label.pack()root.mainloop() The above code imports an image and displays it on a label widget. The image is opened using the Image module and then converted to a PhotoImage object using the ImageTk module. The PhotoImage object is then assigned to the image attribute of the label widget. The pack() method is used to display the label widget on the Tkinter window.
Creating a Background Label
To create an active background for an image, a background label needs to be created first so other widgets can be packed or gridded on top of it. The background label can be created using the following code:
from tkinter import *root = Tk()# Create background label background_label = Label(root, bg="blue") background_label.pack(fill=BOTH, expand=YES)# Create other widgets on top of the background label button = Button(background_label, text="Click me!") button.pack()root.mainloop() In the above code, a label widget is created with a blue background color. The fill=BOTH and expand=YES arguments are used to fill the entire window with the label widget. The button widget is then created on top of the background label using the Button constructor.
How To Use Images as Backgrounds
Using Activebackground in Tkinter
The activebackground option in Tkinter sets the background color of the button when pressed or under the cursor. The following code demonstrates how to use the activebackground option:
from tkinter import *root = Tk()# Create button with activebackground button = Button(root, text="Click me!", activebackground="red") button.pack()root.mainloop() In the above code, a button widget with the text “Click me!” is created. The activebackground option is set to “red”, which changes the background color of the button when it is pressed or under the cursor.
Changing Button Functionality with .bind in Tkinter
Using the .bind method of the button widget can be used to change the button’s functionality on click. The following code demonstrates how to change the button’s text when it is clicked:
from tkinter import *root = Tk()# Define function to change button text on click def change_text(event): button.config(text="Clicked!")# Create button and bind to function button = Button(root, text="Click me!") button.bind("", change_text) button.pack()root.mainloop() In the above code, a function is defined to change the button’s text to “Clicked!” when it is clicked. The bind method is used to bind the change_text function to the button widget.
Advantages and Disadvantages of Using Tkinter
advantages of using tkinter include its ease of use and availability in the standard library. Tkinter is also cross-platform, which means that applications created with Tkinter can be run on different operating systems.
disadvantages of using tkinter include its limited customization options and outdated look compared to other GUI frameworks. Tkinter is also not suitable for creating complex applications with advanced graphics and animations.
Other helpful code examples for creating an image with an active background in Tkinter
In Python , for instance, create image tkinter set active background code sample
import tkinter as tk from PIL import ImageTk, Imageclass CanvasButton: def __init__(self, canvas): self.canvas = canvas self.number = tk.IntVar() self.button = tk.Button(canvas, textvariable=self.number, command=self.buttonclicked) self.id = canvas.create_window(50, 100, width=25, height=25, window=self.button) def buttonclicked(self): self.number.set(self.number.get()+1) # auto updates Buttonroot = tk.Tk() root.resizable(width=False, height=False) root.wm_attributes("-topmost", 1)imgpath = 'archipelago_big.gif' img = Image.open(imgpath) photo = ImageTk.PhotoImage(img)canvas = tk.Canvas(root, bd=0, highlightthickness=0) canvas.pack() canvas.create_image(0, 0, image=photo)CanvasButton(canvas) # create a clickable button on the canvasroot.mainloop() Conclusion
In conclusion, Tkinter is a useful GUI framework for creating applications with Python. We have discussed how to create an image with an active background using Tkinter in Python. By following the key points, important points, and helpful points outlined in this article, developers can create visually appealing applications with Tkinter.
How to Change Background Color of Tkinter Button during Mouse Click?
Python Tkinter Button – Change Background Color during Mouse Click
You can change the button’s background color, while the button is pressed using mouse, using activebackground property of the button.
Examples
1. Change button background to green color during mouse click
In this example, we will change the color of button to red while it is in pressed state.
Python Program
from tkinter import * tkWindow = Tk() tkWindow.geometry('400x150') tkWindow.title('PythonExamples.org - Tkinter Example') button = Button(tkWindow, text = 'Submit', bg='#ffffff', activebackground='#00ff00') button.pack() tkWindow.mainloop()#00ff00 mean green color.
2. Change button background color to specified HEX color during mouse click
In this example, we will change the color of button to red color while it is in pressed state.
Python Program
from tkinter import * tkWindow = Tk() tkWindow.geometry('400x150') tkWindow.title('PythonExamples.org - Tkinter Example') button = Button(tkWindow, text = 'Submit', bg='#ffffff', activebackground='#4444ff') button.pack() tkWindow.mainloop()3. Change button background color to ‘red’ during mouse click
In this example, we will change the color of button to red color while it is in pressed state.
Python Program
from tkinter import * tkWindow = Tk() tkWindow.geometry('400x150') tkWindow.title('PythonExamples.org - Tkinter Example') button = Button(tkWindow, text = 'Submit', bg='#ffffff', activebackground='red') button.pack() tkWindow.mainloop()For the standard colors, you can provided the name of the color. Like red, black, green, yellow, etc.
Summary
In this tutorial of Python Examples, we learned to change background color of a button during its state of pressed.