Python set window title
Основным компонентом графических программ является окно. Затем в окно добавляются все остальные компоненты графического интерфейса. В Tkinter окно представлено классом Tk . Например, создание окна:
Для отображения окна и взаимодействия с пользователем у окна вызывается метод mainloop()
from tkinter import * root = Tk() root.mainloop()
Класс Tk обладает рядом методов и атрибутов, которые позволяют установить различные аспекты окна. Некоторые из них.
Размеры и начальная позиция окна
По умолчанию окно имеет некоторые стандартные размеры. Для установки размеров используется метод geometry() . Например, определение окна с шириной в 300 единиц и высотой 250 единиц:
from tkinter import * root = Tk() root.geometry("300x250") root.mainloop() По умолчанию окно позиционируется в верхний левый угол экрана с небольшим смещением. Но мы можем изменить его положение, передав нужные значения в метод geometry() :
from tkinter import * root = Tk() root.geometry("300x250+400+200") root.mainloop() Теперь строка в методе geometry имеет следующий формат: «Ширина x Высота + координатаX + координатаY». То есть при запуске окно шириной в 300 единиц и высотой 250 единиц будет находиться на 400 пикселей вправо и на 200 пикселей вниз от верхнего левого угла экрана.
Для получения данных о размере и позиции также можно использовать метод geometry() , который возвращает данные значения в виде строки в формате «widthxheight+x+y»:
from tkinter import * root = Tk() root.geometry("300x250+400+200") root.update_idletasks() print(root.geometry()) # "300x250+400+200" root.mainloop() Чтобы приложение еще до метода mainloop() принименило для окна переданные ему значения по ширине, высоте и позиции, вызывается метод root.update_idletasks() . В итоге вызов root.geometry() возвратить строку «300×250+400+200»
По умолчанию мы можем изменять размеры окна. Тем не менее иногда может потребоваться сделать размер окна фиксированным. В этом случае мы можем использовать метод resizable() . Его первый параметр указывает, может ли пользователь растягивать окно по ширине, а второй параметр — можно ли растягивать по высоте. Чтобы запретить растягивание по какой-либо стороне, необходимо для соответствующего параметра передать значение False . Например, запретим какое-либо изменение размеров:
from tkinter import * root = Tk() root.geometry("300x250") root.resizable(False, False) root.mainloop() Также можно установить минимальные и максимальные размеры окна:
root.minsize(200,150) # минимальные размеры: ширина - 200, высота - 150 root.maxsize(400,300) # максимальные размеры: ширина - 400, высота - 300
Установка заголовка
По умолчанию заголовок окна — «tk». Для установки заголовка применяется метод title() , в который передается текст заголовка:
from tkinter import * root = Tk() root.title("Hello METANIT.COM") root.geometry("300x250") root.mainloop() 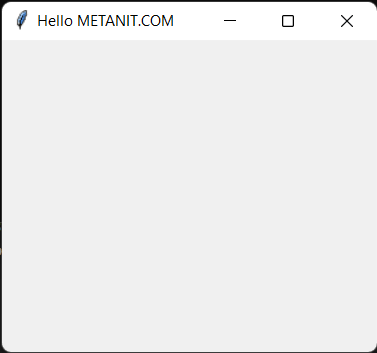
Установка иконки
Перед заголовком отображается иконка. По умолчанию это иконка пера. С помощью метода iconbitmap() можно задать любую другую иконку. Например, определим в одной папке с файлом приложения какой-нибудь файл с иконкой, допустип, он называется «favicon.ico» и используем его для установки иконки:
from tkinter import * root = Tk() root.title("Hello METANIT.COM") root.iconbitmap(default="favicon.ico") root.geometry("300x250") root.mainloop() через параметр default в метод iconbitmap передается путь к иконки. В данном случае файл иконки располагается с файлом приложения в одной папке, поэтому в качестве пути указывается просто имя файла.
В качестве альтернативы для установки иконки также можно было бы использовать метод iconphoto()
from tkinter import * root = Tk() root.geometry("250x200") root.title("Hello METANIT.COM") icon = PhotoImage(file = "icon2.png") root.iconphoto(False, icon) root.mainloop() Первый параметр метода iconphoto() указывает, надо ли использовать иконку по умолчанию для всех окон приложения. Второй параметр — объект PhotoImage, который собственно и устанавливает файл изображения (здесь файл «icon2.png)
Однако что, если мы хотим, чтобы окно вообще не имело иконки? В этом случае можно определить прозрачную иконку и также ее подключать. Можно это сделать также динамически без наличия реального файла:
from tkinter import * import tempfile, base64, zlib ICON = zlib.decompress(base64.b64decode("eJxjYGAEQgEBBiDJwZDBysAgxsDAoAHEQCEGBQaIOAg4sDIgACMUj4JRMApGwQgF/ykEAFXxQRc=")) _, ICON_PATH = tempfile.mkstemp() with open(ICON_PATH, "wb") as icon_file: icon_file.write(ICON) root = Tk() root.title("Hello METANIT.COM") root.geometry("300x250") root.iconbitmap(default=ICON_PATH) root.mainloop() В данном случае создается временный файл иконки в памяти.
Перехват закрытия окна
from tkinter import * def finish(): root.destroy() # ручное закрытие окна и всего приложения print("Закрытие приложения") root = Tk() root.geometry("250x200") root.title("Hello METANIT.COM") root.protocol("WM_DELETE_WINDOW", finish) root.mainloop() Первый параметр метода protocol() представляет имя события, в данном случае это «WM_DELETE_WINDO». Второй параметр представляет функцию, которая вызывается при возникновении события. Здесь эта функция finish() , в котором с помощью метода destroy() вручную вызываем закрытие окна (а с ним и всего приложения), а затем выводим на консоль некоторое сообщение.
Атрибуты окна
С помощью специального метода attributes() можно установать отдельные атрибуты окна, для которых нет специальных методов. В качестве первого параметра метод принимает название атрибута, которое предваряется дефисом. А второй параметр — значение для этого атрибута. Например, растяжение окна на весь экран:
root.attributes("-fullscreen", True) Здесь атрибуту fullscreen передается значение True, благодаря чему устанавливается полноэкранный режим.
Другой пример — установка прозрачности с помощью атрибута alpha :
Значение 0.5 указывает на полупрозрачность.
Третий пример — отключение верхней панели окна (за исключением заголовка и крестика для закрытия):
root.attributes("-toolwindow", True) Tkinter Window
Summary: in this tutorial, you’ll learn how to manipulate various attributes of a Tkinter window.
Let’s start with a simple program that consists of a window:
import tkinter as tk root = tk.Tk() root.mainloop()Code language: Python (python)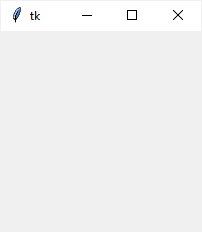
The root window has a title that defaults to tk . It also has three system buttons including Minimize, Maximize, and Close.
Let’s learn how to change the attributes of the root window.
Changing the window title
To change the window’s title, you use the title() method like this:
window.title(new_title)Code language: Python (python)For example, the following changes the title of the root window to ‘Tkinter Window Demo’ :
import tkinter as tk root = tk.Tk() root.title('Tkinter Window Demo') root.mainloop()Code language: Python (python)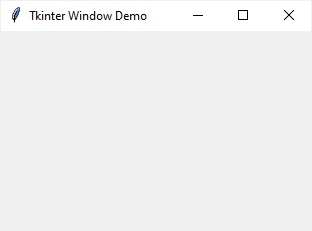
To get the current title of a window, you use the title() method with no argument:
title = window.title()Code language: Python (python)Changing window size and location
In Tkinter, the position and size of a window on the screen is determined by geometry.
The following shows the geometry specification:
widthxheight±x±yCode language: Python (python)
- The width is the window’s width in pixels.
- The height is the window’s height in pixels.
- The x is the window’s horizontal position. For example, +50 means the left edge of the window should be 50 pixels from the left edge of the screen. And -50 means the right edge of the window should be 50 pixels from the right edge of the screen.
- The y is the window’s vertical position. For example, +50 means the top edge of the window should be 50 pixels below the top of the screen. And -50 means the bottom edge of the window should be 50 pixels above the bottom of the screen.
To change the size and position of a window, you use the geometry() method:
window.geometry(new_geometry)Code language: Python (python)The following example changes the size of the window to 600×400 and the position of the window to 50 pixels from the top and left of the screen:
import tkinter as tk root = tk.Tk() root.title('Tkinter Window Demo') root.geometry('600x400+50+50') root.mainloop()Code language: Python (python)Sometimes, you may want to center the window on the screen. The following program illustrates how to do it:
import tkinter as tk root = tk.Tk() root.title('Tkinter Window - Center') window_width = 300 window_height = 200 # get the screen dimension screen_width = root.winfo_screenwidth() screen_height = root.winfo_screenheight() # find the center point center_x = int(screen_width/2 - window_width / 2) center_y = int(screen_height/2 - window_height / 2) # set the position of the window to the center of the screen root.geometry(f'x++') root.mainloop()Code language: PHP (php)- First, get the screen width and height using the winfo_screenwidth() and winfo_screenheight() methods.
- Second, calculate the center coordinate based on the screen and window width and height.
- Finally, set the geometry for the root window using the geometry() method.
If you want to get the current geometry of a window, you can use the geometry() method without providing any argument:
window.geometry()Code language: Python (python)Resizing behavior
By default, you can resize the width and height of a window. To prevent the window from resizing, you can use the resizable() method:
window.resizable(width,height)Code language: Python (python)The resizable() method has two parameters that specify whether the width and height of the window can be resizable.
The following shows how to make the window with a fixed size:
import tkinter as tk root = tk.Tk() root.title('Tkinter Window Demo') root.geometry('600x400+50+50') root.resizable(False, False) root.mainloop()Code language: Python (python)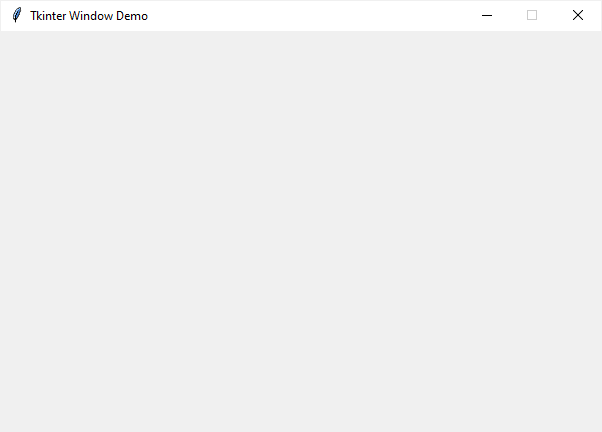
When a window is resizable, you can specify the minimum and maximum sizes using the minsize() and maxsize() methods:
window.minsize(min_width, min_height) window.maxsize(min_height, max_height)Code language: Python (python)Transparency
Tkinter allows you to specify the transparency of a window by setting its alpha channel ranging from 0.0 (fully transparent) to 1.0 (fully opaque):
window.attributes('-alpha',0.5)Code language: Python (python)The following example illustrates a window with 50% transparent:
import tkinter as tk root = tk.Tk() root.title('Tkinter Window Demo') root.geometry('600x400+50+50') root.resizable(False, False) root.attributes('-alpha', 0.5) root.mainloop()Code language: Python (python)![]()
Window stacking order
The window stack order refers to the order of windows placed on the screen from bottom to top. The closer window is on the top of the stack and it overlaps the one lower.
To ensure that a window is always at the top of the stacking order, you can use the -topmost attribute like this:
window.attributes('-topmost', 1)Code language: Python (python)To move a window up or down of the stack, you can use the lift() and lower() methods:
window.lift() window.lift(another_window) window.lower() window.lower(another_window)Code language: Python (python)The following example places the root window on top of all other windows. In other words, the root window is always on top:
import tkinter as tk root = tk.Tk() root.title('Tkinter Window Demo') root.geometry('300x200+50+50') root.resizable(0, 0) root.attributes('-topmost', 1) root.mainloop()Code language: Python (python)Changing the default icon
Tkinter window displays a default icon. To change this default icon, you follow these steps:
- Prepare an image in the .ico format. If you have the image in other formats like png or jpg , you can convert it to the .ico format. There are many online tools that allow you to do it quite easily.
- Place the icon in a folder that can be accessible from the program.
- Call the iconbitmap() method of the window object.
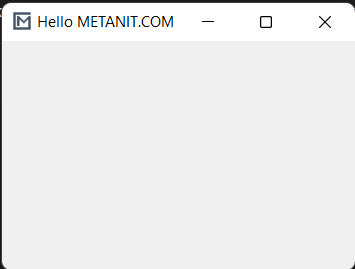
The following program illustrates how to change the default icon to a new one:
import tkinter as tk root = tk.Tk() root.title('Tkinter Window Demo') root.geometry('300x200+50+50') root.resizable(False, False) root.iconbitmap('./assets/pythontutorial.ico') root.mainloop()Code language: PHP (php)![]()
If you want to use the above icon, you can download it to your computer:
Summary
- Use the title() method to change the title of the window.
- Use the geometry() method to change the size and location of the window.
- Use the resizable() method to specify whether a window can be resizable horizontally or vertically.
- Use the window.attributes(‘-alpha’,0.5) to set the transparency for the window.
- Use the window.attributes(‘-topmost’, 1) to make the window always on top.
- Use lift() and lower() methods to move the window up and down of the window stacking order.
- Use the iconbitmap() method to change the default icon of the window.