- Requests — Overview
- Features of Requests
- Request
- Response
- Headers
- Timeouts
- Error handling
- Cookies
- Sessions
- SSL certificates
- Authentication
- Advantages of using Python Requests Library
- Requests — Environment Setup
- Installing Python
- To add to PATH follow the steps−
- Checking the python version
- Install Requests
- Requests — How Http Requests Work?
- Using POST, we can do as follows−
- Print the Entire Http Request (Raw) in Python
- Method 1: Logging and Turning request Verbosity on
- Method 2: Using PreparedRequests class of requests
Requests — Overview
Requests is a HTTP library that provides easy functionality to deal with http request/response in your web application. The library is developed in python.
The official website of Python Requests which is available at https://2.python-requests.org/en/master/ defines Requests as follows −
Requests is an elegant and simple HTTP library for Python, built for human beings.
Features of Requests
The features of Requests are discussed below −
Request
The python requests library has easy to use methods available to handle Http request. Passing of parameters and handling the request type like GET, POST, PUT, DELETE, etc. is very easy.
Response
You can get the response in the format you need and the supported ones are text format, binary response, json response, and raw response.
Headers
The library allows you to read, update or send new headers as per your requirements.
Timeouts
Timeouts can be easily added to the URL you are requesting using python requests library. It so happens that you are using a third-party URL and waiting for a response.
It is always a good practice to give a timeout on the URL as we might want the URL to respond within that timeout with a response or an error that is coming because of timeout. Not doing so can cause either to wait on that request indefinitely.
Error handling
The requests module gives support for error handling and some of which are Connection Error, Timeout errors, TooManyRedirects, Response.raise_for_status errors, etc.
Cookies
The library allows you to read, write and update for the requested URL.
Sessions
To maintain the data, you require between requests you need sessions. So, if the same host is called again and again you can re-use the TCP connection which in turn will improve the performance.
SSL certificates
SSL certificate is a security feature that comes with secure urls. When you use Requests, it also verifies SSL certificates for the https URL given. SSL Verification is enabled by default in the requests library and will throw an error if the certificate is not present.
Authentication
HTTP authentication is on the server-side asking for some authentication information like username, password when the client requests a URL. This is an additional security for the request and the response being exchanged between the client and the server.
Advantages of using Python Requests Library
Following are the advantages of using Python Requests Library −
- Easy to use and fetch the data from the URL given.
- Requests library can be used to scrape the data from the website.
- Using requests, you can get, post, delete, update the data for the URL given.
- The handling of cookies and session is very easy.
- The security is also taken care of the help of authentication module support.
Requests — Environment Setup
In this chapter, we will work on the installation of Requests. To start working with the Requests module, we need to install Python first. So we are going to work on following−
Installing Python
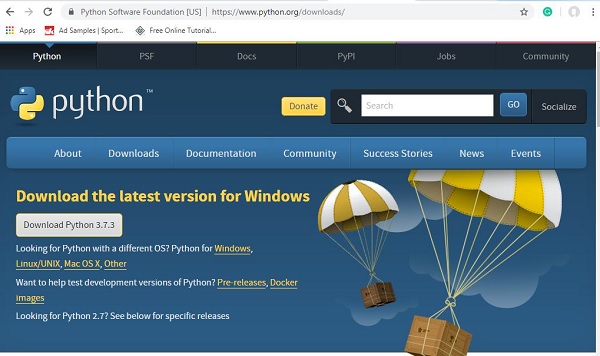
Go to the Python official site: https://www.python.org/downloads/ as shown below and click on the latest version available for Windows, Linux/Unix, and Mac OS. Download Python as per your 64 or 32 bit OS available with you.
Once you have downloaded, click on the .exe file and follow the steps to install python on your system.

The python package manager, i.e., pip will also get installed by default with the above installation. To make it work globally on your system, directly add the location of python to the PATH variable. The same is shown at the start of the installation to remember to check the checkbox which says ADD to PATH. In case you forget to check it, please follow the below-given steps to add to PATH.
To add to PATH follow the steps−
Right-click on your Computer icon and click on properties > Advanced System Settings.
It will display the screen as shown below −

Click on Environment Variables as shown above. It will display the screen as shown below −
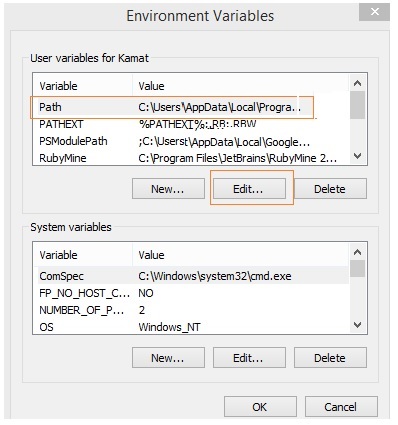
Select Path and click on Edit button, add the location path of your python at the end. Now, let us check the python version.
Checking the python version
E:\prequests>python --version Python 3.7.3
Install Requests
Now that we have python installed, we are going to install Requests.
Once python is installed, python package manager i.e. pip will also get installed. Following is the command to check pip version.
E:\prequests>pip --version pip 19.1.1 from c:\users\xxxxx\appdata\local\programs\python\python37\lib\site-p ackages\pip (python 3.7)
We have pip installed and the version is 19.1.1. Now, will use pip to install Requests module.
The command is given below−
E:\prequests>pip install requests Requirement already satisfied: requests in c:\users\xxxx\appdata\local\programs \python\python37\lib\site-packages (2.22.0) Requirement already satisfied: certifi>=2017.4.17 in c:\users\kamat\appdata\loca l\programs\python\python37\lib\site-packages (from requests) (2019.3.9) Requirement already satisfied: urllib3!=1.25.0,!=1.25.1,=1.21.1 in c:\use rs\xxxxx\appdata\local\programs\python\python37\lib\site-packages (from requests ) (1.25.3) Requirement already satisfied: idna=2.5 in c:\users\xxxxxxx\appdata\local\pr ograms\python\python37\lib\site-packages (from requests) (2.8) Requirement already satisfied: chardet=3.0.2 in c:\users\xxxxx\appdata\l ocal\programs\python\python37\lib\site-packages (from requests) (3.0.4)
We already have the module installed, so in the command prompt it says Requirement already satisfied; if not installed it would have downloaded the required packages for installation.
To check the details of the requests module installed, you can use the following command−
pip show requests E:\prequests>pip show requests Name: requests Version: 2.22.0 Summary: Python HTTP for Humans. Home-page: http://python-requests.org Author: Kenneth Reitz Author-email: me@kennethreitz.org License: Apache 2.0 Location: c:\users\xxxxx\appdata\local\programs\python\python37\lib\site-package S Requires: certifi, idna, urllib3, chardet Required-by:
The version of Requests module is 2.22.0.
Requests — How Http Requests Work?
Python’s Requests is a HTTP library that will help us exchange data between the client and the server. Consider you have a UI with a form, wherein you need to enter the user details, so once you enter it, you have to submit the data which is nothing but a Http POST or PUT request from the client to server to save the data.
When you want the data, you need to fetch it from the server, which is again a Http GET request. The exchange of data between the client when it requests the data and the server responding with the required data, this relationship between the client and the server is very important.
The request is made to the URL given and it could be a secure or non-secure URL.
The request to the URL can be done using GET, POST, PUT, DELETE. The most commonly used is the GET method, mainly used when you want to fetch data from the server.
You can also send data to the URL as a query string for example−
So here, we are passing and username = Delphine to the URL. All the values are sent in key/value pair after the question mark(?) and multiple params are passed to the URL separated by &.
Using the request library, the URL is called as follows using a string dictionary.
Wherein the data to the URL is sent as a dictionary of strings. If you want to pass and username=Delphine, you can do as follows−
The requests library is called as follows−
Using POST, we can do as follows−
Print the Entire Http Request (Raw) in Python
This article will discuss three methods that can be used to print HTTP requests sent using Python.
- Turning verbosity on when sending requests,
- Using the attributes in PreparedRequest of requests library, and,
- Using requests_toolbelt library
Method 1: Logging and Turning request Verbosity on
In this method, we need requests, logging, and http_client() to enable the logging of the output of a request in debugging mode. The log will show the HTTP request, including headers and data, response with headers but without the data.
Output (truncated):
DEBUG:urllib3.connectionpool:Starting new HTTP connection (1): api.github.com:80 send: b'GET /ussfsdsers HTTP/1.1\r\nHost: api.github.com\r\nUser-Agent: Mozilla/5.0 (Macintosh; Intel Mac OS X 10.6; en-US; rv:1.0.1) Gecko/20100101 Firefox/1.0.1\r\nAccept-Encoding: gzip, deflate\r\nAccept: */*\r\nConnection: keep-alive\r\nCustom: Testing Request\r\n\r\n' reply: 'HTTP/1.1 301 Moved Permanently\r\n' header: Location: https://api.github.com/ussfsdsers header: Content-Length: 0 DEBUG:urllib3.connectionpool:http://api.github.com:80 "GET /ussfsdsers HTTP/1.1" 301 0 DEBUG:urllib3.connectionpool:Starting new HTTPS connection (1): api.github.com:443 send: b'GET /ussfsdsers HTTP/1.1\r\nHost: api.github.com\r\nUser-Agent: Mozilla/5.0 (Macintosh; Intel Mac OS X 10.6; en-US; rv:1.0.1) Gecko/20100101 Firefox/1.0.1\r\nAccept-Encoding: gzip, deflate\r\nAccept: */*\r\nConnection: keep-alive\r\nCustom: Testing Request\r\n\r\n' reply: 'HTTP/1.1 404 Not Found\r\n' header: Server: GitHub.com header: Content-Length: 98 header: X-GitHub-Request-Id: D3EA:12B09:9DE5DA6:A072E38:632D9481 DEBUG:urllib3.connectionpool:https://api.github.com:443 "GET /ussfsdsers HTTP/1.1" 404 98
The output log is informative. It shows the actual HTTP request containing the headers and the data. The debugger also details all the events happening under the hoods. The final debug statement shows that the URL we passed does not exist (resulting in a 404).
Method 2: Using PreparedRequests class of requests
The class has a method called prepare() that allows us to pass request parameters to the object before sending the actual request. The object “contains the exact bytes that will be sent to the server.“