- #5 Ответ сервера и перехват запросов во Flask
- Создание ответа с помощью make_response()
- Создание ответов с помощью кортежей
- Перехват запросов
- Отмена запроса с помощью abort()
- Изменение страниц ошибок
- How to return the status code in Flask
- What is Flask?
- What are status codes in HTTP?
- Status code in a tuple
- Code
- Explanation
- The make_response() method
- Code
- Success
- Success
- Explanation
#5 Ответ сервера и перехват запросов во Flask
До сих пор этот способ использовался, чтобы отправлять ответ клиенту. Когда Flask видит, что из функции представления возвращается строка, он автоматически конвертирует ее в объект ответа (с помощью метода make_response() ) со строкой, содержащей тело ответа, статус-код HTTP 200 и значение text/html в заголовке content-type . В большинстве случаев это — все, что нужно. Но иногда необходимы дополнительные заголовки перед отправлением ответа клиенту. Для этого создавать ответ нужно с помощью функции make_response() .
Создание ответа с помощью make_response()
Синтаксис make_response() следующий:
res_obj = make_response(res_body, status_code=200) res_body — обязательный аргумент, представляющий собой тело ответа, а status_code — опциональный, по умолчанию его значение равно 200.
Следующий код показывает, как добавить дополнительные заголовки с помощью функции make_response() .
from flask import Flask, make_response, @app.route('/books/') def books(genre): res = make_response("All Books in <> category".format(genre)) res.headers['Content-Type'] = 'text/plain' res.headers['Server'] = 'Foobar' return res Следующий — демонстрирует, как вернуть ошибку 404 с помощью make_response() .
@app.route('/') def http_404_handler(): return make_response("404 Error
", 400) Настройка куки — еще одна базовая задача для любого веб-приложения. Функция make_response() максимально ее упрощает. Следующий код устанавливает два куки в клиентском браузере.
@app.route('/set-cookie') def set_cookie(): res = make_response("Cookie setter") res.set_cookie("favorite-color", "skyblue") res.set_cookie("favorite-font", "sans-serif") return res Примечание: куки обсуждаются подробно в уроке «Куки во Flask».
Куки, заданные в вышеуказанном коде, будут активны до конца сессии в браузере. Можно указать собственную дату истечения их срока, передав в качестве третьего аргумента в методе set_cookie() количество секунд. Например:
@app.route('/set-cookie') def set_cookie(): res = make_response("Cookie setter") res.set_cookie("favorite-color", "skyblue", 60*60*24*15) res.set_cookie("favorite-font", "sans-serif", 60*60*24*15) return res Здесь, у куки будут храниться 15 дней.
Создание ответов с помощью кортежей
Последний способ создать ответ — использовать кортежи в одном из следующих форматов:
(response, status, headers) (response, headers) (response, status) response — строка, представляющая собой тело ответа, status — код состояния HTTP, который может быть указан в виде целого числа или строки, а headers — словарь со значениями заголовков.
@app.route('/') def http_500_handler(): return ("500 Error
", 500) Функция представления вернет ошибку HTTP 500 Internal Server Error. Поскольку при создании кортежей можно не писать скобки, вышеуказанный код можно переписать следующим образом:
@app.route('/') def http_500_handler(): return "500 Error
", 500 Следующий код демонстрирует, как указать заголовки с помощью кортежей:
@app.route('/') def render_markdown(): return "## Heading", 200, 'Content-Type': 'text/markdown'> Сможете догадаться, что делает следующая функция?
@app.route('/transfer') def transfer(): return "", 302, 'location': 'https://localhost:5000/login'> Функция представления перенаправляет пользователя на https://localhost:5000/login с помощью ответа 302 (временное перенаправление). Перенаправление пользователей — настолько распространенная практика, что во Flask для этого есть даже отдельная функция redirect() .
from flask import Flask, redirect @app.route('/transfer') def transfer(): return redirect("https://localhost:5000/login") По умолчанию, redirect() осуществляет 302 редиректы. Чтобы использовать 301, нужно указать это в функции redirect() :
from flask import Flask, redirect @app.route('/transfer') def transfer(): return redirect("https://localhost:5000/login", code=301) Перехват запросов
В веб-приложениях часто нужно исполнить определенный код до или после запроса. Например, нужно вывести весь список IP-адресов пользователей, которые используют приложение или авторизовать пользователя до того как показывать ему скрытые страницы. Вместе того чтобы копировать один и тот же код внутри каждой функции представления, Flask предлагает следующие декораторы:
- before_first_request : этот декоратор выполняет функцию еще до обработки первого запроса
- before_request : выполняет функцию до обработки запроса
- after_request : выполняет функцию после обработки запроса. Такая функция не будет вызвана при возникновении исключений в обработчике запросов. Она должна принять объект ответа и вернуть тот же или новый ответ.
- teardown_request : этот декоратор похож на after_request . Но вызванная функция всегда будет выполняться вне зависимости от того, возвращает ли обработчик исключение или нет.
Стоит отметить, что если функция в before_request возвращает ответ, тогда обработчик запросов не вызывается.
Следующий код демонстрирует, как использовать эти точки перехвата во Flask. Нужно создать новый файл hooks.py с таким кодом:
from flask import Flask, request, g app = Flask(__name__) @app.before_first_request def before_first_request(): print("before_first_request() called") @app.before_request def before_request(): print("before_request() called") @app.after_request def after_request(response): print("after_request() called") return response @app.route("/") def index(): print("index() called") return 'Testings Request Hooks
' if __name__ == "__main__": app.run(debug=True) После этого необходимо запустить сервер и сделать первый запрос, перейдя на страницу https://localhost:5000/ . В консоли, где был запущен сервер, должен появиться следующий вывод:
before_first_request() called before_request() called index() called after_request() called Примечание: записи о запросах к серверу опущены для краткости.
После перезагрузки страницы отобразится следующий вывод.
before_request() called index() called after_request() called Поскольку это второй запрос, функция before_first_request() не будет вызываться.
Отмена запроса с помощью abort()
Flask предлагает функцию abort() для отмены запроса с конкретным типом ошибки: 404, 500 и так далее. Например:
from flask import Flask, abort @app.route('/') def index(): abort(404) # код после выполнения abort() не выполняется 
Эта функция представления вернет стандартную страницу ошибки 404, которая выглядит вот так:
abort() покажет похожие страницы для других типов ошибок. Если нужно изменить внешний вид страниц с ошибками, необходимо использовать декоратор errorhandler .
Изменение страниц ошибок
Декоратор errorhandler используется для создания пользовательских страниц с ошибками. Он принимает один аргумент — ошибку HTTP, — для которой создается страница. Откроем файл hooks.py для создания кастомных страниц ошибок 404 и 500 с помощью декоратора:
from flask import Flask, request, g, abort #. #. @app.after_request def after_request(response): print("after_request() called") return response @app.errorhandler(404) def http_404_handler(error): return "HTTP 404 Error Encountered
", 404 @app.errorhandler(500) def http_500_handler(error): return "HTTP 500 Error Encountered
", 500 @app.route("/") def index(): # print("index() called") # return 'Testings Request Hooks
' abort(404) if __name__ == "__main__": #. Стоит отметить, что оба обработчика ошибок принимают один аргумент error , который содержит дополнительную информацию о типе ошибки.
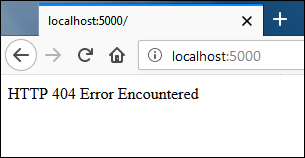
Если сейчас посетить корневой URL, отобразится следующий ответ:
How to return the status code in Flask
Many candidates are rejected or down-leveled in technical interviews due to poor performance in behavioral or cultural fit interviews. Ace your interviews with this free course, where you will practice confidently tackling behavioral interview questions.
What is Flask?
Flask is a lightweight Python framework for quick and rapid web application development.
What are status codes in HTTP?
HTTP response status codes are used in web development to determine whether a particular HTTP request has been completed successfully.
Status code in a tuple
The view function can return the status code as one of a tuple’s elements. A response object is automatically created from the return result of a view function. It is possible to get a tuple back that contains additional information. The tuple with the status code to be returned can be in any of the following formats:
Code
from flask import Flask, make_response, request app = Flask(__name__) @app.route(«/userDetails», methods=[«GET», «POST»]) def user_details(): if request.method == «POST»: username = request.form.get(«username») firstname = request.form.get(«firstname») lastname = request.form[«lastname»] return «Success», 201 @app.route(«/userSignUp», methods=[«POST»]) def sign_up(): if request.method == «POST»: username = request.form.get(«username») password = request.form.get(«password») return «Success», 200,
Explanation
In the code above, the important lines to focus on are the following:
- Line 14: We are returning the response as a tuple with the response body as Success and the status code of 201 .
- Line 24: We are returning the response as a tuple with the response body as Success , status code of 200 , and some headers as a dictionary.
Use the following curl commands to test the userDetails endpoint.
curl -X POST http://localhost:5000/userDetails -H "Content-Type: application/x-www-form-urlencoded" -d "username=sam&firstname=john&lastname=king" Use the following curl commands to test the userSignUp endpoint.
curl -X POST http://localhost:5000/userSignUp -H "Content-Type: application/x-www-form-urlencoded" -d "username=sam&firstname=john" The make_response() method
The make_response method from Flask returns a Response object that can be used to send custom headers and change the properties such as status_code, mimetype, and so on.
We can set the status code using the make_response method in two ways:
- Pass the status code as a constructor parameter.
- Use the property status_code to set the status code. Here, the value set has to be an integer.
Code
from flask import Flask, make_response, request app = Flask(__name__) @app.route("/userDetails", methods=["GET", "POST"]) def user_details(): if request.method == "POST": username = request.form.get("username") firstname = request.form.get("firstname") lastname = request.form["lastname"] response = make_response("Success
", 201) return response @app.route("/userSignUp", methods=["POST"]) def sign_up(): if request.method == "POST": username = request.form.get("username") password = request.form.get("password") response = make_response("Success
") response.status_code = 200 return response Explanation
In the code above, the important lines to focus on are the following:
- Line 14: We use the make_response method to create an instance of the Response class. We pass the status code as a constructor parameter.
- Lines 25–26: We use the make_response method to create an instance of the Response class. We set the status code by explicitly setting the status_code property of the response object.
Use the following curl commands to test the userDetails endpoint.
curl -X POST http://localhost:5000/userDetails -H "Content-Type: application/x-www-form-urlencoded" -d "username=sam&firstname=john&lastname=king" Use the following curl commands to test the userSignUp endpoint.
curl -X POST http://localhost:5000/userSignUp -H "Content-Type: application/x-www-form-urlencoded" -d "username=sam&firstname=john"