- Install pyqt
- How to install PyQt5 on Windows?
- How to install PyQt5 on Mac OS X?
- How to install PyQt5 on Linux?
- PyQt5 для начинающих
- Установка PyQt5
- Hello, World!
- Меняем шрифт надписи
- Более продвинутая разметка с XHTML
- Pyqt python pip install
- # Install PyQt6 on macOS or Linux
- # Install PyQt6 in Visual Studio Code
- # Install PyQt6 in PyCharm
- # Install PyQt6 in Anaconda
- # Install PyQt6 in Jupyter Notebook
Install pyqt
PyQt is often not installed by default. The PyQt module can be used to create desktop applications with Python. In this article you’ll learn how to install the PyQt module.
Desktop applications made with PyQt are cross platform, they will work on Microsoft Windows, Apple Mac OS X and Linux computers (including Raspberry Pi).
How to install PyQt5 on Windows?
To install PyQt on Windows there are a few steps you need to take.
First use the installer from the qt-project website, from qt to install PyQt.
Next you want to install a Python version 3.3 or newer. Check the box to add all of the PyQt5 extras. It’s not necessary to compile everything from source, you can install all the required packages with the installer.
On Python >= 3.6, you can also try this command:
It should work without problems.
How to install PyQt5 on Mac OS X?
On Apple Mac OS X installation is a bit simpler. The first step to take is to install the Mac OS X binary. This installs the PyQt GUI library.
But to use it from Python, you also need Python module. This is where the tool brew comes in.
You can use brew to install pyqt (in the terminal):
How to install PyQt5 on Linux?
Python is often installed by default on Linux (in nearly all of the distributions including Ubuntu). But you want to make sure to use Python 3, because of all the features and ease of use. You can verify that you have the newest Python version with the command:
On Ubuntu Linux they sometimes include two versions of python, python3 and python . In that case use Python 3.
Once you have Python ready, the next step is to install PyQt.
This isn’t hard to do if you have some Linux experience. You can install PyQt your software package manager. Which package manager to use depends on which Linux distribution you are using.
On Ubuntu Linux / Debian Linux you can use the command:
sudo apt-get install python3-pyqt5
For CentOS 7 use the command:
yum install qt5-qtbase-devel
For RPM-based systems (Redhat-based)
PyQt GUI Programming Tutorial
PyQt5 для начинающих
Привет, Хабр! Сегодня я вас хочу научить делать интерфейс на Python 3&PyQt5.
Установка PyQt5
Для того, чтобы установить PyQt5 в Windows или MacOS, откройте Командную строку или Терминал и введите:
Для Linux, откройте Терминал и введите:
sudo apt-get update sudo apt-get upgrade sudo apt-get install python3-pyqt5Hello, World!
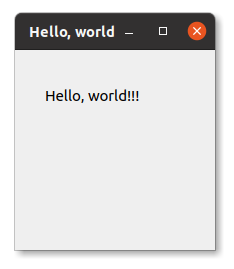
А сейчас сделаем Hello World приложение. Создайте файл Python, откройте его и введите такой код:
from PyQt5.QtWidgets import * import sys class MainWindow(QMainWindow): # главное окно def __init__(self, parent=None): super().__init__(parent) self.setupUi() def setupUi(self): self.setWindowTitle("Hello, world") # заголовок окна self.move(300, 300) # положение окна self.resize(200, 200) # размер окна self.lbl = QLabel('Hello, world. ', self) self.lbl.move(30, 30) if __name__ == "__main__": app = QApplication(sys.argv) win = MainWindow() win.show() sys.exit(app.exec_())Когда вы запустите, должна получится примерно такая картина:
Меняем шрифт надписи
А теперь поменяем шрифт надписи. Теперь код станет таким:
from PyQt5.QtWidgets import * from PyQt5.QtGui import * import sys class MainWindow(QMainWindow): # главное окно def __init__(self, parent=None): super().__init__(parent) self.setupUi() def setupUi(self): self.setWindowTitle("Hello, world") # заголовок окна self.move(300, 300) # положение окна self.resize(200, 200) # размер окна self.lbl = QLabel('Hello, world. ', self) self.lbl.move(30, 30) self.font = QFont() # создаём объект шрифта self.font.setFamily("Rubik") # название шрифта self.font.setPointSize(12) # размер шрифта self.font.setUnderline(True) # подчёркивание self.lbl.setFont(self.font) # задаём шрифт метке if __name__ == "__main__": app = QApplication(sys.argv) win = MainWindow() win.show() sys.exit(app.exec_()) Пример рассчитан на то, что у вас уже установлен шрифт Rubik от Google Fonts. Если нет, его всегда можно скачать отсюда.
Более продвинутая разметка с XHTML
А теперь добавим XHTML. Например, так:
from PyQt5.QtWidgets import * import sys class MainWindow(QMainWindow): # главное окно def __init__(self, parent=None): super().__init__(parent) self.setupUi() def setupUi(self): self.setWindowTitle("Hello, world") # заголовок окна self.move(300, 300) # положение окна self.resize(200, 200) # размер окна self.lbl = QLabel('Hello, world. 123', self) self.lbl.move(30, 30) if __name__ == "__main__": app = QApplication(sys.argv) win = MainWindow() win.show() sys.exit(app.exec_()) Те, кто хотя бы немного знают XHTML, заметят, что надпись Hello сделана курсивом, слово world — жирным, а 123 — и вычеркнуто, и жирное.
Pyqt python pip install
The pip show pyqt6 command will either state that the package is not installed or show a bunch of information about the package, including the location where the package is installed.
# Install PyQt6 on macOS or Linux
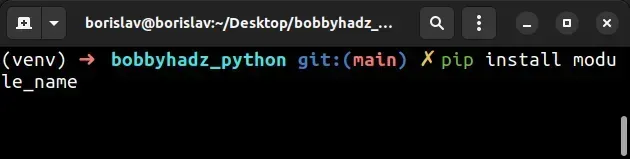
To install PyQt6 on macOS or Linux:
Copied!pip install pyqt6 # 👇️ for Python 3 pip3 install pyqt6 # 👇️ if you get permissions error sudo pip3 install pyqt6 # 👇️ if you don't have pip in your PATH environment variable python -m pip install pyqt6 # 👇️ for python 3 python3 -m pip install pyqt6 # 👇️ alternative if you get permissions error pip install pyqt6 --user
If you get an error that pip isn’t found, use the python -m command.
Copied!python -m pip install pyqt6 python3 -m pip install pyqt6
If you get a permissions error, prefix the command with sudo .
Copied!sudo pip install pyqt6 sudo pip3 install pyqt6
Alternatively, you can install the pyqt6 package in a virtual environment:
Copied!# 👇️ could also be "python -m venv venv" python3 -m venv venv # 👇️ activate virtual env on macOS or Linux source venv/bin/activate # 👇️ install pyqt6 in virtual environment pip install pyqt6
Your virtual environment will use the version of Python that was used to create it.
You can use the pip show command to verify pyqt6 has been installed successfully.
Copied!pip show pyqt6 pip3 show pyqt6 python -m pip show pyqt6 python3 -m pip show pyqt6
The pip show pyqt6 command will either state that the package is not installed or show a bunch of information about the package.
# Install PyQt6 in Visual Studio Code
To install PyQt6 in Visual Studio Code:
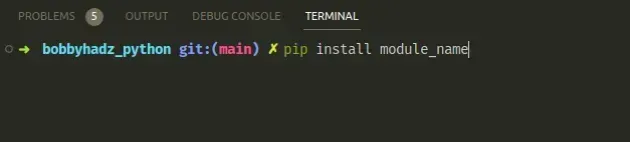
- Press CTRL + ` (Backtick) on your keyboard to open the terminal.
- Run the pip install pyqt6 command to install the PyQt6 module.
Copied!pip install pyqt6 # 👇️ for Python 3 pip3 install pyqt6 # 👇️ if you get permissions error sudo pip3 install pyqt6 # 👇️ if you don't have pip in your PATH environment variable python -m pip install pyqt6 # 👇️ for python 3 python3 -m pip install pyqt6 # 👇️ using py alias py -m pip install pyqt6 # 👇️ alternative if you get permissions error pip install pyqt6 --user
You can also open the terminal in Visual studio code by pressing CTRL+Shift+P and then typing «View: Toggle Terminal».
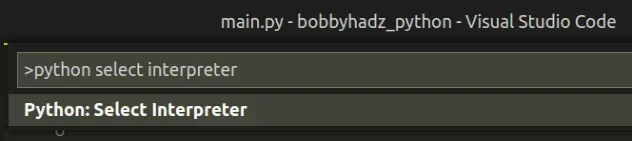
Press CTRL+Shift+P or ( ⌘ + Shift + P on Mac) to open the command palette.
Then type «Python select interpreter» in the field.
Then select the correct Python version from the dropdown menu.
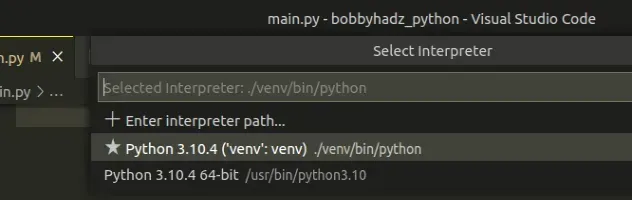
Your IDE should be using the same version of Python (including the virtual environment) that you are using to install packages from your terminal.
You can use the python —version command if you need to get your version of Python.
Copied!python --version python3 --version

You can also try creating a virtual environment if you don’t already have one.
Copied!# 👇️ could also be "python -m venv venv" or "py -m venv venv" python3 -m venv venv # 👇️ activate on Unix or MacOS source venv/bin/activate # 👇️ activate on Windows (cmd.exe) venv\Scripts\activate.bat # 👇️ activate on Windows (PowerShell) venv\Scripts\Activate.ps1 # 👇️ install pyqt6 in virtual environment pip install pyqt6
Your virtual environment will use the version of Python that was used to create it.
# Install PyQt6 in PyCharm
To install PyQt6 in PyCharm:
- Press Alt+F12 on your keyboard to open the terminal.
- Run the pip install pyqt6 command to install the PyQt6 module.
Copied!pip install pyqt6 # 👇️ for Python 3 pip3 install pyqt6 # 👇️ if you get permissions error sudo pip3 install pyqt6 # 👇️ if you don't have pip in your PATH environment variable python -m pip install pyqt6 # 👇️ for python 3 python3 -m pip install pyqt6 # 👇️ using py alias py -m pip install pyqt6 # 👇️ alternative if you get permissions error pip install pyqt6 --user

Alternatively, you can use the IDE itself to install the module.
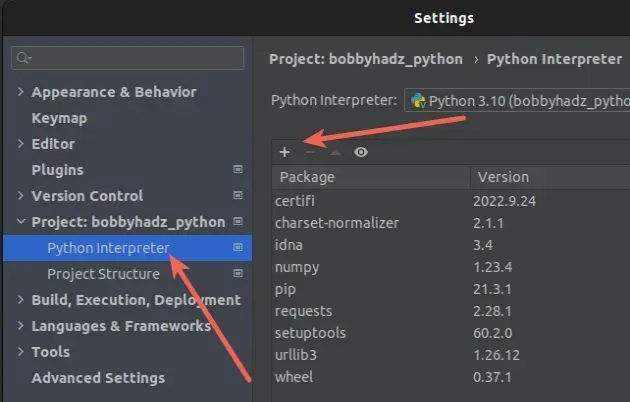
- Click on «File» > «Settings» > «Project» > «Python Interpreter».
- Click on the + icon and type PyQt6 .
- Click on «Install Package».
When installing Python modules in PyCharm, make sure that your IDE is configured to use the correct version of Python.
Click on «File» > «Settings» > «Project» > «Python Interpreter».
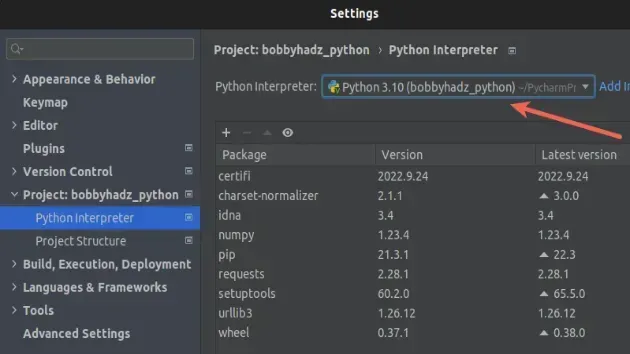
Then select the correct Python version from the dropdown menu.
Your IDE should be using the same version of Python (including the virtual environment) that you are using to install packages from your terminal.
You can use the python —version command if you need to get your version of Python.
Copied!python --version python3 --version
# Install PyQt6 in Anaconda
If you are on Windows, search for «Anaconda Prompt» and open the application.
If you are on macOS or Linux, open your terminal.
Run the following command to install the pyqt6 package.
Copied!# 👇️ Alternatively use `pip` pip install pyqt6 # 👇️ for Python 3 pip3 install pyqt6 # 👇️ if you get permissions error sudo pip3 install pyqt6 # 👇️ if you don't have pip in your PATH environment variable python -m pip install pyqt6 # 👇️ for python 3 python3 -m pip install pyqt6 # 👇️ using py alias py -m pip install pyqt6 # 👇️ alternative if you get permissions error pip install pyqt6 --user
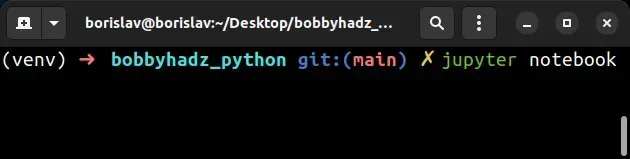
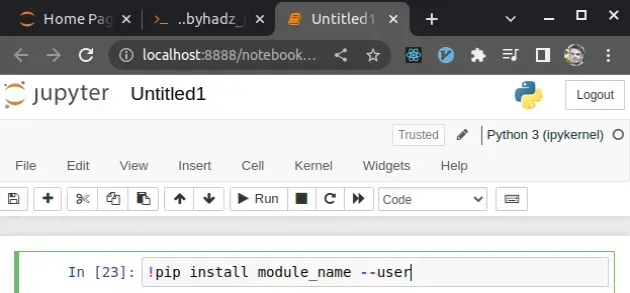
# Install PyQt6 in Jupyter Notebook
To install PyQt6 in Jupyter Notebook:
Copied!# 👇️ using pip pip install pyqt6 # 👇️ for Python 3 pip3 install pyqt6 # 👇️ if you get permissions error sudo pip3 install pyqt6 # 👇️ if you don't have pip in your PATH environment variable python -m pip install pyqt6 # 👇️ for python 3 python3 -m pip install pyqt6 # 👇️ using py alias py -m pip install pyqt6 # 👇️ alternative if you get permissions error pip install pyqt6 --user
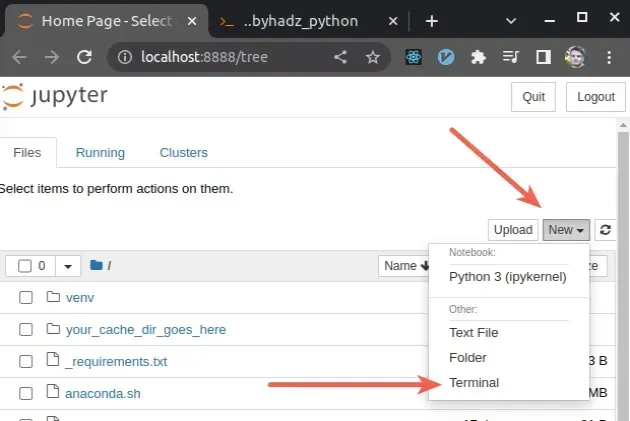
Alternatively, you can use the Python ipykernel.
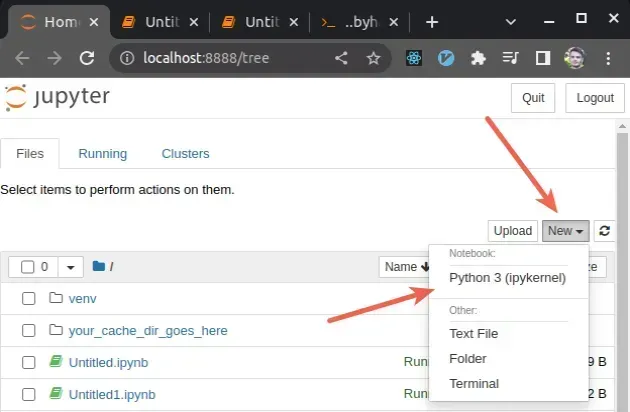
- Click on «New» and then click on «Python 3 (ipykernel)».
- Type !pip install pyqt6 and click on «Run».
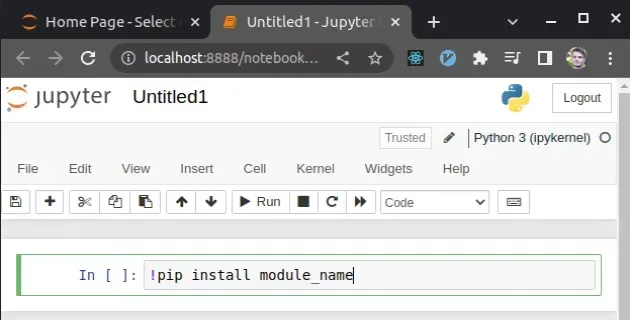
Note that the pip install command must be prefixed with an exclamation mark if you use this approach.
Once you type the command, click «Run» to install the pyqt6 module.
If you get a permissions error, e.g. » [WinError: 5] Access is denied», add the —user option to the installation command.
Copied!!pip install pyqt6 --user
I wrote a book in which I share everything I know about how to become a better, more efficient programmer.