- Как web-страницу легко превратить в PDF?
- How to create a PDF from any HTML page or form using only JavaScript
- Install jsPDF
- Customize HTML to PDF conversion
- Customize PDF orientation
- Customize PDF unit and dimensions
- Convert HTML form to PDF
- Key takeaways
- 11 Amazing New JavaScript Features in ES13
- How to convert html to pdf in php? (By Using TCPDF)
- Follow the steps for convert HTML to PDF in PHP
Как web-страницу легко превратить в PDF?

Для меня было очень неожиданно то, что в хабе по Java практически нет информации по работе с PDF документами, поэтому я, из личного опыта, хочу на примере сервлета показать как легко можно любую web-страницу превратить в PDF документ.
Преамбула:
Напишем простой сервлет, который будет брать указанную нами web-страницу по HTTP протоколу и генерировать на её основе полноценный PDF документ.
Используемые библиотеки:
- Flying Saucer PDF — основная библиотека, которая поможет создать нам PDF документ из HTML/CSS
- iText — библиотека, которая включена в состав той, что описана выше, но я не мог не включить ее в список библиотек, т.к. именно на основе неё будет генерироваться PDF документ
- HTML Cleaner — библиотека, которая будет приводить наш HTML код в порядок
org.xhtmlrenderer flying-saucer-pdf 9.0.4 net.sourceforge.htmlcleaner htmlcleaner 2.6.1 Формирование страницы:
Одним из самый важных моментов является формирование страницы. Дело в том, что именно из самой страницы, посредством CSS, задаются параметры будущего PDF документа.
@font-face < font-family: "HabraFont"; src: url(http://localhost:8080/resources/fonts/tahoma.ttf); -fs-pdf-font-embed: embed; -fs-pdf-font-encoding: Identity-H; >@page < margin: 0px; padding: 0px; size: A4 portrait; >@media print < .new_page < page-break-after: always; >> body < background-image: url(http://localhost:8080/resources/images/background.png); >body * < padding: 0; margin: 0; >* < font-family: HabraFont; >#block < width: 90%; margin: auto; background-color: white; border: dashed #dbdbdb 1px; >#logo < margin-top: 5px; width: 100%; text-align: center; border-bottom: dashed #dbdbdb 1px; >#content Привет, хабр! Текущее время: <%=sdf.format(new Date())%>Новая страница! Здесь хочу остановиться на нескольких моментах. Для начала самое важное: все пути должны быть абсолютными! Картинки, стили, адреса шрифтов и др., на всё должны быть прописаны абсолютные пути. А теперь пройдемся по CSS правилам (то, что начинается с символа @).
@ font-face — это правило, которое скажет нашему PDF генератору какой нужно взять шрифт, и откуда. Проблема в том, что библиотека, которая будет генерировать PDF документ не содержит шрифтов, включающих в себя кириллицу. Именно поэтому таким образом придется определять ВСЕ шрифты, которые используются в Вашей странице, пусть это будут даже стандартные шрифты: Arial, Verdana, Tahoma, и пр., в противном случае Вы рискуете не увидеть кириллицу в Вашем документе.
Обратите внимание на такие свойства как «-fs-pdf-font-embed: embed;» и «-fs-pdf-font-encoding: Identity-H;», эти свойства необходимы, их просто не забывайте добавлять.
@ page — это правило, которое задает отступы для PDF документа, ну и его размер. Здесь хотелось бы отметить, что если Вы укажите размер страницы A3 (а как показывает практика, это часто необходимо, т.к. страница не помещается в документ по ширине), то это не значит, что пользователю необходимо будет распечатывать документ (при желании) в формате A3, скорее просто весь контент будет пропорционально уменьшен/увеличен до желаемого (чаще A4). Т.е. относитесь к значению свойства size скептически, но знайте, что оно может сыграть для Вас ключевую роль.
@ media — правило, позволяющее создавать CSS классы для определенного типа устройств, в нашем случае это «print». Внутри этого правила мы создали класс, после которого наш генератор PDF документа создаст новую страницу.
Сервлет:
package ru.habrahabr.web_to_pdf.servlets; import org.htmlcleaner.CleanerProperties; import org.htmlcleaner.HtmlCleaner; import org.htmlcleaner.PrettyXmlSerializer; import org.htmlcleaner.TagNode; import org.xhtmlrenderer.pdf.ITextRenderer; import javax.servlet.ServletException; import javax.servlet.http.HttpServlet; import javax.servlet.http.HttpServletRequest; import javax.servlet.http.HttpServletResponse; import java.io.*; import java.net.HttpURLConnection; import java.net.URL; import java.net.URLConnection; /** * Date: 31.03.2014 * Time: 9:33 * * @author Ruslan Molchanov (ruslanys@gmail.com) */ public class PdfServlet extends HttpServlet < private static final String PAGE_TO_PARSE = "http://localhost:8080/page.jsp"; private static final String CHARSET = "UTF-8"; @Override protected void service(HttpServletRequest req, HttpServletResponse resp) throws ServletException, IOException < try < resp.setContentType("application/pdf"); byte[] pdfDoc = performPdfDocument(PAGE_TO_PARSE); resp.setContentLength(pdfDoc.length); resp.getOutputStream().write(pdfDoc); >catch (Exception ex) < resp.setContentType("text/html"); PrintWriter out = resp.getWriter(); out.write("Something wrong

"); ex.printStackTrace(out); ex.printStackTrace(); > > /** * Метод, подготавливащий PDF документ. * @param path путь до страницы * @return PDF документ * @throws Exception */ private byte[] performPdfDocument(String path) throws Exception < // Получаем HTML код страницы String html = getHtml(path); // Буффер, в котором будет лежать отформатированный HTML код ByteArrayOutputStream out = new ByteArrayOutputStream(); // Форматирование HTML кода /* эта процедура не обязательна, но я настоятельно рекомендую использовать этот блок */ HtmlCleaner cleaner = new HtmlCleaner(); CleanerProperties props = cleaner.getProperties(); props.setCharset(CHARSET); TagNode node = cleaner.clean(html); new PrettyXmlSerializer(props).writeToStream(node, out); // Создаем PDF из подготовленного HTML кода ITextRenderer renderer = new ITextRenderer(); renderer.setDocumentFromString(new String(out.toByteArray(), CHARSET)); renderer.layout(); /* заметьте, на этом этапе Вы можете записать PDF документ, скажем, в файл * но раз мы пишем сервлет, который будет возвращать PDF документ, * нам нужен массив байт, который мы отдадим пользователю */ ByteArrayOutputStream outputStream = new ByteArrayOutputStream(); renderer.createPDF(outputStream); // Завершаем работу renderer.finishPDF(); out.flush(); out.close(); byte[] result = outputStream.toByteArray(); outputStream.close(); return result; >private String getHtml(String path) throws IOException < URLConnection urlConnection = new URL(path).openConnection(); ((HttpURLConnection) urlConnection).setInstanceFollowRedirects(true); HttpURLConnection.setFollowRedirects(true); boolean redirect = false; // normally, 3xx is redirect int status = ((HttpURLConnection) urlConnection).getResponseCode(); if (HttpURLConnection.HTTP_OK != status && (HttpURLConnection.HTTP_MOVED_TEMP == status || HttpURLConnection.HTTP_MOVED_PERM == status || HttpURLConnection.HTTP_SEE_OTHER == status)) < redirect = true; >if (redirect) < // get redirect url from "location" header field String newUrl = urlConnection.getHeaderField("Location"); // open the new connnection again urlConnection = new URL(newUrl).openConnection(); >urlConnection.setConnectTimeout(30000); urlConnection.setReadTimeout(30000); BufferedReader in = new BufferedReader(new InputStreamReader(urlConnection.getInputStream(), CHARSET)); StringBuilder sb = new StringBuilder(); String line; while (null != (line = in.readLine())) < sb.append(line).append("\n"); >return sb.toString().trim(); > @Override public String getServletInfo() < return "The servlet that generate and returns pdf file"; >>
Кстати, совсем не обязательно писать для этих целей сервлет, Вы можете перенести логику этого сервлета хоть в консольное приложение, которое будет сохранять PDF документы в файлы. Как Вы могли заметить, в сервлете не нужно ничего настраивать, менять, дополнять, и т.д. (ну за исключением пути до страницы и, возможно, кодировки), соответственно вся работа по подготовке PDF документа очень проста и происходит исключительно во вьюшке.
В конечном итоге у Вас должен получиться примерно такой PDF документ: github.com/ruslanys/example-web-to-pdf/blob/master/web-to-pdf-example.pdf
Я немного дополнил свой документ информацией (распарсил главную страницу Хабра) и у меня получился такой вот документ: github.com/ruslanys/sample-html-to-pdf/blob/master/web-to-pdf-habra.pdf
P.S. В принципе, на основе этого примера можно написать целый сервис, который будет по любому адресу страницы создавать PDF документ. Единственное, что будет необходимо сделать — это привести HTML код страницы в соответствие с нашими правилами, т.е. в первую очередь нужно будет переписать все относительные пути на абсолютные (благо это делается не сложно), и в соответствии с какой-то логикой задать размеры документа.
How to create a PDF from any HTML page or form using only JavaScript
With the jspdf library, we can easily convert any HTML page or form to a PDF:

JavaScript Copied!
import < jsPDF >from 'jspdf'; const pdfContentEl = document.getElementById('pdf-content'); const doc = new jsPDF(); await doc.html(pdfContentEl.innerHTML).save('test.pdf');PDF is a popular file format we use to present and share documents with a fixed layout across different platforms and devices.
To start the conversion, we create a new jsPDF object with the constructor. Then we call the html() method, passing the element with the contents we want to be in the PDF. On the result, we call save() , passing our desired name of the output PDF file.
Let’s say we had HTML like this:
HTML Copied!
Test Here's what we're saving to PDF
with an output on the webpage like this:
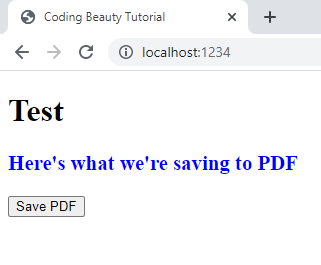
When we click the “Save PDF” button, jsPDF will create a new PDF from the HTML element and download it as a file in the browser
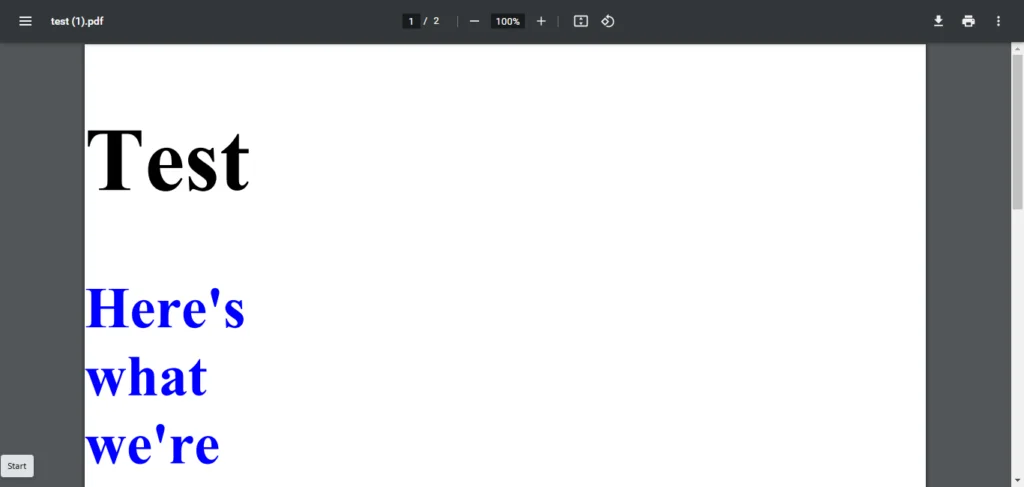
Here’s what displays when we open the PDF:
Install jsPDF
To get started with the jsPDF library, we can install it from NPM with this command.
Shell Copied!
After the installation, we’ll be able to import it into a JavaScript file, like this:
JavaScript Copied!
For this file to work in the HTML, we can use a module bundler like Parcel, which is what I use.
With Parcel, we can include the script in the HTML like this:
JavaScript Copied!
We can use modern tools like TypeScript and ES module imports in the script, and it will work just fine because of Parcel.
As far as we run the HTML with npx parcel my-file.html after installing Parcel with npm install parcel .
Shell Copied!
npm install parcel npx parcel my-file.htmlParcel makes the HTML available at localhost:1234 , as you might have seen in the demo above.
Customize HTML to PDF conversion
The jsPDF constructor accepts an options object that customizes the PDF conversion process.
For example, the orientation option sets the orientation of the resulting PDF.
By default, it’s portrait , but we can set it to landscape .
Customize PDF orientation
JavaScript Copied!
Customize PDF unit and dimensions
With the unit and format options, we can set the unit and dimensions of each PDF page in the output file.
JavaScript Copied!
Here we specify a landscape export that is 2 by 4 inches.
Convert HTML form to PDF
jsPDF also works with HTML elements whose appearance can change dynamically from user interaction, like form inputs.
HTML Copied!
JavaScript Copied!
import < jsPDF >from 'jspdf'; const doc = new jsPDF(); const savePdf = document.getElementById('save-pdf'); const formEl = document.getElementById('form'); savePdf.addEventListener('click', async () => < await doc.html(formEl).save('test.pdf'); >); 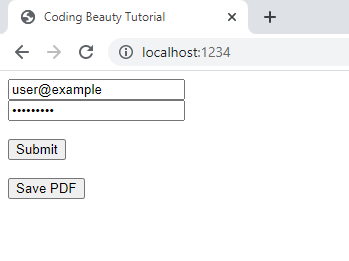
In the webpage, we’ve put in some test values in the two form inputs, to see that they display in the PDF output.
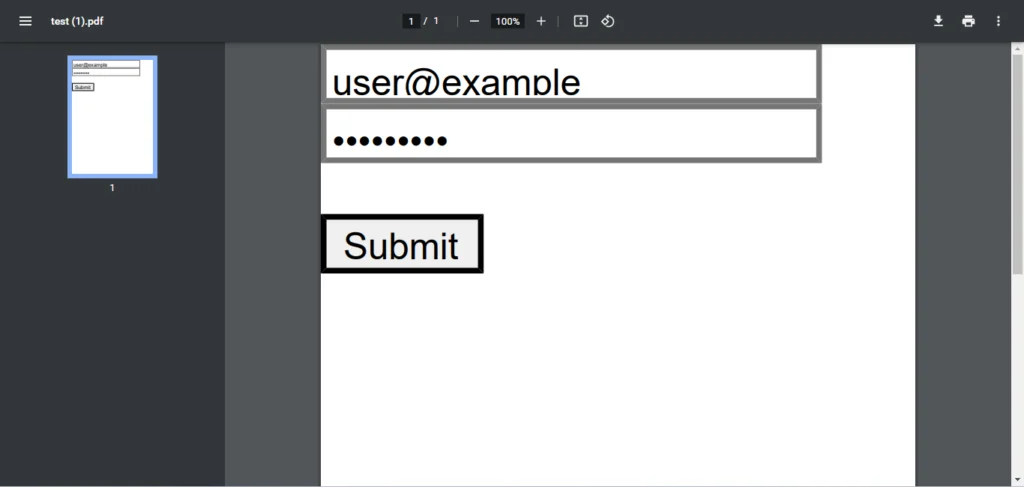
The PDF:
We can’t interact with the form inputs or button in the PDF file though.
Key takeaways
The jsPDF library provides a convenient way to convert HTML content, including forms, to PDF format. The entire process is pretty easy, as we can create a new jsPDF object, call the html() method to specify the content, and then use the save() method to generate the output file. Plus, we can customize the PDF output with options like orientation , unit , and format . Overall, using jsPDF simplifies creating PDF files from HTML content in our web apps.
11 Amazing New JavaScript Features in ES13
This guide will bring you up to speed with all the latest features added in ECMAScript 13. These powerful new features will modernize your JavaScript with shorter and more expressive code.
How to convert html to pdf in php? (By Using TCPDF)
In this tutorial, I will show you how to convert HTML to pdf in PHP or how to transfer HTML to pdf using PHP by following simple steps. No need to be an expert in PHP or HTML but a little bit PHP and HTML knowledge is required. I am explaining to you in very basic language. Please follow the instructions.
There are too many scripts are available on the internet to convert pdf to HTML in PHP. I have tried most of them and find the best one which is “TCPDF”.

Why TCPDF is the best?
It is free and many functions are available in this script. Also, functions are very easy to understand and implement. TCPDF is user-friendly and coding is very easy to understand. The main advantage of this script is a page break function. When your pdf pages are more than one then it works very charmingly. It will arrange all the designs of your HTML in a very good manner. Rather other scripts can’t do it very well. Another advantage is the HTML table structure(tr-td). This script makes it very simple and attractive.
When I tried other scripts there are too many issues occurs like:
- When PDF goes to the next page then the design is messing up.
- Can’t fix proper table structure.
- Margin issue.
- etc…
Now I will show you how to set up all the things for transfer HTML to pdf using PHP and HTML.
Follow the steps for convert HTML to PDF in PHP
Step 1: Download “TCPDF” script
First of all, you have to download the TCPDF library because we need this library to execute the code. You can download the library from the click below button.
Step 2: Unzip and Upload “TCPDF” folder to your server
Then you have to unzip the downloaded file, You will see one folder name “TCPDF”. Now upload this folder in your root directory of the server using FTP (Filezilla). If you are work in localhost then you can copy the folder and paste it in this path (xampp -> htdocs -> project name -> paste it)
Step 3: Now create “index.php” file and put the below code in this file.
$pdf = ' // You can put your HTML code here < h1 >Lorem Ipsum.</h1> < h2 >Lorem Ipsum.</h2> < h3 >Lorem Ipsum.</h3> < h4 >Lorem Ipsum.</h4> '; require('TCPDF/tcpdf.php'); $tcpdf = new TCPDF(PDF_PAGE_ORIENTATION, PDF_UNIT, PDF_PAGE_FORMAT, true, 'UTF-8', false); // set default monospaced font $tcpdf->SetDefaultMonospacedFont(PDF_FONT_MONOSPACED); // set title of pdf $tcpdf->SetTitle('Bill Collection Letter'); // set margins $tcpdf->SetMargins(10, 10, 10, 10); $tcpdf->SetHeaderMargin(PDF_MARGIN_HEADER); $tcpdf->SetFooterMargin(PDF_MARGIN_FOOTER); // set header and footer in pdf $tcpdf->setPrintHeader(false); $tcpdf->setPrintFooter(false); $tcpdf->setListIndentWidth(3); // set auto page breaks $tcpdf->SetAutoPageBreak(TRUE, 11); // set image scale factor $tcpdf->setImageScale(PDF_IMAGE_SCALE_RATIO); $tcpdf->AddPage(); $tcpdf->SetFont('times', '', 10.5); $tcpdf->writeHTML($pdf, true, false, false, false, ''); //Close and output PDF document $tcpdf->Output('demo.pdf', 'I');
For set page title: $tcpdf->SetTitle(‘Bill Collection Letter’);
You can set the margins of your pdf page by changing this: $tcpdf->SetMargins(10, 10, 10, 10);
By following these steps you can easily convert HTML to pdf in PHP. That’s it, now you can execute the code and you will see your HTML code is converted into pdf. You can get more examples, functions, and demos on TCPDF official site.
I hope you enjoyed this tutorial, please comment below and share it with your friends.
Releated Post: