- Charts
- Working with axes
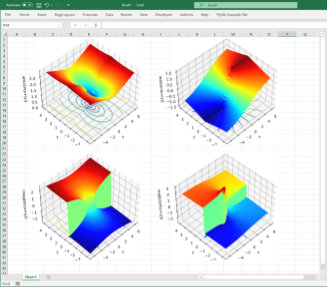
- Plot data from Excel Sheet using Python
- Steps to Plot data from Excel Sheet using Python
- Step 1: Importing Modules
- Step 2: Loading Dataset
- Step 3: Separating x and y values
- Step 4: Plotting a Scatter Plot
- Charts and Plotting 
- Plotting from Worksheet Functions 
- Plotting from Menus, Macros and Elsewhere 
Charts
Charts are composed of at least one series of one or more data points. Series themselves are comprised of references to cell ranges.
>>> from openpyxl import Workbook >>> wb = Workbook() >>> ws = wb.active >>> for i in range(10): . ws.append([i]) >>> >>> from openpyxl.chart import BarChart, Reference, Series >>> values = Reference(ws, min_col=1, min_row=1, max_col=1, max_row=10) >>> chart = BarChart() >>> chart.add_data(values) >>> ws.add_chart(chart, "E15") >>> wb.save("SampleChart.xlsx")
By default the top-left corner of a chart is anchored to cell E15 and the size is 15 x 7.5 cm (approximately 5 columns by 14 rows). This can be changed by setting the anchor , width and height properties of the chart. The actual size will depend on operating system and device. Other anchors are possible; see openpyxl.drawing.spreadsheet_drawing for further information.
Working with axes
Plot data from Excel Sheet using Python

In this tutorial, we will be learning a basic requirement in the world of Machine Learning and data science. Plotting the data can help to visualize the data and helps in a better understanding of the data points.
Steps to Plot data from Excel Sheet using Python
Today we will be making use of an excel sheet to plot data with the help of pandas and matplotlib modules in Python programming. So let’s begin!
Step 1: Importing Modules
We will be importing matplotlib and pandas modules in which the matplotlib module is used for plotting and pandas is used to handle the excel file datapoints.
Before importing the module, we need to make sure that the modules are installed in our system which is done using the following command on CMD ( Command Prompt ).
pip install pandas pip install matplotlib
Now we will be importing both the modules in our program using the code lines below.
import pandas as pd import matplotlib.pyplot as plt
Step 2: Loading Dataset
To load the data we will be using read_excel function from the pandas module which will take the path of the excel file as a parameter.
For this tutorial, we created a sample excel sheet containing some sample data points as shown in the image below.

Now, the loading of data is done with the help of the code statement mentioned below.
var = pd.read_excel("sample_excel.xlsx") print(var) Step 3: Separating x and y values
Now in the dataset, we have two columns one for x data points and the other for y data points. This is done after separating the first and second columns into separate variables.
x = list(var['X values']) y = list(var['Y values'])
After the separation of the x and y coordinates, we will be making a scatter plot for the data in the next step.
Step 4: Plotting a Scatter Plot
The scatter plot is displayed with the help of the code block mentioned below.
plt.figure(figsize=(10,10)) plt.style.use('seaborn') plt.scatter(x,y,marker="*",s=100,edgecolors="black",c="yellow") plt.title("Excel sheet to Scatter Plot") plt.show() 
You can try out a different dataset or search for a random dataset in excel format online. I hope you understood the concept thoroughly and will be able to implement the same yourself!
Thank you for reading! Happy Learning!
Charts and Plotting 
As well as using Excel’s own charting capabilities, PyXLL allows you to use Python’s other plotting libraries within Excel.
PyXLL has support for the following Python plotting libraries, and can be extended to support other via custom code.
Using Python’s plotting packages is preferable to using Excel’s own charts in some situations.
- You can plot directly from Python and so this can reduce the need to return a lot of data to Excel and make your sheets smaller and simpler.
- Using the Python plotting libraries gives you more control over how your charts appear and gives you access to chart types that are not available using Excel’s own chart types.
Matplotlib charts in Excel 
To show a plot or chart in Excel you use whichever Python plotting library you prefer to generate the chart and then use PyXLL’s plot function to render it to Excel. See the individual guides linked above for specific instructions for each.
Regardless of which plotting library you use the plot itself will be inserted into Excel as an image. This means that it will not be interactive in the way that one hosted on a website or in a Jupyter notebook might be.
You can plot directly from an Excel worksheet function decorated with xl_func , and so you can provide your own inputs to your plotting function. These can be used to let the user of your function have some control over how the chart is plotted to make it interactive. Each time they change an input the plot will be re-drawn.
Depending on the version of Excel you are using and the plotting library, the chart may be exported as an SVG image when plotting to Excel.
Some plotting libraries can occasionally show problems when plotting to SVG. If you see any visual errors (for example, borders being too thick or the background color showing through) you can set allow_svg=False when calling plot . This will cause it to export the image in a bitmap format instead.
Plotting from Worksheet Functions 
When you use plot from an Excel worksheet function using xl_func the image inserted into the Excel workbook will be placed just below the cell the function is being called from.
Additionally, subsequent calls to the same function will replace the image rather than creating a new one each time the function is called. This is done by giving the image a unique name for the calling cell. If you perform multiple plots from the same function you will need to pass a name for each to the plot function.
Plotting from Menus, Macros and Elsewhere 
The plot function when called from anywhere other than a worksheet function will always add a new image to the Excel workbook. By default, the location of the image will be just underneath the currently selected cell.
If you want to replace an existing image rather than add a new one, use the name argument to plot and when plotting an image with the same name multiple times the existing image in Excel will be replaced instead of creating a new one.