- Matplotlib — Save Plots as File
- Matplotlib Series Overview
- Sample Line Plot
- Save as PDF File
- Save as SVG File
- Save as PNG File
- Quality
- Color Options
- Save as JPG File
- JPG Options
- Which Export Format to Use?
- Summary
- Mentioned Resources
- Get Notified on New Future Studio Content and Platform Updates
- Сохранение графиков matplotlib в pdf файл
- Способ I. Сохранение одного графика на одной странице с помощью PdfPages
- Способ II. Сохранение нескольких графиков в на одной странице с помощью PdfPages
- Способ III. Использование reportlab
- Save Plots as PDF File in Matplotlib
- savefig() Method to Save Plots as PDF File
- savefig() Method of the PdfPages Class
Matplotlib — Save Plots as File
In our tutorial series on matplotlib, you have learned how create many different plots and how to customize their design. So far, you have looked at the resulting plot by calling .show() . But what if you need to share the plot? For example, if you need to send it in an email or use it in a presentation?
In this tutorial, you will learn how to export plots and save them in different file formats.
Matplotlib Series Overview
Sample Line Plot
Before you can experiment with different export options, you need a plot to export 🙂
For the rest of this tutorial, you can use a simple line plot because it’s especially suitable to see quality differences:
year = [2014, 2015, 2016, 2017, 2018, 2019] tutorial_count = [39, 117, 111, 110, 67, 29] plt.plot(year, tutorial_count, color="#6c3376", linewidth=3) plt.xlabel('Year') plt.ylabel('Number of futurestud.io Tutorials') 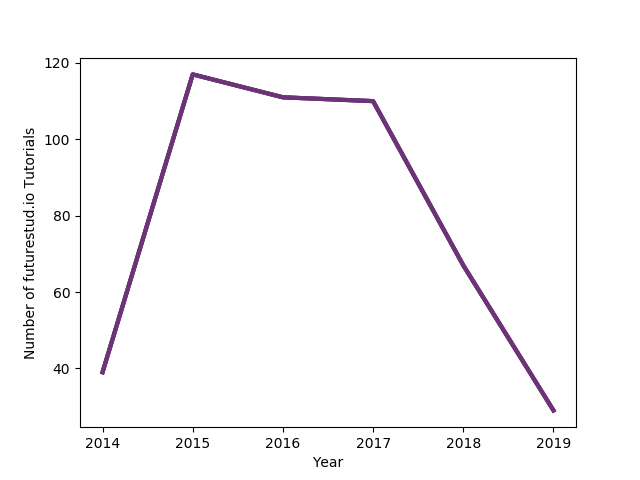
Save as PDF File
If you want to export a graph with matplotlib, you will always call .savefig(path) . matplotlib will figure out the file type based on the passed file path .
For example, if you want to save the above plot in a PDF file:
This will save the plot in line_plot.pdf . You can view all output files here.
Save as SVG File
If you want to save the plot as a SVG file instead, you use the same .savefig(path) method, but change the file ending to .svg :
Both PDF and SVG are vector-based file formats and save the plot in excellent quality.
However, some software does not easily support these modern formats (looking at you, PowerPoint) and requires you to export plots as images. Luckily, this is not a problem with matplotlib.
Save as PNG File
You hopefully understood the pattern and can guess how to export a plot as a PNG file. Simply pass a path to .savefig() with a png file ending:
Quality
All image-based file formats, such as PNG or JPG, will come with some quality loss. You can increase (or decrease) the quality of the plot by setting the dpi . For example, if you want to create a higher quality PNG export:
plt.savefig('line_plot_hq.png', dpi=300) If you take a closer look, this will make the plot a lot nicer. However, keep in mind that it also tripled the file size! If you need to export plots to an image format, there is a trade-off between quality and file size.
Color Options
Exporting to PNG does have one advantage over JPG. PNG allows transparent colors. By default, matplotlib creates plots on a white background and exports them as such. But you can make the background transparent by passing transparent=true to the savefig() method:
plt.savefig('line_plot_hq_transparent.png', dpi=300, transparent=True) This can make plots look a lot nicer on non-white backgrounds.
In general, the order of passed parameters does not matter. You can set them however you want to.
Save as JPG File
The final export options you should know about is JPG files, which offers better compression and therefore smaller file sizes on some plots.
plt.savefig('line_plot.jpg', dpi=300) JPG Options
matplotlib offers some optional export options that are only available to .jpg files. For example, quality (default 95), optimize (default: false ), and progressive (default: false ).
plt.savefig('line_plot.jpg', dpi=300, quality=80, optimize=True, progressive=True) With the above options enabled, the file size is reduced by 50% while keeping the quality on a similar level.
Which Export Format to Use?
The export as vector-based SVG or PDF files is generally preferred over bitmap-based PNG or JPG files as they are richer formats, usually providing higher quality plots along with smaller file sizes.
If you want to see the effect of the different data formats, zoom up close onto the line plot. With the PDF and SVG format, it will still be a smooth, straight line (left). However, with PNG or JPG, it’ll be clunky (right).

Summary
In this tutorial, you have learned how to export files in a variety of file formats and some of options to control plot quality.
All code and sample exports are available for easy copy & paste and a closer look on a GitHub repository.
Do you have questions or feedback where this series should go? Let us know on Twitter @futurestud_io or leave a comment below.
Enjoy plotting & make it rock!
Mentioned Resources
Get Notified on New Future Studio
Content and Platform Updates
Get your weekly push notification about new and trending
Future Studio content and recent platform enhancements
Сохранение графиков matplotlib в pdf файл
Есть несколько графиков matplotlib. Необходимо сохранить их в единый pdf файл. Что делать?
Способ I. Сохранение одного графика на одной странице с помощью PdfPages
Этот способ можно реализовать с помощью двух вариантов.
Использование магии matplotlib:
from matplotlib.backends.backend_pdf import PdfPages import matplotlib.pyplot as plt import numpy as np # Создание файла. pdf = PdfPages("Figures.pdf") # Создание сюжетов и их сохранение. FUNCTIONS = [np.sin, np.cos, np.sqrt, lambda x: x**2] X = np.linspace(-5, 5, 100) for function in FUNCTIONS: plt.plot(X, function(X)) pdf.savefig() plt.close() # Сохранение файла pdf.close()Использование непосредственного доступа к фигурам:
from matplotlib.backends.backend_pdf import PdfPages import matplotlib.pyplot as plt import numpy as np # Создание массива фигур. FUNCTIONS = [np.sin, np.cos, np.sqrt, lambda x: x**2] X = np.linspace(-5, 5, 100) figures = [] for function in FUNCTIONS: figure = plt.figure() axes = figure.subplots() axes.plot(X, function(X)) figures.append(figure) # Массив фигур. # figures = [] # Создание файла и сохранение каждой фигуры. pdf = PdfPages("Figures.pdf") for figure in figures: pdf.savefig(figure) # Сохранение файла pdf.close()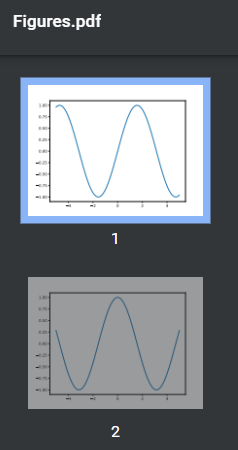
Способ II. Сохранение нескольких графиков в на одной странице с помощью PdfPages
from matplotlib.backends.backend_pdf import PdfPages import matplotlib.pyplot as plt import numpy as np # Константы FUNCTIONS = [np.sin, np.cos, np.sqrt, lambda x: x**2, np.tan] X = np.linspace(-5, 5, 100) # Количество строк и столбоц на одной строке ROWS = 2 COLUMNS = 2 # Создание файла. pdf = PdfPages("Figures.pdf") # Цикл по страницам index = 0 for page in range(len(FUNCTIONS)//(ROWS*COLUMNS)+1): # Создаем фигуру с несколькими осями. figure = plt.figure(figsize=(12, 12)) axes = figure.subplots(ROWS, COLUMNS) # Цикл по строкам и столбцам for row in range(ROWS): for column in range(COLUMNS): if index < len(FUNCTIONS): axes[row, column].plot(X, FUNCTIONS[index](X)) index += 1 # Сохраняем страницу pdf.savefig(figure) # Сохранение файла pdf.close()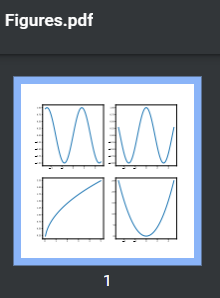
Так сделать не получится, если у нас есть массив уже конкретных построенных фигур. По той простой причине, на фигуре уже отрисовано то, что нужно, и так, как нужно. Да и к тому же, каждая фигура имеет свое значение dpi и size, которые влияют на отрисовку. Конечно, все это можно учесть, усложнив алгоритм, но намного проще перейти к 3 способу.
Способ III. Использование reportlab
Наиболее универсальный способ.
import matplotlib.pyplot as plt import numpy as np from io import BytesIO from reportlab.pdfgen import canvas from reportlab.lib.units import cm from reportlab.lib.utils import ImageReader # Создание массива фигур. FUNCTIONS = [np.sin, np.cos, np.sqrt, lambda x: x**2] X = np.linspace(-5, 5, 100) figures = [] for function in FUNCTIONS: figure = plt.figure() axes = figure.subplots() axes.plot(X, function(X)) figures.append(figure) # Массив фигур. # figures = [] # Отступ indent = 1.5 # Создаем canvas и устанавливаем текущее значение высоты c = canvas.Canvas("Figures.pdf") c.setTitle("Figures") height = indent # Цикл по фигурам. for figure in figures: # dpi и размер (в дюймах) графика dpi = figure.get_dpi() figureSize = figure.get_size_inches() # Создаем рамку вокруг графика. # Это не обязательно, но так удобнее вырезать распечатанный график ножницами. figure.patches.extend( [plt.Rectangle((0, 1/(dpi*figureSize[1])), width=1-2/(dpi*figureSize[0]), height=1-2/(dpi*figureSize[1]), transform=figure.transFigure, figure=figure, clip_on=False, edgecolor="black", facecolor="none", linewidth=1)]) # Рендер фигуры. image = BytesIO() figure.savefig(image, format="png") image.seek(0) image = ImageReader(image) # Размер фигуры в см. figureSize = figure.get_size_inches()*2.54 # A4 210×297 мм # Если выходим за пределы листа, то добавляем новый лист if height + figureSize[1] + indent > 29.7: height = indent c.showPage() # Добавляем image в pdf c.drawImage(image, (10.5-figureSize[0]/2)*cm, height*cm, figureSize[0]*cm, figureSize[1]*cm) height += figureSize[1] # Сохраняем. c.save()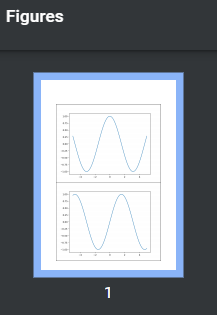
Спасибо за прочтение статьи. Удачи!
Save Plots as PDF File in Matplotlib

- savefig() Method to Save Plots as PDF File
- savefig() Method of the PdfPages Class
The plots generated from Matplotlib can be simply saved as a PDF file using the .pdf extension of the filename in the savefig() method. To save multiple plots in a single PDF file, we use the PdfPages class.
savefig() Method to Save Plots as PDF File
We can simply save a plot as an image file in Matplotlib using savefig() method.
matplotlib.pyplot.savefig(fname, dpi=None, facecolor='w', edgecolor='w', orientation='portrait', papertype=None, format=None, transparent=False, bbox_inches=None, pad_inches=0.1, frameon=None, metadata=None) The fname in the parameter section represents the name and path of the file relative to the working directory. If we use .pdf as the extension to filename, the plot is saved as a PDF file.
import numpy as np import matplotlib.pyplot as plt x=np.linspace(0,5,50) y=np.cos(2 * np.pi * x) plt.scatter(x, y) plt.plot(x, y) plt.title("Plot of cosx") plt.xlabel("x") plt.ylabel("cosx") plt.show() plt.savefig("Save Plot as PDF file using savefig.pdf") This saves the generated plot with filename Save Plot as PDF file using savefig.pdf in the current working directory.
savefig() Method of the PdfPages Class
If we wish to plot multiple plots in a single, we can use the savefig() method of the PdfPages class.
import numpy as np import matplotlib.pyplot as plt from matplotlib.backends.backend_pdf import PdfPages x=np.linspace(-3,3,100) y1=np.sin(x) y2=np.cos(x) y3=1/(1+np.exp(-x)) y4=np.exp(x) def retFig(x, y): fig = plt.figure() a= plt.plot(x, y) return fig fig1 = retFig(x, y1) fig2 = retFig(x, y2) fig3 = retFig(x, y3) fig4 = retFig(x, y4) pp = PdfPages('Save multiple plots as PDF.pdf') pp.savefig(fig1) pp.savefig(fig2) pp.savefig(fig3) pp.savefig(fig4) pp.close() This saves 4 generated figures in Matplotlib in a single PDF file with the file name as Save multiple plots as PDF.pdf in the current working directory.
Here, we return figures for each plot and then save all figures into a single PDF file by passing individual figures in the savefig() method of the PdfPages class.
Suraj Joshi is a backend software engineer at Matrice.ai.