- Php redis extension windows
- Installing Redis on Windows Server
- Redis on Laragon
- Installing PHP Redis Extension
- Downloading The PHP Redis Extension DLL File
- Adding the DLL File to the PHP Extension Folder
- Starting The Redis Server
- Windows installation redis
- Installation test
- Php redis extension
- Download php_igbinary extension
- Download php_redis.dll
- Configuration
Php redis extension windows
The main feature of this release is new Streams API implemented by Michael Grunder.
Note: There are no changes between 4.2.0RC3 and 4.2.0.
* Optimize close method [2a1ef961] (fanjiapeng)
* Prevent potential infinite loop for sessions [4e2de158] (Pavlo Yatsukhnenko)
* Fix coverty warnings [6f7ddd27] (Pavlo Yatsukhnenko)
* Fix session memory leaks [071a1d54, 92f14b14] (Pavlo Yatsukhnenko, Michael Grunder)
* Fix XCLAIM on 32-bit installs [18dc2aac] (Michael Grunder)
* Build warning fixes [b5093910, 51027044, 8b0f28cd] (Pavlo Yatsukhnenko, Remi Collet, twosee)
* Fix incorrect arginfo for `Redis::sRem` and `Redis::multi` [25b043ce] (Pavlo Yatsukhnenko)
* Update STREAM API to handle STATUS -> BULK reply change [0b97ec37] (Michael Grunder)
* Treat a -1 response from cluster_check_response as a timeout. [27df9220, 07ef7f4e, d1172426] (Michael Grunder)
* Use a ZSET insted of SET for EVAL tests [2e412373] (Michael Grunder)
* Missing space between command and args [0af2a7fe] (@remicollet)
In case of missing DLLs, consider to contact the PHP for Windows Team.
Installing Redis on Windows Server
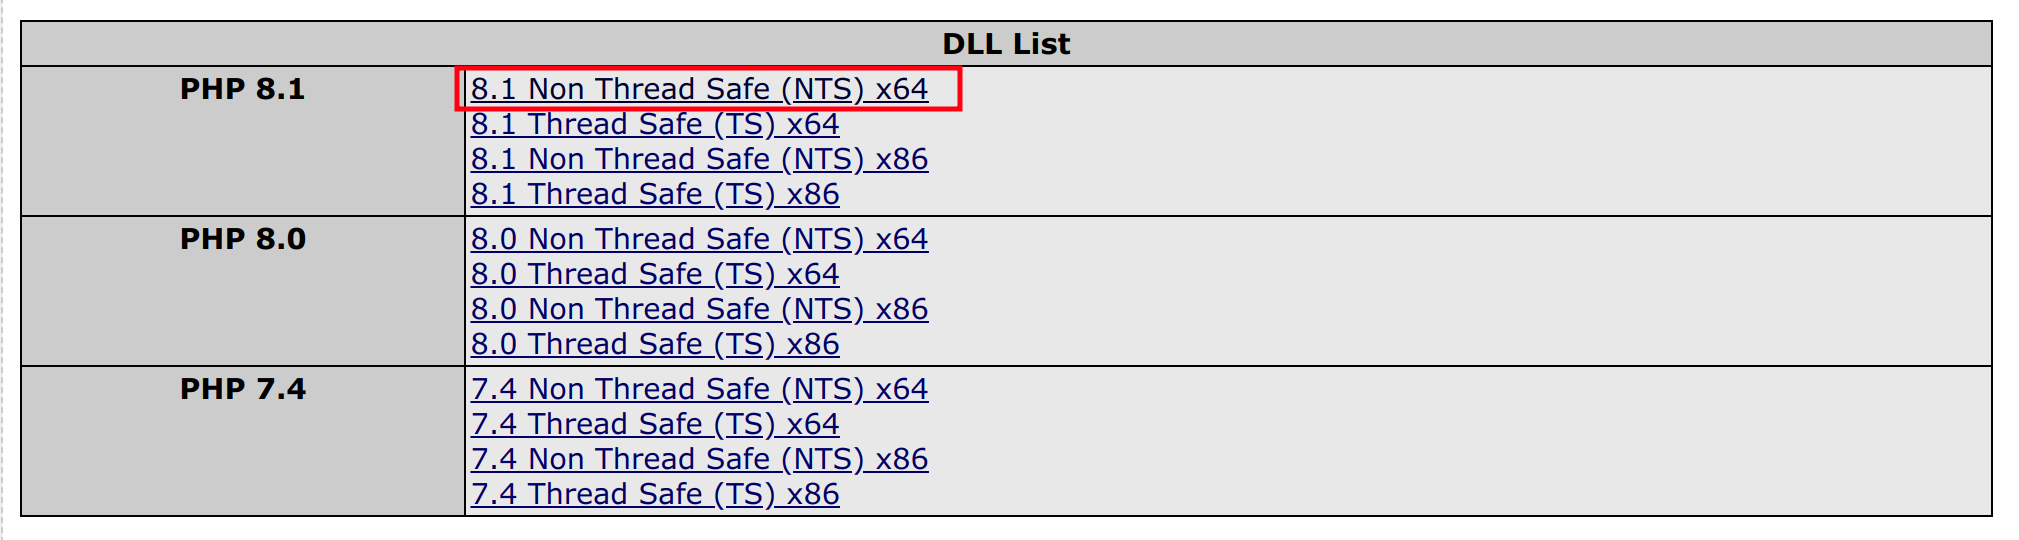
Click Here to download PHP 8.1 NTS x64 zip file.
- Unzip the php-redis zip file, a folder will be created, go inside the folder, copy the php_redis.dll file and paste it in C:\php8.1\ext.(C:\php\ext incase of Apache WebServer).
- Now enable php redis extension in php.ini configuration located in C:\php8.1.(C:\php incase of Apache WebServer).
- Now go to Server Manager, open IIS Server and restart it. (or restart Apache incase of Apache WebServer)
Click Here to download last recent release of Redis.

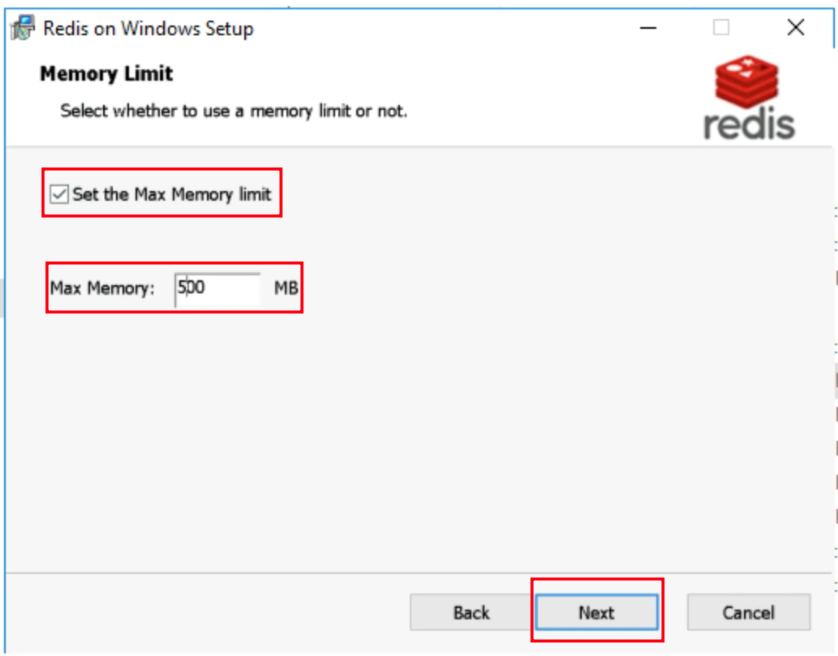
Execute the installer to perform the required installation steps
- Accept the terms in the License agreement.
- Add the Redis installation folder to the PATH environment variable.

The Redis installation is finished.
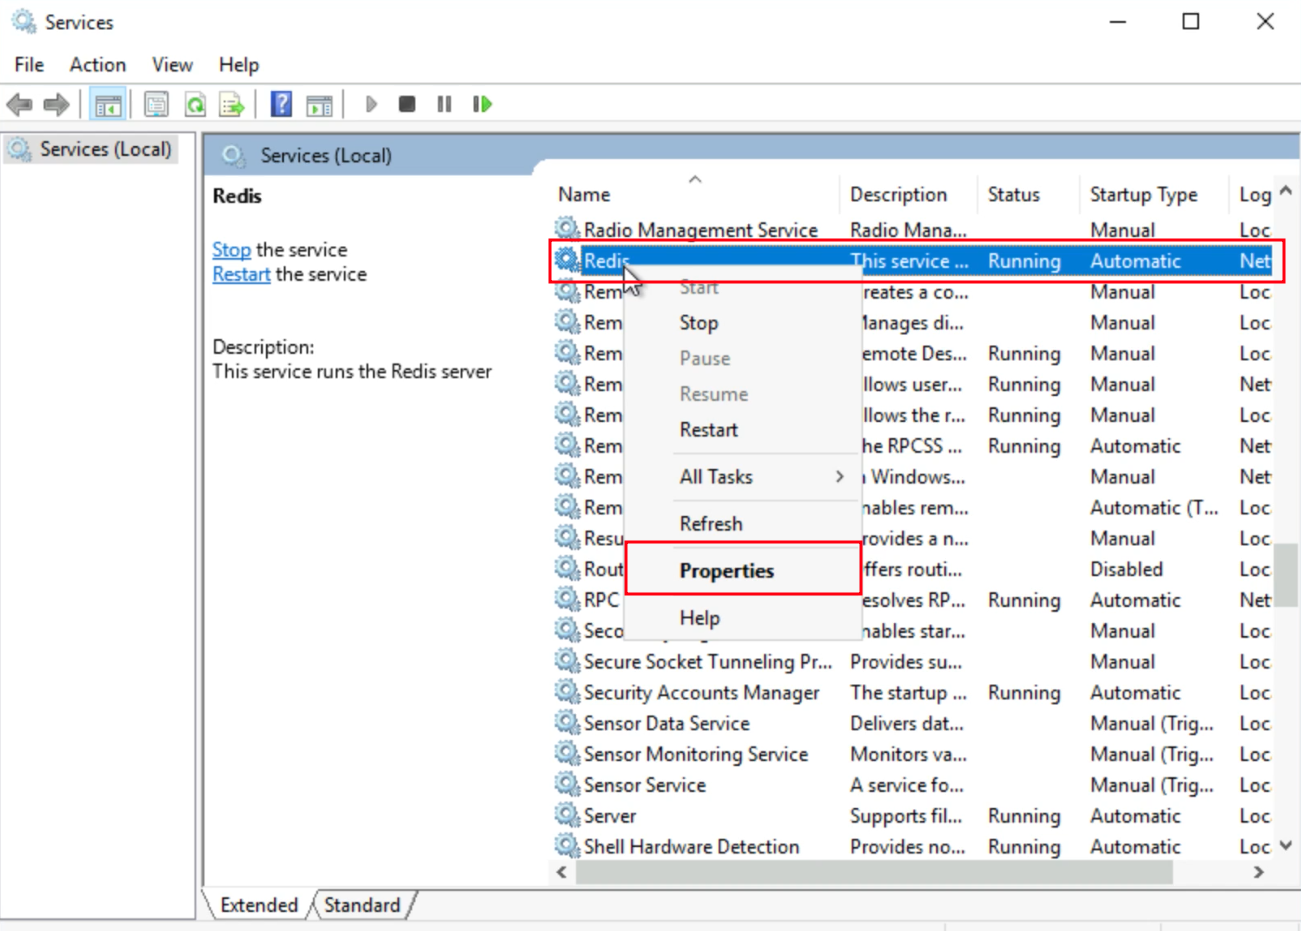
- Now go to windows menu > Run > Services, This can be done by following shortcut win+R, type services.msc & click OK, it will open a new Services tab.
- Find Redis right click on it & go to Properties > Recovery a new tab will open.
- Change first failure, second failure & subsequent failure from Take No Action to Restart the Service & click OK.

Redis has been successfully installed, this can be confirmed in Command Prompt by typing redis-cli, a loopback address will be shown in the Command Prompt.
Unzip the nssm-2.24 zip file, a folder nssm-2.24 with nssm files will be created.
Go inside the folder & copy the nssm-2.24 folder & paste it in C:\Program Files.
Go inside the pasted nssm-2.24 folder, go to win64, nssm will be present there, copy the nssm path i.e, C:\Program Files\nssm-2.24\win64.
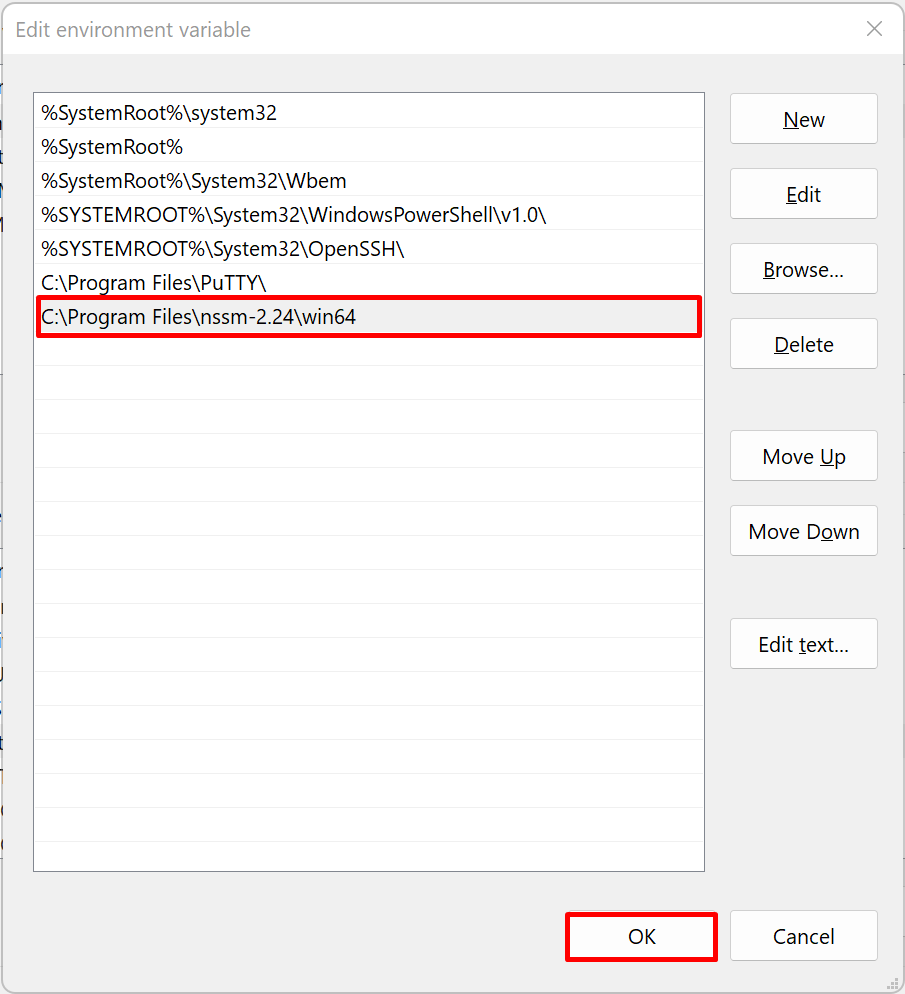
Paste this path in System Environmental Variables by following the below steps:
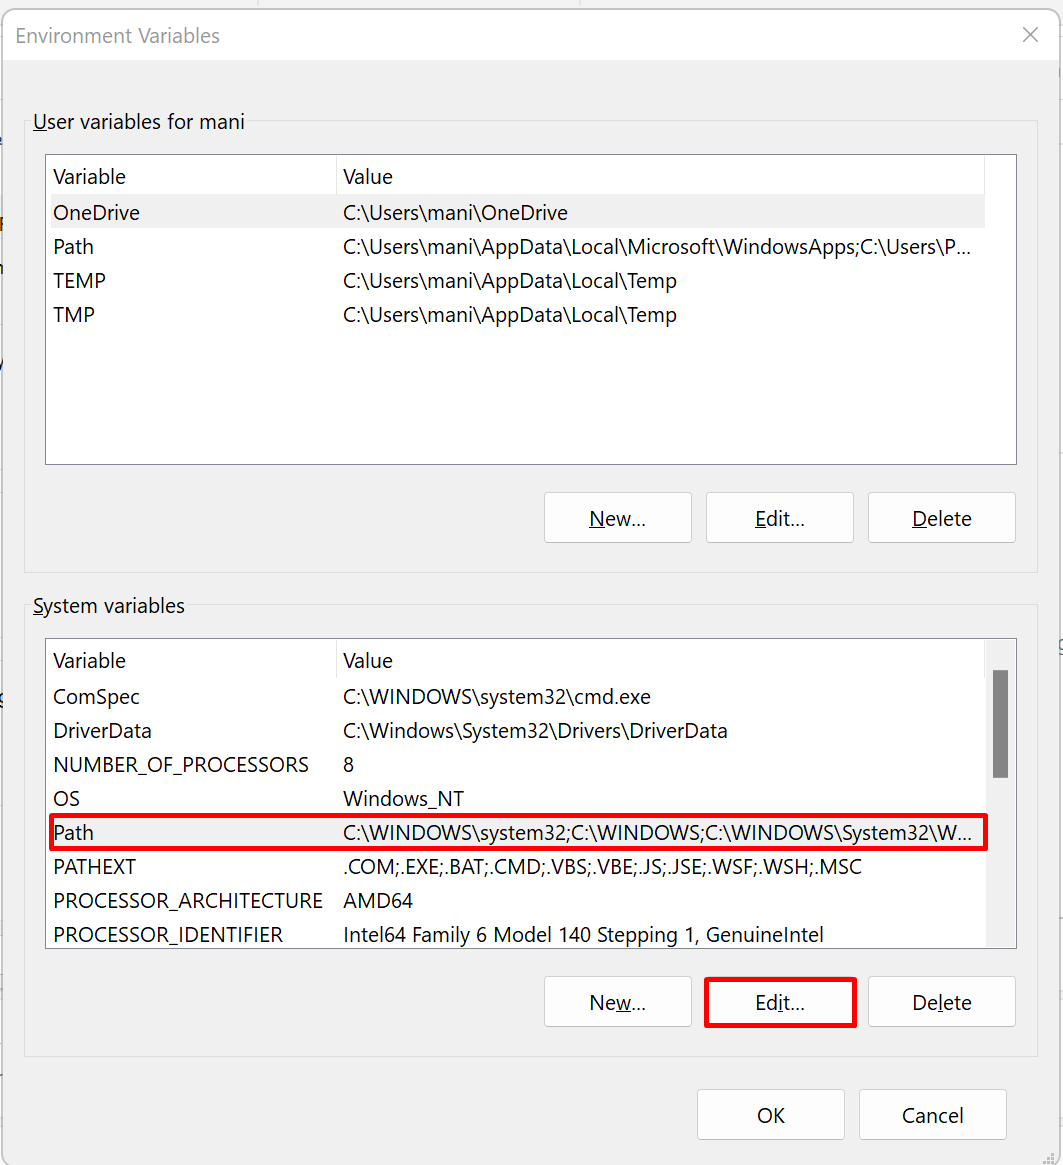
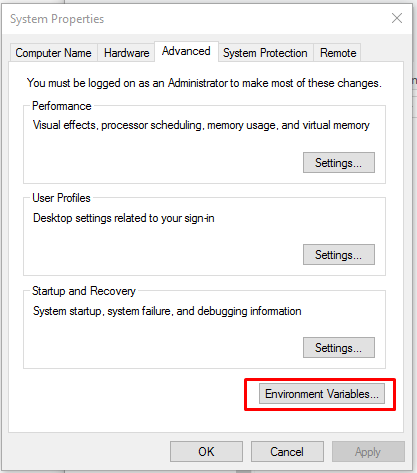
- Now click on Path > Edit > New & add copied path C:\Program Files\nssm-2.24\win64 \ here and click OK in all 3 tabs.
NSSM has been installed now, it can be confirmed in Command Prompt by typing nssm
4. General Instructions to Create NSSM Services
NOTE: These are the General Instructions to create NSSM Services for Faveo. The actual ones are listed below as Faveo-Mail-Worker, Faveo-Recurring, Faveo-Reports & Faveo-Notifications.
Go to Command Prompt and configure NSSM-SERVICE by typing the following commands. (Faveo-Mail-Worker, Faveo-Recurring, Faveo-Reports & Faveo-Notifications are to be configured in actual).
- In Application section click on three dots and navigate to C > Windows > System32 and search for cmd, click on the cmd as shown in the figure below, then click on open, a path will be added.


For IIS /c php "c:\inetpub\wwwroot\artisan" queue:work --argument For Apache /c php "c:\Apache24\htdocs\artisan" queue:work --argument - Go to Details and give Display Name as SERVICE-NAME (The actual names will be faveo-mail-worker, faveo-recurring, faveo-reports & faveo-notifications)
- Now click on the right arrow and go to I/O and set Output (stdout) by clicking on three dots.
- Navigate to C:\inetpub\wwwroot\storage\logs, (C:\Apache24\htdocs\storage\logs in case of Apache) provide a file name as SERVICE-NAME.log and click open as shown in figure below, Output (stdout) will be added. (The actual file names would be worker.log, recurring.log, reports.log & notification.log).


- Now go to windows menu > Run > Services, This can be done by following shortcut win+R, type services.msc & click OK, it will open a new Services tab.
- Find SERVICE-NAME right click on it & go to Properties > Recovery a new tab will open.

- Change first failure, second failure & subsequent failure from Take No Action to Restart the Service & click OK.


Follow the above general steps to create NSSM Services for FAVEO MAIL WORKER, FAVEO RECURRING, FAVEO REPORTS & FAVEO NOTIFICATIONS
The details to be filled for Faveo Mail Worker, Faveo Recurring, Faveo Reports & Faveo Notifications are summarised below:
nssm install faveo-mail-worker Redis on Laragon
Redis is no longer supported in Windows, but the version 3.2.1 is still available to use (ref), so that’s why laragon contain version 3.* only. If you want to taste the latest redis version, using Docker through Laradock would be an alternative.
Installing PHP Redis Extension
If you right-click on the dashboard & check on PHP > Extensions , you will not find redis extension because it doesn’t come up with Laragon by default. So you have to add it manually, but yet it so easy.
Downloading The PHP Redis Extension DLL File
Go to https://pecl.php.net/package/redis and find the right match your current PHP version but also use the latest stable available. In my case, it was version 5.3.4 at the moment and it supports PHP 8.0 , 7.4 , 7.3 .  Click the Windows icon DLL link to get the available distribution for the version. Download the archive that match with your PHP version. You might be confuse which one between Non-Thread-Safe (NTS) and Thread-Safe (TS) should you pick to download. To find out, just check on your Laragon dashboard and see the php version along with NTS or TS indication.
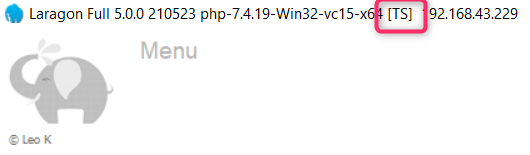
Adding the DLL File to the PHP Extension Folder
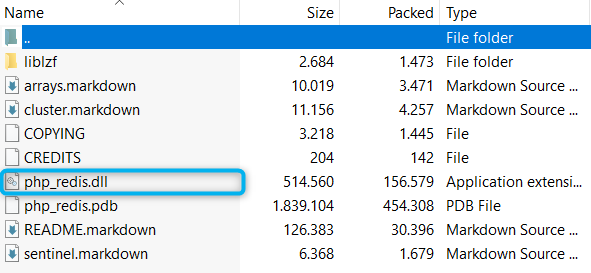
On the downloaded archive, you should find the php_redis.dll file. copy or move the file to the C:\laragon\bin\php\php-7.4.19-Win32-vc15-x64\ext (change to your own path), and then add the line extension=php_redis.dll to the C:\laragon\bin\php\php-7.4.19-Win32-vc15-x64\php.ini file.

you should see that Redis extension is available now.
Starting The Redis Server
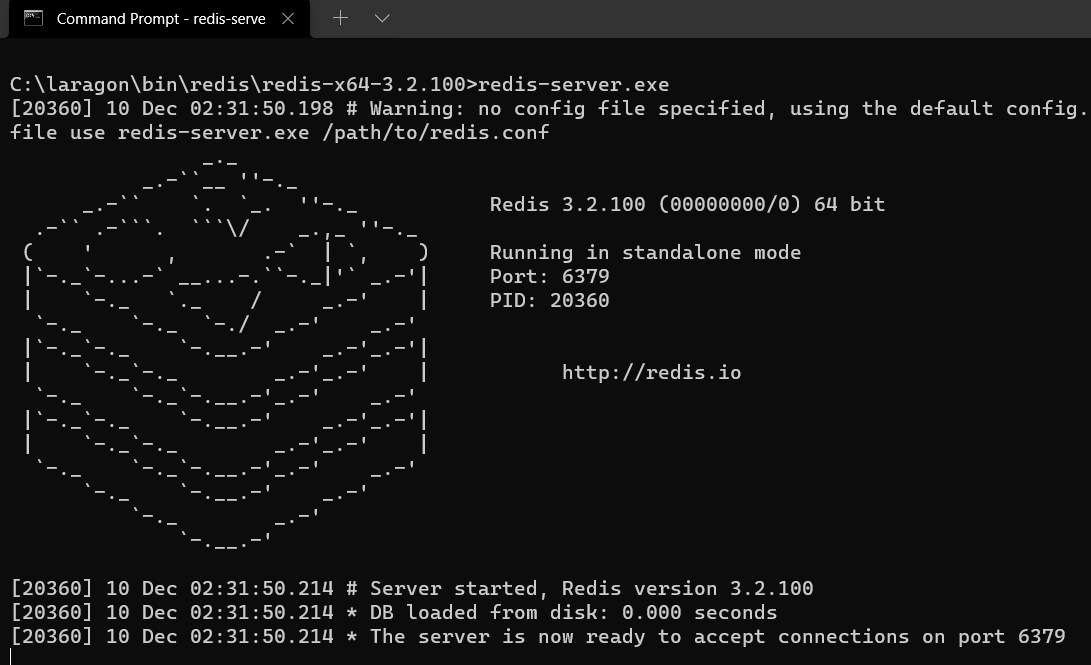
If you installed the full laragon, redis is availabe in this path C:\laragon\bin\redis\redis-x64-3.2.100 (change to your own path). To run the redis server, you can use Command Prompt to execute the redis-server.exe . And you can also stop it later using Ctrl + C .
Windows installation redis

Git download addresshttps://github.com/MSOpenTech/redis/releases
Installation test
Unzip the redis archive to the specified file, open the cmd window, and enter the unzip file run command:
redis-server redis.windows.conf

When the above picture appears, the startup is successful. This window does not need to be closed, otherwise the redis service stops.
Php redis extension
PHP version information: 7.0 | nts | x86 | vc14
Download php_igbinary extension

download link:https://windows.php.net/downloads/pecl/releases/igbinary/2.0.8/
After downloading, put the php_igbinary.dll file in the archive into the ext directory in the PHP installation directory.
Download php_redis.dll
download link https://pecl.php.net/package/redis 
This download is version 3.1.3. After opening the new page, select the extension download corresponding to the PHP information. 
Configuration

Unzip the downloaded file and put the two files in the ext directory.
Modify the php.ini file and add the following code:
extension=php_igbinary.dll extension=php_redis.dll

Restart apache and check if there is redis in phpinfo.php. If it exists, the installation is successful.