- Compile from source and install Apache HTTP Server 2.4 and PHP 7 on Linux
- Apache HTTP Server 2.4 (httpd) compilation, installation and configuration
- PHP7 compilation, installation and configuration
- Apache HTTP Server reconfiguration for virtual hosts
- Fix for autogenerate bug in Eclipse PHP run configuration
- Сборка php 8 из исходников на Debian 10
- Загрузка и распаковка
- Подготовка
- Конфигурирование
- Сборка
- httpd.conf
- Пересборка
- Итог
Compile from source and install Apache HTTP Server 2.4 and PHP 7 on Linux
I am using a nearly decade-old version of Ubuntu as my main OS. As it runs Gnome 2 and Firestarter, I will be sticking with it until rapture time. However, I did not want the old Apache and PHP from the “Old Releases” Ubuntu repository. Apache HTTP Server 2.4 was released in March this year. I couldn’t care for the new features. The old Apache would have worked just fine but new was new. So, I decided to install the latest Apache HTTP server and PHP 7 by building them from source. There aren’t any tutorials on building Apache 2.4 and PHP 7 from source, particularly from the requirement of a development machine. Besides that many of the configuration files, executables (a2ensite) and directories seem to be missing after the compilation/installation process was complete. It required a bit of thinking and RTFM. So, I decided to put it all down here in one place.
Apache HTTP Server 2.4 (httpd) compilation, installation and configuration
First, download the source files.
- Apache HTTP Server (httpd) – https://httpd.apache.org/. Check the documentation at https://httpd.apache.org/docs/2.4/new_features_2_4.html to see if you need anything more than what is given here. I am not install things like SSL as my requirement is to build and test localhost (virtual host) PHP 7 websites on my laptop.
- Perl Compatible Regular Expressions (PCRE) – https://pcre.org/
- Apache Runtime – https://apr.apache.org/
cd ~/Build wget -c url-of-pcre-archive wget -c url-of-apache-httpd-archive wget -c url-of-apr-util wget -c url-of-apr
Extract the source files of PCRE and httpd in a directory named Build. The source files of the Apache Runtime need to be extracted inside the srclib directory of the httpd directory.
cd ~/Build tar -xf pcre* tar -xjf http*.bz* cd http* cd srclib tar -xf ../../apr-1* tar -xf ../../apr-util-1* ln -s apr-1* apr ln -s apr-util-1* apr-util
Next, compile and install PCRE to some directory (/usr/local/pcre).
cd ~/Build cd pcre* ./configure --prefix=/usr/local/pcre make sudo make install # Installs PCRE to directory /usr/local/pcre
Finally, compile Apache httpd to some directory (/opt/httpd) with specified PCRE and Apache Runtime directories.
cd ~/Build cd http* ./configure --prefix=/opt/httpd --with-included-apr --with-pcre=/usr/local/pcre make sudo make install # Install Apache httpd to directory /opt/httpd
The Apache HTTP Server has been installed. Now, it is time to start it and check it in a browser.
sudo /opt/httpd/bin/apachectl -k start # Start server firefox http://localhost # Serves /opt/httpd/htdocs/index.html
The configuration files of Apache httpd 2.4 seem to be different from the ones from the Apache installed from the old Ubuntu repositories. The main configuration file will be at /opt/httpd/conf/httpd.conf
PHP7 compilation, installation and configuration
Next, compile and install PHP 7 to some directory (/opt/php-7). When executing the configure statement, you need to specify the location of the Apache Extension Tool (/opt/httpd/bin/apxs).
sudo /opt/httpd/bin/apachectl -k stop # Stop Apache HTTP Server cd ~/Build cd php-7* ./configure --help | more read -p "Press enter to continue" oNothing ./configure -with-apxs2=/opt/httpd/bin/apxs --prefix=/opt/php/php-7/arch-all --exec-prefix=/opt/php/php-7/arch make make test # This step is optional sudo make install # Install PHP to directory /opt/php/php-7 sudo libtool --finish ~/Build/php-7/libs # Adds PHP 7 module loader to httpd.conf
This completes the PHP 7 installation. Please note that the libtool statement writes the following line to Apache server’s httpd.conf file.
LoadModule php7_module modules/libphp7.so
After PHP 7 has been installed, add a PHP file extension handler to Apache server’s httpd.conf file.
# The following is a multi-line statement. Copy all of them. echo '; SetHandler application/x-httpd-php ' | sudo tee -a /opt/httpd/conf/httpd.conf
Copy the development php.ini in the Build directory to /opt/php/php-7/arch/lib directory.
cd ~/Build/php-7* sudo cp php.ini-development /opt/php/php-7/arch/lib/php.ini
Modify this file appropriately for your developmental setup. For production, you will have to use modify and use php.ini-production as the php.ini file. This completes the PHP installation and configuration.
Now, it is time to test .it. Create a sample PHP file in the Apache server’s htdocs directory and request it in a browser.
echo '' > php-test.php sudo mv ./php-test.php /opt/httpd/htdocs/php-test.php sudo /opt/httpd/bin/apachectl -k start # Start Apache HTTP Server firefox http://localhost/php-test.php
This will prove that your HTTPd server can handle PHP. However, to develop websites on your local development machine, some more changes need to be made. You can delete the /opt/httpd/htdocs/php-test.php file.
Apache HTTP Server reconfiguration for virtual hosts
First, append a line in your /etc/hosts file so that browser requests to your test site (say me-website.com) are routed to your local installation of the httpd server.
echo "127.0.0.1 me-website.com" | sudo tee -a /etc/hosts
Next, clean up httpd.conf by removing the PHP file handler and the PHP loadmodule statement. Instead, append the following lines to httpd.conf.
# Added by me Include conf/me-websites.conf
Now, httpd.conf is mostly in its original state, save for the line that tells httpd to load the new me-websites.conf configuration file. Then, create the file me-websites.conf file and put all your virtual hosts configurations in it. Copy this file to /opt/httpd/conf directory. This will ensure that PHP scripting is limited to your “virtual host” sites.
Listen 8080ServerAdmin webmaster@me-website.com DocumentRoot "/home/account-name/Websites/PHP/me-website/htdocs" ServerName me-website.com ServerAlias www.me-website.com ErrorLog "/home/account-name/Websites/PHP/me-website/logs/me-website.com.error.log" TransferLog "/home/account-name/Websites/PHP/me-website/logs/me-website.com.access.log" LoadModule rewrite_module modules/mod_rewrite.so LoadModule php7_module modules/libphp7.so SetHandler application/x-httpd-php Options Indexes FollowSymLinks AllowOverride All Require all granted
Next, add your account to the user group www-data . Your account can be the owner of the directory /home/account-name/Websites/PHP/me-website/htdocs but you need to give read, write and execute permissions to www-data . Now, you can put your PHP scripts in /home/account-name/Websites/PHP/me-website/htdocs and start coding. You can test the site in a browser at http://me-website.com:8080/
If you would like to test it on port 80, then remove the “Listen 80” in httpd.conf and replace 8080 in inside the VirtualHost directive in me-websites.conf . Then, you can simply test your sites at http://me-website.com/ or http://me-website.com:80.
Fix for autogenerate bug in Eclipse PHP run configuration
I have already published how to modify the Eclipse source files to fix the autogenerate bug in the Run configuration of Eclipse PHP. If that is too much for you, then you can simply let Apache HTTP Server’s rewrite module fix it for you. Create a .htaccess file in your home folder. This will remove the your Eclipse PHP project name for the run configuration.
RewriteEngine On Redirect "/me-website" "/"
Interestingly, the propriety IDE (derived from the same open-source project) sold by the creator of PHP does not suffer from this PDT “bug”.
Сборка php 8 из исходников на Debian 10
Попробуем собрать и запустить интерпретатор php как модуль под веб сервер apache2.
Предполагается что apache2 уже установлен на сервере.
Как собрать apache2 из исходников читайте в статье.
Загрузка и распаковка
Скачаем исходники текущей стабильной версии php на сервер c официального сайта.
07.01.2021 вышла версия php 8.0.1
wget https://www.php.net/distributions/php-8.0.1.tar.gz Распакуем архив и перейдем директорию с исходниками php-8.0.1
tar xvf php-8.0.1.tar.gz cd php-8.0.1 Так же создадим директорию php8 куда его будем ставить.
К текущему состоянию структура домашнего каталога выглядит так:
ls -1 apache2 httpd-2.4.46 httpd-2.4.46.tar.gz php8 php-8.0.1 php-8.0.1.tar.gz Подготовка
Большинство библиотек уже должны быть установлены на сервере. Мы поставили их когда, собирали apache2.
Теперь установим недостающие без которых будет ошибка при конфигурировании.
sudo apt install libsqlite3-dev libonig-dev Так же может потребоваться установить следующие библиотеки.
sudo apt install -y pkg-config bison re2c libxml2-dev Конфигурирование
Конфигурируем с помощью скрипта .\configure с минимально возможными параметрами, в последствии можно перезапустить скрипт с измененными параметрами.
./configure --prefix=/home/alex/php8 --with-apxs2=/home/alex/apache2/bin/apxs --with-config-file-path=/home/alex/php8/config --with-mysqli=mysqlnd --with-pdo-mysql=mysqlnd --enable-mbstring - –prefix — директория куда ставить php, для простоты ставим все в один домашний каталог
- –with-apxs2 — Инструмент для создания модулей расшрения сервера apache2, он и создаст нам модуль для php8
- –with-config-file-path — Куда сохранить фаил php.ini
- –with-mysqli — Добавить поддержку mysqli
- –with-pdo-mysql — Добавить поддержку pdo-mysql
- –enable-mbstring — Включить mbstring
В конце конфигурирования должно отобразиться сообщение о лицензии и в директории с исходниками создаться Makefile .
+--------------------------------------------------------------------+ | License: | | This software is subject to the PHP License, available in this | | distribution in the file LICENSE. By continuing this installation | | process, you are bound by the terms of this license agreement. | | If you do not agree with the terms of this license, you must abort | | the installation process at this point. | +--------------------------------------------------------------------+ Thank you for using PHP. Сборка
Пришло время собрать php и очистить временные файлы.
Ждем пока завершится процесс компиляции (~минут 10).
Далее очищаем временные файлы.
Проверяем что php работает.
/home/alex/php8/bin/php -v PHP 8.0.1 (cli) (built: Jan 8 2021 15:39:03) ( ZTS ) Copyright (c) The PHP Group Zend Engine v4.0.1, Copyright (c) Zend Technologies Скопируем конфигурацию php.ini из директории с исходниками в собранный каталог.
cp /home/alex/php-8.0.1/php.ini-development /home/alex/php8/config/php.ini httpd.conf
php работает теперь нужно настроить apache.
В конце сборки, должен быть создан модуль для apache2, о чем свидетельствуют следующие строки в конце вывода.
chmod 755 /home/alex/apache2/modules/libphp.so [activating module `php' in /home/alex/apache2/conf/httpd.conf] Откроем файл конфигурации apache2 /home/alex/apache2/conf/httpd.conf и найдем строчку подключения модуля php LoadModule php_module modules/libphp.so
vim /home/alex/apache2/conf/httpd.conf Далее под подключением модуля добавим в конфиг поддержку типов с расширением php.
SetHandler application/x-httpd-php SetHandler application/x-httpd-php-source sudo /home/alex/apache2/bin/apachectl -k restart Для проверки работоспособности в корне веб сервера переименовываем index.html в index.php и добавляем код проверки.
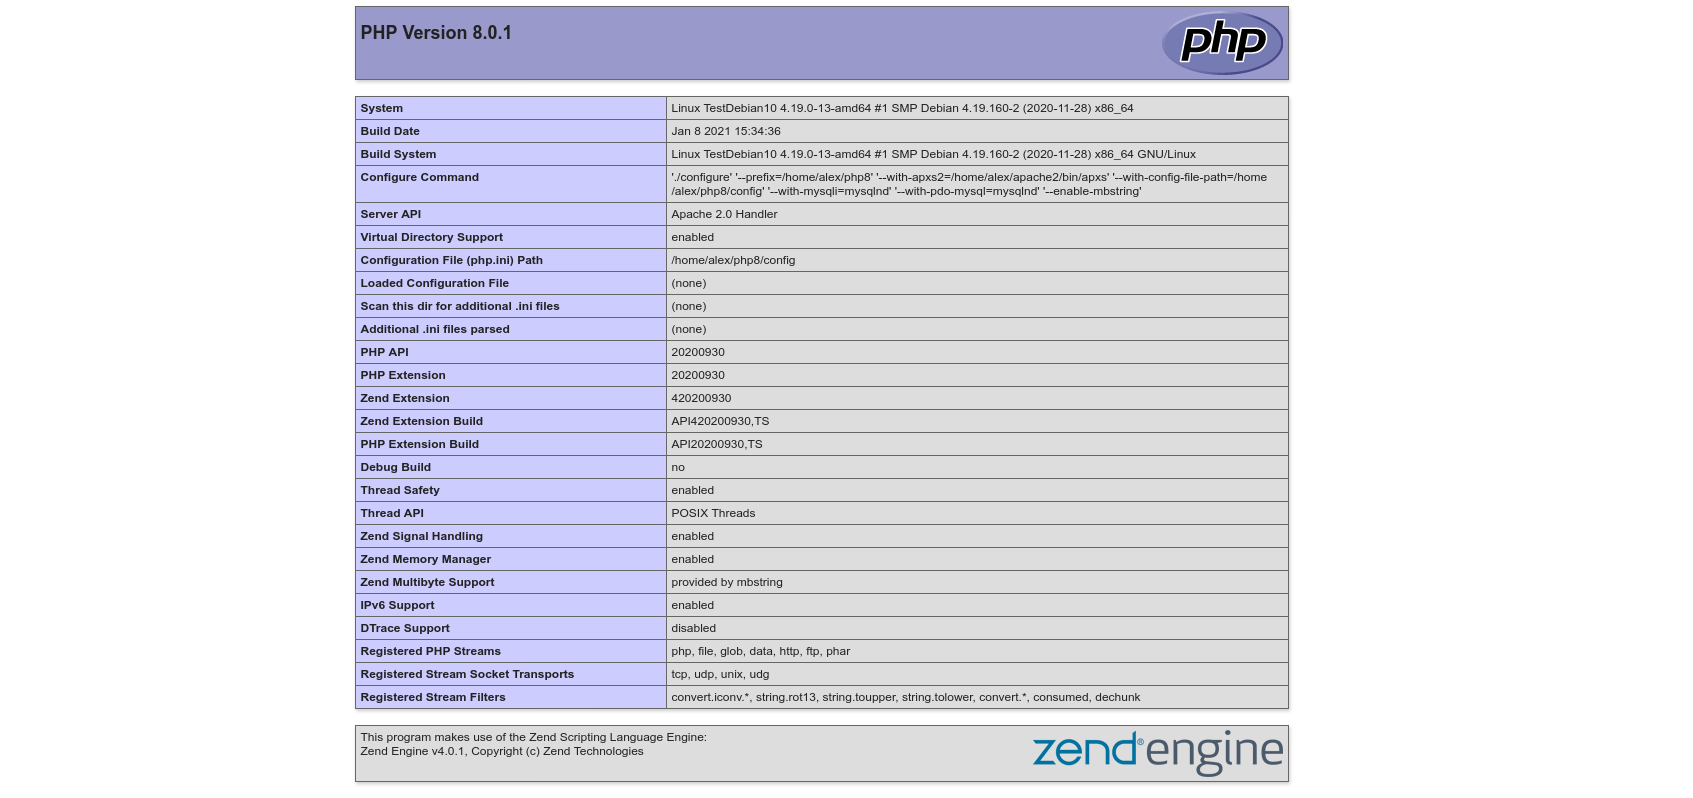
Если видим страницу с настройками php, то все в порядке.
Пересборка
Если нужно как, то изменить конфигурацию, php можно пересобрать.
Добавим поддержку трех расширений calendar intl soap которых у нас нет.
Это делается теми же командами, что и выше.
./configure --prefix=/home/alex/php8 --with-apxs2=/home/alex/apache2/bin/apxs --with-config-file-path=/home/alex/php8/config --with-mysqli=mysqlnd --with-pdo-mysql=mysqlnd --enable-mbstring --enable-soap --enable-calendar --enable-intl make make install make clean Если вы не очищали каталог командой make clean , то сборка будет происходить быстрее.
На этом сборка php 8 из исходников завершена.
Итог
В итоге надеюсь, получилось разобраться как собрать минимальную сборку php 8.1 из исходников.
Конечно есть куда стремиться, я хотел показать именно минимальную сборку с относительно не сложной установкой.