- How to give outer glow to an object in a transparent png using css3?
- Method 1: Using RGBA color values
- Method 2: Using multiple box-shadow
- Method 3: Using a pseudo-element
- CSS Outer Glow
- Multiple Glows
- Text Glow
- Simple Glow
- Multi Glow
- Glow on Hover
- Transition
- Examples
- Conclusion
- Generating an outer glow effect in HTML using CSS
- How to give outer glow effect to column in HTML/CSS?
- Css Card Outer Glow Effect Using HTML and CSS
- Outer glow to surround image?
- HTML5 canvas create outer glow effect of shape
How to give outer glow to an object in a transparent png using css3?
Outer glow is a visual effect that adds emphasis to an object and makes it stand out on the page. In CSS, it can be achieved by using the «box-shadow» property. However, when the object has a transparent PNG background, it becomes challenging to apply the outer glow effect, as the background transparency may interfere with the appearance of the shadow. In this scenario, you need to adjust the way the shadow is generated to maintain the transparency and still achieve the desired effect.
Method 1: Using RGBA color values
To add an outer glow to an object in a transparent PNG using CSS3, you can use the box-shadow property with RGBA color values. Here’s an example code:
/* Apply the outer glow to an element with a class of 'glow' */ .glow box-shadow: 0 0 10px rgba(255, 255, 255, 0.5); >In the code above, we set the box-shadow property to 0 0 10px rgba(255, 255, 255, 0.5) . This creates a white outer glow with a spread radius of 10 pixels and an opacity of 0.5 (50% transparent).
You can customize the color of the glow by changing the RGBA values. For example, to create a red glow, you can use rgba(255, 0, 0, 0.5) .
You can also adjust the spread radius to make the glow larger or smaller. For example, to create a larger glow, you can use 20px instead of 10px .
/* Apply a larger outer glow to an element with a class of 'glow' */ .glow box-shadow: 0 0 20px rgba(255, 255, 255, 0.5); >In addition to the spread radius, you can also adjust the horizontal and vertical offset of the glow by changing the first two values of the box-shadow property. For example, to move the glow to the right and down, you can use 5px 5px instead of 0 0 .
/* Apply an offset outer glow to an element with a class of 'glow' */ .glow box-shadow: 5px 5px 10px rgba(255, 255, 255, 0.5); >Overall, using RGBA color values with the box-shadow property is a simple and effective way to add an outer glow to an object in a transparent PNG using CSS3.
Method 2: Using multiple box-shadow
To give an outer glow to an object in a transparent png using CSS3, you can use the box-shadow property. Here’s how to do it using multiple box-shadow values:
.box background-image: url('transparent.png'); width: 200px; height: 200px; box-shadow: 0 0 10px 5px #fff, 0 0 20px 10px #fff, 0 0 30px 15px #fff, 0 0 40px 20px #fff; >In this example, we’re using four box-shadow values to create a gradient-like effect. The first value is the horizontal offset, the second is the vertical offset, the third is the blur radius, and the fourth is the spread radius. The last value is the color of the shadow.
You can adjust these values to create different effects. For example, if you want a softer glow, you can decrease the blur radius and spread radius. If you want a more intense glow, you can increase these values.
Here’s another example that uses different colors for each box-shadow value:
.box background-image: url('transparent.png'); width: 200px; height: 200px; box-shadow: 0 0 10px 5px #ff0000, 0 0 20px 10px #00ff00, 0 0 30px 15px #0000ff, 0 0 40px 20px #ffff00; >In this example, we’re using different colors for each box-shadow value to create a rainbow-like effect.
You can also use rgba() values to create a more transparent glow. Here’s an example:
.box background-image: url('transparent.png'); width: 200px; height: 200px; box-shadow: 0 0 10px 5px rgba(255, 255, 255, 0.5), 0 0 20px 10px rgba(255, 255, 255, 0.5), 0 0 30px 15px rgba(255, 255, 255, 0.5), 0 0 40px 20px rgba(255, 255, 255, 0.5); >In this example, we’re using rgba() values with an alpha value of 0.5 to create a more transparent glow.
That’s it! With these examples, you should be able to create different types of outer glows for your transparent png images using CSS3.
Method 3: Using a pseudo-element
To give an outer glow to an object in a transparent PNG using CSS3, you can use a pseudo-element. Here are the steps to achieve this:
.container background-image: url('image.png'); background-size: cover; position: relative; >.container::before content: ''; position: absolute; top: -10px; left: -10px; right: -10px; bottom: -10px; z-index: -1; background: rgba(255, 255, 255, 0.5); border-radius: 50%; box-shadow: 0 0 20px 10px rgba(255, 255, 255, 0.5); >- The content property is used to create the pseudo-element, and the position property is set to absolute to position it behind the PNG. The z-index property is set to -1 to make sure it stays behind the PNG.
- The background property is set to a semi-transparent white color using rgba() . The border-radius property is set to 50% to make the pseudo-element circular.
- Finally, the box-shadow property is used to create the outer glow effect. The first two values are set to 0 to position the shadow directly behind the pseudo-element. The third value is the blur radius of the shadow, and the fourth value is the spread radius of the shadow. The color and opacity of the shadow are also set using rgba() .
Here’s the complete CSS code:
.container background-image: url('image.png'); background-size: cover; position: relative; > .container::before content: ''; position: absolute; top: -10px; left: -10px; right: -10px; bottom: -10px; z-index: -1; background: rgba(255, 255, 255, 0.5); border-radius: 50%; box-shadow: 0 0 20px 10px rgba(255, 255, 255, 0.5); >You can adjust the values of the box-shadow property to customize the outer glow effect.
CSS Outer Glow
CSS offers a very powerful property of box-shadow. It enables developers to simulate the drop-shadows — as if our HTML elements are in a true 3D space and can be moved along the z-axis to rise above the background content or submerge in it.
Let’s visualize it by considering the following example. We have two buttons in our view. One is without a box-shadow while the other has it. It can be observed that without a box-shadow, the entire perspective remains 2D as if a button is drawn with a pencil on paper. But with a box-shadow, our brains start to process the view as a 3D perspective. We feel as if the box is a true 3D element, placed or hovering above a true 3D plane. This is the power of box-shadow.
A box-shadow is described by
- Horizontal and Vertical Offsets from the target element’s edges
- Blur Radius
- Spread Radius
- Color
You can explore the details of these properties and experiment with them on the MDN resource page.
Now that we have a brief introduction to the world of box-shadows, we will pay attention to the main topic of this article — outer glow.
The glowing effect is observed when an element radiates steady light around the edges of its body. For example, the effect that can be seen around the edges of the button in the following example.
Let’s create this effect using box-shadow.
Firstly, we will create a black container as glow stands out with a dark background. We will center its content in both dimensions. The content will, in our case, be just a text in a box. We call it simply a card.
We have our card centered in a dark container and the only thing left is the outer glow.
Interestingly, the outer glow is only 1 line of CSS away. We achieve the right blurring of box-shadow by calibrating values of blur and spread radii. For better understanding this, here is the breakdown of how box-shadow is applied:
- First, the browser renders the element as a solid color (of course we get to choose this color)
- Second, the browser then makes this image larger by the spread radius. If the element has a border-radius applied, then the larger image will also have rounded corners. If no border-radius is applied, then the larger image will have square corners
- Thirdly, the browser applies a gaussian blur over the image using the blur radius
Here is a video demonstrating how changing the values of blur and spread radii affects the shadow.
Coming back to the outer glow, let’s apply the required CSS declaration.
Note that our overall color scheme, and values for spread and blur radii of the box-shadow matter the most in creating this effect. With the right calibration of these values, we were able to leverage box-shadows to mimic the effect of glowing.
CSS supports the rendering of multiple shadows using a comma-separated list. The shadows are rendered front-to-back in the order of declaration. So the first shadow in the list will be on the front.
Let’s update the box-shadow in the above example to render multiple shadows.
Multiple Glows
Text Glow
CSS offers another great property that can be leveraged to create glowing effects of texts. The text-shadow property. Consider the following example of text-glow.
Let’s build it from scratch.
As seen, the glow was added easily using one line of CSS — the text-shadow.
text-shadow: rebeccapurple 0 0 10px;
We can even apply transitions to box-shadow and text shadows to create eye-catching effects. For example, such transitions can mimic Neon Signs.
Let’s animate into our above examples, a transition of text-shadow colors. Note that we need to set the same shadow in the initial (0% frame) and final (100% frame) state of the animation. Otherwise, we will see a glitch as the final shadow color will immediately change to the initial shadow color when the animation loop resets.
@keyframes shadows < 0% < text-shadow: #48abe0 0 0 10px; >50% < text-shadow: blueviolet 0 0 10px; >75% < text-shadow: rebeccapurple 0 0 10px;>100% < text-shadow: #48abe0 0 0 10px; >> The same applies to box shadows. Following codepen demonstrates both, outer and text glow, and their animation.
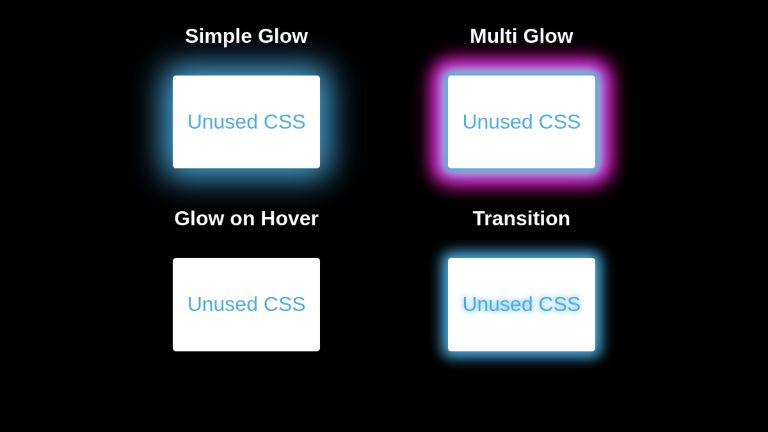
Simple Glow
Unused CSS
Multi Glow
Unused CSS
Glow on Hover
Unused CSS
Transition
Unused CSS
body < font-family: sans-serif; background-color: black; >.parent < display: flex; flex-direction: row; justify-content: center; align-items: center; flex-wrap: wrap; >.parent h4 < color: white; margin-top : 0; >.glow-item < text-align: center; margin: 30px 100px; >.card < width: fit-content; height: fit-content; padding: 0.7rem; display: flex; justify-content: center; align-items: center; background: white; color: #48abe0; text-align: center; border-radius: 5px; cursor: pointer; box-shadow: 0 0 50px 15px #48abe0; >.card.reactive < box-shadow: none; >.card.reactive:hover < box-shadow: 0 0 50px 15px #48abe0; >.multi-glow .card < box-shadow: 0 0 10px 5px #48abe0, 0 0 20px 7px #ebecca, 0 0 25px 20px #8a2be2, 0 0 30px 25px #ff1493; >.card.shadow-animate < box-shadow: 0px 0px 20px 10px #48abe0; animation: shadows 1.5s infinite; >@keyframes shadows < 0% < text-shadow: #48abe0 0 0 10px; box-shadow: 0px 0px 20px 10px #48abe0; >50% < text-shadow: blueviolet 0 0 10px; box-shadow: 0px 0px 20px 10px blueviolet; >75% < text-shadow: rebeccapurple 0 0 10px; box-shadow: 0px 0px 20px 10px rebeccapuprle; >100% < text-shadow: #48abe0 0 0 10px; box-shadow: 0px 0px 20px 10px #48abe0; >>
Examples
Glowing social medial icons.
Transitioning glow on text — An effect useful for navigating the user’s focus.
Conclusion
Box-Shadow and Text-Shadow are very useful properties. Using the right calibration of values, we can create attractive glow effects that can navigate users’ focus while adding to the stylistic beauty of our web pages.
UnusedCSS helps website owners remove their unused CSS every day. Sign Up to see how much you could remove.
You Might Also Be Interested In
Generating an outer glow effect in HTML using CSS
To add glow to your image files, use software like Photoshop or GIMP. Alternatively, adjust your values to achieve the desired effect. For a shadow-based outer glow, refer to the provided link or basic JSFiddle.
How to give outer glow effect to column in HTML/CSS?
You can use box-shadow property.
Please eliminate background-image that is present in #wrapper .
Don’t forget to include the necessary code to make sure the shadow can be seen on a wider range of browsers.
Further information on this topic is available at the following link: http://css-tricks.com/snippets/css/css-box-shadow /
CSS Smart Image Glow — DEV Community , I started by creating a simple HTML page with a transparent-background picture of Majora’s Mask (following the Nintendo theme with my favorite
Css Card Outer Glow Effect Using HTML and CSS
Css Card Outer Glow Effect Using HTML CSS (Codic gyan) In this video we will Make Css
Duration: 12:20
Outer glow to surround image?
I have modified the first two parameters in your box-shadow properties, which correspond to the horizontal and vertical offsets.
Modify the values of your box-shadow .
Outerglow css Code Example, div < width: 150px; height: 150px; background-color: #fff; box-shadow: 120px 80px 40px 20px #0ff; /* in order: x offset, y offset, blur size, spread size,
HTML5 canvas create outer glow effect of shape
To produce an outer glow, you may apply shadow in this manner:
context.shadowBlur = 10; context.shadowColor = "black"; Refer to this link for an instance: http://www.williammalone.com/articles/html5-canvas-example/
And here’s a really basic JSFiddle.
My belief is that this method will be quicker than utilizing a for loop to create circles of varying radii and alpha values.
To create a glow effect on a filled path, I utilized a shadow with 0 offset, a significant blur radius, and a shade that resembled light. Thus, my code took on the appearance of a green «glow.

By substituting my straight geometry with your circular arcs, you can achieve the desired outcome without using image files.
If the circles are in the form of image files, you can add a glowing effect to them using software like Photoshop or GIMP. Afterwards, save these files as .PNG format to maintain the transparency of the background.
What if the circles drawn on the screen using canvas drawing functions are redrawn 25 times, with each circle increasing in width by one pixel?
Full glow css Code Example, div < width: 150px; height: 150px; background-color: #fff; box-shadow: 120px 80px 40px 20px #0ff; /* in order: x offset, y offset,