- Opencv draw rectangle python
- Drawing Line
- Drawing Rectangle
- Drawing Circle
- Drawing Ellipse
- Drawing Polygon
- Adding Text to Images:
- Result
- Additional Resources
- Exercises
- Opencv draw rectangle python
- Drawing Line
- Drawing Rectangle
- Drawing Circle
- Drawing Ellipse
- Drawing Polygon
- Adding Text to Images:
- Result
- Additional Resources
- Exercises
- Learn to Draw Rectangle in OpenCV Python using cv2.rectangle() with Examples
- Rectangle in OpenCV Python : cv2.rectangle()
- Syntax
- Examples of cv2.Rectangle() in Python OpenCV
- Import Required Libraries
- Function to Create Blank Image
- Example – 1 : Draw Simple Rectangle with cv2.rectangle()
- Example – 2 : Draw Filled Rectangle with cv2.rectangle()
- Example – 3 : Draw Rectangle on Image with cv2.rectangle()
- Conclusion
Opencv draw rectangle python
In all the above functions, you will see some common arguments as given below:
- img : The image where you want to draw the shapes
- color : Color of the shape. for BGR, pass it as a tuple, eg: (255,0,0) for blue. For grayscale, just pass the scalar value.
- thickness : Thickness of the line or circle etc. If -1 is passed for closed figures like circles, it will fill the shape. default thickness = 1
- lineType : Type of line, whether 8-connected, anti-aliased line etc. By default, it is 8-connected.cv.LINE_AA gives anti-aliased line which looks great for curves.
Drawing Line
To draw a line, you need to pass starting and ending coordinates of line. We will create a black image and draw a blue line on it from top-left to bottom-right corners.
Drawing Rectangle
To draw a rectangle, you need top-left corner and bottom-right corner of rectangle. This time we will draw a green rectangle at the top-right corner of image.
Drawing Circle
To draw a circle, you need its center coordinates and radius. We will draw a circle inside the rectangle drawn above.
Drawing Ellipse
To draw the ellipse, we need to pass several arguments. One argument is the center location (x,y). Next argument is axes lengths (major axis length, minor axis length). angle is the angle of rotation of ellipse in anti-clockwise direction. startAngle and endAngle denotes the starting and ending of ellipse arc measured in clockwise direction from major axis. i.e. giving values 0 and 360 gives the full ellipse. For more details, check the documentation of cv.ellipse(). Below example draws a half ellipse at the center of the image.
Drawing Polygon
To draw a polygon, first you need coordinates of vertices. Make those points into an array of shape ROWSx1x2 where ROWS are number of vertices and it should be of type int32. Here we draw a small polygon of with four vertices in yellow color.
Note If third argument is False, you will get a polylines joining all the points, not a closed shape. cv.polylines() can be used to draw multiple lines. Just create a list of all the lines you want to draw and pass it to the function. All lines will be drawn individually. It is a much better and faster way to draw a group of lines than calling cv.line() for each line.
Adding Text to Images:
To put texts in images, you need specify following things.
- Text data that you want to write
- Position coordinates of where you want put it (i.e. bottom-left corner where data starts).
- Font type (Check cv.putText() docs for supported fonts)
- Font Scale (specifies the size of font)
- regular things like color, thickness, lineType etc. For better look, lineType = cv.LINE_AA is recommended.
We will write OpenCV on our image in white color.
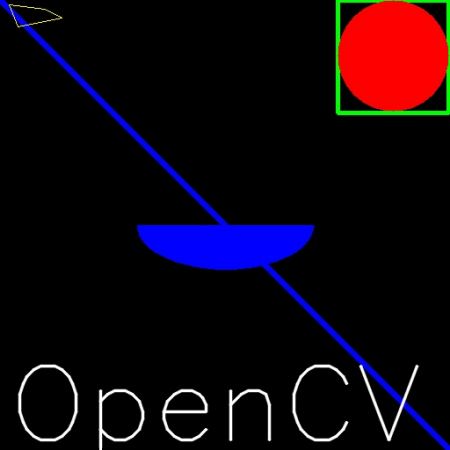
Result
So it is time to see the final result of our drawing. As you studied in previous articles, display the image to see it.

Additional Resources
Exercises

Generated on Tue Jul 25 2023 01:39:32 for OpenCV by 1.8.13
Opencv draw rectangle python
In all the above functions, you will see some common arguments as given below:
- img : The image where you want to draw the shapes
- color : Color of the shape. for BGR, pass it as a tuple, eg: (255,0,0) for blue. For grayscale, just pass the scalar value.
- thickness : Thickness of the line or circle etc. If -1 is passed for closed figures like circles, it will fill the shape. default thickness = 1
- lineType : Type of line, whether 8-connected, anti-aliased line etc. By default, it is 8-connected.cv.LINE_AA gives anti-aliased line which looks great for curves.
Drawing Line
To draw a line, you need to pass starting and ending coordinates of line. We will create a black image and draw a blue line on it from top-left to bottom-right corners.
Drawing Rectangle
To draw a rectangle, you need top-left corner and bottom-right corner of rectangle. This time we will draw a green rectangle at the top-right corner of image.
Drawing Circle
To draw a circle, you need its center coordinates and radius. We will draw a circle inside the rectangle drawn above.
Drawing Ellipse
To draw the ellipse, we need to pass several arguments. One argument is the center location (x,y). Next argument is axes lengths (major axis length, minor axis length). angle is the angle of rotation of ellipse in anti-clockwise direction. startAngle and endAngle denotes the starting and ending of ellipse arc measured in clockwise direction from major axis. i.e. giving values 0 and 360 gives the full ellipse. For more details, check the documentation of cv.ellipse(). Below example draws a half ellipse at the center of the image.
Drawing Polygon
To draw a polygon, first you need coordinates of vertices. Make those points into an array of shape ROWSx1x2 where ROWS are number of vertices and it should be of type int32. Here we draw a small polygon of with four vertices in yellow color.
Note If third argument is False, you will get a polylines joining all the points, not a closed shape. cv.polylines() can be used to draw multiple lines. Just create a list of all the lines you want to draw and pass it to the function. All lines will be drawn individually. It is a much better and faster way to draw a group of lines than calling cv.line() for each line.
Adding Text to Images:
To put texts in images, you need specify following things.
- Text data that you want to write
- Position coordinates of where you want put it (i.e. bottom-left corner where data starts).
- Font type (Check cv.putText() docs for supported fonts)
- Font Scale (specifies the size of font)
- regular things like color, thickness, lineType etc. For better look, lineType = cv.LINE_AA is recommended.
We will write OpenCV on our image in white color.
Result
So it is time to see the final result of our drawing. As you studied in previous articles, display the image to see it.
Additional Resources
Exercises

Generated on Mon Jul 24 2023 23:36:02 for OpenCV by 1.8.13
Learn to Draw Rectangle in OpenCV Python using cv2.rectangle() with Examples

In this tutorial, we are going to show you how we can draw rectangles in OpenCV Python by using cv2.rectangle() function. Rectangles are commonly used to create a bounding box for object detection hence you should know how to create them in OpenCV Python. We will show you the syntax of cv2.rectangle() along with few examples for a better understanding for beginners.
Rectangle in OpenCV Python : cv2.rectangle()
OpenCV Python has got a rectangle() function that can be used quite easily to create rectangular shapes on an image. Let us see its syntax below –
Syntax
cv2.rectangle(image, pt1, pt2, color, thickness)
- image – It is the image on which the rectangle has to be drawn.
- pt1 – Vertex of the rectangle at the top left corner.
- pt2 – Vertex of the rectangle at the bottom right corner.
- color – It is the color of the rectangle line in RGB.
- thickness – It is the thickness of the line.
It does not return anything and draws the rectangle on the original image in place, this means the rectangle drawn on the image will be permanent.
Examples of cv2.Rectangle() in Python OpenCV
Import Required Libraries
Before going through the examples let us first import some of the required libraries as shown below –
import cv2 import numpy as np import matplotlib.pyplot as plt %matplotlib inline
Function to Create Blank Image
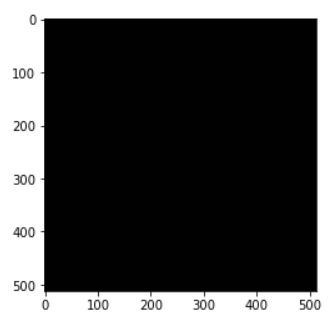
We will create a utility function that creates an empty image of the size 512×512 and 3 color channels on which we shall draw rectangles for examples.
def generate_blank_image(): return np.ones(shape=(512,512,3), dtype=np.int16)
Let us see this function in action by calling it below.
img = generate_blank_image() plt.imshow(img)
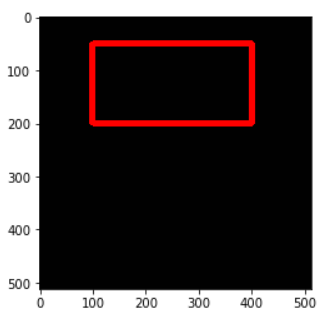
Example – 1 : Draw Simple Rectangle with cv2.rectangle()
In this example, we are going to draw a simple rectangle on the blank image whose line is red in color and line thickness is 10.
We generate the empty image and pass it to cv2.rectangle() along with the two vertices coordinates of the rectangle, rgb value of red (255,0,0) and thickness = 10.
img1 = generate_blank_image() cv2.rectangle(img1, pt1=(400,200), pt2=(100,50), color=(255,0,0), thickness=10) plt.imshow(img1)
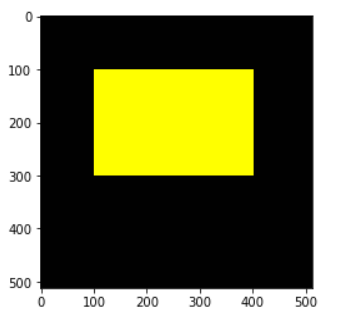
Example – 2 : Draw Filled Rectangle with cv2.rectangle()
In this example, we are going to draw a rectangle on the blank image which is filled with blue color.
To fill the rectangle we use the thickness = -1 in the cv2.rectangle() function.
img2 = generate_blank_image() cv2.rectangle(img2, pt1=(400,300), pt2=(100,100), color=(255,255,0), thickness= -1) plt.imshow(img2)
Example – 3 : Draw Rectangle on Image with cv2.rectangle()
In this example, we are using a real image of cat and drawing the rectangle over it in red color. We have manually calculated the values of pt1 and pt2 so that the rectangle is drawn properly on the cat’s face.
img3 = cv2.imread('cat.jpg') cv2.rectangle(img3, pt1=(400,100), pt2=(1000,700), color=(255,0,0), thickness=10) plt.imshow(img3) 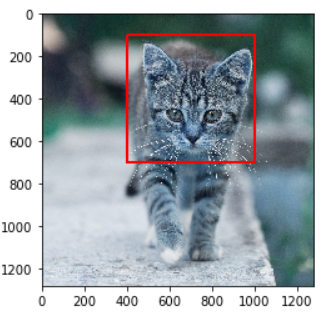
Conclusion
Hope you found this short tutorial on how to draw rectangles in OpenCV quite helpful. We covered the syntax of the cv2 rectangle() function along with different types of examples for a better understanding of beginners.