- How to Add an Onclick Effect with HTML and CSS
- Example of adding an onclick event by using the checkbox hack:
- Result
- Example of adding an onclick event for resizing the image:
- Example of adding an onclick effect on the tag:
- How to Create Pure CSS onClick Image Zoom Effect
- When to Use the CSS-Only Solution
- Front-End Techniques We’ll Use
- Add Onclick Event on HTML Image Tag in JavaScript
- Adding onclick Event on an HTML img Tag Using JavaScript
- Related Article — JavaScript Image
- Related Article — JavaScript Event
How to Add an Onclick Effect with HTML and CSS
The most common way of creating a click event with CSS is using the checkbox hack. This method has broad browser support. You need to add a for attribute to the element and an id attribute to the element.
Example of adding an onclick event by using the checkbox hack:
html> html> head> style> label < display: block; background: #dbdbd9; width: 80px; height: 80px; > #box:checked + label < background: #fffc47; color: #666666; > style> head> body> form action="/form/submit" method="post"> input type="checkbox" id="box" /> label for="box">Click here label> form> body> html>Result
In the example above, we applied the same value both to the id attribute of the tag and for attribute of the tag. The label onclick is restyled with the :checked pseudo-class.
Example of adding an onclick event for resizing the image:
html> html> head> style> #btnControl < display: none; > #btnControl:checked + label > img < width: 150px; height: 170px; > style> head> body> input type="checkbox" id="btnControl" /> label class="btn" for="btnControl"> img src="https://images.unsplash.com/photo-1565520651265-1148c3b277f4?ixlib=rb-1.2.1&ixid=eyJhcHBfaWQiOjEyMDd9&auto=format&fit=crop&w=500&q=60" id="btnLeft" /> label> body> html>Since a element can be associated only with one form control, you cannot just place a button inside the tag. But you can add some CSS to change the appearance and behavior of the button.
Example of adding an onclick effect on the tag:
html> html> head> style> #btnControl < display: none; > .btn < width: 80px; height: 30px; background: #ffffff; border-radius: 7px; padding: 1px 3px; box-shadow: 1px 1px 1px #000000; display: block; text-align: center; background-image: linear-gradient(to bottom, #e8e8e8, #a1a1a1); font-family: arial; font-size: 14px; line-height: 30px; > .btn:hover < background-image: linear-gradient(to bottom, #97e8ae, #3be36b); > .btn:active < margin-left: 1px 1px 0; box-shadow: -1px -1px 1px #000; outline: 1px solid #000000; -moz-outline-radius: 7px; background-image: linear-gradient(to top, #97e8ae, #3be36b); > #btnControl:checked + label < width: 70px; height: 74px; line-height: 74px; > style> head> body> input type="checkbox" id="btnControl" /> label class="btn" for="btnControl">Click here label> body> html>How to Create Pure CSS onClick Image Zoom Effect
CSS doesn’t have a pseudoclass for targeting click events, and this constitutes one of the biggest pain points of front-end developers. The closest pseudo-class is :active which styles an element for the period of time a user presses their mouse over it.
This effect is however short-lived: once the user releases the mouse, :active doesn’t work any more. We need to find some other way to emulate the click event in CSS.
This post has been written in response to a reader’s request, and it’s going to explain how to target the click event with pure CSS in a specific use case, image zoom.
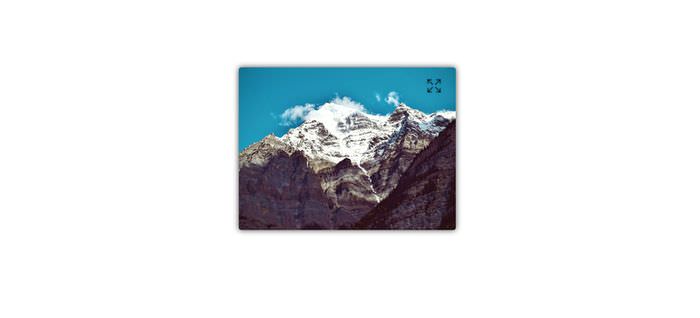
You can see the final result below — a CSS-only solution for image zoom on click.
When to Use the CSS-Only Solution
Before I proceed, I do want to say, that for image zoom I recommend the CSS-only method (which changes the dimensions of the image), only when you want a single or a group of few images to have the zoom feature.
For a proper gallery, JavaScript provides more flexibility and efficiency.
Front-End Techniques We’ll Use
Now that you’ve been cautioned, let’s quickly look over the 3 key techniques we’ll be using:
- The HTML tag that allows browsers to create linkable areas over an image. Read more on the element in my earlier post.
- The usemapattribute of the
tag, that hooks up the image to the image map.
- The :targetCSS pseudo-class that represents an element that has been targeted using its ID selector.
1. Create the HTML Base
First, let’s create the HTML base. In the code below, we add an image to be zoomed and expanded & close button icons for zooming in and out.
It’s important to have an ID on the image to be zoomed, and the Close button needs to be a link that has the href=»#» attribute, I’ll explain why later in the post.
2. Add the CSS
Initially, the Close icon shouldn’t be displayed. The position , margin- , left , and bottom properties place the Expand and Close icons where we want them to be — at the top-right corner of the image.
The pointer-events: none; rule allows mouse events to pass through the Expand icon and reach the image.
3. Add the Image Map
On the image map, the clickable area should be at the top-right corner of the image right below the Expand icon, and about its size. Place the element before the first tag in the HTML. We’ll bind the image to the map in the next step.
- the left edge of the image & the left edge of the link area
- the top edge of the image & the top edge of the link area
- the left edge of the image & the right edge of the link area
- the top edge of the image & the bottom edge of the link area
The value of the href attribute has to be the hash identifier of the image (this is why the image should have an id ).
4. Bind the image to the Image Map
Add the usemap attribute to the image so as to bind it to the image map. Its value needs to be the hash representation of the name attribute of the tag we added in Step 3.
The clickable area of the image map now lies behind the Expand button. When the user clicks the Expand button, it’s the clickable area that is clicked in reality — remember that we made the Expand button “passable” with the pointer-events: none; rule in Step 2.
This way the user targets the image itself by clicking it, and after the click the URI gets suffixed with the «#img1» fragment identifier.
5. Style the :target Pseudo-Class
Until the «#img1» fragment identifier is at the end of URI, the targetted image can be styled with the :target pseudo-class
The dimensions of the targeted image increase, the Close button gets shown, and the Expand button gets hidden.
.img:target < height: 450px; width: 500px; >.img:target+.close < display: block; >.img:target+.close+.expand

How the Close Button Works
Now the CSS-only zoom-on-click effect is done, check out the demo below, or read a little bit more on the theory behind image maps in the next section.
Background Info: Why and not ?
By now, you certainly understand that the most important thing for this CSS-only solution to work is to target the image using the href=»#imgid» attribute, which could also be done using the tag instead of the image map.
This may be true, however when it comes to images, using the element is more appropriate. It’s even more important that when you want the zoom to happen on clicking on a larger area on the image rather than just on the Expand icon, gives you an easy solution.
The default value for shape attribute creates a rectangular linkable area that covers the whole image. If you were to use instead, you would have to code it to cover the image, and you may also have to use a wrapper element for the same purpose.
To also speak about the caveats of this solution, the pointer-events CSS property (we used in Step 2) is supported by Internet Explorer only from version 11.
Add Onclick Event on HTML Image Tag in JavaScript

The onclick is added over an image tag inside HTML. The onclick event will make our image clickable. After a user clicks on the image, you can do whatever you want, like opening a new webpage, adding animations, changing an existing image with a new one, and so on. Inside the onclick , you can pass a function. Here, you can either create and call your function, which you have written in JavaScript or use existing functions available to us by the window object like window.open() .
This article will show how to display an image in a new browser tab when a user clicks on it using the onclick event. We will achieve this by creating a function and calling it inside the oncreate attribute of the HTML image tag.
Adding onclick Event on an HTML img Tag Using JavaScript
To achieve onclick event functionality in JavaScript, we first have to create a function and then call that function inside the onclick , which is present on the image tag inside the HTML. Here, we have taken an image, and when a user clicks on this image, the image will be opened in a new browser tab. We will be implementing this in the below example.
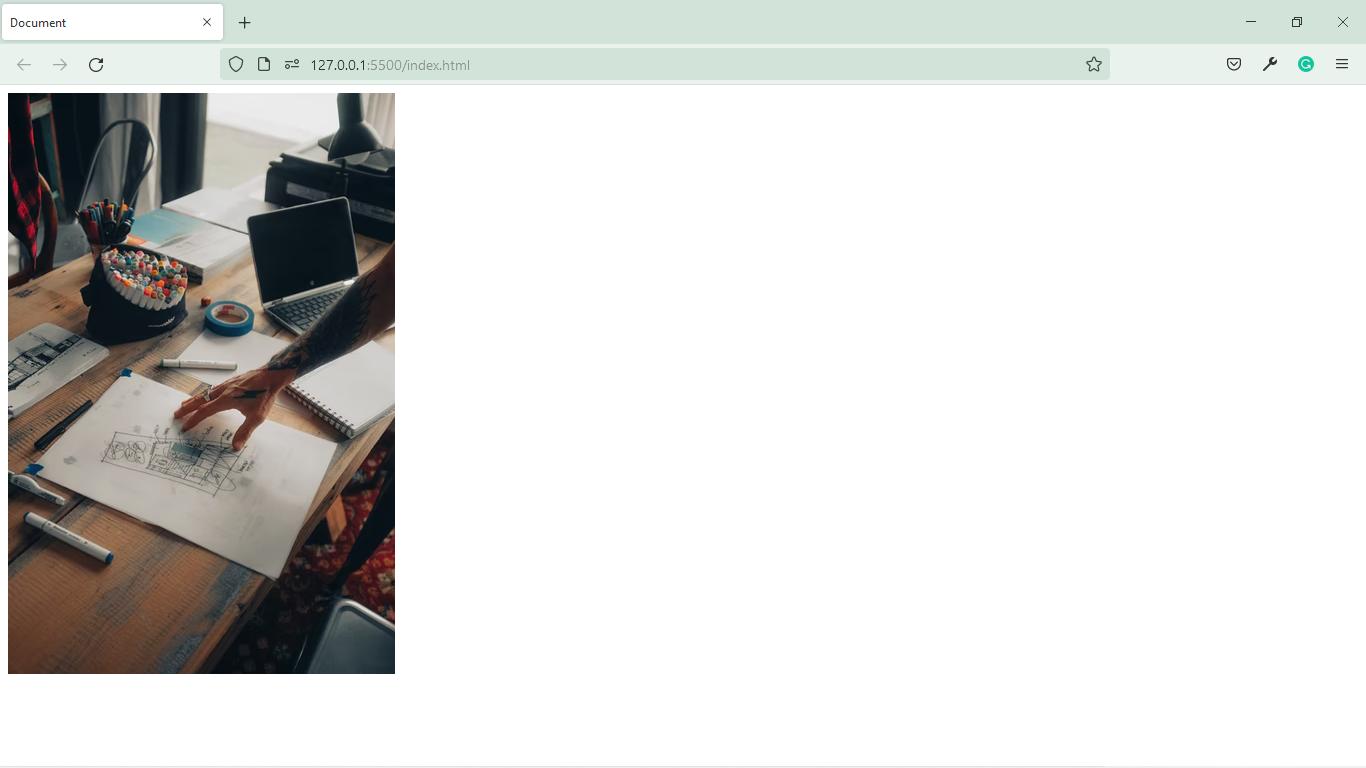
Below we have a basic HTML document, inside which we only have an img tag with the src attribute set to an image fetched from the server. On the onclick attribute of an image, we pass the openImg() function, which will call that function. We have not created this function yet. At the end of the file, we have linked our JavaScript file to create our function. See the code below.
html lang="en"> head> meta charset="UTF-8"> meta http-equiv="X-UA-Compatible" content="IE=edge"> meta name="viewport" content="width=device-width, initial-scale=1.0"> title>Documenttitle> head> body> img id="image" src="https://bit.ly/3jFwe3d" onclick="openImg()"> script src="./script.js">script> body> html> If you run the above code, this is how it will look like in the web browser.
Inside our JavaScript file, we have defined a function openImg() . Inside this function, we first have to get the reference to the img tag, which is present inside the DOM using its id attribute image . This can be done using document.getElementById() method. And then, we will store the image tag’s reference inside the image variable.
Since we want to show the same image inside a new browser tab, we also have to store the image source in a variable that we can get using the src attribute. In JavaScript, we just have to use image.src to access the source attribute, and then we will store it inside the source variable.
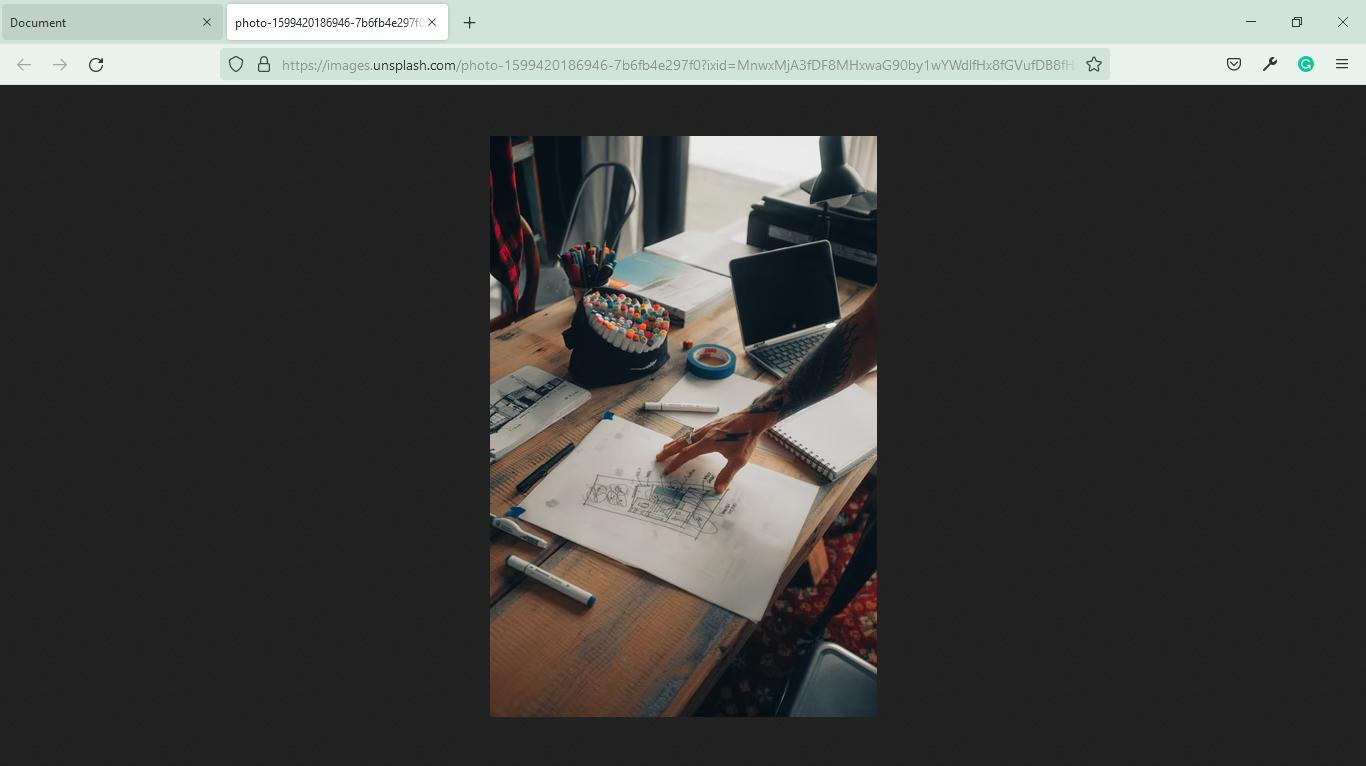
Finally, to display the image using its source, we can use the window.open() method. The window.open() method is used to open a new tab, and whatever we pass inside this function will be displayed inside the new tab. Here, we will pass the source variable, which contains the link of the image itself. This is how our JavaScript openImg() function looks like.
function openImg() var image = document.getElementById('image'); var source = image.src; window.open(source); > If you run the above code inside the web browser and click on the image, the image will be opened in a new browser tab, as shown below.
The HTML onclick image attribute helps make an image clickable in JavaScript. This can be used in various situations and depending on what kind of functionality you would like to implement for your website.
Sahil is a full-stack developer who loves to build software. He likes to share his knowledge by writing technical articles and helping clients by working with them as freelance software engineer and technical writer on Upwork.
Related Article — JavaScript Image
Related Article — JavaScript Event
Copyright © 2023. All right reserved