How to Install Nginx with PHP-FPM on Debian 10
The FastCGI Process Manager (FPM) is an alternative to the FastCGI configuration with multiple enhancements. This is useful for high load websites. This tutorial will help you with the installation and configuration of PHP-FPM with Nginx on your Debian 10 Buster Linux system.
Prerequsities
You must have SSH access to the Debian 10 system with Sudo privileges.
Nginx Installation
Nginx packages are available under default repositories. SSH to your Debian 10 system with sudo privileges accounts and install the Nginx web server from the official repository.
sudo apt update sudo apt install nginx
PHP Installation
For the PHP installation we recommend to use Ondřej Surý‘s PPA, which provides latest PHP versions for Debian systems. Use the below couple of commands to add the PPA to your system.
wget -q https://packages.sury.org/php/apt.gpg -O- | sudo apt-key add - sudo echo "deb https://packages.sury.org/php/ buster main" | tee /etc/apt/sources.list.d/php.list
Then install PHP latest version available on the day of writing this tutorial. Simply execute follows commands for the installation of PHP and PHP-FPM packages.
apt update sudo apt install php php-fpm
Note:- When you are using PHP-FPM. All the PHP modules configurations are residing under /etc/php/7.3/fpm/ directory. You can read more about enable/disable PHP modules.
After installing the above packages php7.3-fpm service will automatically be started. You can make sure by typing below command on terminal.
sudo systemctl status php7.3-fpm ● php7.3-fpm.service - The PHP 7.3 FastCGI Process Manager Loaded: loaded (/lib/systemd/system/php7.3-fpm.service; enabled; vendor preset: enabled) Active: active (running) since Tue 2019-12-03 10:01:54 UTC; 24min ago Docs: man:php-fpm7.3(8) Main PID: 9883 (php-fpm7.3) Status: "Processes active: 0, idle: 2, Requests: 3, slow: 0, Traffic: 0req/sec" Tasks: 3 (limit: 3587) Memory: 14.2M CGroup: /system.slice/php7.3-fpm.service ├─9883 php-fpm: master process (/etc/php/7.3/fpm/php-fpm.conf) ├─9884 php-fpm: pool www └─9885 php-fpm: pool www Dec 03 10:01:54 tecadmin-debian10 systemd[1]: Starting The PHP 7.3 FastCGI Process Manager. Dec 03 10:01:54 tecadmin-debian10 systemd[1]: Started The PHP 7.3 FastCGI Process Manager.
Nginx Configuration
Let’s create Nginx virtual host to run with FPM/FastCGI. For this tutorial, we use default VirtualHost. Edit VirtualHost host configuration file in a text editor. You can create new VirtualHost as per your requirements, so make sure to enable any new VirtualHost.
sudo vim /etc/nginx/sites-available/example.com
Use the below basic Nginx Virtual host configuration with PHP FPM settings. Update the configuration as followings.
Установка
До окончания настроек рекомендуется остановить nginx и php-fpm:
/etc/init.d/nginx stop; /etc/init.d/php5-fpm stop;
Конфигурирование
Конфигурирование nginx
Нужно создать location в котором указать рабочую директорию для php скриптов (например /home/www-data/mysite ) и параметры соединения с php-fpm:
server #имя сервера: server_name mysite.com; #логи access_log /var/log/nginx/mysite.access.log; error_log /var/log/nginx/mysite.error.log; # корневая директория root /home/www-data/mysite; location ~ \.php$ try_files $uri = 404; include fastcgi_params; fastcgi_pass unix:/var/run/php5-fpm.sock; fastcgi_index index.php; fastcgi_param SCRIPT_FILENAME $document_root$fastcgi_script_name; > # порядок индексов location / index index.php index.html index.htm; > #кастомная страница 404 location /errors alias /home/www-data/mysite/errors ; > error_page 404 /errors/404.html; >
Конфигурирование php-fpm
- static — фиксированное число дочерних процессов (определяться параметром pm.max_children);
- dynamic — число дочерних процессов определяется на основе следующих директив. В этом режиме всегда будет хотя бы 1 дочерний процесс.
- ondemand — по требованию, дочерние процессы не будут созданы при старте. Дочерние процессы создаются при помощи fork, когда приходит новый запрос на соединение.
По умолчанию соединение происходит через Unix-сокеты, unix:/var/run/php5-fpm.sock;
Более подробную информацию о директивах конфигурационного файла Вы можете найти на сайте проекта php-fpm configuration file.
См. также
How to Install Nginx with PHP-FPM on Debian 11
Throughout this post, we will take you to step by step to install Nginx with PHP-FPM on Debian 11.
Before we start, it is necessary to explain what Nginx and PHP-FPM are to get a better understanding of the process.
Nginx is an open-source HTTP web server that stands out for being very fast and efficient. In addition, Nginx is ready to be used as a reverse proxy. In this mode, it is used to balance the load between back-end servers, as well as to be used as a cache on a slower back-end server.
One of the main advantages of using Nginx is that it processes tens of thousands of simultaneous connections in a compact, multi-core CPU process. This is why it is so lightweight, efficient, and above all robust.
Unlike Apache, Nginx does not have a module to support PHP. So we have to resort to PHP-FPM for full support. So, PHP-FPM is the most popular alternative implementation of PHP FastCGI, and although it is used for high-traffic websites, we can use it to add PHP support to an Nginx server.
In this post, you will learn how to install them so that you have a lightweight web server with good PHP support.
Install Nginx with PHP-FPM on Debian 11
Step 1: Install Nginx on Debian 11
The first thing to do is to install Nginx on Debian 11. The advantage of this application is that it is present in the official repositories of many Linux distributions. So, installing it won’t be a problem.
Open an SSH connection to your server and when you are inside, update the system completely.
sudo apt update sudo apt upgrade
Now you can install Nginx from the official repositories like this
You can check the status of Nginx to see if the installation was successful.
sudo systemctl status nginx ● nginx.service - A high performance web server and a reverse proxy server Loaded: loaded (/lib/systemd/system/nginx.service; enabled; vendor preset: enabled) Active: active (running) since Mon 2021-10-11 21:39:55 CEST; 9s ago Docs: man:nginx(8) Process: 1821 ExecStartPre=/usr/sbin/nginx -t -q -g daemon on; master_process on; (code=exited, status=0/SUCCESS) Process: 1822 ExecStart=/usr/sbin/nginx -g daemon on; master_process on; (code=exited, status=0/SUCCESS) Main PID: 2011 (nginx) Tasks: 2 (limit: 2276) Memory: 5.3M CPU: 42ms CGroup: /system.slice/nginx.service ├─2011 nginx: master process /usr/sbin/nginx -g daemon on; master_process on; └─2014 nginx: worker process Oct 11 21:39:55 imaginelinux systemd[1]: Starting A high performance web server and a reverse proxy server. Oct 11 21:39:55 imaginelinux systemd[1]: nginx.service: Failed to parse PID from file /run/nginx.pid: Invalid argument Oct 11 21:39:55 imaginelinux systemd[1]: Started A high performance web server and a reverse proxy server.
Then you have to open the ports in the firewall for Nginx to work. This can be done by running
sudo ufw allow 80/tcp sudo ufw allow 443/tcp
This way, when you open a web browser and go to http://your-server-ip or http://your-domain you will see the following screen
This indicates that Nginx is running correctly.
Remember that Nginx is also a system service that you can manage via the systemctl command so you can start it as follows
sudo systemctl start nginx
sudo systemctl stop nginx
sudo systemctl restart nginx
With Nginx running, we can then start playing with PHP-FPM.
Step 2: Install and Configure PHP-FPM
PHP-FPM is an implementation that PHP itself makes. So installing it also installs the language. So, to install PHP and PHP-FPM just run the following command
sudo apt install php php-fpm
This is enough, but it is then necessary to create a new configuration file for our site with PHP.
sudo nano /etc/nginx/sites-available/test.conf
server < listen 80; server_name your_domain; root /var/www/test; index index.html index.htm index.php; location / < try_files $uri $uri/ =404; >location ~ \.php$ < include snippets/fastcgi-php.conf; fastcgi_pass unix:/var/run/php/php7.4-fpm.sock; >location ~ /\.ht < deny all; >>
First, the name of the file, you can change it, I have chosen test for an example. Then, you have to change the server_name directive to your domain name. The root directive refers to the location of the site on the hard disk that we will now create.
And inside it, a PHP file for the demo.
sudo nano /var/www/test/test.php
Add some PHP code like the phpinfo method.
Then, enable the new configuration.
sudo ln -s /etc/nginx/sites-available/test.conf /etc/nginx/sites-enabled/
sudo systemctl restart nginx
So, open a web browser and go to http://your-domain/test.php and you will see the following
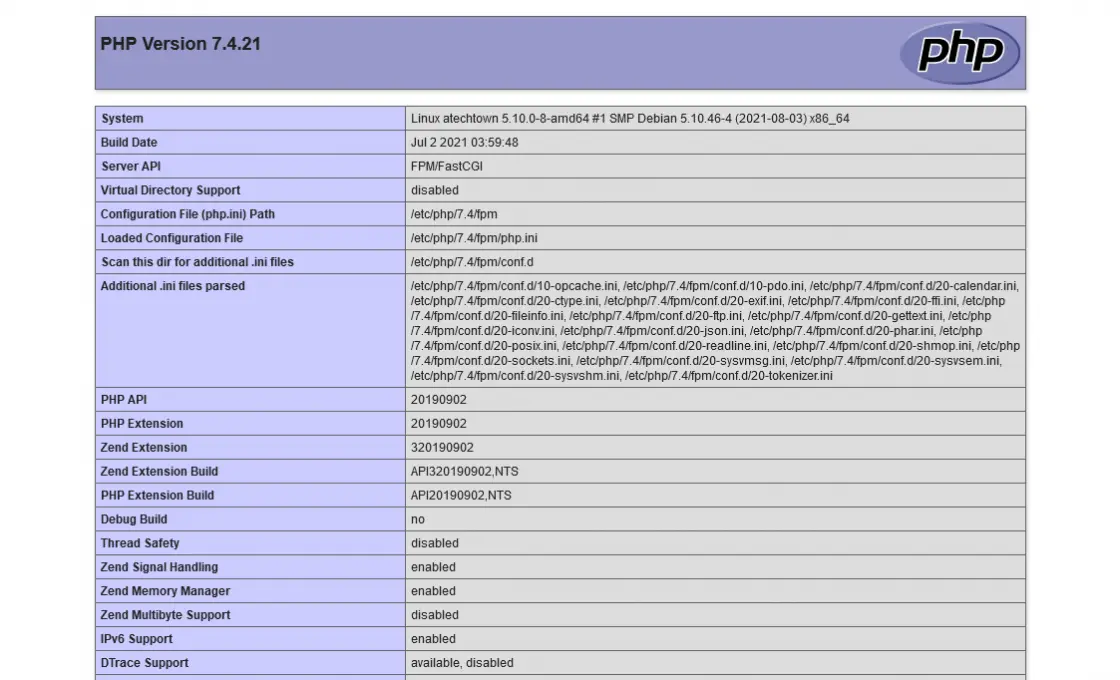
So, we now have Nginx with PHP-FPM on Debian 11 installed.
In this post, you have learned how to install Nginx with PHP-FPM on Debian 11 through a series of steps and configurations that are easy to apply and that will allow you to have PHP support in Nginx.
So, help us grow and leave us a comment, Also if the post has helped you, share it with others.