Создание Bottom Navigation Bar на Kotlin с использованием Anko
Начиная новый проект я решила попробовать полностью отказаться от XML-файлов, на основе которых формируются layouts, а экраны создавать с помощью библиотеки Anko. Имея небольшой опыт разработки под Android (порядка 2-х лет) и еще меньший опыт написания кода на Kotlin (чуть больше полугода) я сразу столкнулась с проблемой включения в приложение Navigation Architecture Component, а вернее отрисовкой Bottom Navigation Bar, создаваемом BottomNavigationView.
Первым делом я обратилась к просторам Инета, чтобы найти возможное решение. Но все статьи найденные мной с той или иной степенью доходчивости рассказывали о том как работать с компонентами навигации и никто (из тех чьи статьи я проштудировала) не делал это на Anko. Решив поставленную задачу, я предлагаю сообществу свой вариант создания Bottom Navigation Bar.
Полностью весь код можно посмотреть здесь
Я пропускаю этап создания нового проекта в Android Studio, отмечу только что для работы с Anko и Navigation Architecture Component в build.gradle на уровне модуля необходимо добавить следующие зависимости:
implementation "org.jetbrains.anko:anko:$anko_version" implementation "org.jetbrains.anko:anko-constraint-layout:$anko_version" implementation "com.android.support.constraint:constraint-layout:2.0.0-alpha3" implementation 'android.arch.navigation:navigation-fragment:1.0.0-beta02' implementation 'android.arch.navigation:navigation-fragment-ktx:1.0.0-beta02' implementation 'android.arch.navigation:navigation-ui-ktx:1.0.0-beta02' implementation 'com.google.android.material:material:1.0.0'Следующий шаг — создаем структуру будущего приложения. Для отрисовки основной активити вместо xml-файла создаем класс MainActivityUI наследуемый от интерфейса AnkoComponent:
class MainActivityUI: AnkoComponent < override fun createView(ui: AnkoContext): View = with(ui) < constraintLayout < >> >В классе MainActivity setContentView(R.layout.activity_main) заменяем на MainActivityUI().setContentView(this).
Затем создаем package fragments в котором будут лежать наши фрагменты и package ui для размещения классов, отвечающих за отрисовку экранов соответствующих фрагментов. Так выглядит структура проекта:
fragments ui HomeUI UsersUI DetailsUI MoreUI HomeFragment UsersFragment DetailsFragment MoreFragmentТеперь займемся непосредственно навигацией и созданием Bottom Navigation Bar.
Подробное описание включения новых компонентов навигации и описание работы в Navigation Editor можно найти на странице документации здесь. Для создания файла (graph’а) навигации между экранами приложения, необходимо в папку res добавить еще одну папку, а именно navigation и уже в неё добавить файл navigation_graph.xml. Для этого проекта он будет таким:
Для отображения самого Bar’а необходимо создать еще одну ресурсную папку, а именно menu. В ней располагается файл отвечающий за видимую часть bar’а. Вот так он выглядит в этом проекте:
Настало время соединить все имеющееся вместе и посмотреть как же это работает.
Добавим в MainActivityUI контейнер для фрагментов, а также определим контейнер для navigation bar.
constraintLayout < val fragmentContainer = frameLayout < >.lparams < width = matchParent height = matchConstraint >val bottomNavigation = bottomNavigation < inflateMenu(R.menu.bottom_navigation_menu) >applyConstraintSet < fragmentContainer < connect( START to START of PARENT_ID, END to END of PARENT_ID, TOP to TOP of PARENT_ID, BOTTOM to TOP of R.id.bottom_nav_view ) >bottomNavigation < connect( START to START of PARENT_ID, END to END of PARENT_ID, TOP to BOTTOM of R.id.fragment_container, BOTTOM to BOTTOM of PARENT_ID ) >> > Особо следует указать на то, что bottomNavigation в данном примере это extantion функция, имеющая следующий вид:
inline fun ViewManager.bottomNavigation(init: BottomNavigationView.() -> Unit = <>) = ankoView(< BottomNavigationView(it) >, theme = 0, init = init)Теперь в MainActivity необходимо определить объект NavHostFragment (см. в доке):
А в методе onCreate() определить:
supportFragmentManager.beginTransaction() .replace(R.id.fragment_container, host) .setPrimaryNavigationFragment(host) .commit()Завершающий штрих — добавим в onStart() MainActivity объект класса NavController, который позволяет осуществлять переход между фрагментами выбирая тот или иной объект navigation bar’а:
override fun onStart() < super.onStart() val navController = host.findNavController() findViewById(R.id.bottom_nav_view)?.setupWithNavController(navController) navController.addOnDestinationChangedListener val dest: String = try < resources.getResourceName(destination.id) >catch (e: Resources.NotFoundException) < Integer.toString(destination.id) >Log.d("NavigationActivity", "Navigated to $dest") > >Запускаем приложение и vois là…
How to Code a Bottom Navigation Bar for an Android App

Chike Mgbemena Last updated May 22, 2021

The material design team at Google defines the functionality of bottom navigation bars in Android as follows:
Bottom navigation bars make it easy to explore and switch between top-level views in a single tap.
Tapping on a bottom navigation icon takes you directly to the associated view or refreshes the currently active view.
According to the official Material Design guidelines for the Android bottom navigation bar, it should be used when your app has:
An example of a popular app that implements the bottom navigation bar is the Google Discover Android app from Google, which uses it to navigate to different destinations of the app. You can see this yourself by downloading the Google Discover app from the Google Play Store (if you don’t already have it on your device). The following screenshot is from the Google Discover app displaying an Android bottom navigation bar.


In this post, you’ll learn how to display menu items inside a bottom navigation bar in Android. You will use AndroidX navigation, which is part of the Jetpack suite of libraries. Jetpack is a suite of libraries to help developers write code that works consistently across Android versions and devices. As a bonus, you’ll also learn how to use Android Studio templates to bootstrap your project with a bottom navigation bar quickly.
Getting Started
Open Android Studio, create a new project, and select a Blank Activity template, as shown below. Select the Kotlin language from the drop-down menu and click Finish. Wait for Android Studio to finish creating the project resources.

Add Project Dependencies
The first thing before we get started is to add the project dependencies. Open the app’s build.gradle file and add the following dependencies.
implementation 'androidx.legacy:legacy-support-v4:1.0.0'
Bottom Navigation Bar in Android
We all have come across apps that have a Bottom Navigation Bar. Some popular examples include Instagram, WhatsApp, etc. In this article, let’s learn how to implement such a functional Bottom Navigation Bar in the Android app. Below is the preview of a sample Bottom Navigation Bar:

Why do we need a Bottom Navigation Bar?
- It allows the user to switch to different activities/fragments easily.
- It makes the user aware of the different screens available in the app.
- The user is able to check which screen are they on at the moment.
The following is an anatomy diagram for the Bottom Navigation Bar:

Steps for Creating Bottom Navigation Bar
Step 1: Create a new Android Studio project
Step 2: Adding the dependency to the build.gradle(:app) file
We will be using Android’s Material Design Library so we need to import it in the build.gradle(:app) file. Here’s the dependency we need to add:
Step 3: Working with activity_main.xml file
For this example, create a basic app with a FrameLayout and a Bottom Navigation Bar. The FrameLayout will contain Fragments which will change as the user click on the items in the Bottom Navigation Bar. This is how the activity_main.xml looks like:
XML
Step 4: Creating a menu for the Bottom Navigation Bar
The Navigation Bar needs to have some items which will create using Menu. To create a Menu, first, create a Menu Directory by clicking on the app -> res(right-click) -> New -> Android Resource Directory and select Menu in the Resource Type.

To create a Menu Resource File , click on the app -> res -> menu(right-click) -> New -> Menu Resource File and name it bottom_nav_menu.

Now the user can create as many items as he wants in the bottom_nav_menu.xml file. The user also needs to create an icon for each of these items. To create an icon, click on the app -> res -> drawable(right-click) -> New -> Image Asset.

In the window that opens, the user can name the icon whatever he wants but it should not comprise any uppercase letter. The user can select the icon he wants by searching it and when the user is done, click Next-> Finish.
Now add these items in the bottom_nav_menu.xml. This is how the bottom_nav_menu.xml file looks like after adding the items:
Navigation bar android kotlin
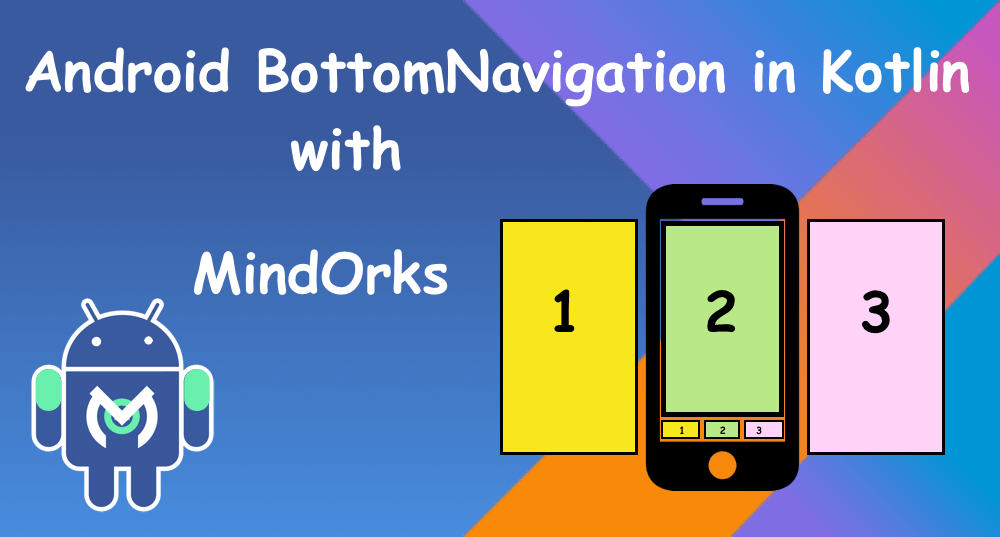
Welcome, here we are going to implement the BottomNavigationView, which you might have seen in the Instagram application, the bottom menu bar.
Let’s start with the development:
Open Android Studio and create a new project. Setup the Constraint layout and also add the dependency of material components and syn the project.
First, create the main screen layout where we will see the bottom navigation bar and also the area above it, we are going to show three different fragments in it, so we need FrameLayout which will hold our fragments.
Just like we set menu in navigationView chapter; we also need to set here the menu which we want to show in the bar. We use the attribute
Create a menu file in the menu folder, we name the file as navigation.
Here, we have three items, and we also added the icons. This icon by default you will get in your project. Now, we need three items, so we also need three different fragment classes and one layout file for them.
We are showing the same layout in all three fragments so we will create only one layout file else to show different UI we can also create different layout files.
We will create three fragment classes.
class BlogFragment : Fragment() < override fun onCreateView(inflater: LayoutInflater, container: ViewGroup?, savedInstanceState: Bundle?): View? = inflater.inflate(R.layout.fragment_common, container, false) override fun onActivityCreated(savedInstanceState: Bundle?) < super.onActivityCreated(savedInstanceState) >> class ChapterFragment : Fragment() < override fun onCreateView(inflater: LayoutInflater, container: ViewGroup?, savedInstanceState: Bundle?): View? = inflater.inflate(R.layout.fragment_common, container, false) override fun onActivityCreated(savedInstanceState: Bundle?) < super.onActivityCreated(savedInstanceState) >> class StoreFragment : Fragment() < override fun onCreateView(inflater: LayoutInflater, container: ViewGroup?, savedInstanceState: Bundle?): View? = inflater.inflate(R.layout.fragment_common, container, false) override fun onActivityCreated(savedInstanceState: Bundle?) < super.onActivityCreated(savedInstanceState) >>Let’s come back to MainActivity, where we will wire up the fragments with the BottomNavigationView.
First, we need to set the toolbar as actionBar.
setSupportActionBar(toolbar)Now, we will set the listener to the BottomNavigationView and pass the listener item to it.
bottomNavigationView.setOnNavigationItemSelectedListener(mOnNavigationItemSelectedListener)When our application first open, we need to set one of the items already selected to show on the screen. We will check if our savedInstanceState is null we will set one the fragments.
if (savedInstanceState == null)
How to get the listener item, which we need to pass to the bottomNavigationView?
private val mOnNavigationItemSelectedListener = BottomNavigationView.OnNavigationItemSelectedListener < menuItem ->when (menuItem.itemId) < R.id.navigation_blog -> < val fragment = BlogFragment() supportFragmentManager.beginTransaction().replace(R.id.container, fragment, fragment.javaClass.getSimpleName()) .commit() return@OnNavigationItemSelectedListener true >R.id.navigation_chapter -> < val fragment = ChapterFragment() supportFragmentManager.beginTransaction().replace(R.id.container, fragment, fragment.javaClass.getSimpleName()) .commit() return@OnNavigationItemSelectedListener true >R.id.navigation_store -> < val fragment = StoreFragment() supportFragmentManager.beginTransaction().replace(R.id.container, fragment, fragment.javaClass.getSimpleName()) .commit() return@OnNavigationItemSelectedListener true >> false >Here, we are checking which item user will select and what action to perform on click. So, on clicking the item, we are getting the fragment instance and placing the fragment into the FrameLayout.
Let’s set some different text on every fragment and different background colors. To do this, we will change the text in onActivityCreated method in our fragment.
tvCommon.text = "Store Fragment" commonLayout.setBackgroundColor(resources.getColor(android.R.color.darker_gray)) tvCommon.text = "Chapter Fragment" commonLayout.setBackgroundColor(resources.getColor(android.R.color.holo_green_light)) tvCommon.text = "Blog Fragment" commonLayout.setBackgroundColor(resources.getColor(android.R.color.holo_orange_dark))Let’s run this application now, Great Work!! There is much more in it like what if you want to add more items to the menu etc. Try to explore more and share us with on our twitter or slack channel.