MySQL Database Connection in Java with Example
In this post, we will discuss how to establish the JDBC connection in Java with MySQL database. After establishing the connection we will develop a sample JDBC application to check whether the connection is done properly or not with the MySQL database. We will develop a simple JDBC program to fetch the record from one table of the MySQL database and display it on the console.
Before establishing a MySQL database connection in Java, make sure you have the following software setup ready on your computer system,
1) MySQL Database
2) JDK1.8 or later version
3) Any text editor to write the code or IDE
Establish MySQL Database Connection
Now let us begin the establishing MySQL JDBC connection.
Step1) Collect JDBC driver of MySQL database.
The JDBC driver of MySQL database doesn’t come along with MySQL database installation, We need to collect it separately. Download the JDBC driver/connector of the MySQL database.
Open the zip file, and extract it. The mysql-connector-java-.jar is the main jar file that will be used to develop the JDBC applications through the MySQL database.
Step2) Add jar file to the CLASSPATH.
Note:- In the CLASSPATH don’t add the location/folder where the jar file is available. We have to add the location of the jar file, not the folder where the jar file is available.
Don’t try to write the location name manually because we can do a spelling mistake, so it is recommended to copy the jar file location. In order to copy the jar files correctly in the Windows operating system, Go to the folder where the jar file is locating, now select jar file, right-click and select properties, in the security section you will find “Object name”. We can copy the actual path of the jar file from here.
The folder where the Jar file is located:- C:\Users\user\Downloads\
The location which will be added to Classpath:- C:\Users\user\Downloads\mysql-connector-java-8.0.21.jar
How to add the jar file to the classpath?
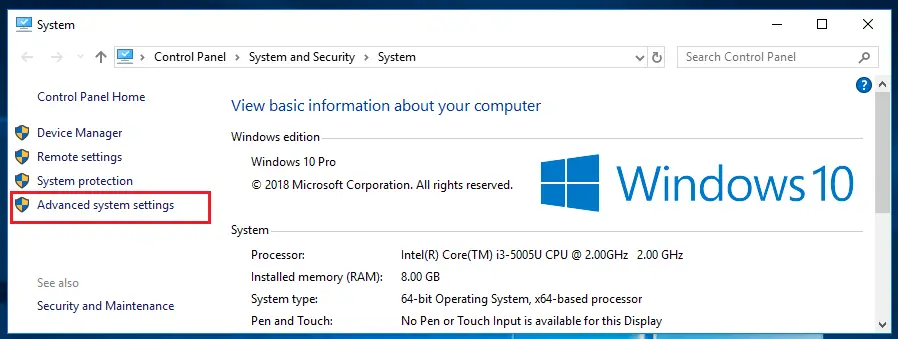
For this, we have to go to “Advance System Settings”. There are many ways to go to “Advance System Settings”,
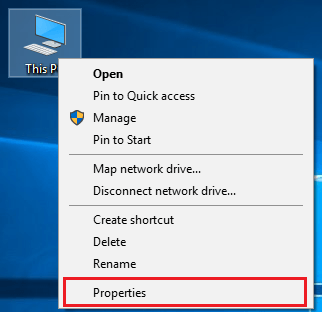
1) This PC -> Properties -> Advance System Settings
2) Control panel -> System and Security -> System -> Advance system settings
Now go to Advance system settings -> Environment Variables -> System Variables.
MySQL

Одной из наиболее популярных СУБД в связке с Java является MySQL. Поэтому рассмотрим, как мы можем работать с MySQL в Java.
Подробнее про работу с MySQL можно посмотреть в соответствующем материале Руководство по MySQL
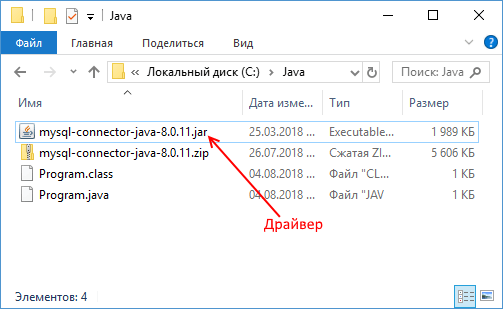
Для работы с MySql в Java необходимо установить официальный драйвер MySQL Connector/J . Загрузим его с адресса https://dev.mysql.com/downloads/connector/j/. Распакуем загруженный архив, найдем там собственно драйвер, который представляет собой файл с расширением jar (на момент написания данной статьи это файл mysql-connector-java-8.0.11.jar), и положим его в папку программы.
Убедимся, что мы в прицнипе можем осуществлять взаимодействие с MySQL через данный драйвер. Для этого определим следующий код программы:
public class Program < public static void main(String[] args) < //java -classpath c:\Java\mysql-connector-java-8.0.11.jar;c:\Java Program try< Class.forName("com.mysql.cj.jdbc.Driver").getDeclaredConstructor().newInstance(); System.out.println("Connection succesfull!"); >catch(Exception ex) < System.out.println("Connection failed. "); System.out.println(ex); >> > Для загрузки драйвера здесь применяется строка
Class.forName("com.mysql.cj.jdbc.Driver").getDeclaredConstructor().newInstance(); Метод Class.forName() в качестве параметра принимает строку, которая представляет полный путь к классу драйвера с учетом всех пакетов. В случае MySQL это путь «com.mysql.cj.jdbc.Driver». Таким образом, Метод Class.forName загружает класс драйвера, который будет использоваться.
Далее вызывается метод getDeclaredConstructor() , который возвращает конструктор данного класса. И в конце вызывается метод newInstance() , который создает с помощью конструктора объект данного класса. И после этого мы сможем взаимодействовать с сервером MySQL.
Убедимся, что сервер MySQL запущен, и скомпилируем и запустим программу на выполнение:
C:\Java>javac Program.java C:\Java>java -classpath c:\Java\mysql-connector-java-8.0.11.jar;c:\Java Program Connection succesfull! C:\Java>
В моем случае класс программы и драйвер размещены в папке C:\Java. Поэтому при выполнении программы после параметра -classpath я указываю полный путь к файлу драйвера — «c:\Java\mysql-connector-java-8.0.11.jar». Далее после точки с запятой указывается каталог, где находятся файлы программы, то есть опть же это каталог «C:\Java». И после этого идет название выполняемого класса программы — «Program».
И если все сделано правильно, то при выполнении программы мы можем увидеть на консоли строку «Connection succesfull!». После этого мы можем начать взаимодействовать с MySQL.
MySQL Java Connector
MySQL provides connectivity for Java client applications with MySQL Connector/J, a driver that implements the Java Database Connectivity (JDBC) API. The API is the industry standard for database-independent connectivity between the Java programming language and a wide range of SQL databases, spreadsheets etc. The JDBC API can do the following things :
- Establish a connection with a database or access any tabular data source.
- Send SQL statements.
- Retrieve and process the results received from the database.
In the following section, we have discussed how to install, configure, and develop database applications using MySQL Connector/J (JDBC driver).
| Connector/J version | JDBC version | MySQL Server version | Status |
|---|---|---|---|
| 5.1 | 3.0, 4.0 | 4.1, 5.0, 5.1, 5.5, 5.6, 5.7 | Recommended version |
| 5.0 | 3.0 | 4.1, 5.0 | Released version |
| 3.1 | 3.0 | 4.1, 5.0 | Obsolete |
| 3.0 | 3.0 | 3.x, 4.1 | Obsolete |
Download Connector/J :
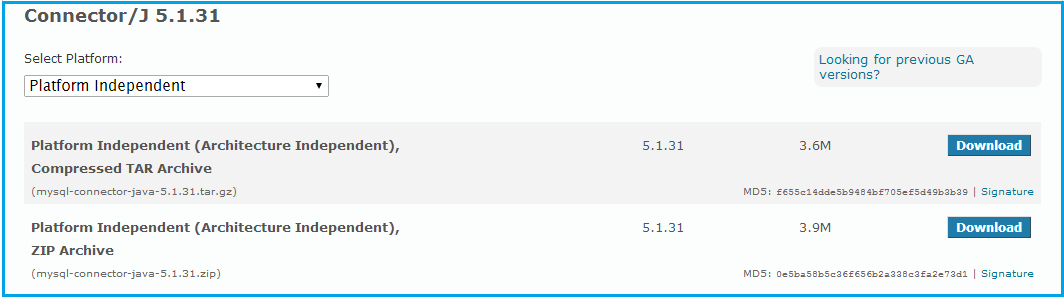
MySQL Connector/J is the official JDBC driver for MySQL. You can download the latest version of MySQL Connector/J binary or source distribution from the following web site —
http://dev.MySQL.com/downloads/connector/j/
For Platform Independent select any one from the following :
Installation
You can install the Connector/J package drivers using either the binary, binary installation or source installation. The binary method is easy which is a bundle of necessary libraries and other files pre-built, with an installer program. The source installation method is important where you want to customize or modifies the installation process or for those platforms where a binary installation package is not available. Apart from that solution, you manually add the Connector/J location to your Java classpath.
MySQL Connector/J is distributed as a .zip or .tar.gz archive containing the sources, the class files. After extracting the distribution archive, you can install the driver by placing MySQL-connector-java-version-bin.jar in your classpath, either by adding the full path to it to your classpath environment variable or by directly specifying it with the command line switch -cp when starting the JVM.
You can set the classpath environment variable under Unix, Linux or Mac OS X either locally for a user within their .profile, .login or another login file. You can also set it globally by editing the global /etc/profile file.
For example add the Connector/J driver to your classpath using one of the following forms, depending on your command shell :
# Bourne-compatible shell (sh, ksh, bash, zsh): shell> export CLASSPATH=/path/MySQL-connector-java-ver-bin.jar:$CLASSPATH # C shell(csh, tcsh): shell> setenv CLASSPATH /path/MySQL-connector-java-ver-bin.jar:$CLASSPATH
In Windows 2000, Windows XP, Windows Server 2003 and Windows Vista, you can set the environment variable through the System Control Panel.
Install Java Connector on Microsoft Windows
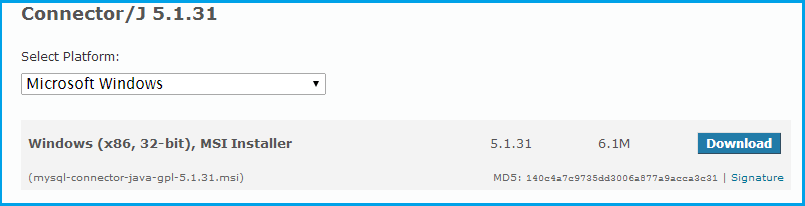
Select and download the MSI installer packages from http://dev.MySQL.com/downloads/connector/j/ as per your requirement.
Now follow the following steps :
Step -1 :
Double click the installer (here it is «MySQL-connector-java-gpl-5.1.31.msi»)

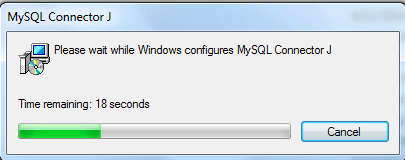
Step -2 :
Click on ‘Run’ and complete the process.
Connecting to MySQL using MySQL Connector/J
The following example shows how to connect/terminate and handle errors. (Java version 7 Update 25 (build 1.7.0_25-b16))
import java.sql.Connection; import java.sql.DriverManager; import java.sql.SQLException; public class test < public static void main (String[] args) < System.out.println("\n\n***** MySQL JDBC Connection Testing *****"); Connection conn = null; try < Class.forName ("com.MySQL.jdbc.Driver").newInstance (); String userName = "root"; String password = "pqrs123"; String url = "jdbc:MySQL://localhost/sakila"; conn = DriverManager.getConnection (url, userName, password); System.out.println ("\nDatabase Connection Established. "); >catch (Exception ex) < System.err.println ("Cannot connect to database server"); ex.printStackTrace(); >finally < if (conn != null) < try < System.out.println("\n***** Let terminate the Connection *****"); conn.close (); System.out.println ("\nDatabase connection terminated. "); >catch (Exception ex) < System.out.println ("Error in connection termination!"); >> > > > To create a java jdbc connection to the database, you must import the following java.sql package.
- import java.sql.Connection;
- import java.sql.DriverManager;
- import java.sql.SQLException;
Now we will make a class named ‘test’ and then the main method.
To create a connection to a database, the code is :
conn = DriverManager.getConnection (url, userName, password);
The JDBC DriverManager class defines objects which can connect Java applications to a JDBC driver. DriverManager is the backbone of the JDBC architecture. The DriverManager has a method called getConnection(). The method uses a jdbc url, username and a password to establish a connection to the database and returns a connection object. We have used the following url, username and password in the above code.
- The url string is «jdbc:MySQL://localhost/sakila» where the first part «jdbc:MySQL://localhost» is the database type (here it is MySQL) and server (here it is localhost). Rest part is the database name (here it is ‘sakila’).
- The user name for MySQL is defined inside the variable ‘userName’.
- The password for MySQL is defined inside the variable ‘password’.
The DriverManager attempts to connect to the database, if the connection is successful, a Connection object is created, (here it is called ‘conn’) and the program will display a message «Database Connection Established. «
If the connection fails (e.g. supplying wong password, host address etc.) then you need to handle the situation. We are trapping the error in catch part of the try … catch statement with appropriate messages and finally close the connection.
Compile and Run it
Assume that ‘test.java’ is stored in E:\ and ‘MySQL-connector-java-5.1.31-bin.jar’ is stored in «C:\Program Files\MySQL\MySQL Connector J\».
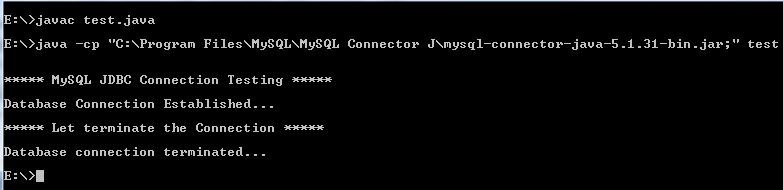
Note : The class path is the path that the Java Runtime Environment (JRE) searches for classes and other resource files. You can change the class path by using the -classpath or -cp option of some Java commands when you call the JVM or other JDK tools or by using the classpath environment variable.
Querying data using MySQL Connector/J
Suppose we want to get the names (first_name, last_name), salary of the employees who earn more than the average salary and who works in any of the IT departments.
Structure of ‘hr’ database :
Sample table : employees
SELECT first_name, last_name, salary FROM employees WHERE department_id IN (SELECT department_id FROM departments WHERE department_name LIKE 'IT%') AND salary > (SELECT avg(salary) FROM employees); Here is the Java Code (version 7 Update 25 (build 1.7.0_25-b16))
import java.sql.Connection; import java.sql.DriverManager; import java.sql.SQLException; import java.sql.Statement; import java.sql.ResultSet; public class testsql < public static void main (String[] args) < Connection conn = null; try < Class.forName ("com.MySQL.jdbc.Driver").newInstance (); String userName = "root"; String password = "datasoft123"; String url = "jdbc:MySQL://localhost/hr"; conn = DriverManager.getConnection (url, userName, password); // Run SQL ->start from here Statement stmt = null; ResultSet rs = null; try < stmt = conn.createStatement(); rs = stmt.executeQuery("SELECT first_name, last_name, salary FROM employees WHERE department_id IN (SELECT department_id FROM departments WHERE department_name LIKE 'IT%') AND salary >(SELECT avg(salary) FROM employees)"); // Extract data from result set System.out.println ("\n-------------SQL DATA-------------\n"); while(rs.next()) < //Retrieve by column name String fname = rs.getString("first_name"); String lname = rs.getString("last_name"); int salary = rs.getInt("Salary"); //Display values System.out.print("Name " + fname+' '+lname); System.out.print(",Salary: " + salary); >System.out.println ("\n\n-------------END-------------\n"); > catch (SQLException ex) < // handle any errors System.out.println("SQLException: " + ex.getMessage()); System.out.println("SQLState: " + ex.getSQLState()); System.out.println("VendorError: " + ex.getErrorCode()); >finally < if (rs != null) < try < rs.close(); >catch (SQLException sqlEx) < >// ignore rs = null; > if (stmt != null) < try < stmt.close(); >catch (SQLException sqlEx) < >// ignore stmt = null; > > // SQL end at here > catch (Exception ex) < System.err.println ("Cannot connect to database server"); ex.printStackTrace(); >finally < if (conn != null) < try < ///System.out.println("\n***** Let terminate the Connection *****"); conn.close (); // System.out.println ("\n\nDatabase connection terminated. "); >catch (Exception ex) < System.out.println ("Error in connection termination!"); >> > > > Compile and Run it
Assume that ‘testsql.java’ is stored in E:\ and ‘MySQL-connector-java-5.1.31-bin.jar’ is stored in «C:\Program Files\MySQL\MySQL Connector J\».
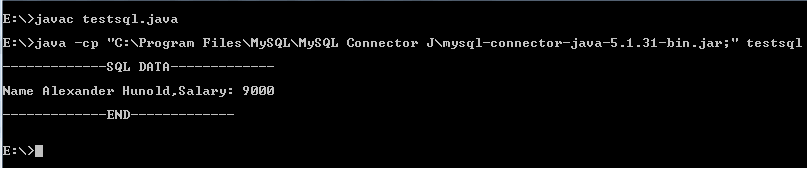
Note : The class path is the path that the Java Runtime Environment (JRE) searches for classes and other resource files. You can change the class path by using the -classpath or -cp option of some Java commands when you call the JVM or other JDK tools or by using the classpath environment variable.
Follow us on Facebook and Twitter for latest update.
- Weekly Trends
- Java Basic Programming Exercises
- SQL Subqueries
- Adventureworks Database Exercises
- C# Sharp Basic Exercises
- SQL COUNT() with distinct
- JavaScript String Exercises
- JavaScript HTML Form Validation
- Java Collection Exercises
- SQL COUNT() function
- SQL Inner Join
- JavaScript functions Exercises
- Python Tutorial
- Python Array Exercises
- SQL Cross Join
- C# Sharp Array Exercises
We are closing our Disqus commenting system for some maintenanace issues. You may write to us at reach[at]yahoo[dot]com or visit us at Facebook