- Code a responsive step progress bar with HTML, CSS, & JavaScript
- Multi Step Progress Bar in HTML CSS & JavaScript
- Video Tutorial of Multi-Step Progress Bar
- Steps to create Multi Step Progress Bar in HTML CSS & JS
- 1. File Structure
- 2. Creating the Multi-Step Progress Bar
- Conclusion and Final Words
- Progress Bar With Steps using HTML, CSS, and JavaScript
- What is Step Progress Bar?
- CSS Code of Step Progress Bar
- JavaScript Code of Step Progress Bar
- Final Output Of Step Progress bar
- What Is Step Progress Bar?
- How to create Step Progress Bar using HTML, CSS, and JavaScript
Code a responsive step progress bar with HTML, CSS, & JavaScript
In this tutorial we’ll be creating a responsive step progress bar. These are commonly used when a large form is split into several steps. They let the user know how much of a form they have completed and how many step remain.
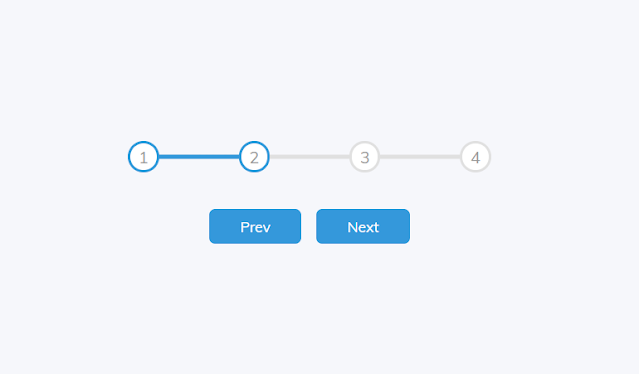
Here’s what the completed progress bar will look like:
Let’s get started by creating the required HTML markup:
div id="progress"> div id="progress-bar"> div> ul id="progress-num"> li class="step active">1 li> li class="step">2 li> li class="step">3 li> li class="step">4 li> ul> div>Code language: HTML, XML (xml)button id="progress-prev" class="btn" disabled>Prev button> button id="progress-next" class="btn">Next button>Code language: HTML, XML (xml)Now for the JavaScript starting with variables for the various elements:
const progressBar = document.getElementById("progress-bar"); const progressNext = document.getElementById("progress-next"); const progressPrev = document.getElementById("progress-prev"); const steps = document.querySelectorAll(".step"); let active = 1;Code language: JavaScript (javascript)To navigate through the steps we’ll add an eventListener to detect clicks on each of the buttons:
progressNext.addEventListener("click", () => < active++; if (active > steps.length) < active = steps.length; >updateProgress(); >); progressPrev.addEventListener("click", () => < active--; if (active < 1) < active = 1; > updateProgress(); >);Code language: JavaScript (javascript)When the eventListener is triggered it increases or decreases the active count based on which button was clicked. It also prevents the active count from going higher or lower than the number of steps. We’re also calling a updateProgress function which looks like this:
const updateProgress = () => < // toggle active class on list items steps.forEach((step, i) => < if (i < active) < step.classList.add("active"); > else < step.classList.remove("active"); > >); // set progress bar width progressBar.style.width = ((active - 1) / (steps.length - 1)) * 100 + "%"; // enable disable prev and next buttons if (active === 1) < progressPrev.disabled = true; > else if (active === steps.length) < progressNext.disabled = true; > else < progressPrev.disabled = false; progressNext.disabled = false; > >;Code language: JavaScript (javascript)- Loops through each of the steps and toggles the active class.
- Set’s the progress bar width as a percentage based on the active and total steps.
- Disables the appropriate button when the active step is either the first or last step.
Now we just need to add some CSS to see the progress bar in action:
#progress < position: relative; margin-bottom: 30px; >Code language: CSS (css)Relative positioning so we can use absolute position on the children elements.
#progress-bar < position: absolute; background: lightseagreen; height: 5px; width: 0%; top: 50%; left: 0; >Code language: CSS (css)This sets the base styles for the the progress bar, we toggle it’s width via JavaScript.
#progress-num < margin: 0; padding: 0; list-style: none; display: flex; justify-content: space-between; >Code language: CSS (css)Flex layout to evenly distribute the numbers within the parent no matter the width.
#progress-num::before < content: ""; background-color: lightgray; position: absolute; top: 50%; left: 0; height: 5px; width: 100%; z-index: -1; >Code language: CSS (css)CSS pseudo-element that represents the inactive portion of the progress bar.
#progress-num .step < border: 3px solid lightgray; border-radius: 100%; width: 25px; height: 25px; line-height: 25px; text-align: center; background-color: #fff; font-family: sans-serif; font-size: 14px; position: relative; z-index: 1; >Code language: CSS (css)Styles each of the inactive steps inside a circle.
#progress-num .step.active < border-color: lightseagreen; background-color: lightseagreen; color: #fff; >Code language: CSS (css)Styles the active steps border and background color to match the progress bar.
That’s all for this tutorial, you should now have a working responsive step progress bar that you can can easily be customised to suit your individual requirements. As always you can find the full working source code used in this tutorial on Github.
Multi Step Progress Bar in HTML CSS & JavaScript

The multi-step process enhances the user experience by dividing the registration process into smaller, more manageable steps. This reduces confusion and frustration for the user, as clear and concise guidance is provided throughout the process.
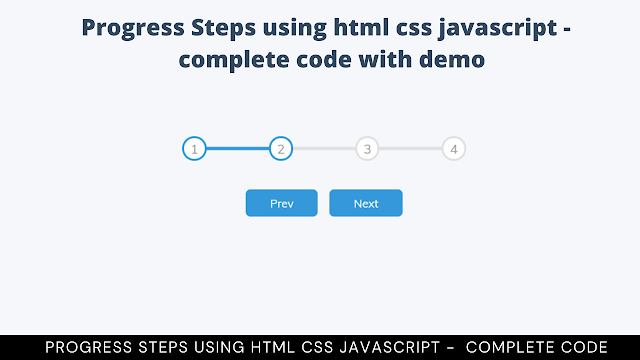
In this blog, you will learn how to create a Multi-Step Progress Bar using HTML CSS & JavaScript. As you can see in the image there will be a total of four steps and two buttons to control that multistep progress bar. Additionally, recently I thought to create Neumorphism Loading Animation, you may like that as well.
By the end of this blog post, you will have a Multi-Step Progress Bar. And, you can implement it in various sections like Registration or signup form.
Video Tutorial of Multi-Step Progress Bar
If you would like to create this multistep progress bar step by step, the video tutorial is provided below. Otherwise, you may continue reading.
Steps to create Multi Step Progress Bar in HTML CSS & JS
1. File Structure
In the initial step, we will create a new directory for our project. You can name it whatever you want, and inside this directory, create two files: index.html and style.css. These files will contain the necessary HTML and CSS code for the card slider.
2. Creating the Multi-Step Progress Bar
In the second step, we will create the layout and style the progress bar & buttons using HTML and CSS. In your index.html file, add the following HTML code to create the basic structure of the multi-step progress bar.
-->1 2 3 4
In your style.css file, add the following CSS code to style the multi-step progress bar. If you want, you can change the font, size, color, and background of the progress bar & buttons by slightly modifying this code.
/* Import Google font — Poppins */ @import url(«https://fonts.googleapis.com/css2?family=Poppins:wght@200;300;400;500;600;700&display=swap»); * < margin: 0; padding: 0; box-sizing: border-box; font-family: "Poppins", sans-serif; >body < height: 100vh; display: flex; align-items: center; justify-content: center; background: #f6f7fb; >.container < display: flex; flex-direction: column; align-items: center; gap: 40px; max-width: 400px; width: 100%; >.container .steps < display: flex; width: 100%; align-items: center; justify-content: space-between; position: relative; >.steps .circle < display: flex; align-items: center; justify-content: center; height: 50px; width: 50px; color: #999; font-size: 22px; font-weight: 500; border-radius: 50%; background: #fff; border: 4px solid #e0e0e0; transition: all 200ms ease; transition-delay: 0s; >.steps .circle.active < transition-delay: 100ms; border-color: #4070f4; color: #4070f4; >.steps .progress-bar < position: absolute; height: 4px; width: 100%; background: #e0e0e0; z-index: -1; >.progress-bar .indicator < position: absolute; height: 100%; width: 0%; background: #4070f4; transition: all 300ms ease; >.container .buttons < display: flex; gap: 20px; >.buttons button < padding: 8px 25px; background: #4070f4; border: none; border-radius: 8px; color: #fff; font-size: 16px; font-weight: 400; cursor: pointer; box-shadow: 0 5px 10px rgba(0, 0, 0, 0.05); transition: all 200ms linear; >.buttons button:active < transform: scale(0.97); >.buttons button:disabled
Finally, add the following JavaScript code to your script.js file to add functionality for creating a multi-step progress bar.
//DOM Elements const circles = document.querySelectorAll(".circle"), progressBar = document.querySelector(".indicator"), buttons = document.querySelectorAll("button"); let currentStep = 1; // function that updates the current step and updates the DOM const updateSteps = (e) => < // update current step based on the button clicked currentStep = e.target.id === "next" ? ++currentStep : --currentStep; // loop through all circles and add/remove "active" class based on their index and current step circles.forEach((circle, index) =>< circle.classList[`$`]("active"); >); // update progress bar width based on current step progressBar.style.width = `$<((currentStep - 1) / (circles.length - 1)) * 100>%`; // check if current step is last step or first step and disable corresponding buttons if (currentStep === circles.length) < buttons[1].disabled = true; >else if (currentStep === 1) < buttons[0].disabled = true; >else < buttons.forEach((button) =>(button.disabled = false)); > >; // add click event listeners to all buttons buttons.forEach((button) => < button.addEventListener("click", updateSteps); >); Conclusion and Final Words
By following the steps in this blog post, you have successfully created a Multi-Step Progress Bar using HTML, CSS, and JavaScript. Now it’s up to you to experiment with the code and make it more useful.
If you encounter any problems or your code is not working as expected, you can download the source code files of this Multi Step Progress Bar project by clicking on the given download button. It’s free, and a zip file will be downloaded that contains the project folder with source code files.
Progress Bar With Steps using HTML, CSS, and JavaScript
Hello coders! Welcome to the Codewithrandom blog. In this tutorial, We learn How to create a Progress Bar With Steps using HTML, CSS, and JavaScript. We Create Structure with Html and Give Styling with Css and For Main functionality using JavaScript.
I hope you enjoy this tutoria. So without wasting any time, let’s go to make Step Progress Bar project.
What is Step Progress Bar?

Do you want to learn HTML to JavaScript? 🔥
If yes, then here is our Master Frontend: Zero to Hero eBook! 📚 In this eBook, you’ll learn complete HTML, CSS, Bootstrap, and JavaScript from beginner to advance level. 💪 It includes 450 Projects with source code.
A step progress bar or multi-step progress bar is shows task in a step format, which is like step1 > step2 > step3, etc. It’s highly used in large websites in their form, like e-Commerce website, Social media website etc. In this step progress bar each bar indicates to it’s each step and it’s shows to a user how many it progress to reach the next. It is a very popular and interesting concept that you can find it every large website or webApp, while you creating account or download/upload content there.
Let’s build this amazing concept called step progress bar project. First start from HTML code.
CSS Code of Step Progress Bar
Create CSS file is named style.css then copy all the CSS code given below and paste all those code into your style.css file.
@import url(‘https://fonts.googleapis.com/css?family=Muli&display=swap’); :root < --line-border-fill: #3498db; --line-border-empty: #e0e0e0; >* < box-sizing: border-box; >body < background-color: #f6f7fb; font-family: 'Muli', sans-serif; display: flex; align-items: center; justify-content: center; height: 100vh; overflow: hidden; margin: 0; >.container < text-align: center; >.progress-container < display: flex; justify-content: space-between; position: relative; margin-bottom: 30px; max-width: 100%; width: 350px; >.progress-container::before < content: ''; background-color: var(--line-border-empty); position: absolute; top: 50%; left: 0; transform: translateY(-50%); height: 4px; width: 100%; z-index: -1; >.progress < background-color: var(--line-border-fill); position: absolute; top: 50%; left: 0; transform: translateY(-50%); height: 4px; width: 0%; z-index: -1; transition: 0.4s ease; >.circle < background-color: #fff; color: #999; border-radius: 50%; height: 30px; width: 30px; display: flex; align-items: center; justify-content: center; border: 3px solid var(--line-border-empty); transition: 0.4s ease; >.circle.active < border-color: var(--line-border-fill); >.btn < background-color: var(--line-border-fill); color: #fff; border: 0; border-radius: 6px; cursor: pointer; font-family: inherit; padding: 8px 30px; margin: 5px; font-size: 14px; >.btn:active < transform: scale(0.98); >.btn:focus < outline: 0; >.btn:disabled
Now we have completed our Styling Of Step Progress Bar. Here is our updated output HTML + CSS.
HTML + CSS Output
Now add JavaScript Code for the Step Progress bar Animation When User Click Next Button.
JavaScript Code of Step Progress Bar
after completing HTML and CSS part, Create JavaScript File Is Named main.js Then Copy All The JavaScript Code Given Below And Paste All Those Code Into Your Main.js File.
const progress = document.getElementById('progress') const prev = document.getElementById('prev') const next = document.getElementById('next') const circles = document.querySelectorAll('.circle') let currentActive = 1 next.addEventListener('click', () => < currentActive++ if(currentActive >circles.length) < currentActive = circles.length >update() >) prev.addEventListener('click', () => < currentActive-- if(currentActive < 1) < currentActive = 1 >update() >) function update() < circles.forEach((circle, idx) => < if(idx < currentActive) < circle.classList.add('active') >else < circle.classList.remove('active') >>) const actives = document.querySelectorAll('.active') progress.style.width = (actives.length - 1) / (circles.length - 1) * 100 + '%' if(currentActive === 1) < prev.disabled = true >else if(currentActive === circles.length) < next.disabled = true >else < prev.disabled = false next.disabled = false >> Final Output Of Step Progress bar
Now we have completed our Step Progress bar. Here is our updated output with JavaScript. Hope you like the Step Progress bar. you can see the output video and project screenshots. See our other blogs and gain knowledge in front-end development.
In this post, we learn how to Create a Step Progress bar with HTML, CSS, & JavaScript. If we made a mistake or any confusion, please drop a comment to reply or help you in easy learning.
Written by – Code With Random/Anki
What Is Step Progress Bar?
A Step Progress Bar Or Multi-Step Progress Bar Is Shows Task In A Step Format, Which Is Like Step1 > Step2 > Step3, Etc. It’s Highly Used In Large Websites In Their Form, Like E-Commerce Website, Social Media Website Etc. In This Step Progress Bar Each Bar Indicates To It’s Each Step And It’s Shows To A User How Many It Progress To Reach The Next. It Is A Very Popular And Interesting Concept That You Can Find It Every Large Website Or WebApp, While You Creating Account Or Download/Upload Content There….
How to create Step Progress Bar using HTML, CSS, and JavaScript
This Tutorial, We Learn How To Create A Step Progress Bar Using HTML, CSS, And JavaScript. We Use Simple HTML, CSS, And JavaScript For This Project. A Step Progress Bar Or Multi-Step Progress Bar Is Shows Task In A Step Format, Which Is Like Step1 > Step2 > Step3 etc.
Create HTML File Is Named Index.Html Then Copy All The HTML Code Given Below And Paste All Those Code Into Your Index.Html File.