- Компоненты регистрации и авторизации в модальном окне (Битрикс)
- [Modal] AJAX Login Form using Bootstrap, PHP OOP, MySQL & jQuery
- How to Create AJAX Login Form using PHP OOP & MySQL?
- Step-1) Create MySQL DB & Tables
- Step-2) Build PHP Class
- UserClass.php
- Step-3) Database Connection
- dbconnect.php
- Step-4) Build Modal Login Form
- index.php
- Step-5) PHP Login Process
- login.php
- Step-6) Create User Dashboard Page
- dashboard.php
- Step-7) Add Logout Process
- logout.php
- Step-8) Script.js
- Step-9) custom.css
- Модальное окно авторизации php
- Как выбрать хороший хостинг для своего сайта?
- Как разместить свой сайт на хостинге? Правильно выбранный хороший хостинг — это будущее Ваших сайтов
- Разработка веб-сайтов с помощью онлайн платформы Wrike
- Почему WordPress лучше чем Joomla ?
- Про шаблоны WordPress
- Анимация набора текста на jQuery
- Самые первые настройки после установки движка WordPress
Компоненты регистрации и авторизации в модальном окне (Битрикс)
Хочу рассказать о моем способе решения задачи с авторизацией в модальном окне (Битрикс). Перерыв кучу ссылок, так и не нашел более-менее изящного подхода, поэтому предлагаю вам свой велосипед.
Для начала создадим страничку, которая будет отдавать формы авторизации/регистрации/забытого пароля по параметру в адресной строке.
Итак, выделяем целый раздел /auth/
require $_SERVER["DOCUMENT_ROOT"]."/bitrix/modules/main/include/prolog_before.php"; $APPLICATION->AuthForm('', false, false); Коротко об $APPLICATION->AuthForm — мы получаем отдельные компоненты по параметру в url. Напримерт /auth/?register=yes — выведет нам форму регистрации.
Дальше нам нужны модальные окна, для этого воспользуемся библиотекой Битрикс, а также нужен jquery
var auth = < popup: null, //наш popup showPopup: function(url) < this.popup = BX.PopupWindowManager.create("modal_auth", '', < closeIcon: true, autoHide: true, offsetLeft: 0, offsetTop: 0, overlay : false, draggable: , closeByEsc: true, content: auth.getForm(url), //получаем контент из другого метода overlay: , events: < onPopupClose: function(PopupWindow) < PopupWindow.destroy(); //удаление из DOM-дерева после закрытия >> >); this.popup.show(); >, getForm: function(url) < //отдаем форму по запросу var content = null; $.ajax(< url: url, method: "GET", async: false, success: function (data) < content = data; >>); return content; > > Дальше необходимо кастомизировать шаблоны компонентов:
system.auth.authorize
system.auth.forgotpasswd
system.auth.registration
Все ссылки приводим к виду
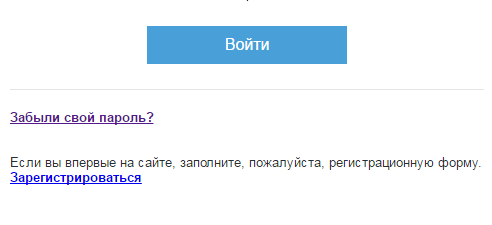
и соответственно нам необходим метод для перехода между формами auth.set
Все input[type=submit] превращаем в input[type=hidden]
и вставляем ссылки для сабмита форма:
[Modal] AJAX Login Form using Bootstrap, PHP OOP, MySQL & jQuery
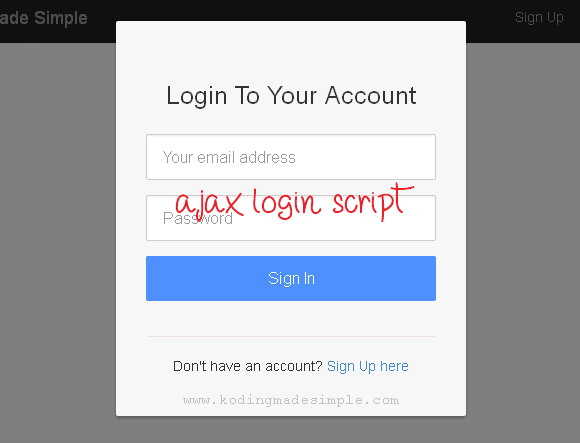
Hi! This time I have come up with jquery ajax login form using bootstrap, php oop & mysql database. And the interesting part is, this login form’s design resembles Google login form but ours is a modal form built with Bootstrap. I always liked Google’s simple and clean style and wanted to try it here and got the chance now. Since our login is a modal form, I’m going to use AJAX to submit form without refresh. So today’s tutorial is about building Modal Login Script using AJAX, PHP OOP & MySQL.
As for user interface I have used bootstrap but with pretty good customization to the css. Also used PHP for server-side processing and MySQL for backend database. The script has Object oriented programming approach and includes complete login logout system in php.
How to Create AJAX Login Form using PHP OOP & MySQL?
We’ll need database for the demo. So let’s create it first.
Step-1) Create MySQL DB & Tables
CREATE DATABASE IF NOT EXISTS `db_login`; USE `db_login`; CREATE TABLE IF NOT EXISTS `users` ( `id` int(9) NOT NULL AUTO_INCREMENT, `name` varchar(30) NOT NULL, `email` varchar(60) NOT NULL, `password` varchar(40) NOT NULL, PRIMARY KEY (`id`), UNIQUE KEY `email` (`email`) ) ENGINE=MyISAM DEFAULT CHARSET=latin1 AUTO_INCREMENT=2; INSERT INTO `users` (`id`, `name`, `email`, `password`) VALUES (1, 'Test', 'test@mydomain.com', '098f6bcd4621d373cade4e832627b4f6');
Step-2) Build PHP Class
Next create the php class for login module. The class includes three functions 1. userLogin() to authenticate user, 2. userLogout() for logging out user and destroy session and 3. escapeString() which is used to escape user input to avoid sql injection.
UserClass.php
db = $db; > function userLogin($email, $pwd) < $result = $this->db->query("SELECT * FROM users WHERE email = '" . $email. "' and password = '" . md5($pwd) . "'"); if ($result->num_rows > 0) < // success @session_start(); $row = $result->fetch_assoc(); $_SESSION['user_id'] = $row['id']; $_SESSION['user_name'] = $row['name']; return true; > else < // login fail return false; >> function userLogout() < session_destroy(); unset($_SESSION['user_id']); unset($_SESSION['user_name']); return; >function escapeString($str) < return $this->db->real_escape_string($str); > > ?> Step-3) Database Connection
Next we’ll create a separate file for database connection. It uses mysqli library for establishing php connection to mysql server. Please make sure to change the connection details like username, password to yours.
dbconnect.php
connect_errno) die('Error ' . $this->db->connect_error); include_once('UserClass.php'); $con = new UserClass($db); ?> Step-4) Build Modal Login Form
We need to create our user interface. Create a file named ‘index.php’ in application root and build modal form using bootstrap. The modal login form wouldn’t be visible at first and would be shown when the user clicks on ‘Login’ menu on top navigation.
index.php
This login form includes jquery validation and both ‘Email’ & ‘Password’ fields are required. Input fields will be highlighted with red color if user fails to enter the details.
Once the user fill in the credentials and clicks on ‘Sign In’ button, form data will be posted to the backend php script using jQuery Ajax() method.
It will be processed there and if user credentials are valid they will taken to the Dashboard page. Else proper error message will be shown in the login form.
Step-5) PHP Login Process
Next create ‘login.php’, here is the form data will be submitted and processed against database.
login.php
escapeString($_POST['email']); $upwd = $con->escapeString($_POST['password']); echo $con->userLogin($uemail, $upwd); > ?>
Step-6) Create User Dashboard Page
This is the dashboard page where the users will be redirected once they are logged in to the website. This page remains inaccessible for guests. Only logged in users get to access it and if not they will be redirected to index page.
dashboard.php
Step-7) Add Logout Process
Then create a file ‘logout.php’ which will be executed when user clicks on ‘Logout’ button. The script destroys user session and flush out the user data stored in session variables.
logout.php
userLogout(); header('Location: index.php'); ?> Step-8) Script.js
This is the JavaScript file loaded in the index page. It contains all jquery functions we have used to validate the login form and Ajax function to submit the user data to login.php file.
$('document').ready(function() < $('#email').on('focus', function () < $('#email').removeClass('error'); >); $('#email').on('blur', function () < if ($('#email').val() == '') < $('#email').addClass('error'); >>); $('#password').on('focus', function () < $('#password').removeClass('error'); >); $('#password').on('blur', function () < if ($('#password').val() == '') < $('#password').addClass('error'); >>); $('#login-form').on('submit', function (e) < e.preventDefault(); $('#err-msg').html(''); var err = false; if ($('#email').val() == '') < $('#email').addClass('error'); err = true; >if ($('#password').val() == '') < $('#password').addClass('error'); err = true; >if (err == true) < return false; >$.ajax( < type: 'POST', url: 'login.php', data: $('#login-form').serialize() + '&' + $('#login').attr('name') + '=' + $('#login').val(), success: function(status)< if (status == true) < $('#login').val('Signing in. '); setTimeout('window.location.href = "dashboard.php";',3000); >else < $('#err-msg').html('Invalid email or password!'); $('#email').val(''); $('#password').val(''); > > >); >); >); Step-9) custom.css
Finally our custom stylesheet for the login form. It includes the css I have used to override bootstrap styles and some additional styles for designing the login form.
* < border-radius: 2px !important; -moz-border-radius: 2px !important; -webkit-border-radius: 2px !important; >.login-modal-container < max-width: 350px; width: 100% !important; background-color: #F7F7F7; margin: 0 auto; padding: 20px; box-shadow: 0px 2px 2px rgba(0, 0, 0, 0.3); overflow: hidden; >.login-modal-container .modal-body < padding: 20px 10px; >.login-modal-container .modal-footer < text-align: center; margin: 0 10px; >.login-modal-container h2 < text-align: center; font-size: 25px; margin-bottom: 25px; >.login-modal-container input < font-size: 16px; >.login-modal-container input[type=submit] < background-color: #4D90FE; border: 2px solid #4D90FE; text-shadow: 0 1px rgba(0,0,0,0.1); >.login-modal-container input[type=submit]:hover < background-color: #357AE8; border: 2px solid #357AE8; >.error
Please make sure to include ‘custom.css’ after loading ‘bootstrap.css’ for the styles to kick in and take effect.
Done! We have finished the coding part. Now to test this ajax login script, run index.php and you will see page like this.
Click on ‘Login’ button on the top and it will launch the modal login form.

Click on the ‘Sign In’ button without providing email or password will trigger validation error and the corresponding fields will be highlighted with red color like this,

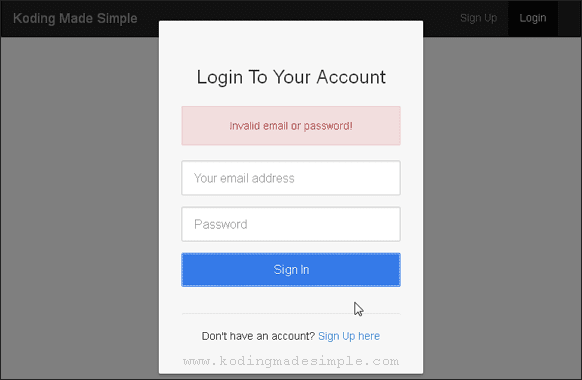
If the email and password doesn’t match up with the database details, then you’ll be shown error message like this,
To test successful login, enter ‘test@mydomain.com’ for email and ‘test’ for password field and click on ‘Sign In’ button.
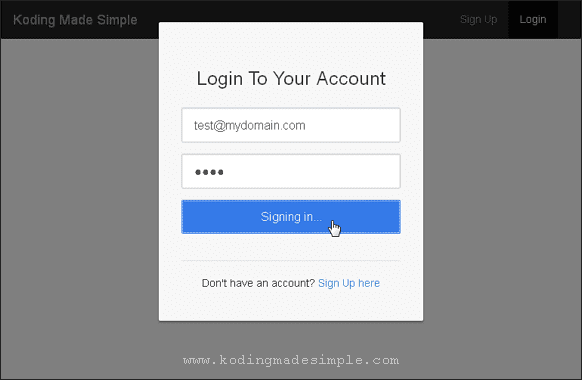
These are the valid login details, so you will see ‘Signing in. ‘ message on the form and will be redirected to Dashboard page.
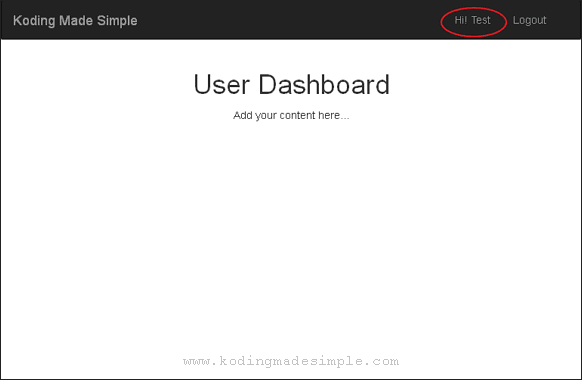
Since you are logged in to the system, you will see ‘Logout’ button on top menu. Clicking it will logout you and redirects to index page. That accounts for our ajax login logout system.
Well! That explains about building ajax login script using php oop, mysql & jquery. I hope you liked this tutorial. Meet you in another interesting post.
Модальное окно авторизации php


Частная коллекция качественных материалов для тех, кто делает сайты

- Creativo.one2000+ уроков по фотошопу
- Фото-монстр300+ уроков для фотографов
- Видео-смайл200+ уроков по видеообработке
- Жизнь в стиле «Кайдзен» Техники и приемы для гармоничной и сбалансированной жизни
В этом разделе перечислены все уроки без разделения по рубрикам.
Выбирайте тот урок, который интересует Вас больше всего на данный момент. К каждому уроку Вы можете оставить свой комментарий, а также проголосовать.
Как выбрать хороший хостинг для своего сайта?
Выбрать хороший хостинг для своего сайта достаточно сложная задача. Особенно сейчас, когда на рынке услуг хостинга действует несколько сотен игроков с очень привлекательными предложениями. Хорошим вариантом является лидер рейтинга Хостинг Ниндзя — Макхост.
Создан: 15 Апреля 2020 Просмотров: 10598 Комментариев: 0
Как разместить свой сайт на хостинге? Правильно выбранный хороший хостинг — это будущее Ваших сайтов
Проект готов, Все проверено на локальном сервере OpenServer и можно переносить сайт на хостинг. Вот только какую компанию выбрать? Предлагаю рассмотреть хостинг fornex.com. Отличное место для твоего проекта с перспективами бурного роста.
Создан: 23 Ноября 2018 Просмотров: 18149 Комментариев: 0

Разработка веб-сайтов с помощью онлайн платформы Wrike
Создание вебсайта — процесс трудоёмкий, требующий слаженного взаимодействия между заказчиком и исполнителем, а также между всеми членами коллектива, вовлечёнными в проект. И в этом очень хорошее подспорье окажет онлайн платформа Wrike.

Почему WordPress лучше чем Joomla ?
Этот урок скорее всего будет психологическим, т.к. многие люди работают с WordPress и одновременно с Joomla, но не могут решится каким CMS пользоваться.
Создан: 26 Августа 2017 Просмотров: 28582 Комментариев: 0

Про шаблоны WordPress
После установки и настройки движка нам нужно поработать с дизайном нашего сайта. Это довольно долгая тема, но мы постараемся рассказать всё кратко и ясно.
Создан: 3 Августа 2017 Просмотров: 26536 Комментариев: 0

Анимация набора текста на jQuery
Сегодня мы бы хотели вам рассказать о библиотеке TypeIt — бесплатном jQuery плагине. С её помощью можно имитировать набор текста. Если всё настроить правильно, то можно добиться очень реалистичного эффекта.
Самые первые настройки после установки движка WordPress
Сегодня мы вам расскажем какие первые настройки нужно сделать после установки движка WordPress. Этот урок будет очень полезен для новичков.