# Entry — Однострочное текстовое поле
Элемент Entry представляет поле для ввода текста. Конструктор Entry принимает следующие параметры:
где master — ссылка на родительское окно, а options — набор следующих параметров:
- bg: фоновый цвет
- bd: толщина границы
- cursor: курсор указателя мыши при наведении на текстовое поле
- fg: цвет текста
- font: шрифт текста
- justify: устанавливает выравнивание текста. Значение LEFT выравнивает текст по левому краю, CENTER — по центру, RIGHT — по правому краю
- relief: определяет тип границы, по умолчанию значение FLAT
- selectbackground: фоновый цвет выделенного куска текста
- selectforeground: цвет выделенного текста
- show: задает маску для вводимых символов
- state: состояние элемента, может принимать значения NORMAL (по умолчанию) и DISABLED
- textvariable: устанавливает привязку к элементу StringVar
- width: ширина элемента
from tkinter import * root = Tk() root.title("Welcome to entry app") text = Entry(root, width=50) text.pack() root.mainloop() from tkinter import * root = Tk() root.title("Welcome to the second entry app") text1 = Entry(root, width=20) text1.pack() text2 = Entry(root, width=50) text2.pack() root.mainloop() from tkinter import * root = Tk() root.title("Welcome to the second entry app") label_login = Label(root, text="Login") label_login.pack() text1 = Entry(root, width=50) text1.pack() label_pass = Label(root, text="Password") label_pass.pack() text2 = Entry(root, width=50) text2.pack() button = Button(root, text="Enter") button.pack() root.mainloop() from tkinter import * def check_pass(): if entry_login.get() and entry_pass.get(): label_welcome.configure(text="Welcome. ") else: label_welcome.configure(text="Please enter the login\nand the password.") root = Tk() root.title("Welcome to the second entry app") label_login = Label(root, text="Login") label_login.pack() entry_login = Entry(root, width=10) entry_login.pack() label_pass = Label(root, text="Password") label_pass.pack() entry_pass = Entry(root, width=10, show='%') entry_pass.pack() button = Button(root, text="Enter", command=check_pass) button.pack() label_welcome = Label(root) label_welcome.pack() root.mainloop() Для работы с текстом, находящимся в текстовом поле, необходимо создать переменную в которой будут храниться значения, которые будут выводиться или считываться в текстовом поле. Общий вид программы зададим следующий:
from tkinter import * root = Tk() root.title("Welcome to entry app") message = StringVar() message.set("Any") text = Entry(root, width=10, textvariable=message) text.pack() root.mainloop() Здесь команда message.set(«Any») — устанавливает значение переменной равное строке «Any». И параметру textvariable присваивается значение переменной message.
Исследуйте переменную message добавив недостающий следующий код:
message = StringVar() print(message) print(type(message)) message.set("Any") print(message) print(message.get()) Подумайте над последовательностью и работой команд message.set() и message.get() . Что происходит при выполнении каждой из команд?
Определим элемент Entry и по нажатию на кнопку выведем его текст в отдельное окно с сообщением:
from tkinter import * from tkinter import messagebox def show_message(): messagebox.showinfo("GUI Python", message.get()) root = Tk() root.title("GUI на Python") root.geometry("300x250") message = StringVar() message_entry = Entry(textvariable=message) message_entry.pack() message_button = Button(text="Click Me", command=show_message) message_button.pack() root.mainloop() Для вывода сообщения здесь применяется дополнительный модуль messagebox, содержащий функцию showinfo() , которая собственно и выводит введенный в текстовое поле текст. Для получения введенного текста используется StringVar .
Теперь создадим более сложный пример с формой ввода:
from tkinter import * from tkinter import messagebox def display_full_name(): messagebox.showinfo("GUI Python", name.get() + " " + surname.get()) root = Tk() root.title("GUI на Python") name_label = Label(text="Введите имя:") name_label.grid(row=0, column=0, sticky="w") name = StringVar() name_entry = Entry(textvariable=name) name_entry.grid(row=0, column=1) surname_label = Label(text="Введите фамилию:") surname_label.grid(row=1, column=0, sticky="w") surname = StringVar() surname_entry = Entry(textvariable=surname) surname_entry.grid(row=1, column=1) message_button = Button(text="Click Me", command=display_full_name) message_button.grid(row=2, column=1) root.mainloop() # Методы Entry
Методы для виджетов — это встроенные функции, которые позволяют менять объект или получать информацию о нем.
Виджет Entry имеет ряд методов. Основные из них:
- insert(index, str) : вставляет в текстовое поле строку по определенному индексу;
- get() : возвращает введенный в текстовое поле текст;
- delete(first, last=None) : удаляет символ по индексу first . Если указан параметр last , то удаление производится до индекса last . Чтобы удалить до конца, в качестве второго параметра можно использовать значение END .
Используем методы в программе:
from tkinter import * from tkinter import messagebox def clear(): name_entry.delete(0, END) surname_entry.delete(0, END) def display(): messagebox.showinfo("GUI Python", name_entry.get() + " " + surname_entry.get()) root = Tk() root.title("GUI на Python") name_label = Label(text="Введите имя:") name_label.grid(row=0, column=0, sticky="w") name_entry = Entry() name_entry.grid(row=0,column=1) name_entry.insert(0, "Tom") surname_label = Label(text="Введите фамилию:") surname_label.grid(row=1, column=0, sticky="w") surname_entry = Entry() surname_entry.grid(row=1, column=1) surname_entry.insert(0, "Soyer") display_button = Button(text="Display", command=display) display_button.grid(row=2, column=0) clear_button = Button(text="Clear", command=clear) clear_button.grid(row=2, column=1) root.mainloop() При запуске программы в оба текстовых поля добавляется текст по умолчанию:
name_entry.insert(0, "Tom") surname_entry.insert(0, "Soyer") Кнопка Clear очищает оба поля, вызывая метод .delete() :
def clear(): name_entry.delete(0, END) surname_entry.delete(0, END) Вторая кнопка, используя метод .get() , получает введенный текст:
def display(): messagebox.showinfo("GUI Python", name_entry.get() + " " + surname_entry.get()) Как видно из примера, нам необязательно обращаться к тексту в Entry() через переменные типа StringVar() , можно это сделать напрямую через метод .get() .
# Упражнения
- Создайте окно с текстовым полем Entry , и задайте значение текстового поля: «Текстовое поле вводит и выводит текст только одной строкой», используя метод .insert() .
- Используя переменную StringVar() . Создайте окно с текстовым полем и двумя кнопками:
- кнопкой «Paste», при нажатии на которую, в текстовом поле выводится текст: «The button clicked!».
- кнопкой «Clear», при нажатии на которую, текст в текстовом поле стирается.
- кнопкой «Paste», при нажатии на которую, в текстовом поле выводится текст: «The button clicked!».
- кнопкой «Clear», при нажатии на которую, текст в текстовом поле стирается.
The first line The second line - при нажатии на вторую кнопку, должны выводиться значения первого и второго полей в консоль с пояснениями в виде:
"Значение первого поля: " "Значение второго поля: " Tkinter – Clear Entry box
The Entry function has a method called delete() which is used to delete the data currently within the Entry box. Don’t worry, the “delete” function will not in any way delete the widget. That’s what the destroy() function is for.
Syntax
The delete() method takes two parameters in total. The first is compulsory, and without it an error will occur. The second is optional.
Passing only one parameter allows us to delete a single character using it’s index position. Remember, indexing in Python starts from 0. The below code will delete the second character, located at index 1.
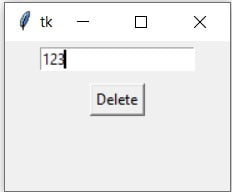
from tkinter import * def delete(): myentry.delete(1) root = Tk() root.geometry('180x120') myentry = Entry(root, width = 20) myentry.pack(pady = 5) mybutton = Button(root, text = "Delete", command = delete) mybutton.pack(pady = 5) root.mainloop() Below is a sample output of what the above code would produce.
The second parameter defines the end point. Any characters in the between the indexes of the first and second parameters will be deleted (including the characters at the indexes). For instance, passing 1 and 3 into the delete() method will delete the characters at the 1 st , 2 nd and 3 rd Indexes.
An example demonstrating this is shown below.
Example
Below we’ve used a special character called ‘end’. Using this will automatically determine the end point of the contents and set it to that.
The code below will delete all the characters from index 3 to the end of the contents of the entry widget.
from tkinter import * def delete(): myentry.delete(3, 'end') root = Tk() root.geometry('180x120') myentry = Entry(root, width = 20) myentry.pack(pady = 5) mybutton = Button(root, text = "Delete", command = delete) mybutton.pack(pady = 5) root.mainloop() Below we’ve included a short video of us interacting with the output of the above code.
As expected, it will delete characters starting from index “3”. Any characters before that will remain.
Bonus fact: You can also use END in place of ‘end’. If you didn’t use the import * statement from tkinter, it will be Tkinter.END .
This marks the end of the Tkinter Clear Entry article. Any suggestions or contributions for CodersLegacy are more than welcome. Questions regarding the article can be asked in the comments section below.