Simple Website Using HTML and CSS with Source code
In this tutorial, we will create a simple website using HTML and CSS. You will learn how to create a landing page, add content to your website, and style your website with CSS. By the end of this tutorial, you will have a simple website using HTML and CSS based.
If you’re looking to create a simple website using HTML and CSS, you’ve come to the right place. In this article, we’ll provide you with the source code for a basic HTML and CSS website, as well as some tips on how to customize it to fit your needs.
Simple Website Using HTML and CSS With Source Code
Creating a website with HTML and CSS is relatively easy – even if you don’t have any prior experience coding. With our simple website code, all you need to do is copy and paste the code into your text editor, save it as an HTML file, and open it in your web browser. From there, you can start making changes to the code to personalize your site.
Not sure where to start? No problem! We’ve included some helpful comments in the code itself to guide you through the process. And if you get stuck, there are plenty of resources available online (like w3schools.com) that can help you troubleshoot any issues.
Once you have your website up and running, don’t forget to promote it! You can share your site’s URL on social media, or even submit it to search engines like Google so that people can find it when they’re searching for related topics.
How to Create a Website Using HTML Code
If you’re looking for a simple website using HTML and CSS, this source code is for you. This code uses basic HTML and CSS to create a clean, minimal website. You can easily customize this code to suit your needs. Simply edit the HTML and CSS files and upload them to your server. That’s it!
This source code is released under the MIT license, so feel free to use it however you like. If you have any questions or comments, feel free to leave them below. Thanks for reading!
The Hub of Technology
Web Designing
Web Development
Desktop Application
Authors
Admin
Manager
Accountant
Contact Us
Name
Email
Message
Once you did that, then the next thing you need to the CSS to design that. So, let me show you the CSS code to design it.
That’s for creating a simple website using HTML and CSS, inside the tutorial, you’ve got basic knowledge that use to make a simple website. So, If you want to learn it step by step practically, I have a video tutorial on it. You can watch it and learn that step by step
Simple Website using HTML CSS and JavaScript With Source Code
Hey Guys, recently I’ve made the complete tutorial with source How to Make Simple Website Using HTML CSS and JavaScript with Source Code. Inside the website, you will learn How to use HTML and CSS3 to design the main page.
Once you design the page using HTML and CSS3, then you will learn How to use JavaScript inside your website the display the countdown timer. So, I’m going to share with you the tutorial and also the source code of the project.
Website Comming Soon
Our Website Under Construction, We Are Working on it, We Will Rady to Lunch it After
Days
Hours
Minutes
Second
Subscribe Now to Get Updates Subscribe Now
Once you have done that, then you need to style it using CSS3, So, I’m going to share with you the CSS code that are help you to manage the page.
Finally, you need JavaScript to display the countdown timer on the front page of the website. So, you can change the countdown timer. So, Let’s check the JS code.
Hope you’ve got ideas from the source code of the project. If you face any problem with the code, you can watch the complete video tutorial. Inside the tutorial you will learn step by step usage of HTML CSS and JavaScript to make a website.
Guys, I hope you’ve learn many new things from the video tutorial. I also made another tutorial that are help you to create a website from scratch using HTML and CSS.
Create a Website Using HTML and CSS With Source Code
It’s landing page website inside that I’ve used video background, you can learn how to use video as a background inside the website. SO, hope this tutorial is helpful and beneficial for you.
Conclusion
In this tutorial, we have learned how to create a simple website using HTML and CSS with source code. We have also included the source code for the website so that you can easily modify it to your own needs.
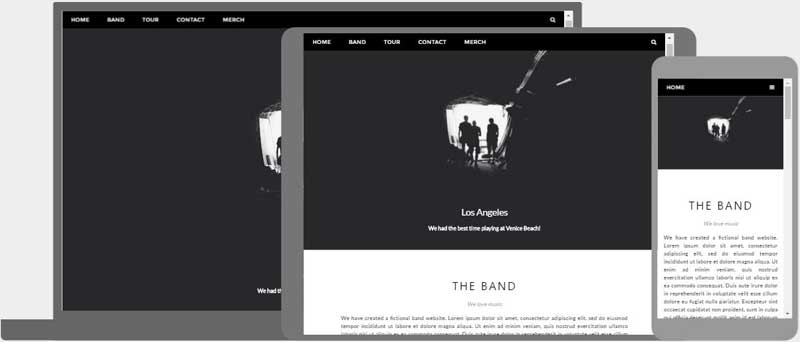
Learn how to create a fast and awesome responsive website that will work on all devices, PC, laptop, tablet, and phone.
Create a Website with a CSS Framework
Ever heard about W3Schools Spaces? Here you can create your website from scratch or use a template.
A «Layout Draft»
It is always wise to draw a layout draft of the page design before building a website.
Having a «Layout Draft» will make it a lot easier to create a web site:
Navigation bar
The Band
Article
Article
Article
Footer
Doctype, Meta Tags, and CSS
The doctype should define the page as an HTML5 document:
A meta tag should define the character set to be UTF-8:
A viewport meta tag should make the web site work on all devices and screen resolutions:
W3.CSS should take care of all our styling needs and all device and browser differences:
To learn more about styling with W3.CSS, please visit our W3.CSS Tutorial.
Our first empty web page will look much like this:
Note: If you want to create a website from scratch, without the help of a CSS framework, read our How To Make a Website Tutorial.
Creating Page Content
Inside the element of our web site we will use our «Layout Picture» and create:
A navigation bar
A slide show
A header
Some sections and articles
A footer
Semantic Elements
HTML5 introduced several new semantic elements. Semantic elements are important to use because they define the structure of web pages and helps screen readers and search engines to read the page correctly.
These are some of the most common semantic HTML elements:
The element can be used to define a part of a website with related content.
The element can be used to define an individual piece of content.
The element can be used to define a header (in a document, a section, or an article).
The element can be used to define a footer (in a document, a section, or an article).
The element can be used to define a container of navigation links.
In this tutorial we will use semantic elements.
However, it is up to you if you want to use elements instead.
The Navigation Bar
On our «Layout Draft» we have a «Navigation bar».
We can use a or element as a container for the navigation links.
The w3-bar class is a container for navigation links.
The w3-black class defines the color of the navigation bar.
The w3-bar-item and w3-button class styles the navigation links inside the bar.
Slide Show
On the «Layout Draft» we have a «Slide show».
For the slide show we can use a or element as a picture container:
We need to add a little JavaScript to change the images every 3 seconds:
// Automatic Slideshow — change image every 3 seconds var myIndex = 0; carousel();
function carousel() var i; var x = document.getElementsByClassName(«mySlides»); for (i = 0; i < x.length; i++) x[i].style.display = "none"; > myIndex++; if (myIndex > x.length) x[myIndex-1].style.display = «block»; setTimeout(carousel, 3000); >
Sections and Articles
Looking at the «Layout Draft» we can see that the next step is to create articles.
First we will create a or element containing band information:
The w3-container class takes care of standard padding.
The w3-center class centers the content.
The w3-wide class provides a wider heading.
The w3-opacity class provides text transparency.
The max-width style sets a maximum with of the band description section.
Then we will add a paragraph describing the band:
We have created a fictional band website. Lorem ipsum dolor sit amet, consectetur adipiscing elit, sed do eiusmod tempor incididunt ut labore et dolore magna aliqua.
The w3-justify class justifies the text’s right and left margins.
Then create a or with an or about each band-member:
John
Paul
Ringo
Footer
Finally we will use a or to create a footer:
The fa fa classes are Font Awesome Icon classes.
To use these classes you must link to a Font Awesome library:
To learn more about using icons, please visit our Icons Tutorial.