- Web Programming Step by Step Lab 1: Basic HTML and CSS
- Lab 1 Resources
- Exercises for Today:
- Exercise 1: About Me Page (roughly 20-25 minutes)
- Exercise 2: Style Your Page with CSS (roughly 15 minutes)
- Exercise 3: Validate Your Page and CSS (roughly 10 minutes)
- Exercise 4: Upload Your Page to the Web (roughly 10 minutes)
- Exercise 5 (advanced): Advanced Style Techniques
- Exercise 6 (advanced): Favorite Movie
- Exercise 7 (for uber-1337 h4x0rz only): Decrementing ol
- Lab exercise on html
- Overview
- Required Resources
- References
- Exercise 0: Build Dog’s website from scratch
- Exercise 1: Make the page your own
- Exercise 2: Style your page using Chrome Inspector (F12) or FireBug
- Exercise 3: Add and style a table of courses
- Exercise 4: Positioning
- Exercise 5: Add a Form
- Exercise 6: Codecademy Exercises
- Lab 1: HTML and CSS
- Overview
- Required Resources
- References
- Learning HTML
- Exercise 0: Set up the barebones of Doggo’s website
- Exercise 1: Set up the «About Me» section
- Exercise 2: Finish setting up the other sections yourself.
- Learning CSS
- Exercise 3: Add and style a table of courses
- Exercise 4: Make it your own
- Exercise 5: Codecademy Exercises
Web Programming Step by Step
Lab 1: Basic HTML and CSS
The purpose of this lab is to practice writing basic web pages with HTML and CSS and uploading them to the Web.
Lab 1 Resources
- Lecture Slides
- Web Programming Step by Step textbook Ch. 2, and Ch. 3 section 3.1
- Solution to this lab, so you can see how your page is supposed to look and work
Exercises for Today:
Exercise 1: About Me Page (roughly 20-25 minutes)
Create a page named aboutme.html that describes you. (If you are using a lab computer, you can do this using the installed TextPad editor.) On your page, include some or all of the following information:
- Your name
- A description of yourself in two sentences or less. Emphasize the most important word(s) by putting them in bold.
- A list of classes you are taking right now at UW.
- Your 3 favorite movies, books, or TV shows, in order. Make at least one link to an interesting site about that tv show/movie/book, such as its IMDB page.
- Two images, one that represents you when you’re happy and the other to represent you when you’re sad.
(These can be any images you like. Consider searching for images on Google Image Search) blockquote or q tags). —> - Something interesting about one or more of your neighbors (people sitting at computers next to you)
(You may be tempted to spend all 50 of your minutes on this part of the lab. But try to keep the page somewhat short so that you can attempt some of the other exercises.)
To see your page in the web browser, in TextPad click View, In Web Browser. Or in Firefox, click File, Open File. and browse to your page file to open it.
 OR
OR 

Write your page using valid XHTML 1.1. Include a link from your page to the W3C XHTML Validator, using the following image and linking to the following site:
The next task will be to write a stylesheet for your page, so also include a link to the W3C CSS Validator, using the following image and linking to the following site:
- image: http://jigsaw.w3.org/css-validator/images/vcss
- site: http://jigsaw.w3.org/css-validator/check/referer
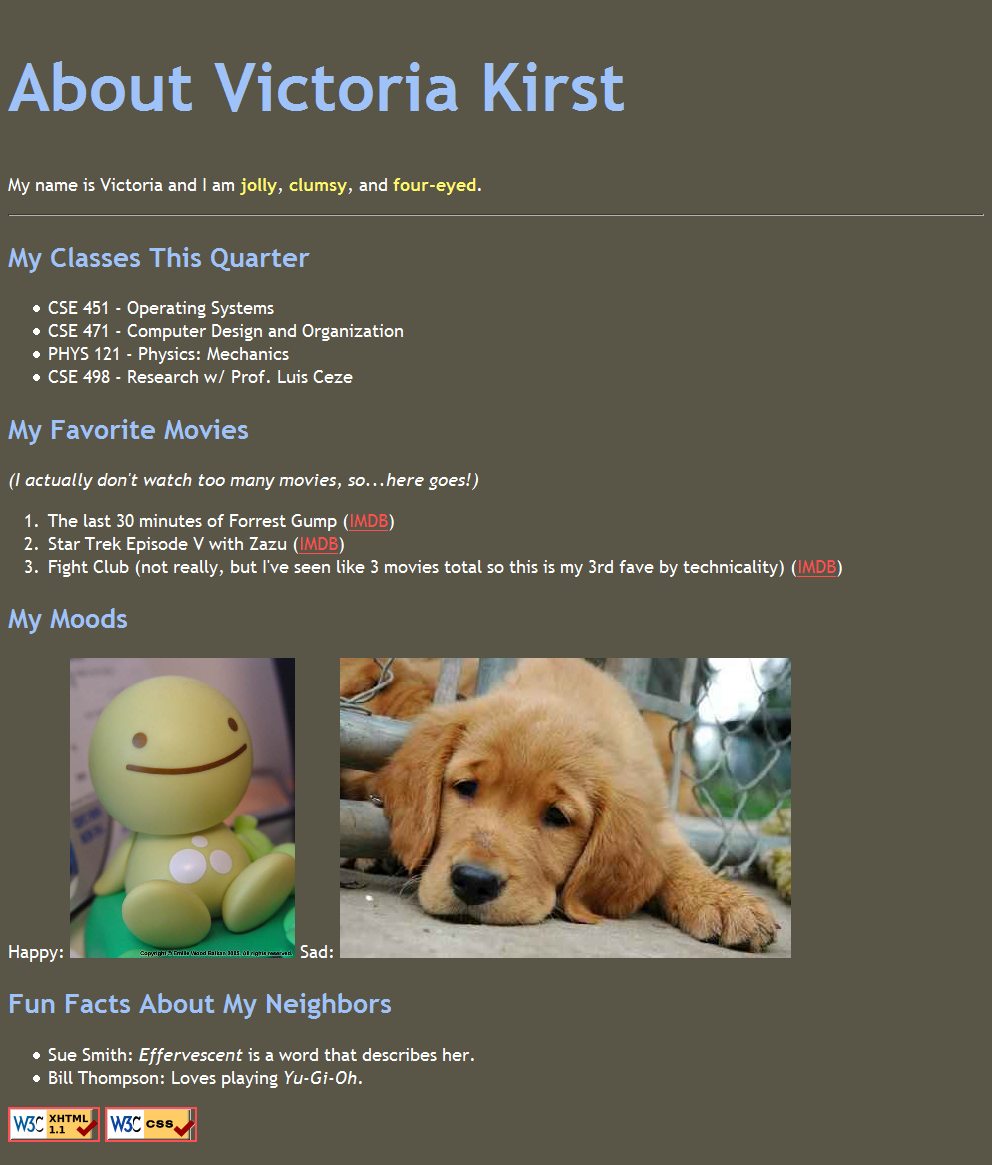
For example, the following About Me page describes textbook coauthor, Victoria Kirst (between, but not including, the thick black lines):

Exercise 2: Style Your Page with CSS (roughly 15 minutes)
Create a stylesheet named aboutme-style.css to improve the appearance of your About Me page. Your stylesheet should do the following without any modification to your HTML code:
- Change the color of at least two elements
- Change the font properties of at least two elements (such as family, size, weight, style). Here are some standard fonts you may want to use:
Arial , Arial Black , Verdana , Trebuchet MS , Georgia , Tahoma , Courier New , Times New Roman - Change at least one other thing of your choosing (such as background color, text alignment, etc.)
For example, this is Victoria’s styled version of her page in Exercise 1 (between, but not including, the thick black lines):
Exercise 3: Validate Your Page and CSS (roughly 10 minutes)
Next, validate your HTML and CSS code to make sure they match the strict XHTML 1.1 specifications. To run the validators, do the following:
- Open http://validator.w3.org/ (for XHTML) or http://jigsaw.w3.org/css-validator/ (for CSS)
- Click Browse in the Validate by File Upload section
- Locate the local file and click Open
- Click Check
- If there are any errors, fix the first one, then repeat steps 1 through 4.
The key thing is to get the green bar saying that your page is valid XHTML. If you see any yellow warnings about being tentatively valid, this is okay. Red errors are not okay.
referer . The catch is the page has to be accessible by the general public to use this link. Clicking this link from a local file will result in a No Referer header found! error. This link will work after you upload to Webster.
Exercise 4: Upload Your Page to the Web (roughly 10 minutes)
Follow your instructor’s directions for how to upload your page to your student web server. Verify that you did this successfully by viewing your page in the web browser.
Exercise 5 (advanced): Advanced Style Techniques
If you manage to complete the first four exercises before lab time is up, edit your stylesheet to also do the following:
- Your hyperlinks should not have an underline by default. When a user hovers over the link, the underline should appear.
Hint: The property you are looking for is a type of CSS pseudo-class . - Every paragraph should start with a drop-caps that is 1.5 times the size of the normal paragraph font size.
Hint: The property you are looking for is a type of CSS pseudo-element .
These are techniques that we have not covered in class, so you will need to use Google or a CSS reference such as W3Schools to figure out how to get this done. Once again, you should be able to make these stylistic changes without modifying your HTML.
For example, these are snippets of TA Victoria’s updated page, showing links and drop-caps (between, but not including, the thick black lines):

Links: (hover is not shown)

Drop-caps:
Exercise 6 (advanced): Favorite Movie
Choose one of the favorite movies or TV shows you listed and look it up on imdb.com. In your aboutme.html , reproduce some of the content of the IMDB page in a nested list under the chosen movie’s bullet.
- IMDB contains a lot of information in short topic: → value pairs, such as Genre: Comedy . Information where a word or phrase is associated with some information is a good candidate for an HTML element called a definition list.
- Definition lists will not be covered in lecture, though they are mentioned briefly in the textbook in Ch. 2 (slides).
- Nested lists have not been covered in lecture yet, though they are mentioned in the textbook in Ch. 2 (slides) and in our lecture slides (slides).
- You may also want to use Google or a reference such as W3Schools for more information about how to use these HTML structures.
For example, this is Victoria’s new Favorite Movies list (between, but not including, the thick black lines):

Exercise 7 (for uber-1337 h4x0rz only): Decrementing ol
Modify your About Me page to have your Top 3 movies or tv shows list in decreasing order, starting at 3 and counting downward to 1. The format of the list must look exactly the same as the default format of an ordered list, simply in reverse order. The only change you may make to your HTML is to switch the order of your list items, but otherwise all work must be done by CSS. We aren’t going to give you any hints at all; you must figure it out on your own, using the web.
Note: This is very tricky! Exercise 7 is only meant for those who are already proficient in CSS, and it is in no way something that majors or non-majors will be expected to do in this course.
For example, this is Victoria’s decrementing Favorite Movies list (between, but not including, the thick black lines):
Lab exercise on html
This lab was held on Thursday, February 4, 2016 at 7:30 P.M. in 32-082.
This is a non-compulsory programming lab to introduce students to webpage building with HTML and CSS.
View the source of this page to see a nicely documented solution to the exercises below.
Last Updated: Sun, Jan 31 2015 at 10:30 P.M.
Overview
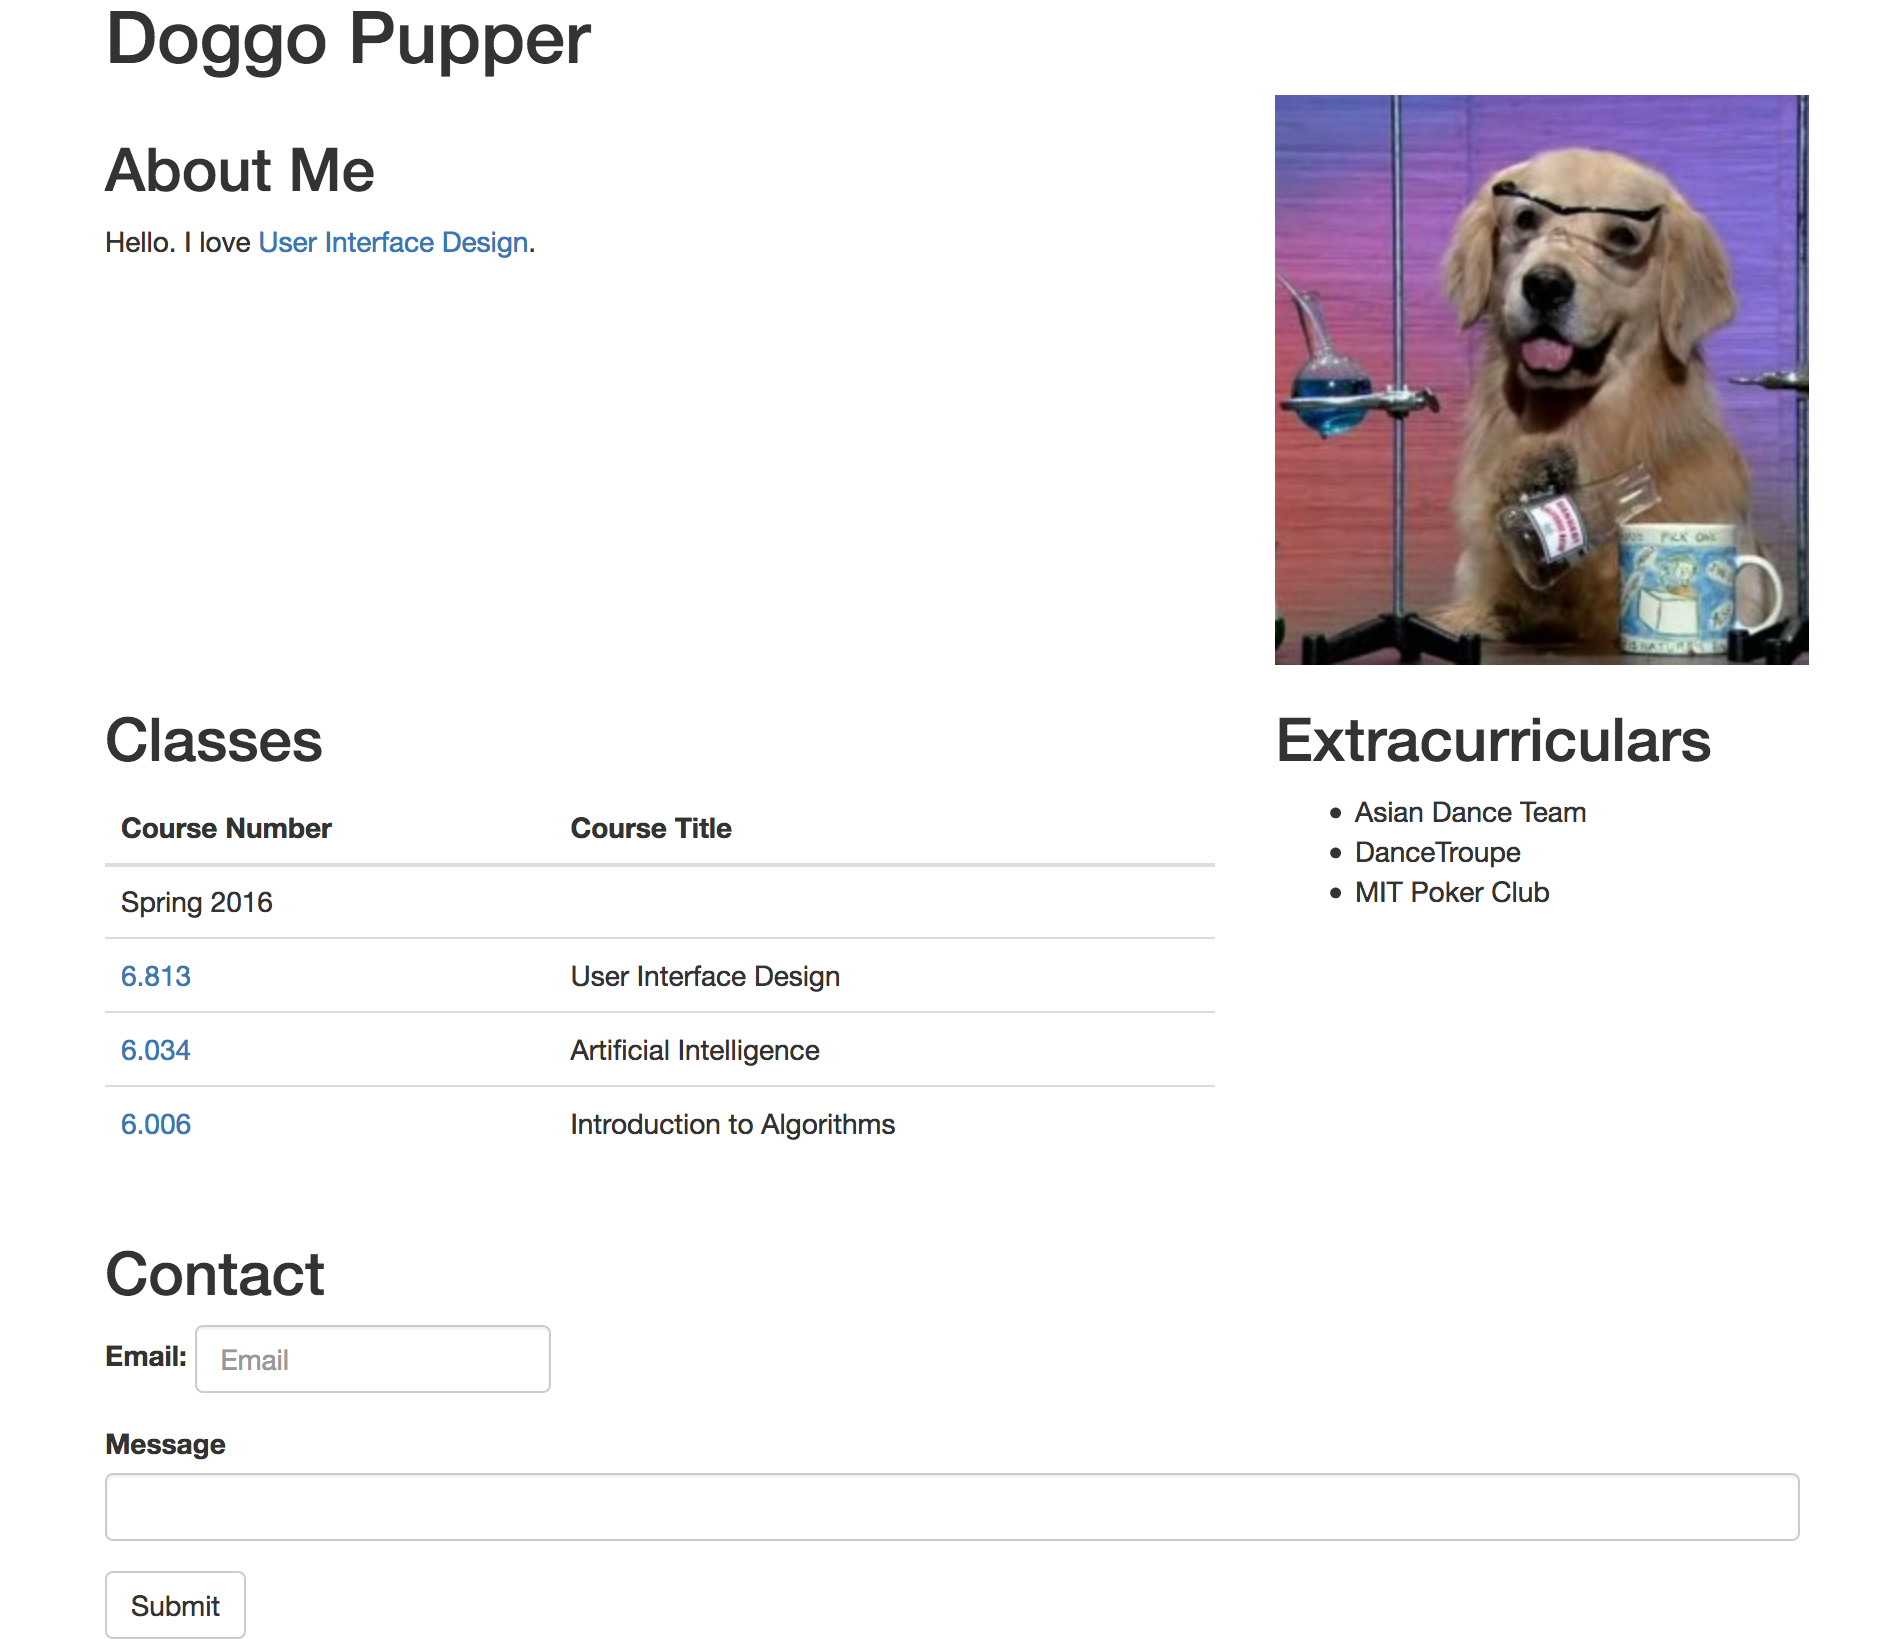
In this programming lab, you will be completing a series of exercises that will help you structure and style web pages. Here’s a picture of what your webpage will look like when you’re done.

Required Resources
You will need a a text editor, preferably with syntax highlighting. We recommend using Sublime Text, available on OS X, Windows and Linux.
References
Exercise 0: Build Dog’s website from scratch
- Use basic HTML tags to define the overall structure of a web page.
- Add some text content to the web page.
- Add an image to the web page.
- Separate the web page into sections and give each section a heading.
- Apply some basic style to the sections using CSS rules.
Exercise 1: Make the page your own
- Replace the name in the page’s title with your own.
- Replace the interests listed with your own.
- Replace the picture of Dog with a picture of yourself.
Exercise 2: Style your page using Chrome Inspector (F12) or FireBug
Use the Chrome Inspector or Firebug to inspect your elements and play with CSS rules. Here is a good reference on CSS selectors.
- Change heading fonts to Georgia and color them maroon.
- Make links colored differently when you hover and have visited them.
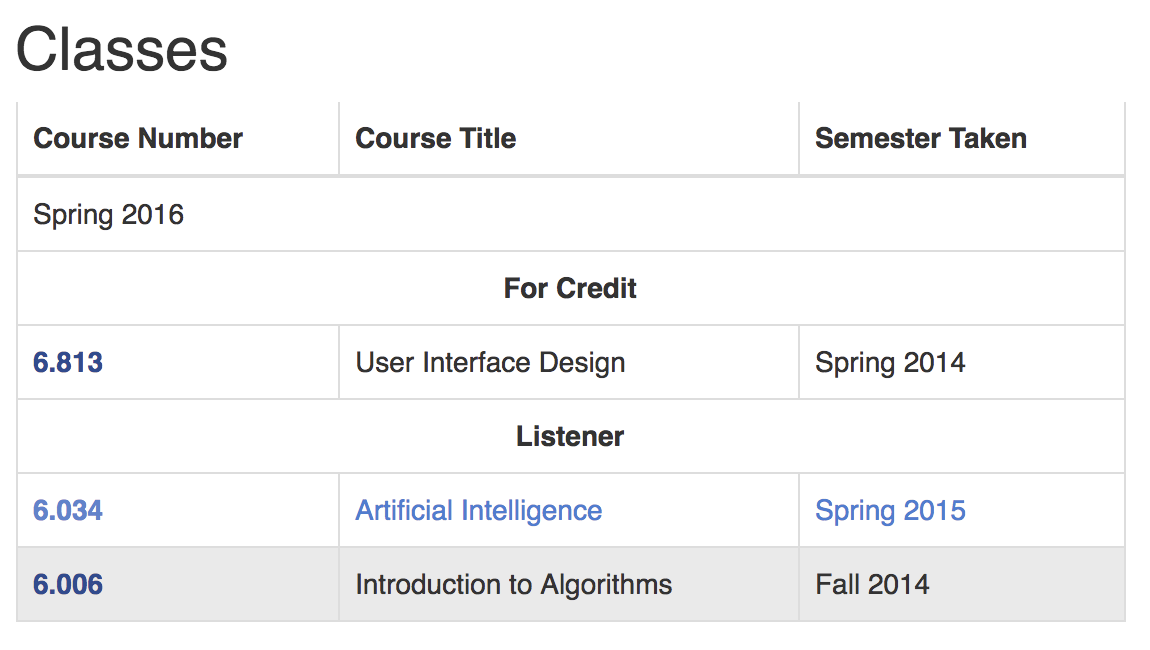
Exercise 3: Add and style a table of courses
Modify the page to include a table of courses you are taking and have taken. Here are some examples of simple tables. Your table should have:
- three columns: course number, course title, and semester taken
- two vertical sections, with headers for courses taken ‘For Credit’ and as ‘Listener’
- alternating row background colors, so it’s easy to read
- green colored text if the class is currently being taken

Exercise 4: Positioning
Use Inspector/Firebug to try different layouts using the CSS position directive. Move your picture, interests and course info around. Here’s a reference on CSS positioning. Put your picture on the right and the rest of your info on the left.

Exercise 5: Add a Form
Add a form which visitors of your website can use to submit information about their pet. Here’s a reference on forms.
Exercise 6: Codecademy Exercises
Lab 1: HTML and CSS
This lab is on Wednesday, February 15, 2017 at 7:30 P.M. in 32-082.
This is a non-compulsory programming lab to introduce students to webpage building with HTML and CSS.
View the source of this page to see a nicely documented solution to the exercises below.
Last Updated: Sun, Jan 31 2015 at 10:30 P.M.
Overview
In this programming lab, you will be completing a series of exercises that will help you structure and style web pages.
Required Resources
- You will need a a text editor, preferably with syntax highlighting. We recommend using Sublime Text, available on OS X, Windows and Linux.
- Bootstrap
References
Learning HTML
Exercise 0: Set up the barebones of Doggo’s website
Exercise 1: Set up the «About Me» section
Exercise 2: Finish setting up the other sections yourself.
- Add a table with your classes.
- Add a list with your extracurriculars.
- Add a form that people can use to contact you with.
Learning CSS
Exercise 3: Add and style a table of courses
Modify the page to include a table of courses you are taking and have taken. Here are some examples of simple tables. Your table should have:
- three columns: course number, course title, and semester taken
- two vertical sections, with headers for courses taken ‘For Credit’ and as ‘Listener’
- alternating row background colors, so it’s easy to read
- green colored text if the class is currently being taken