- 15 CSS Carousels
- Related Articles
- Table of Contents
- Horizontal Carousels
- Author
- Links
- Made with
- About a code
- CSS Variables 3D Carousel
- Author
- Links
- Made with
- About a code
- Playlist Carousel — CSS Only
- Author
- Links
- Made with
- About a code
- A CSS-only Carousel Slider
- Author
- Links
- Made with
- About a code
- Pure CSS Carousel
- Author
- Links
- Made with
- About a code
- Carousel
- Author
- Links
- Made with
- About a code
- Responsive Sliding Carousel
- Author
- Links
- Made with
- About a code
- CSS-Tricks Card Carousel
- Author
- Links
- Made with
- About the code
- Multidirectional Email Carousel
- Author
- Links
- Made with
- About a code
- 3D Carousel Rotating
- Author
- Links
- Made with
- About the code
- Infinite Autoplay Carousel
- Author
- Links
- Made with
- About the code
- Pure CSS Carousels
- Author
- Карусель картинок html css
- Creating a Carousel With Arrows
- Creating a Carousel for Movie Titles
- Other Examples
- Как создать карусель изображений на сайте
- Шаг 1: HTML-структура
- Шаг 2: CSS-стили
- Шаг 3: JavaScript-функционал
15 CSS Carousels
Collection of free HTML and pure CSS carousel code examples: responsive, horizontal and vertical. Update of December 2019 collection. 6 new items.
Related Articles
Table of Contents
Horizontal Carousels
Author
Links
Made with
About a code
CSS Variables 3D Carousel
Compatible browsers: Chrome, Edge, Firefox, Opera, Safari
Author
Links
Made with
About a code
Playlist Carousel — CSS Only
Compatible browsers: Chrome, Edge, Firefox, Opera, Safari
Author
Links
Made with
About a code
A CSS-only Carousel Slider
This carousel is created with HTML and CSS only.
Compatible browsers: Chrome, Edge, Firefox, Opera, Safari
Author
Links
Made with
About a code
Pure CSS Carousel
Animated pure CSS carousel.
Compatible browsers: Chrome, Edge, Firefox, Opera, Safari
Author
Links
Made with
About a code
Carousel
Pure CSS carousel with thumbnails.
Compatible browsers: Chrome, Edge, Firefox, Opera, Safari
Author
Links
Made with
About a code
Responsive Sliding Carousel
Pure CSS, responsive sliding carousel.
Compatible browsers: Chrome, Edge, Firefox, Opera, Safari
Author
Links
Made with
About a code
CSS-Tricks Card Carousel
Compatible browsers: Chrome, Edge, Firefox, Opera, Safari

Author
Links
Made with
About the code
Multidirectional Email Carousel
Carousel type build that scrolls over large background image using directional arrows. Unsupported environments will display a fallback static image.
Author
Links
Made with
About a code
3D Carousel Rotating
Pure CSS 3D carousel which rotates.
Compatible browsers: Chrome, Edge, Firefox, Opera, Safari

Author
Links
Made with
About the code
Infinite Autoplay Carousel
Useful for startup landing pages where you need to display brand partners and other cool logos or whatever.

Author
Links
Made with
About the code
Pure CSS Carousels
Leveraging use of how elements behave in the DOM in combination with features of CSS makes implementing a pure CSS «carousel» relatively trivial.
Author
Карусель картинок html css
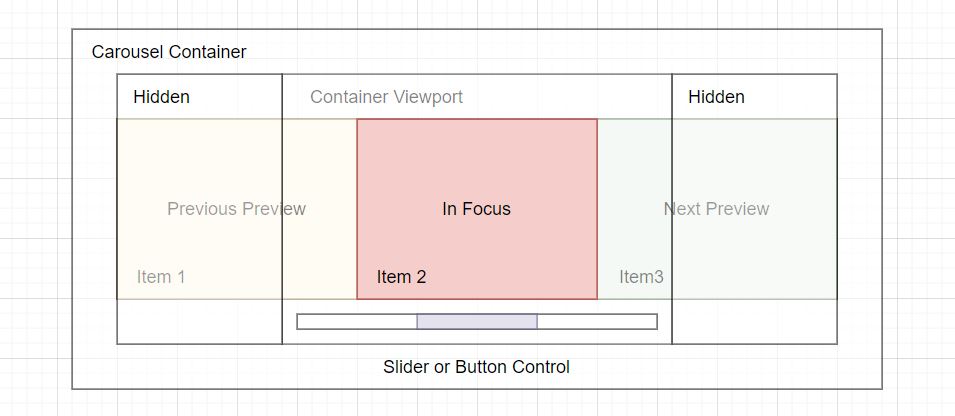
The diagram above outlines the components that make up a simple carousel. These components are made of HTML elements, and let’s review each.
- Carousel Container – The container is the HTML element that holds all the other elements within the carousel. This can also be called the root element of the container.
- Hidden – The hidden sections are items such as images, text, or videos that are not in the container viewport or are previewed on each side. These items will slide into focus whenever the controls are used to navigate.
- Container Viewport – The container viewport shows the selected item in the carousel and most likely takes up the most room within this area.
- Focused Item – The focused item is the active item in the container viewport.
- Previous Preview – The previous preview on the left-hand side, in the viewport, is the item that will come into complete view when the carousel back controls are used.
- Next Preview – The next preview on the right-hand side, in the viewport, is the item that is next in sequence. This item will be the next focused item when the controls are used to move forward.
- Item – An item is each slide within the carousel, and they usually contain videos, images, text, captions, etc.
- Slider or Button Control – The slider or buttons control the various actions, such as back or forward, skipping to a slide, scrolling to the next, or any other actions that have been added.
Creating a Carousel With Arrows
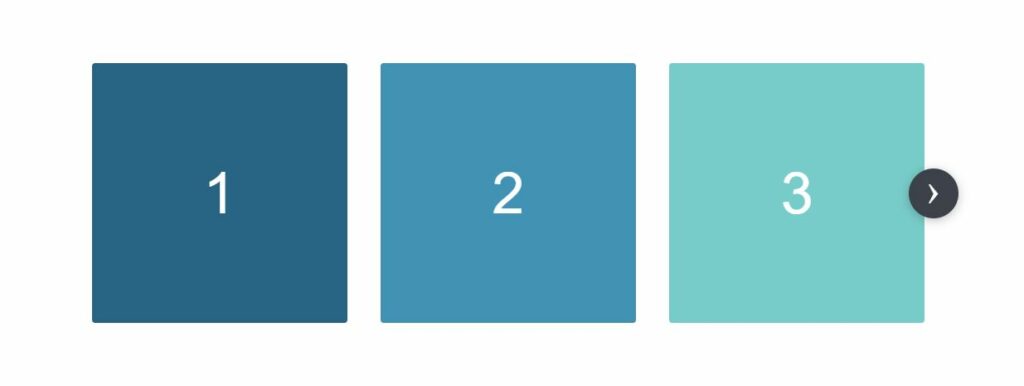
This carousel is made up of three parts.
- Radio Buttons – The radio buttons are hidden inputs that control which item in the track is shown to the user. By using radio buttons, we can pair it with a CSS general sibling combinator ~ to select the child element containing the slide. When the input is :checked it applies styles to the corresponding item.
- Arrows – The arrows are label elements programmatically attached to the radio buttons. Whenever a user clicks on an arrow, the corresponding input will be changed to a checked state, and the rest will be unchecked. Using the :checked pseudo-class selector, we can check the state of each radio.
- Container – The container is the track of the carousel. It contains all of the items. In the track container, the items are made into a horizontal row using the display: inline-flex and width: 33.33% properties. We can combine radio buttons, arrows, and the check state, to move an item along the track with a transform: translateX(value) . Once the transform is applied, it moves the specific slide into view.
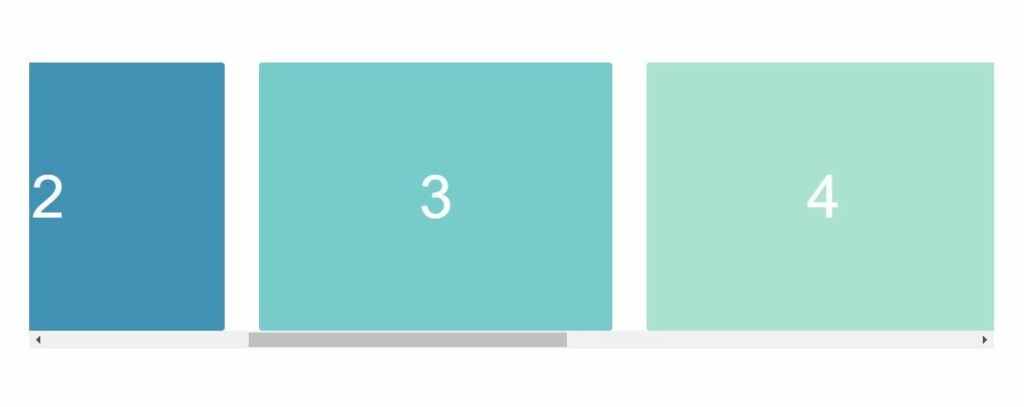
In this example, we have created a feature to adapt to the device’s screen size. In the track, will we will create seven items. One item will be shown on mobile devices, two items on tablets, and three items on larger screens, such as desktops.
Now let’s create the needed HTML.
Next, we need to add the styles for the radio buttons, control arrows, items, and containers.
html < box-sizing: border-box; >*, *:before, *:after < box-sizing: inherit; >.carousel < min-width: 900px; max-width: 1236px; margin-left: auto; margin-right: auto; padding-left: 48px; padding-right: 48px; position: relative; >.activator < display: none; >.controls < display: none; align-items: center; justify-content: space-between; position: absolute; top: 0; right: 16px; left: 16px; bottom: 0; >.controls:first-of-type < justify-content: flex-end; >.controls:last-of-type < justify-content: flex-start; >.control < cursor: pointer; background-color: #3d414a; color: #fff; border-radius: 100%; box-shadow: 0 2px 10px 0 rgb(33 34 36 / 30%); font-size: 40px; height: 48px; justify-content: center; transition: 0.3s all; width: 48px; z-index: 1; text-align: center; line-height: 40px; >.control:hover < transform: scale(1.05); >.activator:nth-of-type(1):checked ~ .controls:nth-of-type(1) < display: flex; >.activator:nth-of-type(1):checked ~ .screen .track < transform: translateX(0%); >.activator:nth-of-type(2):checked ~ .controls:nth-of-type(2) < display: flex; >.activator:nth-of-type(2):checked ~ .screen .track < transform: translateX(-100%); >.activator:nth-of-type(3):checked ~ .controls:nth-of-type(3) < display: flex; >.activator:nth-of-type(3):checked ~ .screen .track < transform: translateX(-200%); >.activator:nth-of-type(4):checked ~ .controls:nth-of-type(4) < display: flex; >.activator:nth-of-type(4):checked ~ .screen .track < transform: translateX(-300%); >.activator:nth-of-type(5):checked ~ .controls:nth-of-type(5) < display: flex; >.activator:nth-of-type(5):checked ~ .screen .track < transform: translateX(-400%); >.activator:nth-of-type(6):checked ~ .controls:nth-of-type(6) < display: flex; >.activator:nth-of-type(6):checked ~ .screen .track < transform: translateX(-500%); >.activator:nth-of-type(7):checked ~ .controls:nth-of-type(7) < display: flex; >.activator:nth-of-type(7):checked ~ .screen .track < transform: translateX(-600%); >.activator:nth-of-type(8):checked ~ .controls:nth-of-type(8) < display: flex; >.activator:nth-of-type(8):checked ~ .screen .track < transform: translateX(-700%); >.activator:nth-of-type(9):checked ~ .controls:nth-of-type(9) < display: flex; >.activator:nth-of-type(9):checked ~ .screen .track < transform: translateX(-800%); >.activator:nth-of-type(10):checked ~ .controls:nth-of-type(10) < display: flex; >.activator:nth-of-type(10):checked ~ .screen .track < transform: translateX(-900%); >.screen < overflow: hidden; margin-left: -16px; margin-right: -16px; >.track < font-size: 0; transition: all 0.3s ease 0s; white-space: nowrap; -webkit-overflow-scrolling: touch; >.item < display: inline-flex; padding-left: 16px; padding-right: 16px; vertical-align: top; white-space: normal; >.item--desktop-in-1 < width: 100%; >.item--desktop-in-2 < width: 50%; >.item--desktop-in-3 < width: 33.3333333333%; >.item--desktop-in-4 < width: 25%; >.item--desktop-in-5 < width: 20%; >.demo-container < display: flex; position: absolute; top: 0; align-items: center; bottom: 0; left: 0; right: 0; >.demo-content < color: #fff; display: flex; font-family: Helvetica; font-weight: 100; align-items: center; justify-content: center; text-transform: uppercase; border-radius: 3px; font-size: 56px; height: 250px; width: 100%; >.item:nth-child(1) .demo-content < background-color: #216485; >.item:nth-child(2) .demo-content < background-color: #3692b6; >.item:nth-child(3) .demo-content < background-color: #6fccc9; >.item:nth-child(4) .demo-content < background-color: #a6e3cf; >.item:nth-child(5) .demo-content < background-color: #aff0be; >.item:nth-child(6) .demo-content < background-color: #527059; >.item:nth-child(7) .demo-content < background-color: #243127; >@media screen and (max-width: 1023px) < .carousel < padding-left: 0; padding-right: 0; >.activator:nth-of-type(n):checked ~ .controls:nth-of-type(n) < display: none; >.activator:nth-of-type(n):checked ~ .screen .track < transform: none; >.screen < margin-left: 0; margin-right: 0; >.track < overflow-x: auto; width: auto; padding-left: 48px; padding-right: 48px; >.item--tablet-in-1 < width: 90%; >.item--tablet-in-2 < width: 45%; >.item--tablet-in-3 < width: 30%; >> @media screen and (max-width: 650px) < .track < padding-left: 0; padding-right: 0; >.item--mobile-in-1 < width: 90%; >.item--mobile-in-2 < width: 45%; >.item--mobile-in-3 < width: 30%; >>Some classes you may notice are the .item—mobile-in-1 .item—tablet-in-2 .item—desktop-in-3 on each slide item. As we talked about before, the layout for the items will be different depending on the device. These classes detect the screen size using a @media query. When the screen size matches the correct query size, the styles contained inside the query will be applied to the items in the track. The styles result in the responsive nature of the carousel. In addition to being responsive, the carousel also becomes swipeable, left or right, on smaller devices.
Creating a Carousel for Movie Titles
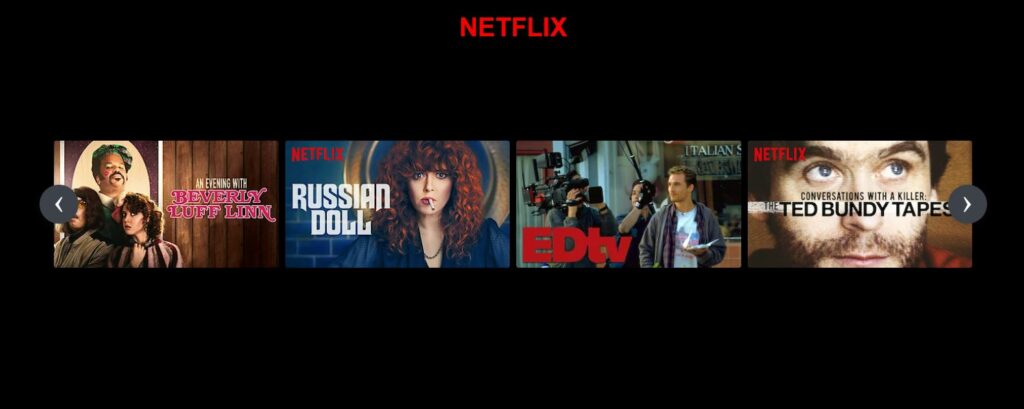
The following example will demonstrate creating a carousel for movie titles using a Netflix theme. As we build the example, we use a couple of features to create a realistic effect for the movie title viewer. Let’s go over these features.
- Wrapper – The .carousel element wrapper contains all the necessary elements to give the carousel its structure. It has a width with a value of calc(80% — 60px) and a left-right padding of 30px.
- Anchor Link – The anchor link elements are the controls. They allow navigation to the different sets of movie titles. Each link has an id attribute corresponding to a section containing the same id. Since we set the value of the anchor link to an id, the carousel moves to that section whenever the forward or backward link control is clicked.
- Item – Each item in the carousel is the image of the movie title. The width of the items is set to 25% of the parent container width, which creates four titles in each section.
- Item Hover – On hovering a movie title, an animation is applied that adds a margin and a transform scale effect. The effect uses a transition property to ease the animation.
- Smooth Scrolling – When the titles change positions, we could call this scrolling, but it isn’t actual scrolling. The scrolling effect is a transform: translateX(n) property combined with a 0.75s transition ease. To get the correct translation length, we set each transform to multiples of 100 (100%, 200%, 300%). The transform tells the browser to shift the section 100% depending on if the value is right (positive) or left (negative).
Let’s begin creating the example.
NETFLIX


Next, we need to add the styles.
html < box-sizing: border-box; background-color: #000; margin: 0; >body < margin: 0; >*, *:before, *:after < box-sizing: inherit; >h1 < font-family: Arial; color: red; text-align: center; >.carousel < min-width: 900px; margin: 0 auto; padding-left: 0 30px; position: relative; width: calc(80% - 60px); >.activator < display: none; >.controls < display: none; align-items: center; justify-content: space-between; position: absolute; top: 0; right: 0; left: 0; bottom: 0; >.controls:last-of-type < justify-content: flex-start; >.control < cursor: pointer; background-color: #3d414a; color: #fff; border-radius: 100%; box-shadow: 0 2px 10px 0 rgb(33 34 36 / 30%); font-size: 40px; height: 48px; justify-content: center; transition: 0.3s all; width: 48px; z-index: 1; text-align: center; line-height: 40px; >.control:hover < transform: scale(1.05); >.activator:nth-of-type(1):checked ~ .controls:nth-of-type(1) < display: flex; >.activator:nth-of-type(1):checked ~ .screen .track < transform: translateX(0%); >.activator:nth-of-type(2):checked ~ .controls:nth-of-type(2) < display: flex; >.activator:nth-of-type(2):checked ~ .screen .track < transform: translateX(-100%); >.activator:nth-of-type(3):checked ~ .controls:nth-of-type(3) < display: flex; >.activator:nth-of-type(3):checked ~ .screen .track < transform: translateX(-200%); >.activator:nth-of-type(4):checked ~ .controls:nth-of-type(4) < display: flex; >.activator:nth-of-type(4):checked ~ .screen .track < transform: translateX(-300%); >.screen < overflow: hidden; margin-left: -16px; margin-right: -16px; padding: 40px 0; >.track < font-size: 0; transition: all 0.75s ease 0s; white-space: nowrap; -webkit-overflow-scrolling: touch; >.item < display: inline-flex; vertical-align: top; white-space: normal; transition: 250ms all; padding: 0 4px; >.item:hover < margin: 0 30px; transform: scale(1.2); >.item--desktop-in-1 < width: 100%; >.item--desktop-in-2 < width: 50%; >.item--desktop-in-3 < width: 25%; >.item--desktop-in-4 < width: 25%; >.item--desktop-in-5 < width: 20%; >.demo-container < display: flex; position: absolute; top: 0; align-items: center; bottom: 0; left: 0; right: 0; >.demo-content
Other Examples
Here is a collection of CSS carousel examples from across the web. Included are examples and code for reuse.
Как создать карусель изображений на сайте
Узнайте, как создать карусель изображений на вашем сайте с помощью HTML, CSS и JavaScript, следуя простым шагам в этой статье!

Карусель изображений, также известная как слайдер, – это популярный элемент веб-дизайна, который позволяет вам представить несколько изображений или контента в прокручиваемом формате. В этой статье мы рассмотрим, как создать карусель изображений на вашем сайте с использованием HTML, CSS и JavaScript.
Шаг 1: HTML-структура
Для начала создадим базовую структуру карусели с помощью HTML:
Здесь мы создали контейнер с классом carousel , который содержит вложенный блок carousel-inner . Внутри этого блока находятся отдельные элементы карусели с классом carousel-item , каждый из которых содержит изображение.
Шаг 2: CSS-стили
Теперь применим базовые стили для нашей карусели с помощью CSS:
.carousel < position: relative; width: 100%; overflow: hidden; >.carousel-inner < display: flex; width: 300%; transition: transform 0.5s; >.carousel-item < flex: 1; text-align: center; >.carousel-item img
Здесь мы задаем стили для контейнера карусели, делаем его узким и скрываем лишний контент. Для блока carousel-inner мы используем свойство display: flex; , чтобы выровнять элементы карусели в одну строку. Также добавляем плавную анимацию с помощью свойства transition .
Шаг 3: JavaScript-функционал
Наконец, добавим функционал прокрутки карусели с помощью JavaScript:
let currentIndex = 0; const carouselItems = document.querySelectorAll('.carousel-item'); function goToSlide(index) < if (index < 0) < index = carouselItems.length - 1; >else if (index >= carouselItems.length) < index = 0; >currentIndex = index; document.querySelector('.carousel-inner').style.transform = `translateX(-$%)`; > function goToNextSlide() < goToSlide(currentIndex + 1); >function goToPrevSlide() < goToSlide(currentIndex - 1); >setInterval(goToNextSlide, 3000); // автоматическая прокрутка каждые 3 секунды Здесь мы используем небольшой скрипт для управления прокруткой карусели. Функция goToSlide прокручивает карусель до указанного индекса, а функции goToNextSlide и goToPrevSlide перемещают карусель вперед и назад соответственно. Также добавлена автоматическая прокрутка каждые 3 секунды с помощью функции setInterval .
🎉 Теперь у вас есть работающая карусель изображений на вашем сайте! Вы можете продолжить настройку и стилизацию согласно своим предпочтениям.
Если вы хотите углубить свои знания в веб-разработке, рекомендую посетить