- 5 Ways to Change CSS Styles with JavaScript: Tips and Best Practices
- Changing an Element’s Style Directly
- Changing an Element’s Style by Class Name
- Change CSS styles in HTML DOM using JavaScript for Beginners
- Using CSS Variables with JavaScript
- Dynamically Adding CSS Rules via JavaScript
- Setting a Class on an Element and Styling it with CSS
- Best Practices
- Other code samples for changing CSS styles with JavaScript
- Conclusion
- 5 Ways To Change Override CSS With Javascript (Simple Examples)
- TLDR – QUICK SLIDES
- TABLE OF CONTENTS
- DOWNLOAD & NOTES
- QUICK NOTES
- EXAMPLE CODE DOWNLOAD
- CHANGE OVERRIDE CSS
- 1) CHANGE INLINE STYLE
- 2) CHANGING MULTIPLE PROPERTIES
- 3) CHANGING MULTIPLE PROPERTIES (ALTERNATIVE)
- 4) CHANGING CSS CLASS
- 5) CHANGING CSS VARIABLES
- EXTRA BITS & LINKS
- LINKS & REFERENCES
- INFOGRAPHIC CHEAT SHEET
- THE END
- 2 thoughts on “5 Ways To Change Override CSS With Javascript (Simple Examples)”
- Leave a Comment Cancel Reply
- Search
- Breakthrough Javascript
- Socials
- About Me
5 Ways to Change CSS Styles with JavaScript: Tips and Best Practices
Learn how to change CSS styles on your webpage with JavaScript. Explore 5 different methods, including using CSS variables and setting classes on elements. Improve your website’s design now!
- Changing an Element’s Style Directly
- Changing an Element’s Style by Class Name
- Change CSS styles in HTML DOM using JavaScript for Beginners
- Using CSS Variables with JavaScript
- Dynamically Adding CSS Rules via JavaScript
- Setting a Class on an Element and Styling it with CSS
- Best Practices
- Other code samples for changing CSS styles with JavaScript
- Conclusion
- Can you change CSS with JavaScript?
- How to change CSS of a class in JavaScript?
- What DOM object can be used to change CSS styling using JavaScript?
- How to change style in JavaScript dynamically?
If you’re looking to change the style of HTML elements on a webpage, JavaScript is a powerful tool that can help you achieve this. There are several ways to change css styles using javascript , whether it’s directly on an element or by changing its class attribute. In this blog post, we will explore the different methods of changing css styles using javascript and provide helpful tips and best practices.
Changing an Element’s Style Directly
The most straightforward way to change an element’s style is by directly modifying its style property. The syntax for changing an element’s style is document.element.style.property = value . The style object contains many properties that correspond to CSS properties, including color , height , left , and more.
For example, if you want to change the color of an element with the ID myElement to red, you can use the following code:
document.getElementById('myElement').style.color = 'red'; Changing an Element’s Style by Class Name
Another way to change the style of an element is by using its class name. You can change the style of all elements with a particular class name by iterating over the collection returned by document.getElementsByClassName(‘className’) and modifying their style property.
For example, if you want to change the background color of all elements with the class name myClass to blue, you can use the following code:
var elements = document.getElementsByClassName('myClass'); for (var i = 0; i elements.length; i++) elements[i].style.backgroundColor = 'blue'; > Change CSS styles in HTML DOM using JavaScript for Beginners
In this JavaScript tutorial we will learn how to create css, alter/ change CSS styles in the Duration: 50:26
Using CSS Variables with JavaScript
CSS variables have access to the DOM, which means that you can change them with JavaScript. This can be useful if you want to change a particular style property on multiple elements at once.
To create a CSS variable, you can use the — prefix followed by a name. For example:
To change the value of this variable using JavaScript, you can use the setProperty method on the style property of the documentElement :
document.documentElement.style.setProperty('--my-variable', 'blue'); Dynamically Adding CSS Rules via JavaScript
You can dynamically add CSS rules via JavaScript using the insertRule method on the CSSStyleSheet object. This can be useful if you want to add a style that is not present in your stylesheet or if you want to modify an existing style.
For example, if you want to add a new rule that sets the background color of all elements with the class name myClass to blue, you can use the following code:
document.styleSheets[0].insertRule('.myClass < background-color: blue; >', 0); Setting a Class on an Element and Styling it with CSS
You can also set a class on an element using JavaScript and style it using CSS. This can be useful if you want to apply a particular style to an element without modifying its existing styles.
For example, if you want to add the class myClass to an element with the ID myElement and apply a blue background color to it using CSS, you can use the following code:
document.getElementById('myElement').classList.add('myClass'); .myClass background-color: blue; > Best Practices
When changing CSS styles using JavaScript, it is important to follow best practices to keep your code organized and maintainable. Here are some tips:
- Use classes instead of inline styles whenever possible. This makes it easier to apply consistent styles across your site and modify them in one place.
- Keep styles consistent across your site. Use a consistent naming convention for classes and avoid duplicating styles if possible.
- Avoid excessive use of JavaScript for styling. While JavaScript can be a powerful tool for changing styles dynamically, it can also slow down your site if overused.
- Understand the box model and how padding, borders, and margins affect element styles. This can help you avoid unexpected behavior when changing styles using JavaScript.
Other code samples for changing CSS styles with JavaScript
In Javascript , how to change css with js
document.querySelector('h1', container).style.backgroundColor = 'red';In Javascript case in point, JavaScript HTML DOM — Changing CSS code example
In Javascript case in point, javascript change css
document.getElementById('YouDiv').style.marginTop='40px';In Javascript , in particular, Change CSS With Javascript
const thing = document.getElementById("thing"); thing.style.backgroundColor = "blue";In Javascript case in point, how to change css using javascript code example
document.getElementById("myText").className = "anyNewClass"In Javascript case in point, js set css
var element = document.createElement('select'); element.style.maxWidth = "100px";Conclusion
Changing CSS styles using JavaScript can be done in several ways, including changing an element’s style directly, by class name, using CSS variables, dynamically Adding CSS Rules , and setting a class on an element. By following best practices and understanding the box model, you can create maintainable and organized code that is easy to modify and maintain.
5 Ways To Change Override CSS With Javascript (Simple Examples)
Welcome to a quick tutorial on how to change or override CSS with Javascript. Want to dynamically update or change some styles on a web page?
- document.getElementById(«ID»).style.PROPERTY = «VALUE»;
- document.getElementById(«ID»).style.cssText = «PROPERTY: VALUE»;
- document.getElementById(«ID»).setAttribute(«style», «PROPERTY: VALUE»);
- document.getElementById(«ID»).className = «CLASS»;
- document.documentElement.style.setProperty(«—VAR», «VALUE»);
That covers the basics, but read on for more examples!
ⓘ I have included a zip file with all the source code at the start of this tutorial, so you don’t have to copy-paste everything… Or if you just want to dive straight in.
TLDR – QUICK SLIDES

TABLE OF CONTENTS
DOWNLOAD & NOTES
Firstly, here is the download link to the example code as promised.
QUICK NOTES
If you spot a bug, feel free to comment below. I try to answer short questions too, but it is one person versus the entire world… If you need answers urgently, please check out my list of websites to get help with programming .
EXAMPLE CODE DOWNLOAD
Click here to download all the example source code, I have released it under the MIT license, so feel free to build on top of it or use it in your own project.
CHANGE OVERRIDE CSS
All right, let us now get into the examples of how to change or override CSS in Javascript.
1) CHANGE INLINE STYLE
Hello World!
function changeA (col)
Yes, it’s that simple if you just want to change a single CSS property – ELEMENT.style.PROPERTY = VALUE .
2) CHANGING MULTIPLE PROPERTIES
To set multiple properties at once, use ELEMENT.style.cssText = «CSS» instead.
3) CHANGING MULTIPLE PROPERTIES (ALTERNATIVE)
Alternatively, we can also use ELEMENT.setAttribute(«style», «CSS») to set multiple styles at once.
4) CHANGING CSS CLASS
.styleA < color: red; font-size: 1em; >.styleB < color: green; font-size: 2em; >.styleC
function changeD (css)
To change the CSS class, use ELEMENT.className = «CLASS» . Take note, we can also set multiple classes this way.
5) CHANGING CSS VARIABLES
:root < --textcol: red; >.demoE function changeE (col)
Finally, for you guys who are using CSS variables to create themes – We can also change the CSS variable itself using setProperty() .
EXTRA BITS & LINKS
That’s all for the tutorial, and here is a small section on some extras and links that may be useful to you.
LINKS & REFERENCES
INFOGRAPHIC CHEAT SHEET
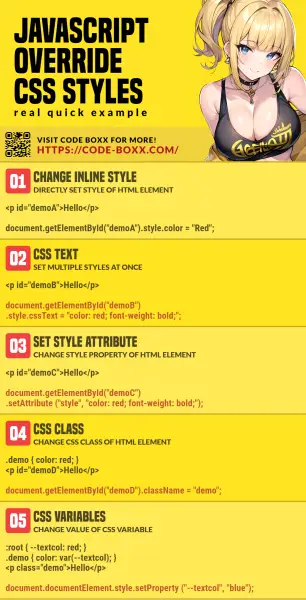
THE END
Thank you for reading, and we have come to the end. I hope that it has helped you to better understand, and if you want to share anything with this guide, please feel free to comment below. Good luck and happy coding!
2 thoughts on “5 Ways To Change Override CSS With Javascript (Simple Examples)”
That last one solved a massive issue for me. Thanks!
gosh. …hehehehe… thanks a lot man…
Leave a Comment Cancel Reply
Search
Breakthrough Javascript

Take pictures with the webcam, voice commands, video calls, GPS, NFC. Yes, all possible with Javascript — Check out Breakthrough Javascript!
Socials
About Me

W.S. Toh is a senior web developer and SEO practitioner with over 20 years of experience. Graduated from the University of London. When not secretly being an evil tech ninja, he enjoys photography and working on DIY projects.
Code Boxx participates in the eBay Partner Network, an affiliate program designed for sites to earn commission fees by linking to ebay.com. We also participate in affiliate programs with Bluehost, ShareASale, Clickbank, and other sites. We are compensated for referring traffic.