Form properties and methods
Forms and control elements, such as have a lot of special properties and events.
Working with forms will be much more convenient when we learn them.
Navigation: form and elements
Document forms are members of the special collection document.forms .
That’s a so-called “named collection”: it’s both named and ordered. We can use both the name or the number in the document to get the form.
document.forms.my; // the form with name="my" document.forms[0]; // the first form in the documentWhen we have a form, then any element is available in the named collection form.elements .
There may be multiple elements with the same name. This is typical with radio buttons and checkboxes.
In that case, form.elements[name] is a collection. For instance:
These navigation properties do not depend on the tag structure. All control elements, no matter how deep they are in the form, are available in form.elements .
A form may have one or many elements inside it. They also have elements property that lists form controls inside them.
There’s a shorter notation: we can access the element as form[index/name] .
In other words, instead of form.elements.login we can write form.login .
That also works, but there’s a minor issue: if we access an element, and then change its name , then it is still available under the old name (as well as under the new one).
That’s easy to see in an example:
That’s usually not a problem, however, because we rarely change names of form elements.
Backreference: element.form
For any element, the form is available as element.form . So a form references all elements, and elements reference the form.
Form elements
Let’s talk about form controls.
input and textarea
We can access their value as input.value (string) or input.checked (boolean) for checkboxes and radio buttons.
input.value = "New value"; textarea.value = "New text"; input.checked = true; // for a checkbox or radio buttonPlease note that even though holds its value as nested HTML, we should never use textarea.innerHTML to access it.
It stores only the HTML that was initially on the page, not the current value.
select and option
A element has 3 important properties:
- select.options – the collection of subelements,
- select.value – the value of the currently selected ,
- select.selectedIndex – the number of the currently selected .
They provide three different ways of setting a value for a :
- Find the corresponding element (e.g. among select.options ) and set its option.selected to true .
- If we know a new value: set select.value to the new value.
- If we know the new option number: set select.selectedIndex to that number.
Here is an example of all three methods:
Unlike most other controls, allows to select multiple options at once if it has multiple attribute. This attribute is rarely used, though.
For multiple selected values, use the first way of setting values: add/remove the selected property from subelements.
Here’s an example of how to get selected values from a multi-select:
new Option
In the specification there’s a nice short syntax to create an element:
option = new Option(text, value, defaultSelected, selected);This syntax is optional. We can use document.createElement(‘option’) and set attributes manually. Still, it may be shorter, so here are the parameters:
- text – the text inside the option,
- value – the option value,
- defaultSelected – if true , then selected HTML-attribute is created,
- selected – if true , then the option is selected.
The difference between defaultSelected and selected is that defaultSelected sets the HTML-attribute (that we can get using option.getAttribute(‘selected’) , while selected sets whether the option is selected or not.
In practice, one should usually set both values to true or false . (Or, simply omit them; both default to false .)
For instance, here’s a new “unselected” option:
let option = new Option("Text", "value"); // creates The same option, but selected:
let option = new Option("Text", "value", true, true);Option elements have properties:
option.selected Is the option selected. option.index The number of the option among the others in its . option.text Text content of the option (seen by the visitor).
References
Summary
document.forms A form is available as document.forms[name/index] . form.elements Form elements are available as form.elements[name/index] , or can use just form[name/index] . The elements property also works for . element.form Elements reference their form in the form property.
Value is available as input.value , textarea.value , select.value , etc. (For checkboxes and radio buttons, use input.checked to determine whether a value is selected.)
For , one can also get the value by the index select.selectedIndex or through the options collection select.options .
These are the basics to start working with forms. We’ll meet many examples further in the tutorial.
In the next chapter we’ll cover focus and blur events that may occur on any element, but are mostly handled on forms.
Dynamically add button, textbox, input, radio elements in html form using JavaScript.
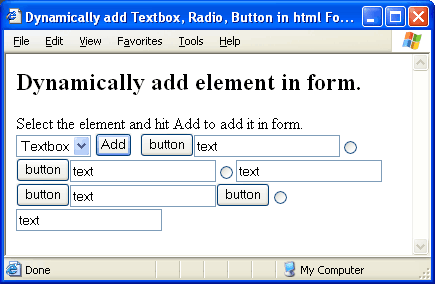
Code language: HTML, XML (xml)HTML> HEAD> TITLE>Dynamically add Textbox, Radio, Button in html Form using JavaScript TITLE> SCRIPT language="javascript"> function add(type) < //Create an input type dynamically. var element = document.createElement("input"); //Assign different attributes to the element. element.setAttribute("type", type); element.setAttribute("value", type); element.setAttribute("name", type); var foo = document.getElementById("fooBar"); //Append the element in page (in span). foo.appendChild(element); > SCRIPT> HEAD> BODY> FORM> H2>Dynamically add element in form. H2> Select the element and hit Add to add it in form. BR/> SELECT name="element"> OPTION value="button">Button OPTION> OPTION value="text">Textbox OPTION> OPTION value="radio">Radio OPTION> SELECT> INPUT type="button" value="Add" onclick="add(document.forms[0].element.value)"/> span id="fooBar"> span> FORM> BODY> HTML>
Also note that we have used setAttribute() method to assign the attributes to our dynamically created element.
Demo
Any other way of adding elements dynamically in html page? Let me know. If you read this far, you should follow me on twitter here.