JavaScript programmatically create an HTML button
Sometimes you need to create an HTML button programmatically as a result of some code execution. You can easily create a button using JavaScript by calling on the document.createElement(«button») method.
- First, you call the document.createElement(«button») and assign the returned element to a variable named btn .
- Then, assign the «Click Me» string to the btn.innerHTML property
- Finally, use document.body.appendChild() to append the button element to the tag
The code below shows how this can be done:
You can append the button element that you’ve created with JavaScript anywhere inside your HTML page by using the appendChild() method.
You can also set the button’s name , type , or value attributes as required by your project. Sometimes, you need to create a type=’submit’ button for forms:
The code above will create the following HTML tag:
Finally, if you want to execute some code when the button is clicked, you can change the onclick property to call a function as follows:
or you can also add an event listener as follows: And that’s how you can create a button programmatically using JavaScript.
Learn JavaScript for Beginners 🔥
Get the JS Basics Handbook, understand how JavaScript works and be a confident software developer.
A practical and fun way to learn JavaScript and build an application using Node.js.
About
Hello! This website is dedicated to help you learn tech and data science skills with its step-by-step, beginner-friendly tutorials.
Learn statistics, JavaScript and other programming languages using clear examples written for people.
Search
Type the keyword below and hit enter
Tags
Click to see all tutorials tagged with:
Java script создать кнопку

Для отправки введенных данных на форме используются кнопки. Для создания кнопки используется либо элемент button :
С точки зрения функциональности в html эти элементы не совсем равноценны, но в данном случае они нас интересуют с точки зрения взаимодействия с кодом javascript.
При нажатии на любой из этих двух вариантов кнопки происходит отправка формы по адресу, который указан у формы в атрибуте action , либо по адресу веб-страницы, если атрибут action не указан. Однако в коде javascript мы можем перехватить отправку, обрабатывая событие click
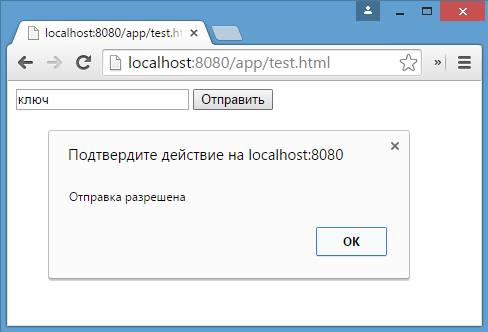
При нажатии на кнопку происходит событие click , и для его обработки к кнопке прикрепляем обработчик sendForm . В этом обработчике проверяем введенный в текстовое поле текст. Если его длина больше 5 символов, то выводим сообщение о недостимой длине и прерываем обычный ход события с помощью вызова e.preventDefault() . В итоге форма не отправляется.
Если же длина текста меньше шести символов, то также выводится сообщение, и затем форма отправляется.
Также мы можем при необходимости при отправке изменить адрес, на который отправляются данные:
function sendForm(e)< // получаем значение поля key var keyBox = document.search.key; var val = keyBox.value; if(val.length>5) < alert("Недопустимая длина строки"); document.search.action="PostForm"; >else alert("Отправка разрешена"); >
В данном случае, если длина текста больше пяти символов, то текст отправляется, только теперь он отправляется по адресу PostForm , поскольку задано свойство action:
document.search.action="PostForm";
Для очистки формы предназначены следующие равноценные по функциональности кнопки:
При нажатию на кнопки произойдет очистка форм. Но также функциональность по очистке полей формы можно реализовать с помощью метода reset() :
function sendForm(e)< // получаем значение поля key var keyBox = document.search.key; var val = keyBox.value; if(val.length>5) < alert("Недопустимая длина строки"); document.search.reset(); e.preventDefault(); >else alert("Отправка разрешена"); >
Кроме специальных кнопок отправки и очистки на форме также может использоваться обычная кнопка:
При нажатии на подобную кнопку отправки данных не происходит, хотя также генерируется событие click:
При нажатии на кнопку получаем введенный в текстовое поле текст, создаем новый элемент параграфа для этого текста и добавляем параграф в элемент printBlock.
Кнопка
Рассмотрим пример, как нужно обрабатывать нажатия кнопки в форме с помощью JavaScript.
Создадим простейшую форму.
На данный момент кнопка ничего не делает. Получим доступ к кнопке.
var button = getElementById("addButton");
Далее следует создать код, который будет выполняться при нажатии кнопки.
function handleButtonClick
Осталось подключить созданную функцию к переменной
button.onclick = handleButtonClick;
window.onload = init; function init() < var button = document.getElementById("addButton") button.onclick = handleButtonClick; >function handleButtonClick()
При нажатии на кнопку появляется сообщение.
Идём дальше. Мы хотим получить текст, введённый пользователем в текстовом поле. Когда пользователь вводит текст, то у элемента input type=»text» в свойстве value появляется значение, которое и содержит текст пользователя. Таким образом, нам нужно сначала получить доступ к элементу страницы по идентификатору, а затем его свойство.
var button2 = document.getElementById("addButton2") button2.onclick = handleButtonClick2; function handleButtonClick2()
Теперь выводится сообщение, в котором содержится имя кота. Не помешает небольшая проверка, что текст был введён.
function handleButtonClick2() < var textInput = document.getElementById("catNameInput2"); var catName = textInput.value; if(catName == "")< alert("Введите имя кота, пожалуйста"); >else < alert("Добавлено новое имя кота! " + catName); >>
Третий шаг — выводить имена котов на самой странице. Мы уже приготовили список ul, к которому тоже можно получить доступ и добавлять дочерние элементы. Для получения доступа используем знакомый метод getElementById(). Для динамического создания нового элемента используется метод document.createElement(). После создания мы можем настроить элемент, например, прописав текст. Для текста элемента списка будем использовать переменную, которая содержит имя кота. Создав новый элемент, его необходимо добавить к родительскому элементу через appendChild().
function handleButtonClick3() < var textInput = document.getElementById("catNameInput3"); var catName = textInput.value; if(catName == "")< alert("Введите имя кота, пожалуйста"); >else < var ul = document.getElementById("catlist3"); var li = document.createElement("li"); li.innerHTML = catName; ul.appendChild(li); alert("Добавлено новое имя кота! " + catName); >>
Новые способы
В последнее время стали использовать другой код. Например, используют const вместо var, вместо onclick — addEventListener.
Также вместо getElementById() можно использовать querySelector(). А в addEventListener использовать другой формат вызова функции.
.button < background-color: #33ae74; transition: background-color 0.5s ease-out; >.button.is-active
Атрибут onclick
Также можно использовать готовый атрибут у кнопки onclick.
JavaScript Button
JavaScript button is one of the JavaScript element which gives effects to web pages. JavaScript buttons give a good look and feel to the website. These JavaScript buttons can be used to send or receive data; fire clicks events, change the color or text, etc. HTML tag is used in JavaScript frameworks that define a clickable button. When a button is rendered onto the web page, an event is fired to perform a functionality. We shall look into the creation of JavaScript buttons by using createElement() and an HTML tag, which is used for JavaScript frameworks.
Web development, programming languages, Software testing & others
Using HTML tag for JavaScript Buttons
Above is the syntax mainly used in JavaScript Frameworks like ReactJs, AngularJs, etc.
varsampleButton = document.createElement(btn);Above is the Pure JavaScript Syntax used to create a JavaScript button.
Examples of JavaScript Button
Look at the below examples to learn How JavaScript buttons are created?
Example #1
Creating a JavaScript Button using tag
Creation of a JavaScript Button using HTML tag
As there is no functionality or any event linked, clicking button will not work
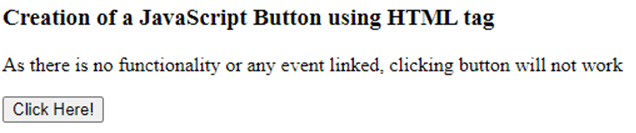
So here, in the above example, we are just creating a button using the HTML tag with an id. Clicking won’t work as there is no event handler or functionality applicable.
Example #2
Add a Click Event to the button.
Adding onClick event handler for JavaScript Button
Click below to see the onClick functionality
function sampleClick() 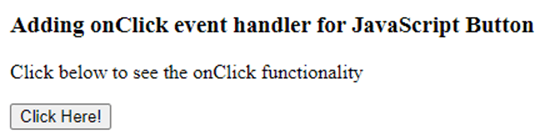
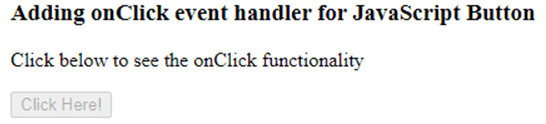
In the above example, we use the onClick functionality to disable the button. .disabled is the method that helps the button get disabled, and clicking would not work.
Example #3
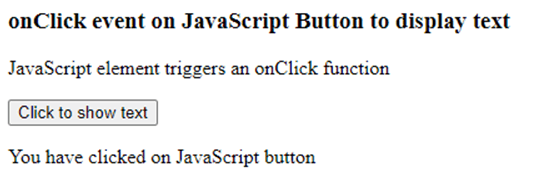
onClick on a button to display text.
onClick event on JavaScript Button to display text
JavaScript element triggers an onClick function
function clickText() 
Example #4
body < text-align: left; >/* Styling for the btn1 class */ .btn1 < background-color: #4FFF8A; >/* Styling for */ #htmlbtn1 < font-weight: bold; >/* Styling for */ #htmlbtn2 < font-style: italic; >/* Styling for */ #jsbtn JavaScript buttons:

Let us walk through the code to understand it in a much better way,
a document.createElement(‘btn1’); creates clickable button object and referenced as ‘clickBtn.’
- innerHTML helps in setting inner content, also known as a label.
- id = ‘jsbtn,’ sets button Id
- className = ‘btn1’, sets the buttons styling CSS
- body.appendChild(clickBtn) helps append clickBtn to the document’s body as a child.
When the page renders, we see all three buttons with background styling from the btn1 class; also, each button has different font styles specific to the ids.
Initially, the text label for htmlbtn2 was ‘I’m an HTML button 2!’; we used JavaScript and modified the text label to ‘Modified HTML button 2!’.
Example #5
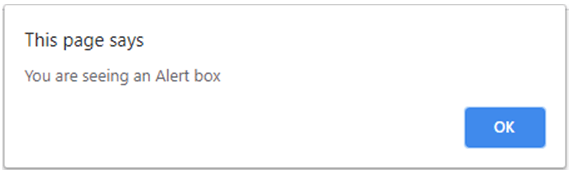
onClick event on button for pop up
Click the button to see a pop up with text
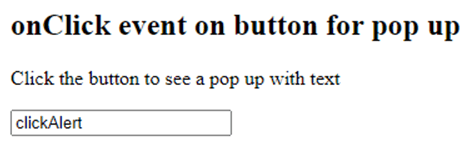
On click, you will see an alert box,
Example #6
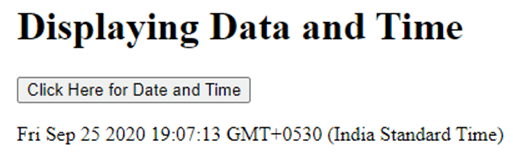
Displaying Data and Time
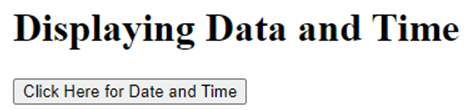
On click, we will see the Current Date and Time,
JavaScript buttons can have multiple event handlers applied to them.
- on clicking the button
- Hover the mouse over the button
- on mouse out from the button
- on submitting a form/ data by clicking the button (Post method)
- Retrieving data from a source (Get method)
- Removing the focus from the button
- Applying focus on the button
- Disabling the button using .disable
- On change method
- and many more…..
Conclusion
With this, we shall conclude the topic ‘JavaScript button.’ We have discussed JavaScript buttons and their usage. Different ways of describing the button; one is by using JavaScript createElement() and the other by using HTML tag . I have listed some examples with clear explanations to make you understand much better. As we have many event handler methods applicable to JavaScript buttons, we have listed some. You can even try hands-on with the other events. JavaScript buttons make the web page look more elegant, as most essential web pages have buttons with various functionalities.
Recommended Articles
This is a guide to JavaScript Button. Here we also discuss the javascript button’s introduction and syntax, different examples, and code implementation. You may also have a look at the following articles to learn more –
89+ Hours of HD Videos
13 Courses
3 Mock Tests & Quizzes
Verifiable Certificate of Completion
Lifetime Access
4.5
97+ Hours of HD Videos
15 Courses
12 Mock Tests & Quizzes
Verifiable Certificate of Completion
Lifetime Access
4.5
JAVASCRIPT Course Bundle — 83 Courses in 1 | 18 Mock Tests
343+ Hours of HD Videos
83 Courses
18 Mock Tests & Quizzes
Verifiable Certificate of Completion
Lifetime Access
4.5