- How to create, build and run a Java Hello World program with Eclipse
- 1. Download and Install Eclipse IDE
- 2. Choose a Workspace Directory
- 3. Change Perspective
- 4. Create a Java Project
- 5. Write Your First Java Program
- 6. Compile, Build and Run Your First Java Program
- Related Java Hello World Tutorials:
- Other Eclipse Tutorials:
- About the Author:
- Java15/Examples
How to create, build and run a Java Hello World program with Eclipse
If you are new to Java programming and Eclipse IDE, this step-by-step tutorial helps you get started to be familiar with the most Java IDE by writing your first Java program using Eclipse. And you will be able to build and run your program inside Eclipse.
1. Download and Install Eclipse IDE
Eclipse is the most popular Integrated Development Environment (IDE) for developing Java applications. It is robust, feature-rich, easy-to-use and powerful IDE which is the #1 choice of almost Java programmers in the world. And it is totally FREE.
As of now (fall 2016), the latest release of Eclipse is Neon (version 4.6). Click the following link to download Eclipse:
You will see the download page like this:
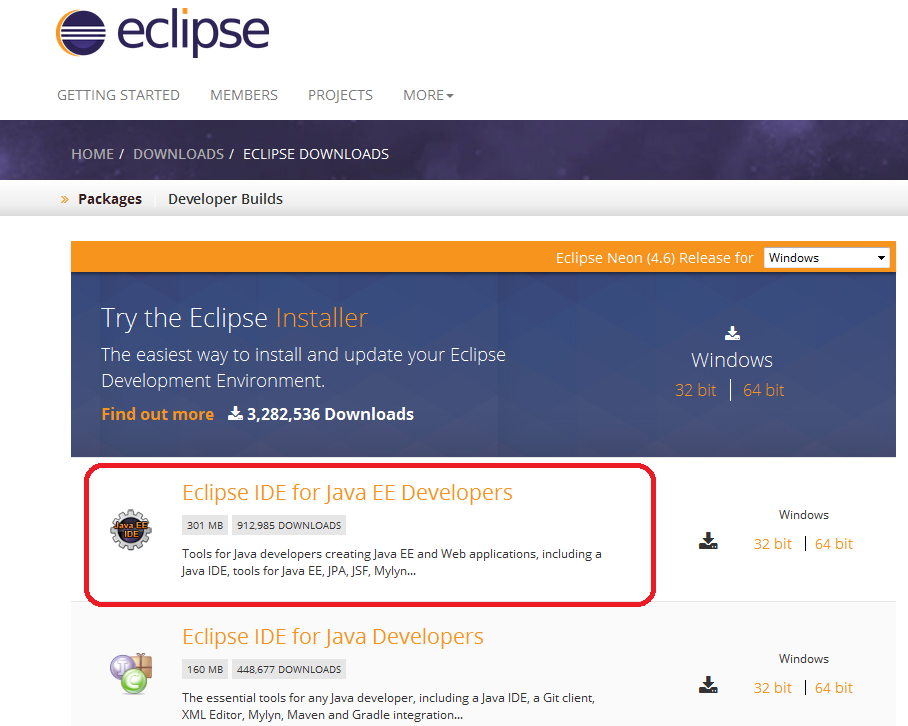
You can install Eclipse either by downloading the Eclipse Installer or package (zip file). I’d recommend you to download by package. Eclipse comes with various packages for different development purposes. For Java, there are two main packages listed as you see above:
- Eclipse IDE for Java EE Developers: This is for developing Java EE applications (web applications using Servlets & JSP).
- Eclipse IDE for Java Developers: This is for developing Java SE applications, a subset of the Java EE Developer package.
Click on the link 32-bit or 64-bit (depending on the bit version of your operating system) to start download the package.
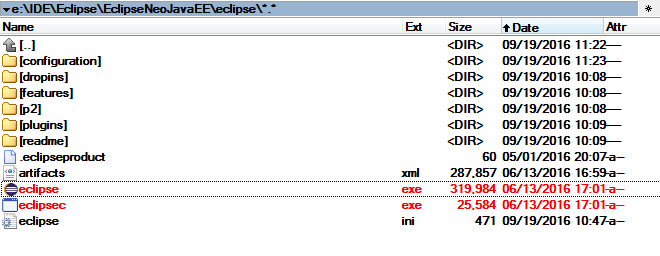
Extract this ZIP file into a directory on your computer. You will see a directory called eclipse containing Eclipse’s installed files:
Eclipse Neon requires Java 8 or newer so make sure you have JDK 8 already installed on your computer. If not, follow this tutorial to install JDK.
Click eclipse.exe file (Windows) to start the IDE. You will see the splash screen of Eclipse Neo:

That’s it! You have successfully installed Eclipse IDE. Next, let’s see how to create a workspace.
2. Choose a Workspace Directory
Eclipse organizes projects by workspaces. A workspace is a group of related projects and it is actually a directory on your computer. That’s why when you start Eclipse, it asks to choose a workspace location like this:
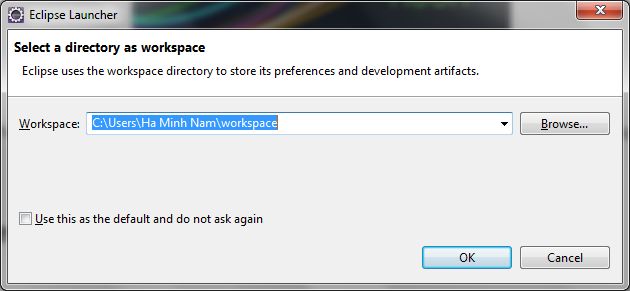
By default, Eclipse created a workspace directory at your USER_HOME\workspace. If you want to choose another directory, click Browse. Here I chose a different workspace:
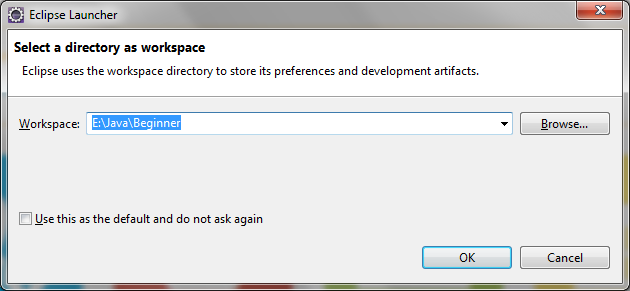
Check Use this as the default and do not ask again if you don’t want to be asked whenever you start Eclipse. You can always change workspace when Eclipse is running.
Click OK. You should see the welcome screen:
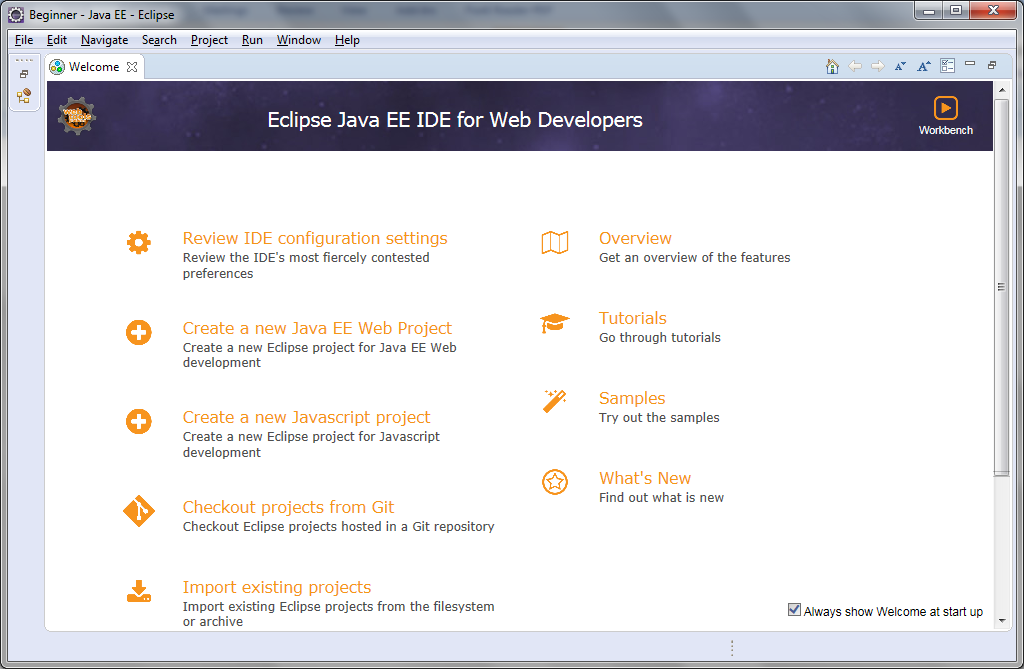
Now, we are ready to create a Java project.
3. Change Perspective
Before creating a new Java project, let familiarize yourself with Perspective. Imagine a perspective is a predefined configuration specialized for a specific aspect of development process such as Java, Java EE, Debug, Database Development, Web, etc. Depending on your need, you can switch back and forth among different perspectives during a development session.
Since we installed Eclipse IDE for Java EE Developers, the default perspective is Java EE. To change perspective, go to Window > Perspective > Open Perspective > Other… You will see a small dialog listing all available perspectives:

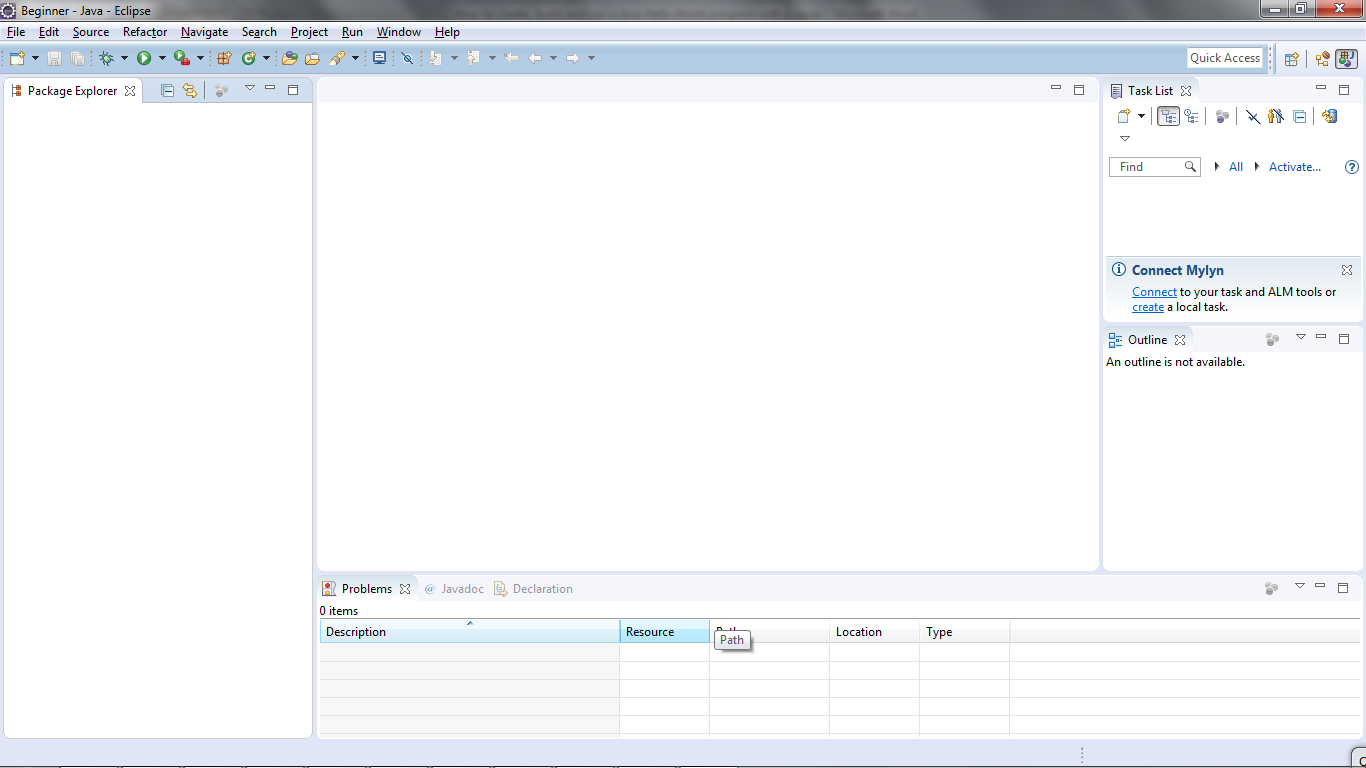
Here we choose Java perspective. Click OK. Here’s how the Java perspective would look like:
4. Create a Java Project
To create a new Java project in Eclipse, go to File > New > Java Project. The New Java Project wizard dialog appears let you specify configurations for the project:

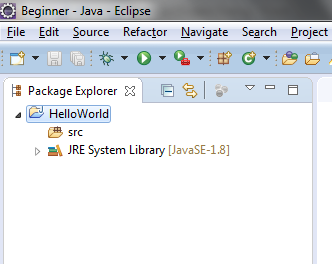
Enter project name: HelloWorld. Leave the rest as it is, and click Finish.
You should see the HelloWorld project is created in the Package Explorer view as following:
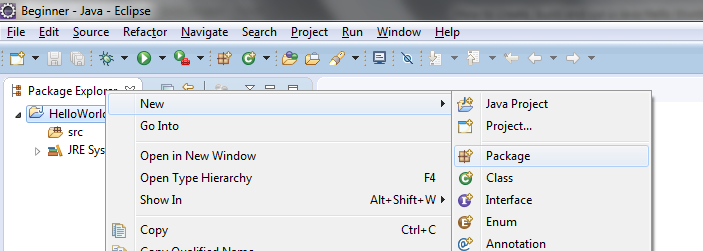
It’s recommended to create a package for your project. Right click on the project, and select New > Package from the context menu:
In the New Java Package dialog, enter the name your package. Here I enter net.codejava :
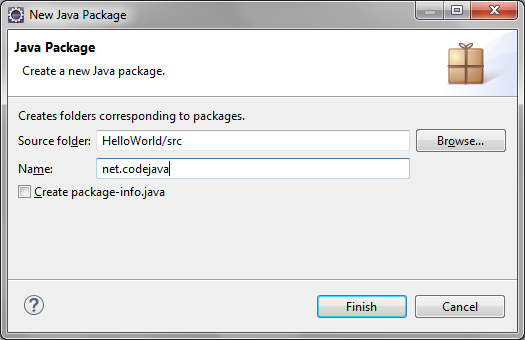
Click Finish. You should see the newly created package appears:
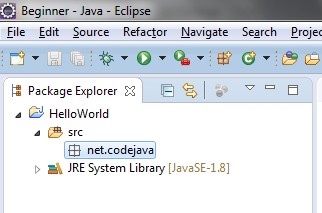
Now, it’s time to create a Java class for your hello world application.
5. Write Your First Java Program
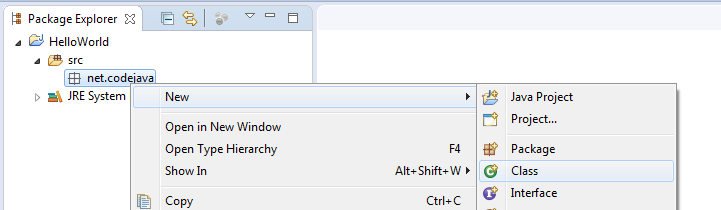
To create a new Java class under a specified package, right click on the package and select New > Class from the context menu:
The New Java Class dialog appears, type the name of class as HelloWorld and choose the option to generate the main() method:
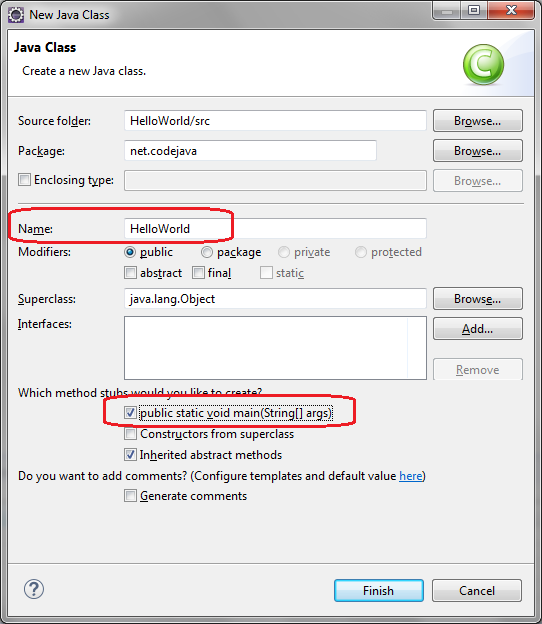
And click Finish. The HelloWorld class is generated like this:

Now, type some code in the main() method to print the message “Hello World” to the console:
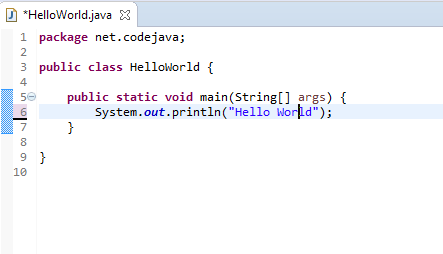
That’s it. We have created a Java hello world program using Eclipse IDE.
6. Compile, Build and Run Your First Java Program
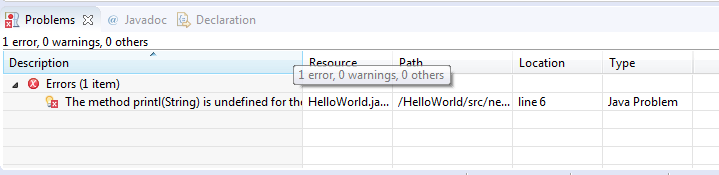
By default, Eclipse compiles the code automatically as you type. And it will report compile errors in the Problems view at the bottom like this:
If you want to disable automatically build feature, click the menu Project and uncheck Build Automatically:
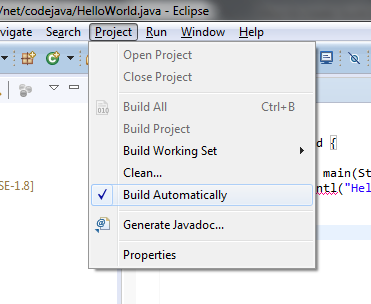
However, it’s strongly recommended to keep the auto build mode for it helps you detect errors instantly.
Now, let’s run the hello world application. Click menu Run > Run (or press Ctrl + F11), Eclipse will execute the application and show the output in the Console view:

That’s it! The HelloWorld program has run and printed the output “Hello World” and terminates.
We hope this tutorial help you get started with Eclipse and Java easily. Thank you for reading.
What’s next? I recommend you to continue with this article: Java OOP: Understand Classes and Objects
Watch this tutorial in video:
Related Java Hello World Tutorials:
Other Eclipse Tutorials:
About the Author:

Nam Ha Minh is certified Java programmer (SCJP and SCWCD). He started programming with Java in the time of Java 1.4 and has been falling in love with Java since then. Make friend with him on Facebook and watch his Java videos you YouTube.
Java15/Examples
This is an informal page listing examples of features that are implemented by the Java 15 Support, which can be installed from the Marketplace. You are welcome to try out these examples. If you find bugs, please file a bug after checking for a duplicate entry here
Watch out for additional examples being added soon.
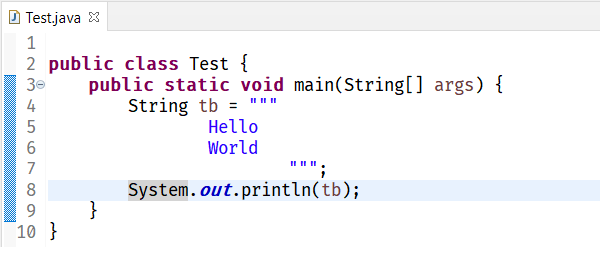
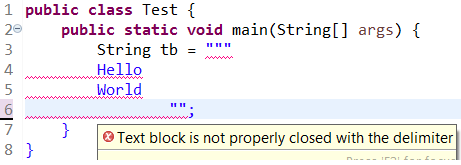
- TextBlock is standard features in Java 15.
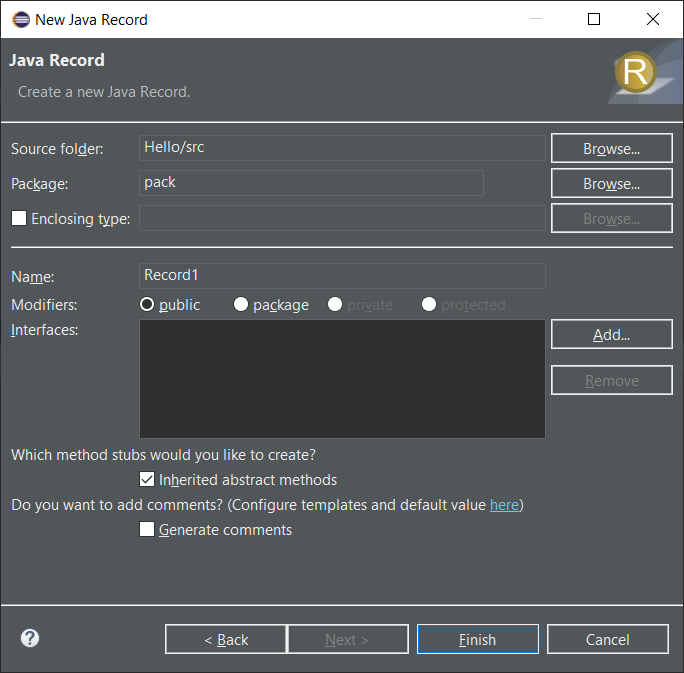
- Records is also another preview feature in Java 15. They are not enabled by default and can by enabled using —enable-preview.
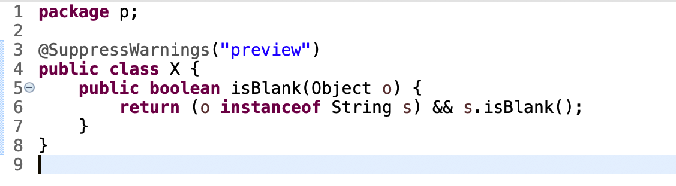
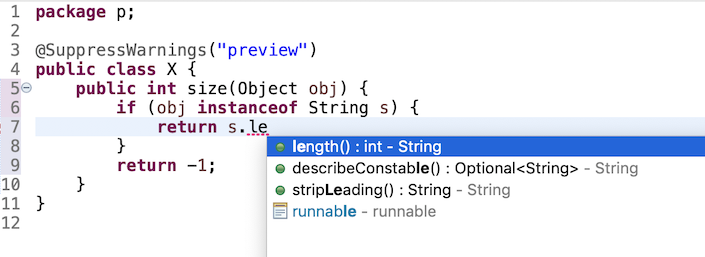
- Instanceof Pattern Matching is also another preview feature in Java 15. They are not enabled by default and can by enabled using —enable-preview.
- In Eclipse, —enable-preview can be enabled from the Preferences. It is implicitly added while launching a java program if the feature has been enabled for the project/workspace.
public class Test { public static void main(String[] args) { String tb = """ Hello World """; System.out.println(tb); } }
public class Test { public static void main(String[] args) { String tb = """ Hello World ""; > >
@SuppressWarnings("preview") record Point(int x, int y) { } public class X1 { public static void main(String[] args) { Point p = new Point(100, 200); System.out.println(p.x()); } }
class X2 { public static void main(String[] args) { System.out.println(0); } @SuppressWarnings("preview") record Point(int x, int y) { } }
class X3 { public static void main(String[] args) { System.out.println(0); } } @SuppressWarnings("preview") final record Point(int x, int y) { }
@SuppressWarnings("preview") record R() { } class X4 { public static void main(String[] args) { System.out.println(new R().hashCode()); } }
import java.lang.annotation.Target; import java.lang.annotation.ElementType; @Target({ ElementType.PARAMETER }) @interface MyAnnot { } @SuppressWarnings("preview") record R(@MyAnnot()int i, int j) { } class X5 { public static void main(String[] args) { System.out.println(new R(100, 200).hashCode() != 0); } }
class X6 { @SuppressWarnings("preview") public static void main(String[] args) { record R(int x,int y){} R r = new R(100, 200); System.out.println(r.x()); } }
@SuppressWarnings("preview") abstract record Point(int x, int y){ } class X7 { public static void main(String[] args){ System.out.println(0); } }
@SuppressWarnings("preview") record Point1(int myInt, char myChar) implements I { public Point1 { this.myInt = myInt; this.myChar = myChar; } } public class X8 { public static void main(String[] args) { System.out.println(0); } } interface I { }
class record { public static void main(String[] args) { System.out.println(0); } }
@SuppressWarnings("preview") public class X { public boolean isBlank(Object o) { return (o instanceof String s) && s.isBlank(); } }
@SuppressWarnings("preview") public class X { public int size(Object obj) { if (obj instanceof String s) { return s.le } return -1; } }
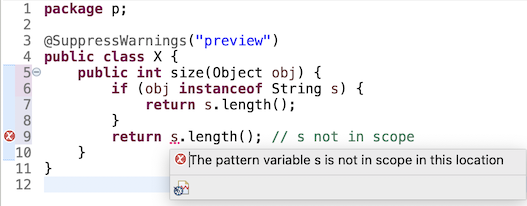
package p; @SuppressWarnings("preview") public class X { public int size(Object obj) { if (obj instanceof String s) { return s.length(); } return s.length(); // s not in scope } }
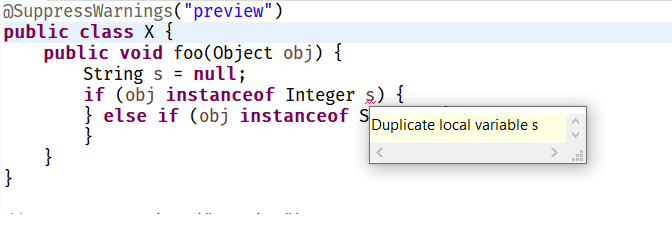
@SuppressWarnings("preview") public class X { public void foo(Object obj) { String s = null; if (obj instanceof Integer s) { } else if (obj instanceof String) { } } }
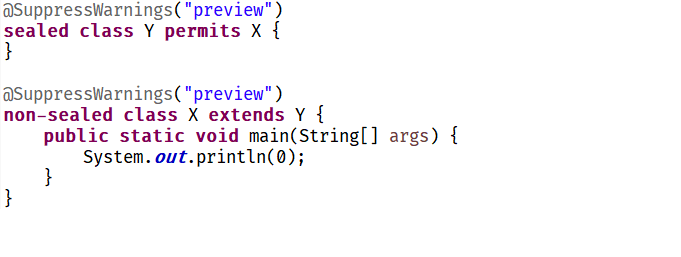
@SuppressWarnings("preview") sealed class Y permits X { } @SuppressWarnings("preview") non-sealed class X extends Y { public static void main(String[] args) { System.out.println(0); } }
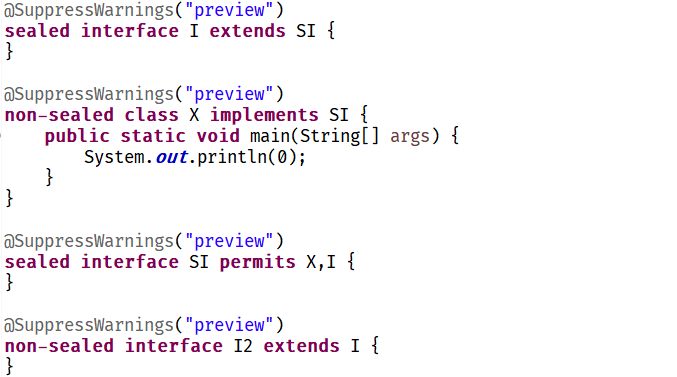
@SuppressWarnings("preview") sealed interface I extends SI { } @SuppressWarnings("preview") non-sealed class X implements SI { public static void main(String[] args) { System.out.println(0); } } @SuppressWarnings("preview") sealed interface SI permits X,I { } @SuppressWarnings("preview") non-sealed interface I2 extends I { }
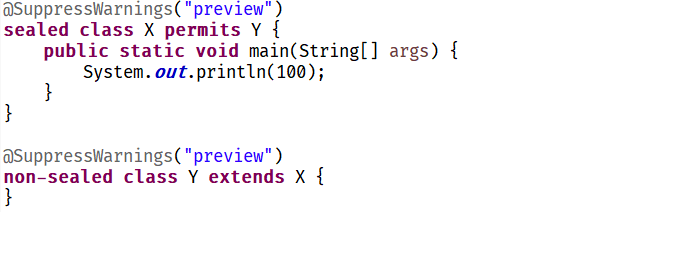
@SuppressWarnings("preview") sealed class X permits Y { public static void main(String[] args) { System.out.println(100); } } @SuppressWarnings("preview") non-sealed class Y extends X { }
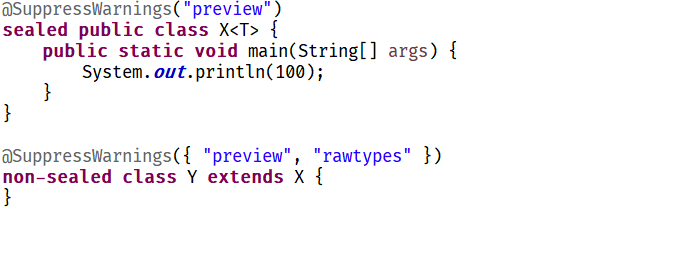
@SuppressWarnings("preview") sealed public class XT> { public static void main(String[] args) { System.out.println(100); } } @SuppressWarnings({ "preview", "rawtypes" }) non-sealed class Y extends X { }
@SuppressWarnings("preview") sealed public sealed class X { public static void main(String[] args) { System.out.println(100); } }
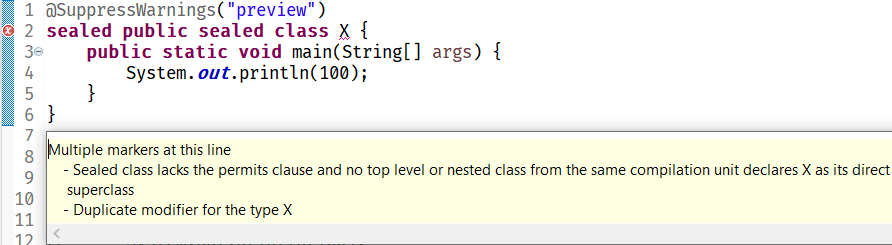
— Sealed class lacks the permits clause and no top level or nested class from the same compilation unit declares X as its direct superclass
— Duplicate modifier for the type X»